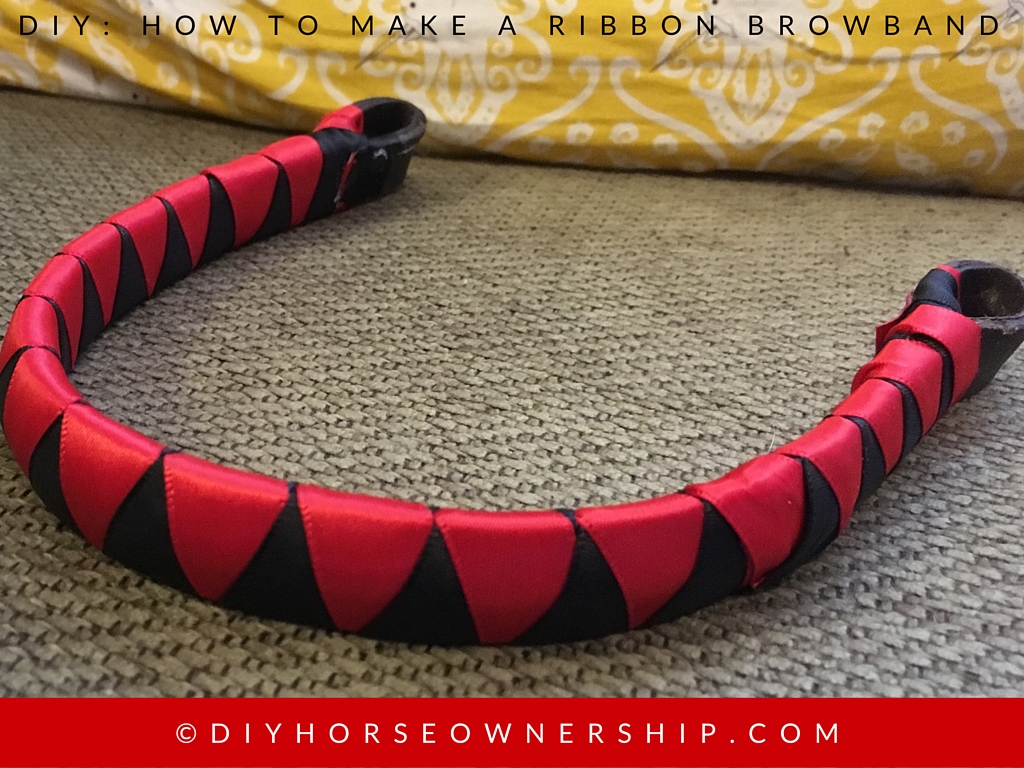
I’ve been wanting to make one of these for a while and finally got around to it. It’s actually a pretty quick and easy project. It might be the easiest DIY I’ve shared. This ribbon browband is done in the Sharktooth pattern. I hope to do another post with other patterns in the future.
Equipment Needed
- 1 used browband: try to match your bridle’s leather color. Flat is easier, but I used a raised browband and it was fine.
- 2 colors of unwired ribbon in 5/8″ width. You can use other widths, this is just the width I chose. You need about 4 foot of ribbon for this width, but more if you do a narrower ribbon.
- Hot glue gun and scissors
For the instructions, I am going to refer to each ribbon by my colors, but you will obviously do the steps with whichever colors you’re using.
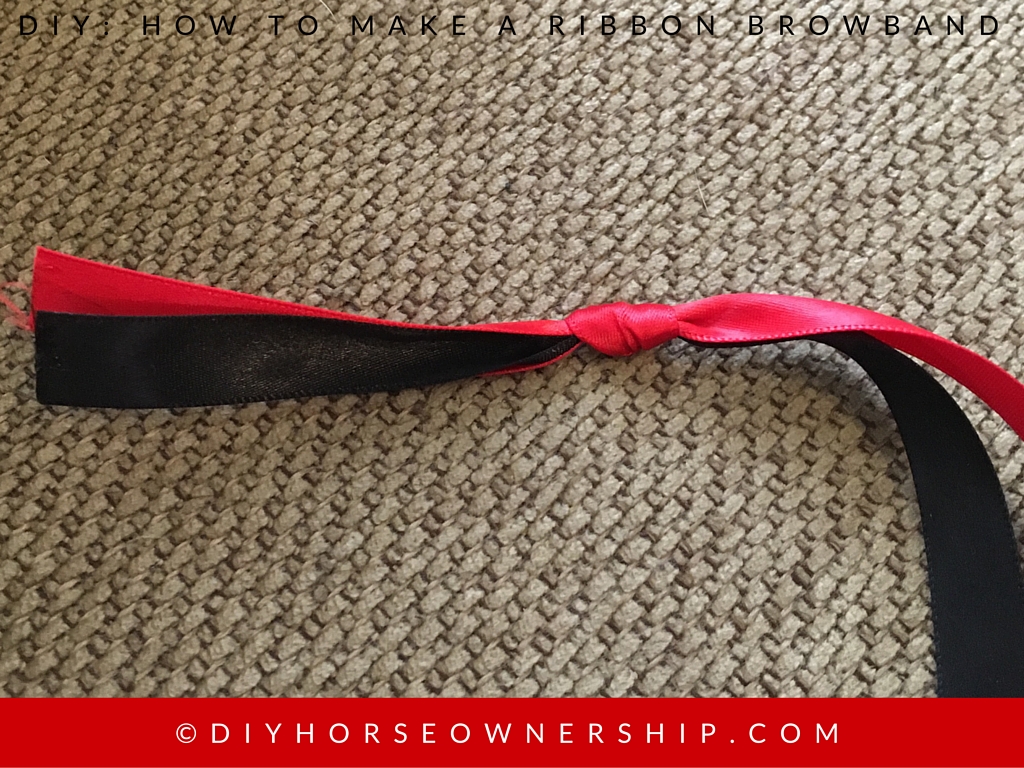
- 1. Cut 4′ of each ribbon and tie them together. Make sure you leave 4-5″ of extra ribbon. Do not tie the knot very tightly as you will re-open it later.
Step 1
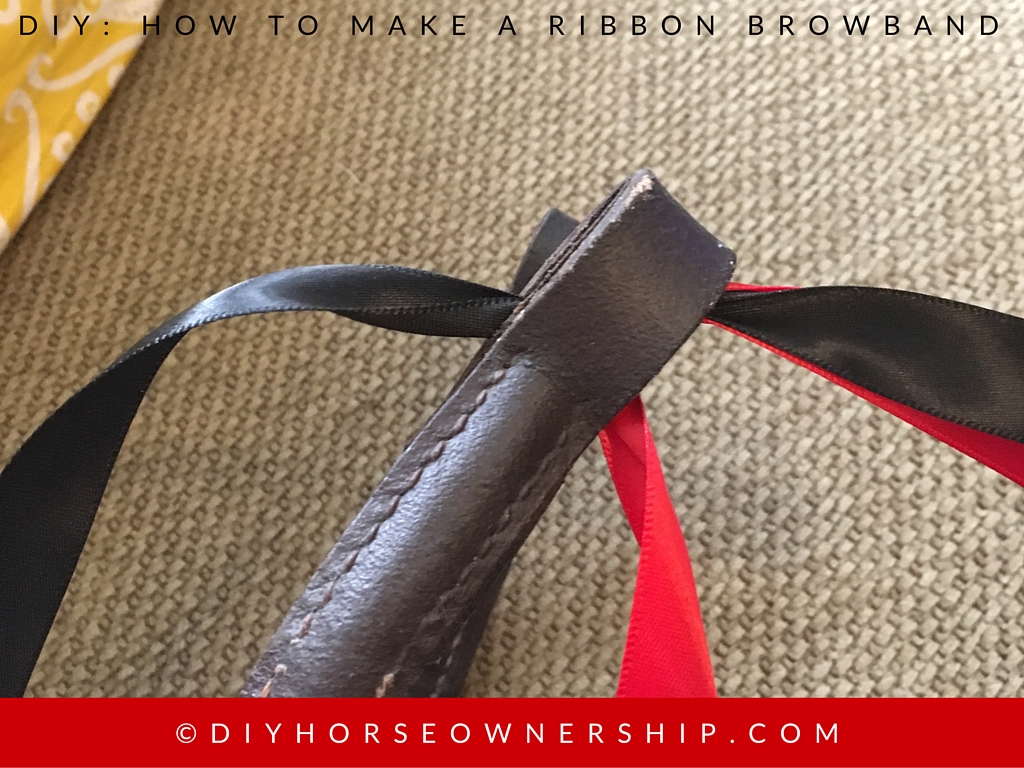
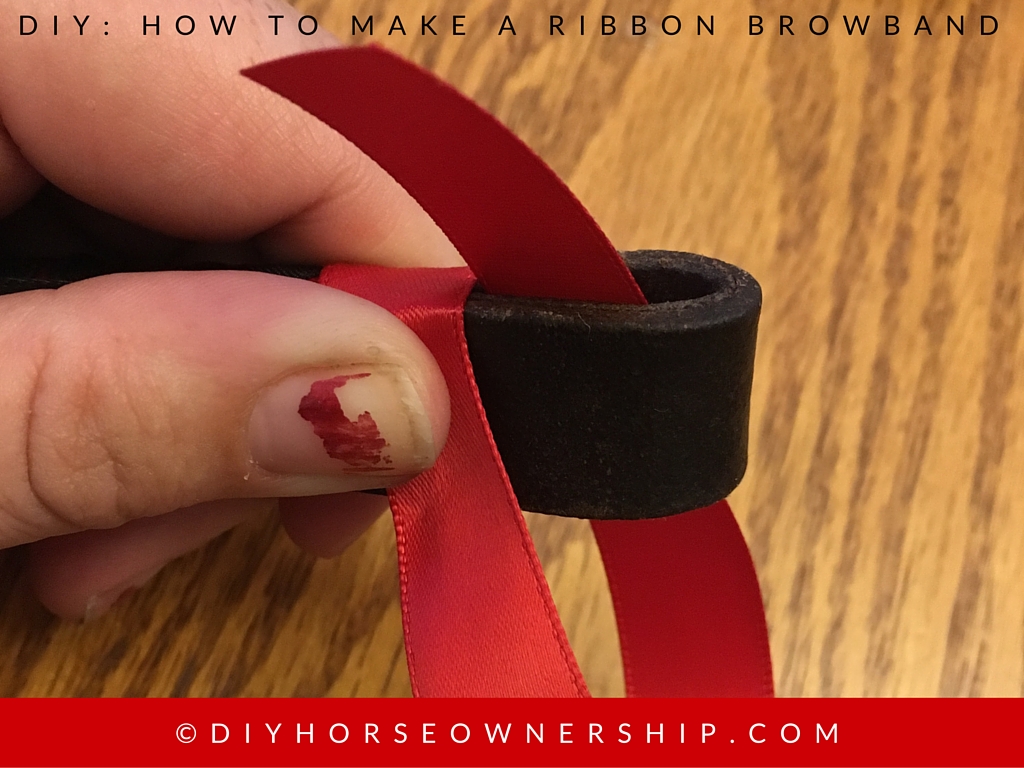
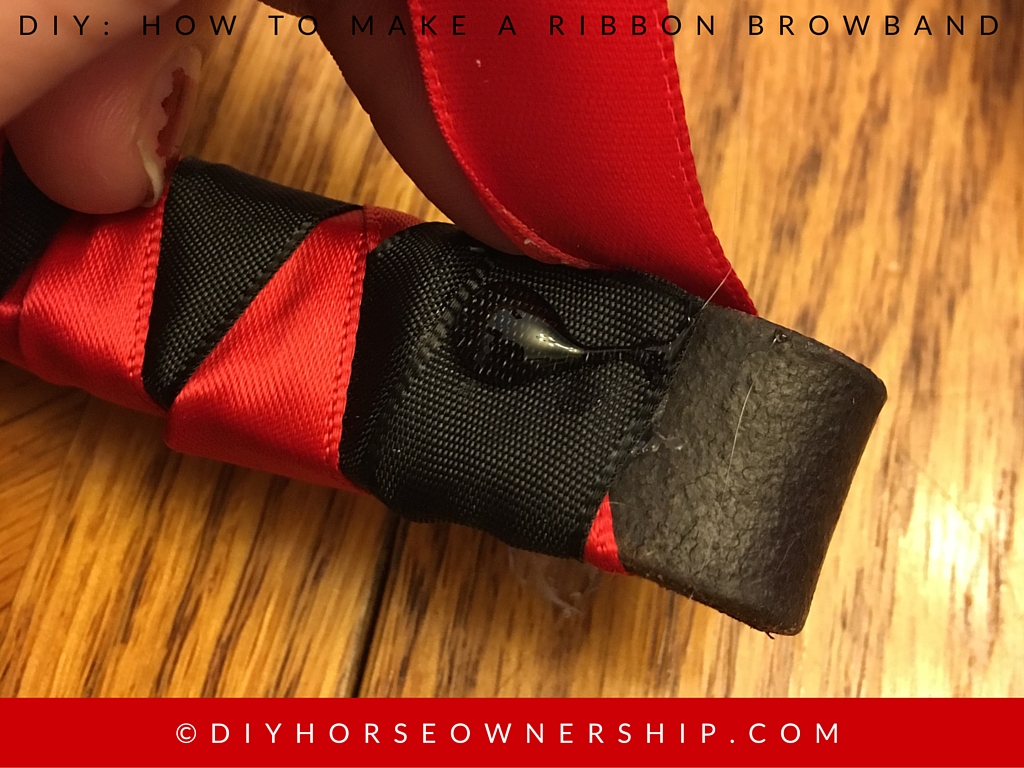
2. Slip your black ribbon through the browband loop.
Step 2
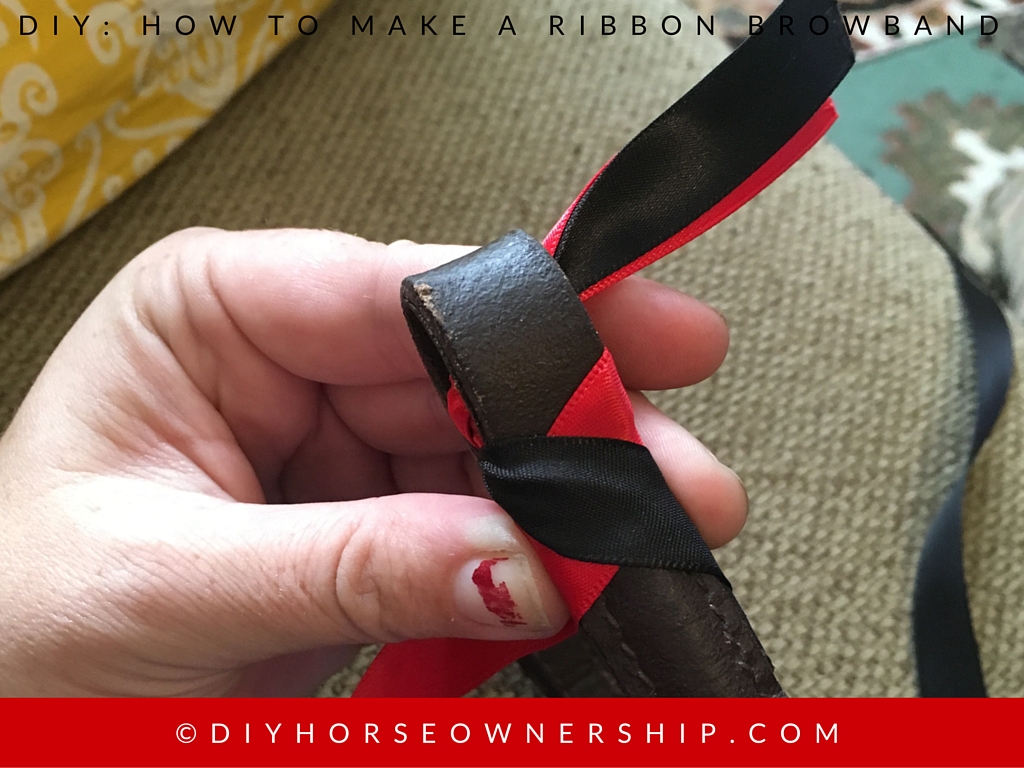
3.Wrap your red ribbon around the browband diagonally and then wrap the black ribbon around diagonally over top of the red.
Step 3
4. Don’t worry if the design isn’t perfect right away, you’ll come back and fix it at the end. Wrap the red ribbon diagonally over the black ribbon. Your red ribbon edges should be lined up next to each other as if the black ribbon weren’t there.
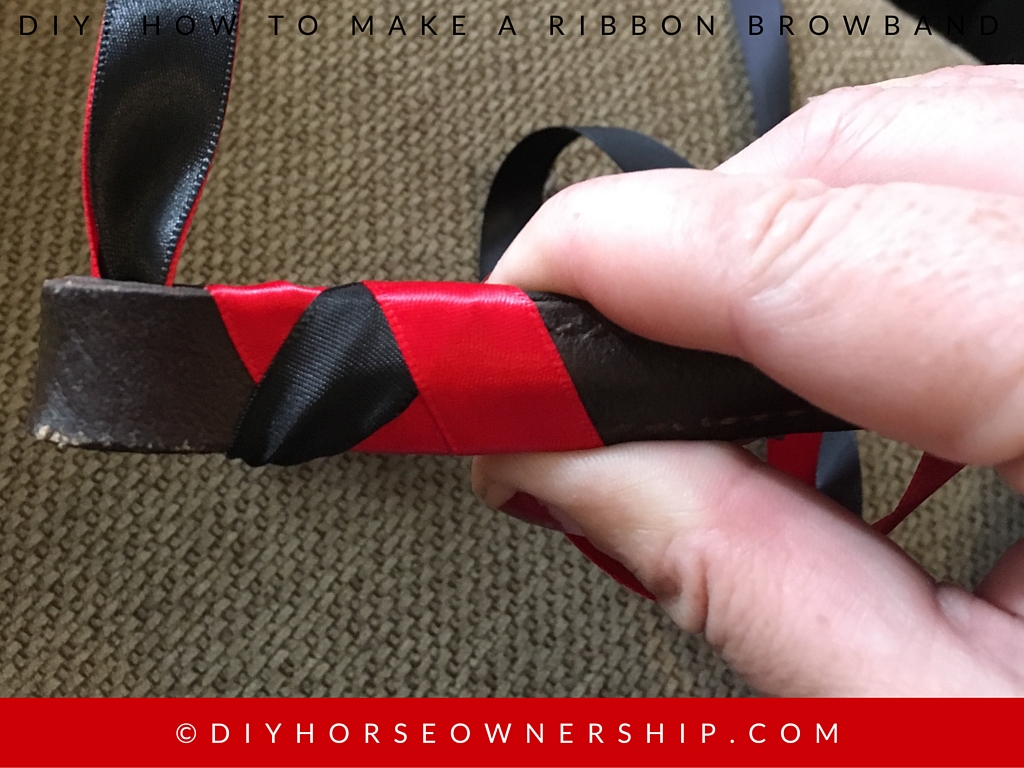
Step 4
5. Bring your black ribbon up from the bottom so that it’s edge also touches the previous black loop’s edge. Peel back the red ribbon on the diagonal so they can be lined up perfectly.
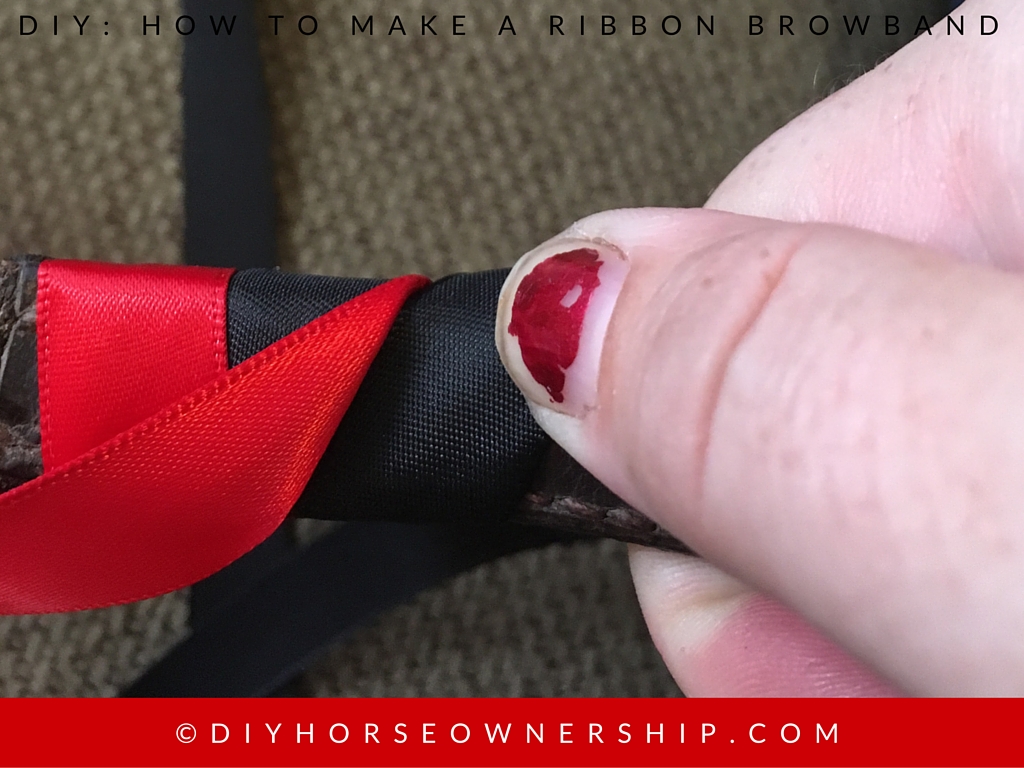
Step 5
6. Then lay the red ribbon down across the black and pull it around to the backside of the browband. On the backside, peel the black back diagonally and press the red down along the edge of the previous red loop.
Step 6
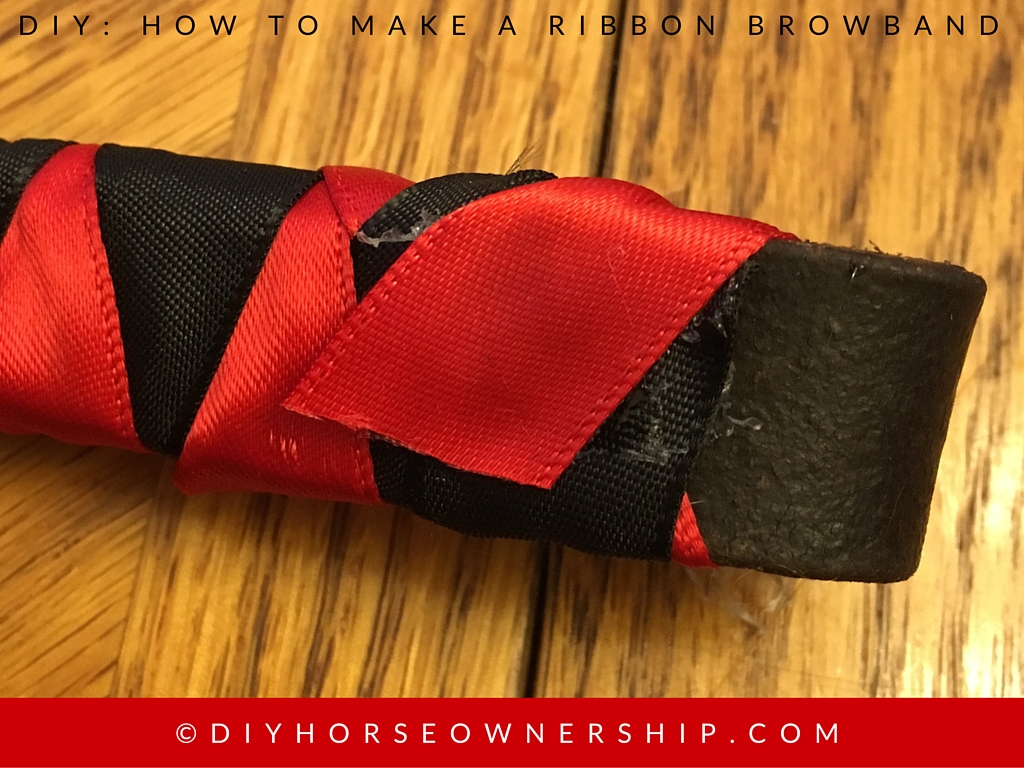
7. Keep going like this wrapping 1 color at a time diagonally across the browband keeping the edge close together and lifting the other color to get a straight line.
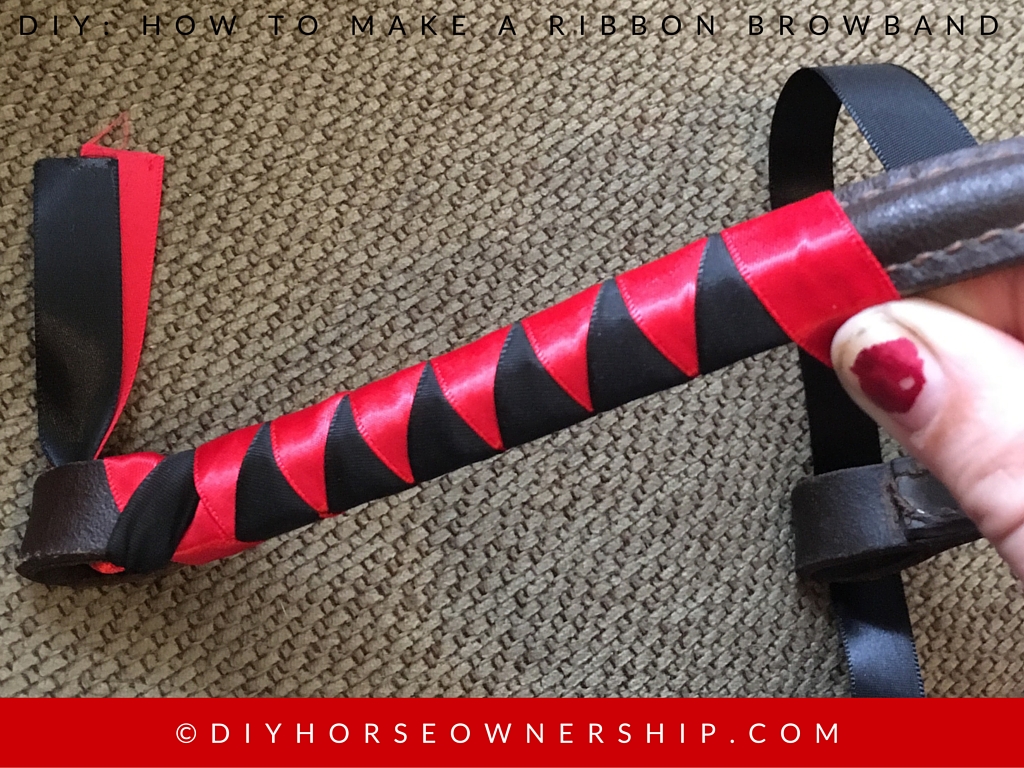
Step 7
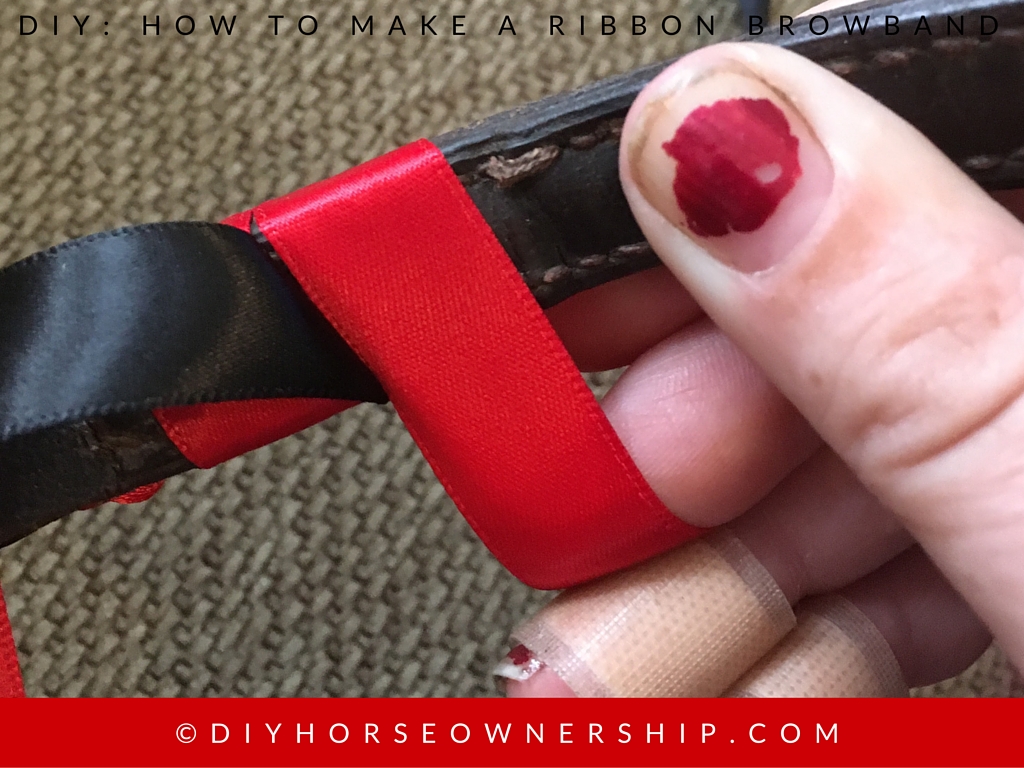
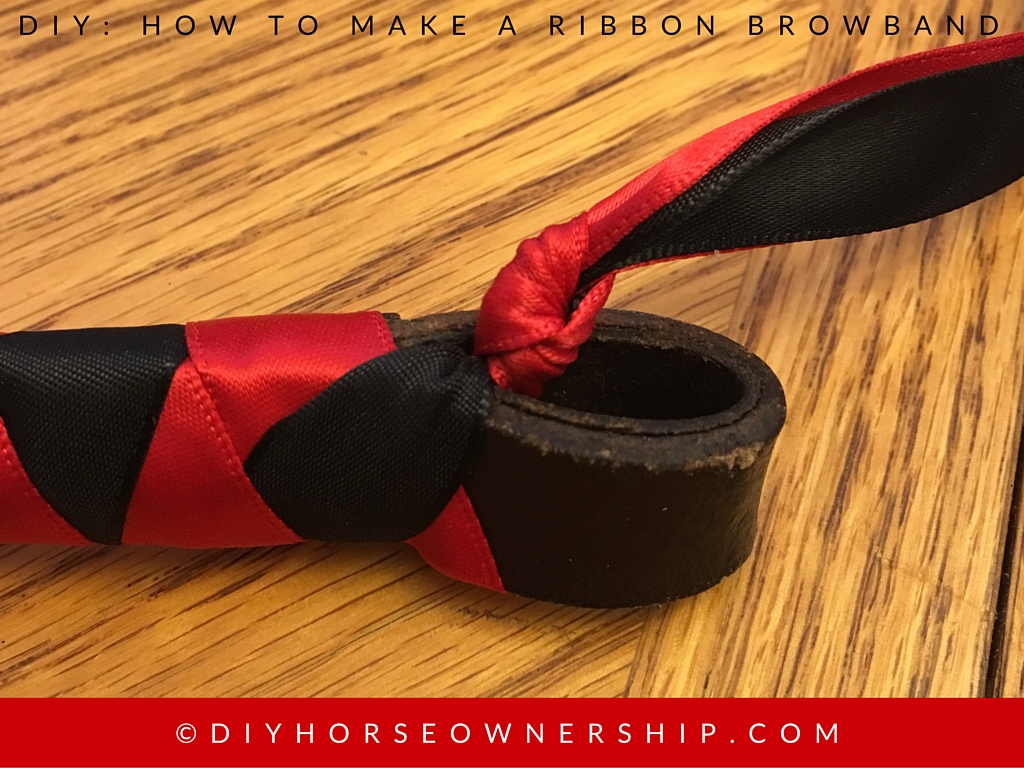
8. Once you get to the end of the browband, thread your red ribbon through the browband loop. Then tuck your black ribbon through.
Step 8
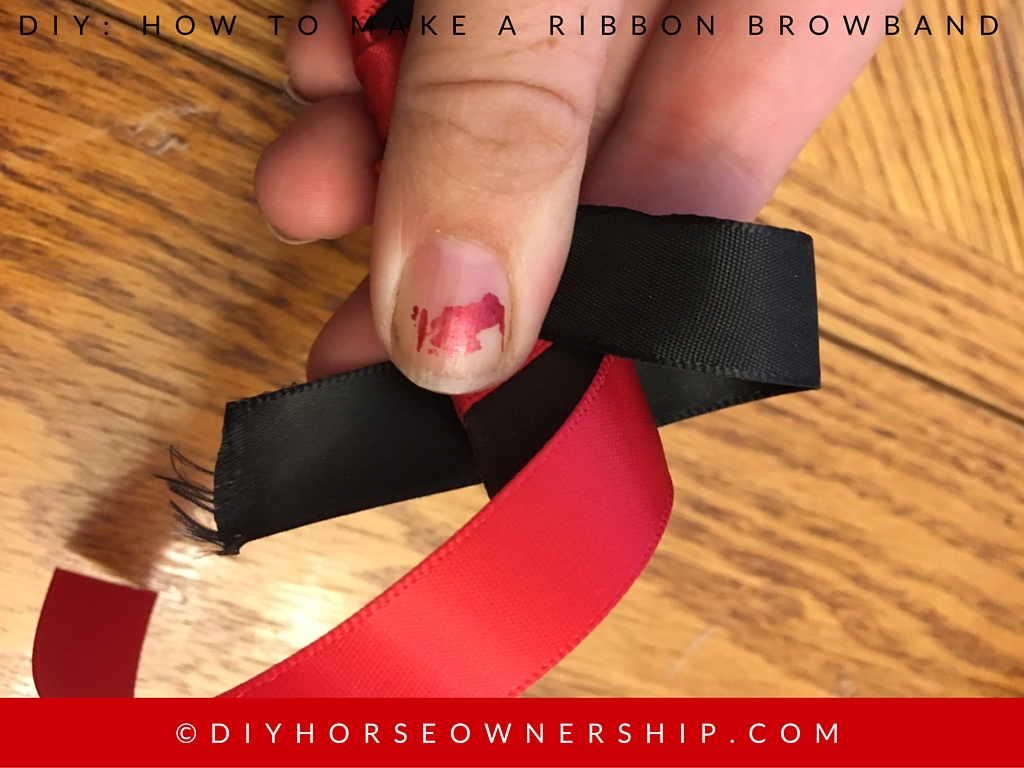
Step 8 part 2
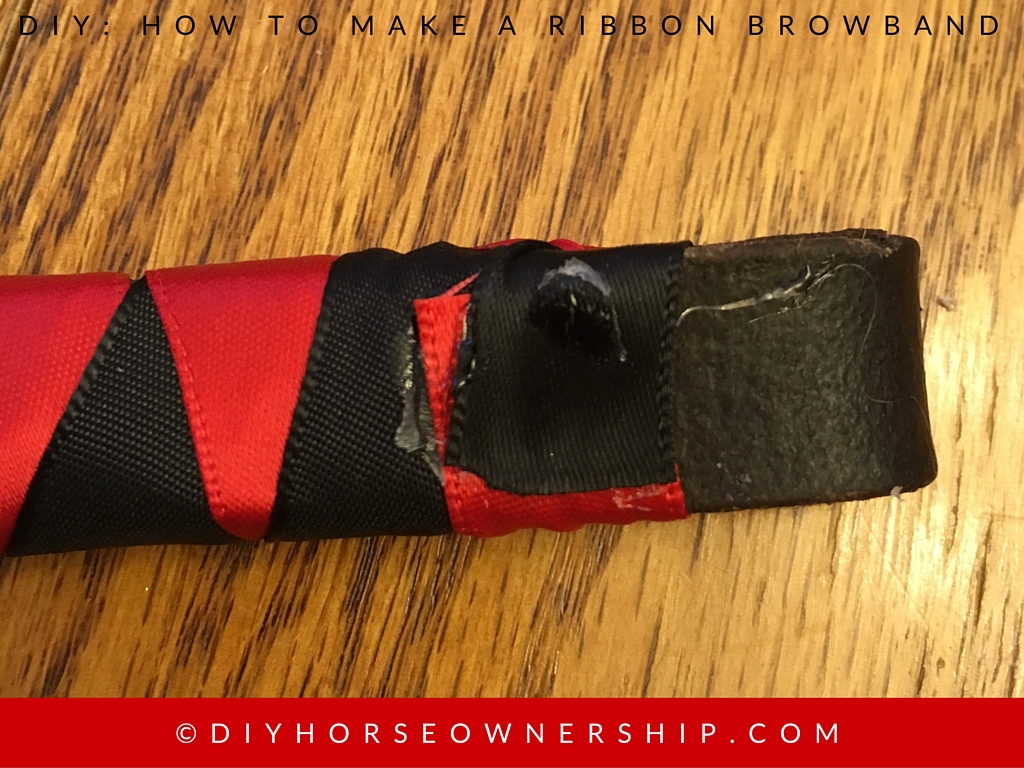
9. Add a small drop of hot glue to the base of the ribbon and press the black ribbon down.
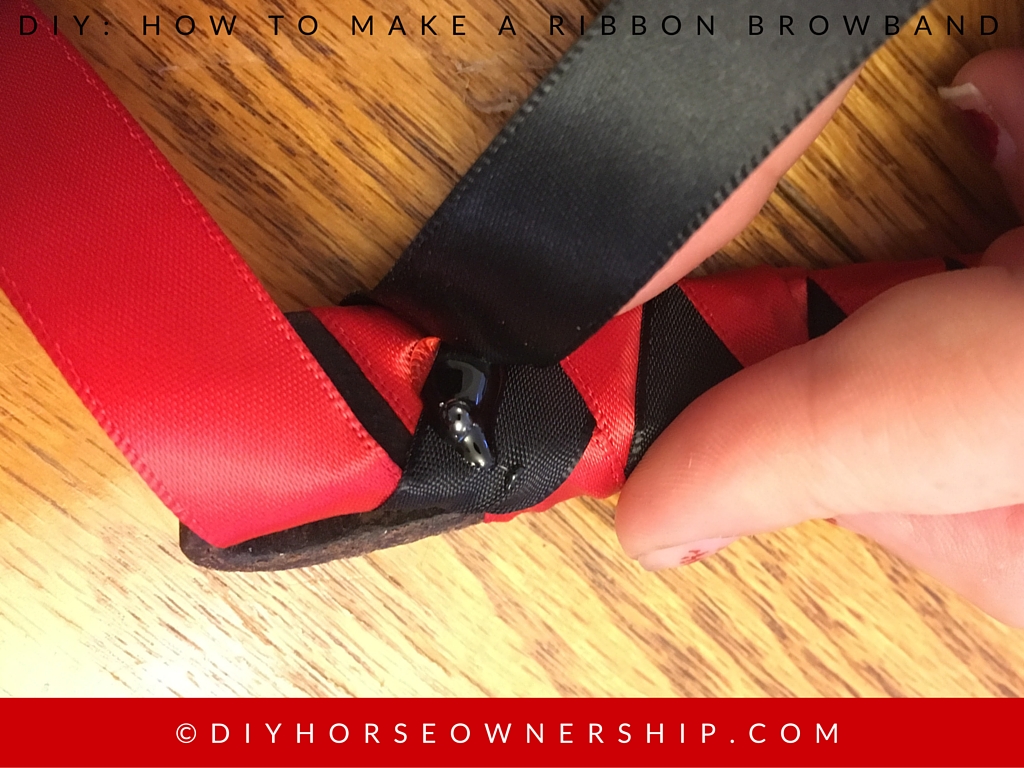
Step 9
10. Make sure the glue is dried then cut the excess off.
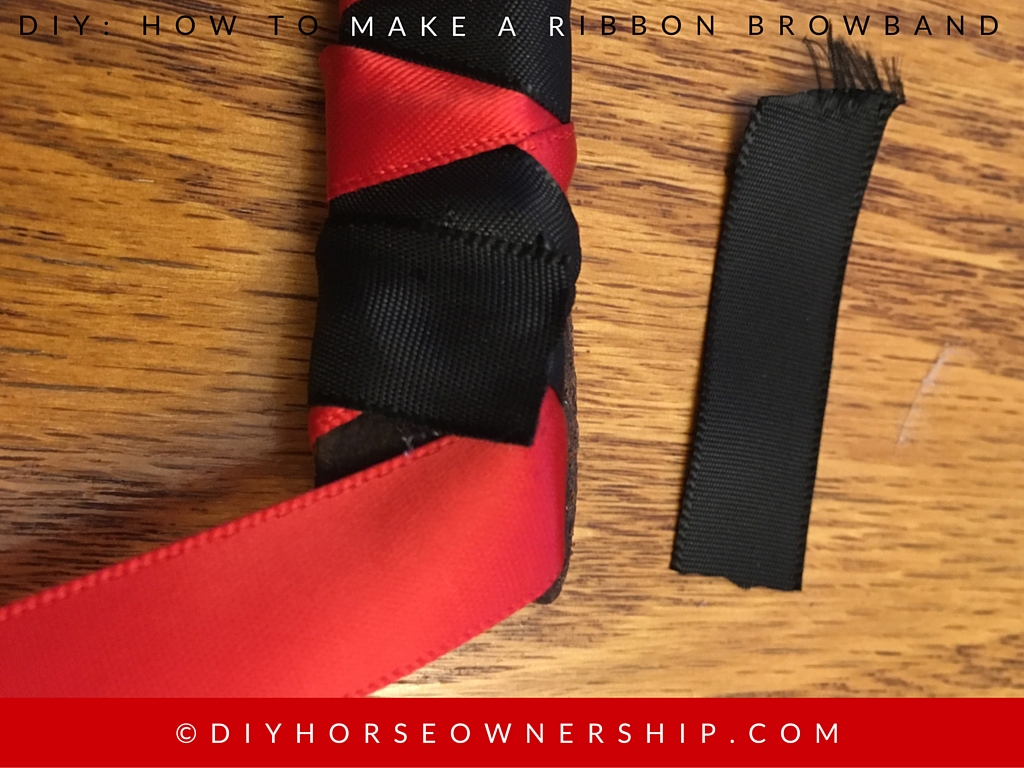
Step 10
11. Repeat the glue process with the red ribbon.
12. Now go back to your knotted end and untie your knot. At this point, you can use your extra ribbon and work backwards a few diagonals to get the pattern perfect.

13. Repeat the glueing steps from the other side.
Step 13
14. That’s it; you’re done! All you need to do is add it to your bridle.
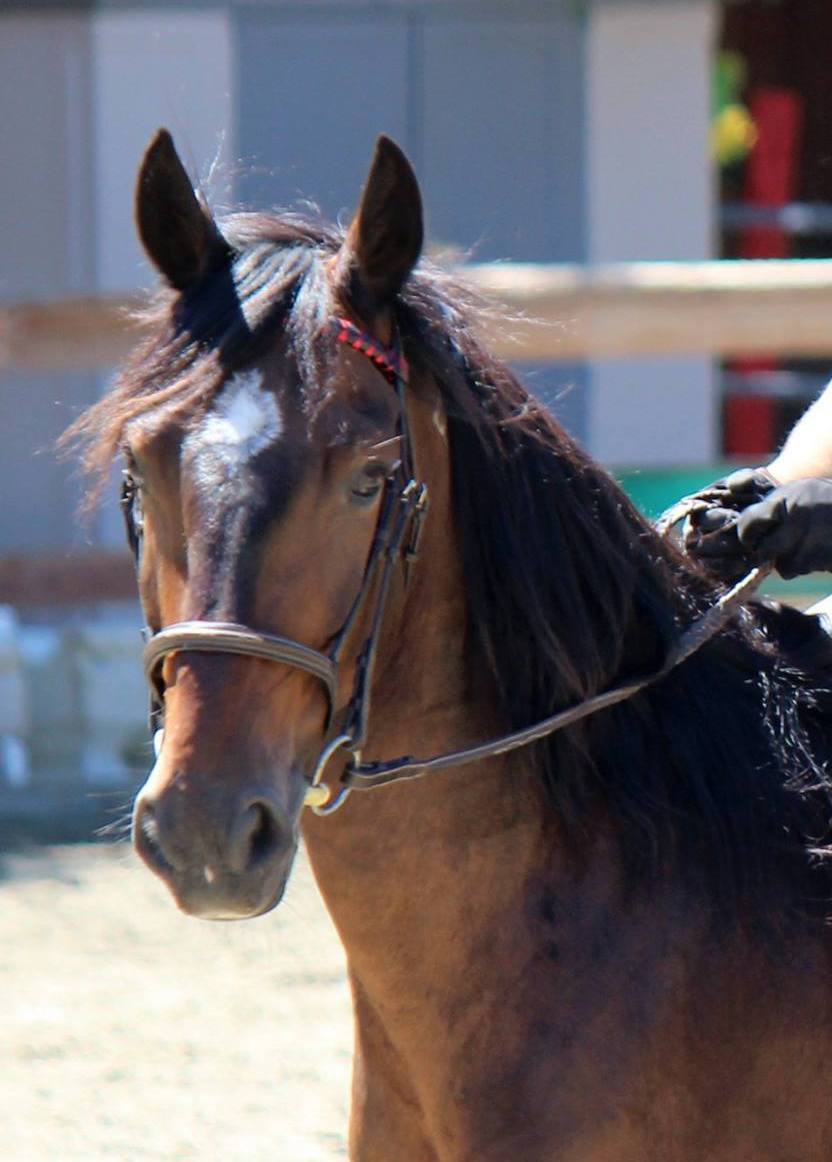
Because of his super thick forelock, you can barely see it, but Eugene debuted his ribbon browband at the LAHHA Schooling show.
Wow. I LOVE that. hmmm, I have browbands sitting in my tack trunk….
Do it! It’s so easy and so pretty.
I have some ribbon hanging out because I wanted to do this to a belt — now I have step by step pictures to try it! 😁 Awesome tutorial!
Yes, I’ve seen people do belts like this too.
That looks like a DIY even I could do. I just may try it.
Go for it! It’s really very easy and looks great.
I love this! I always figured it wasn’t too hard but never knew someone to teach me. Now if only I had a horse to make one for. Haha!
You could make a headband or a belt?
That looks much easier than I expected. Good for you!
It takes a little bit of fiddling to get used with the pattern, but by half way through, it’s easy.
Great tutorial
Thanks. This was a fun and easy one.
Came out so classy! Thanks for sharingl.
No problem. I hope you try it.
wow that looks AWESOME!! and i totally have spare browbands sitting around.
thanks!
I picked up some cheap browbands at the used tack store, but if you have extra, go for it.
That came out great! Thanks for the tutorial!
I used to do this regularly for special events on Ozzy! Simple way to dress up your bridle! Love it.