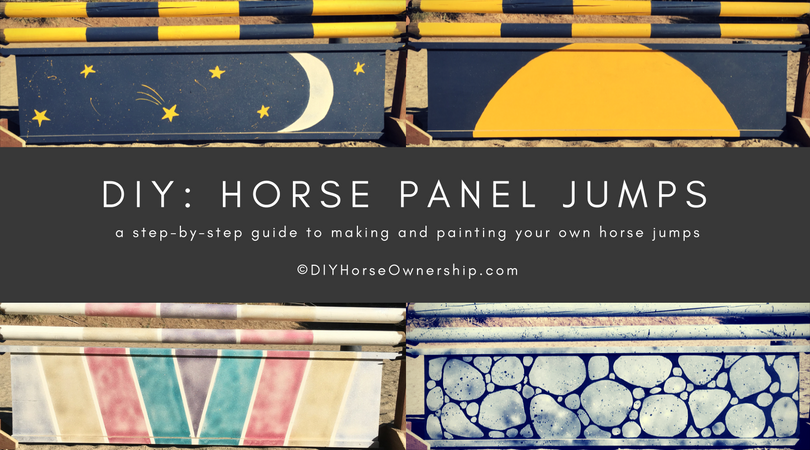
We wanted to add some more color and variety into our jumps collection so we decided to make some panel jumps. Panel jumps are a really fun and easy DIY project. As a bonus, if you paint each side of the panel a different design you can create 2 different jump presentations with one set of materials.
We use 8′ jump poles because they’re a lot cheaper than 12′ poles and smaller jumps allow us to fit more into our small arena. Therefore, all of the measurements are for 8′ jump panels, but if you want to make 12′ panels, just adjust the measurements.
** I’m not a professional jump builder or professional contractor. If you follow these directions you do so at your own risk. If you use any such jumps made from following these directions, do so at your own risk.
Materials for 2:
One 4’x8’x1/2″ plywood board
Eight 1″x2″x8′ pine boards
Wood Glue
1 5/8″ Wood Screws
You’ll also need a circular saw, C-clamps, and a screwdriver.
Here’s a diagram to guide you:

- Start by cutting your 4’x8′ in half lengthwise.
- For the next step, you’ll be removing a 4″x 22″ section from the two bottom sides of the plywood board.
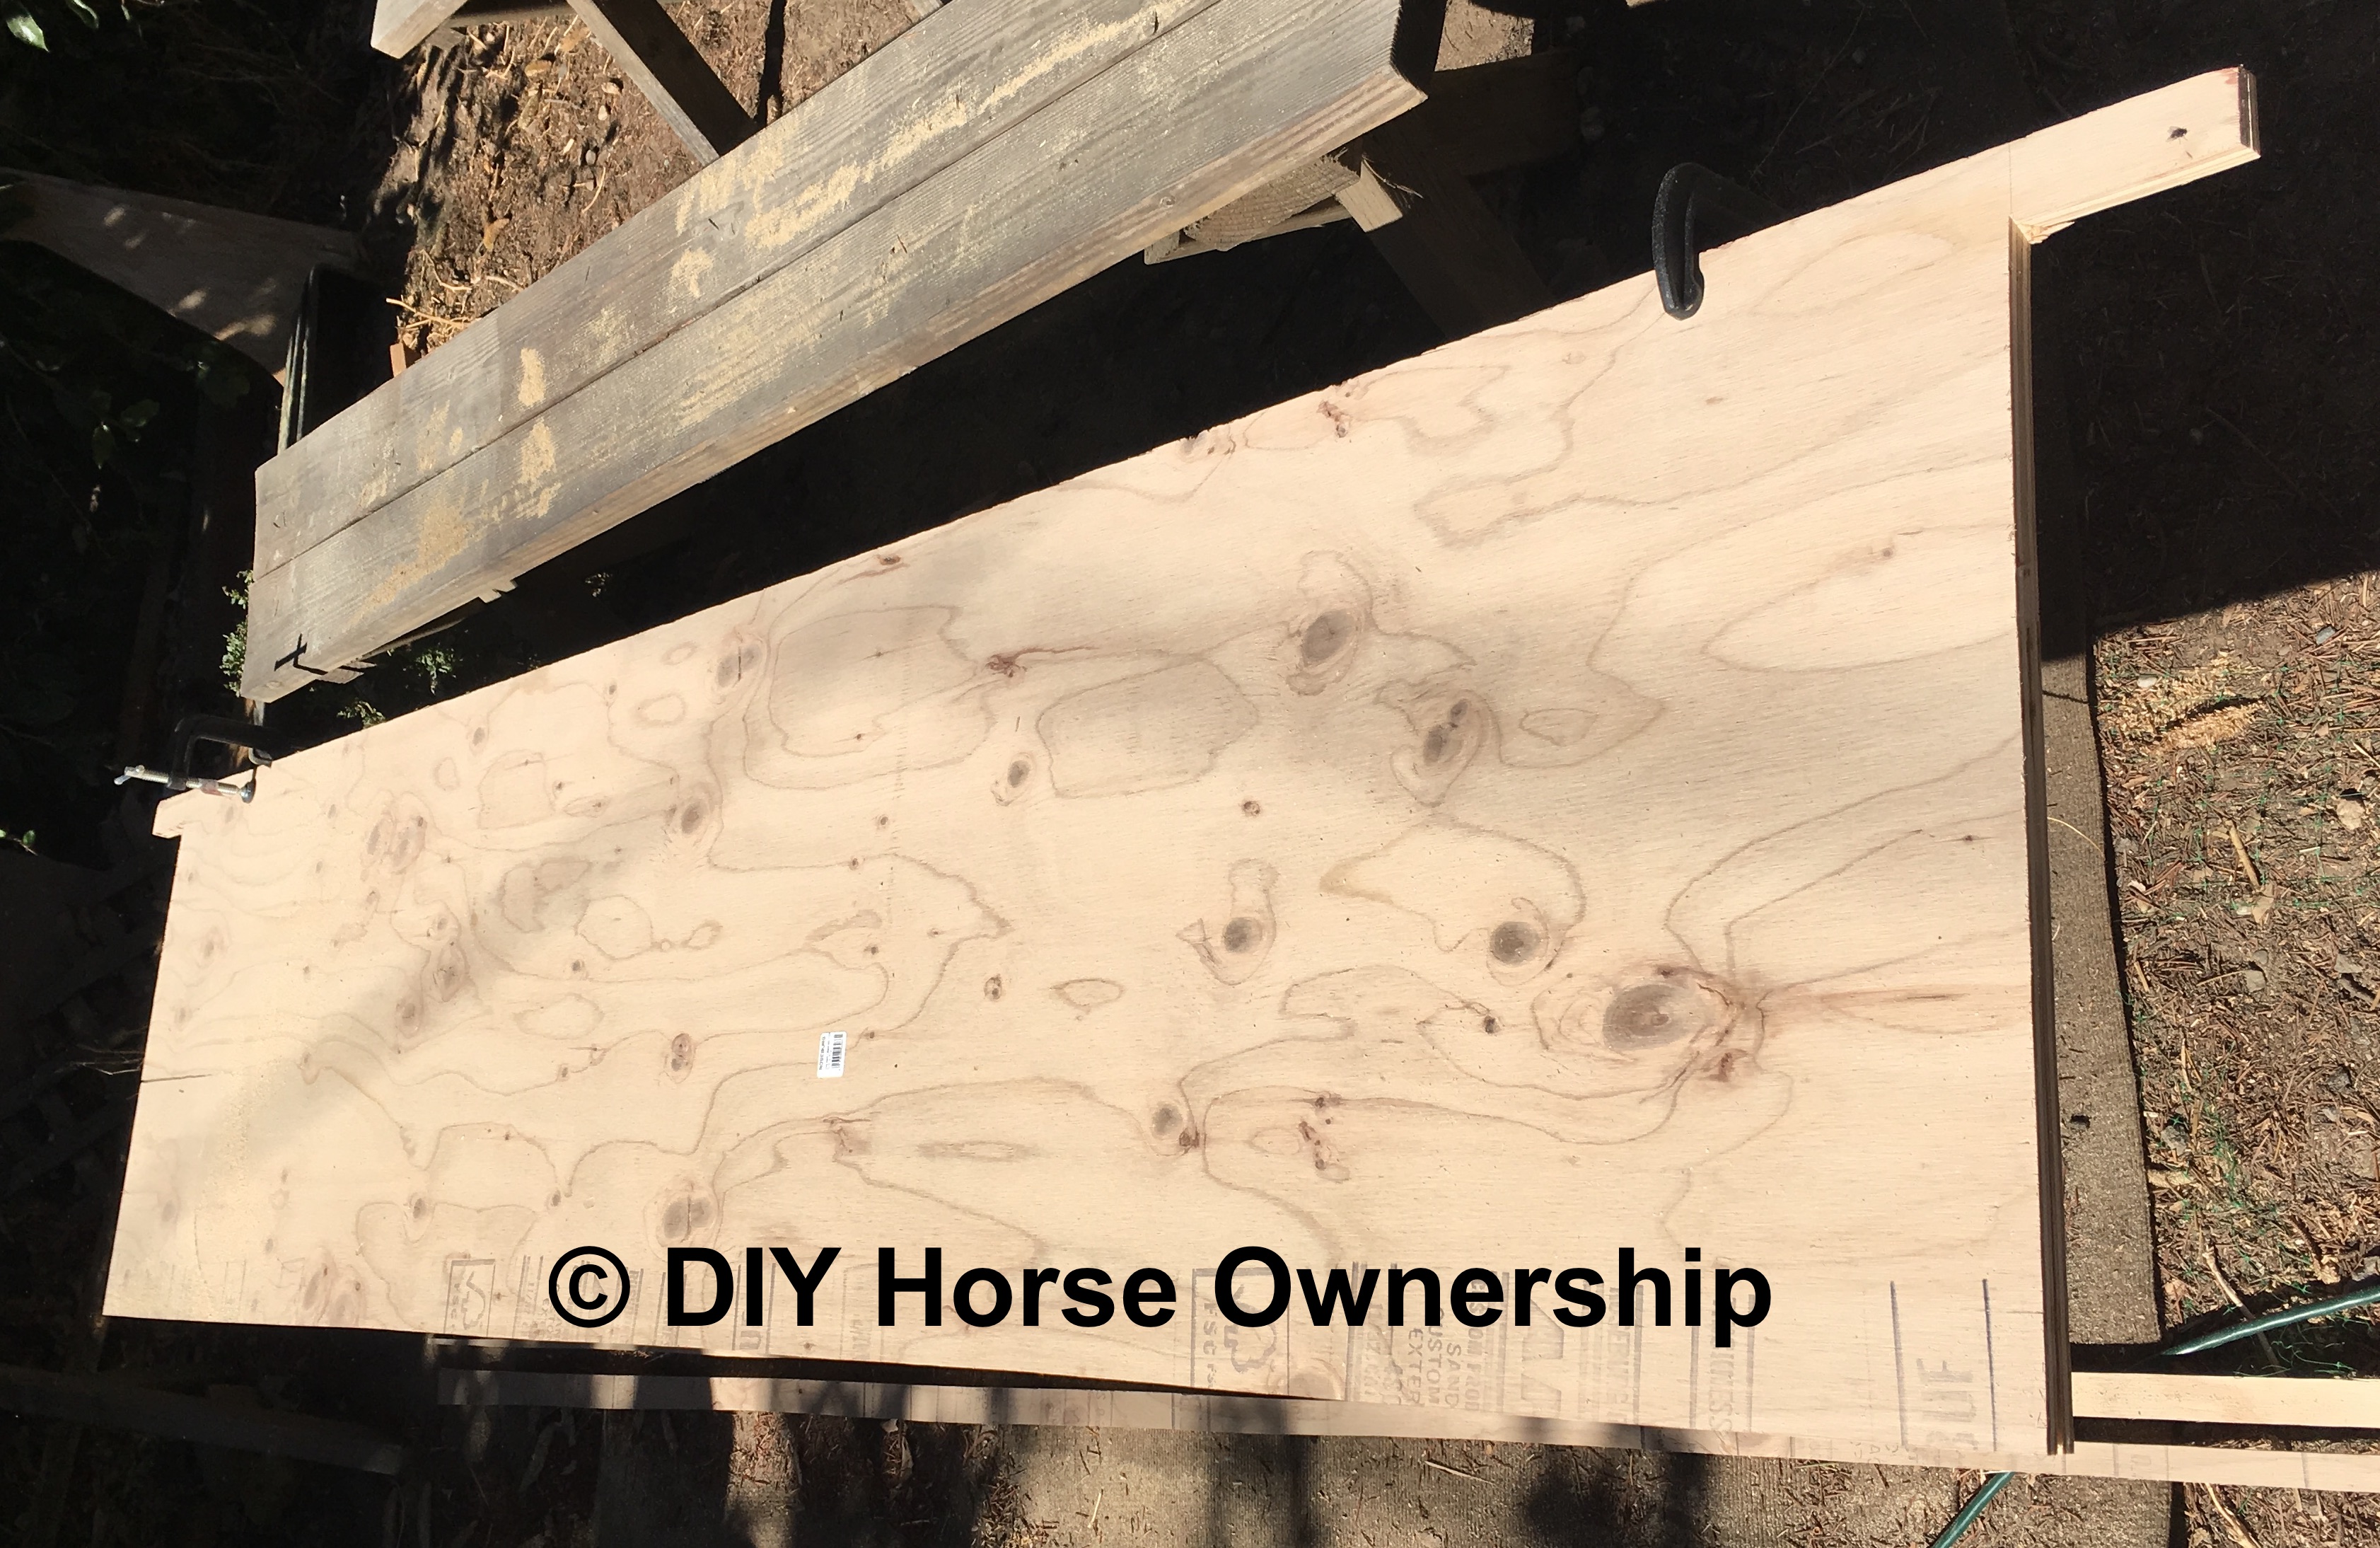
- To get the correct measurement, place one of the 1″x2″x8′ boards along the top edge and use a pencil to mark along the edge of the 1″x2″ for 4 inches on each side of the plywood.
- Use a square or a ruler to measure 4″ in along the bottom and draw a connecting line up to the upper line on each side.
- Cut out these sections on each side. Your board should look like the picture above.
- Cut 8″ off 4 of your 1″x2″x8′ boards.
- Place one of the 8′ 1″x2″ boards down on your work surface and run a line of wood glue along the middle:
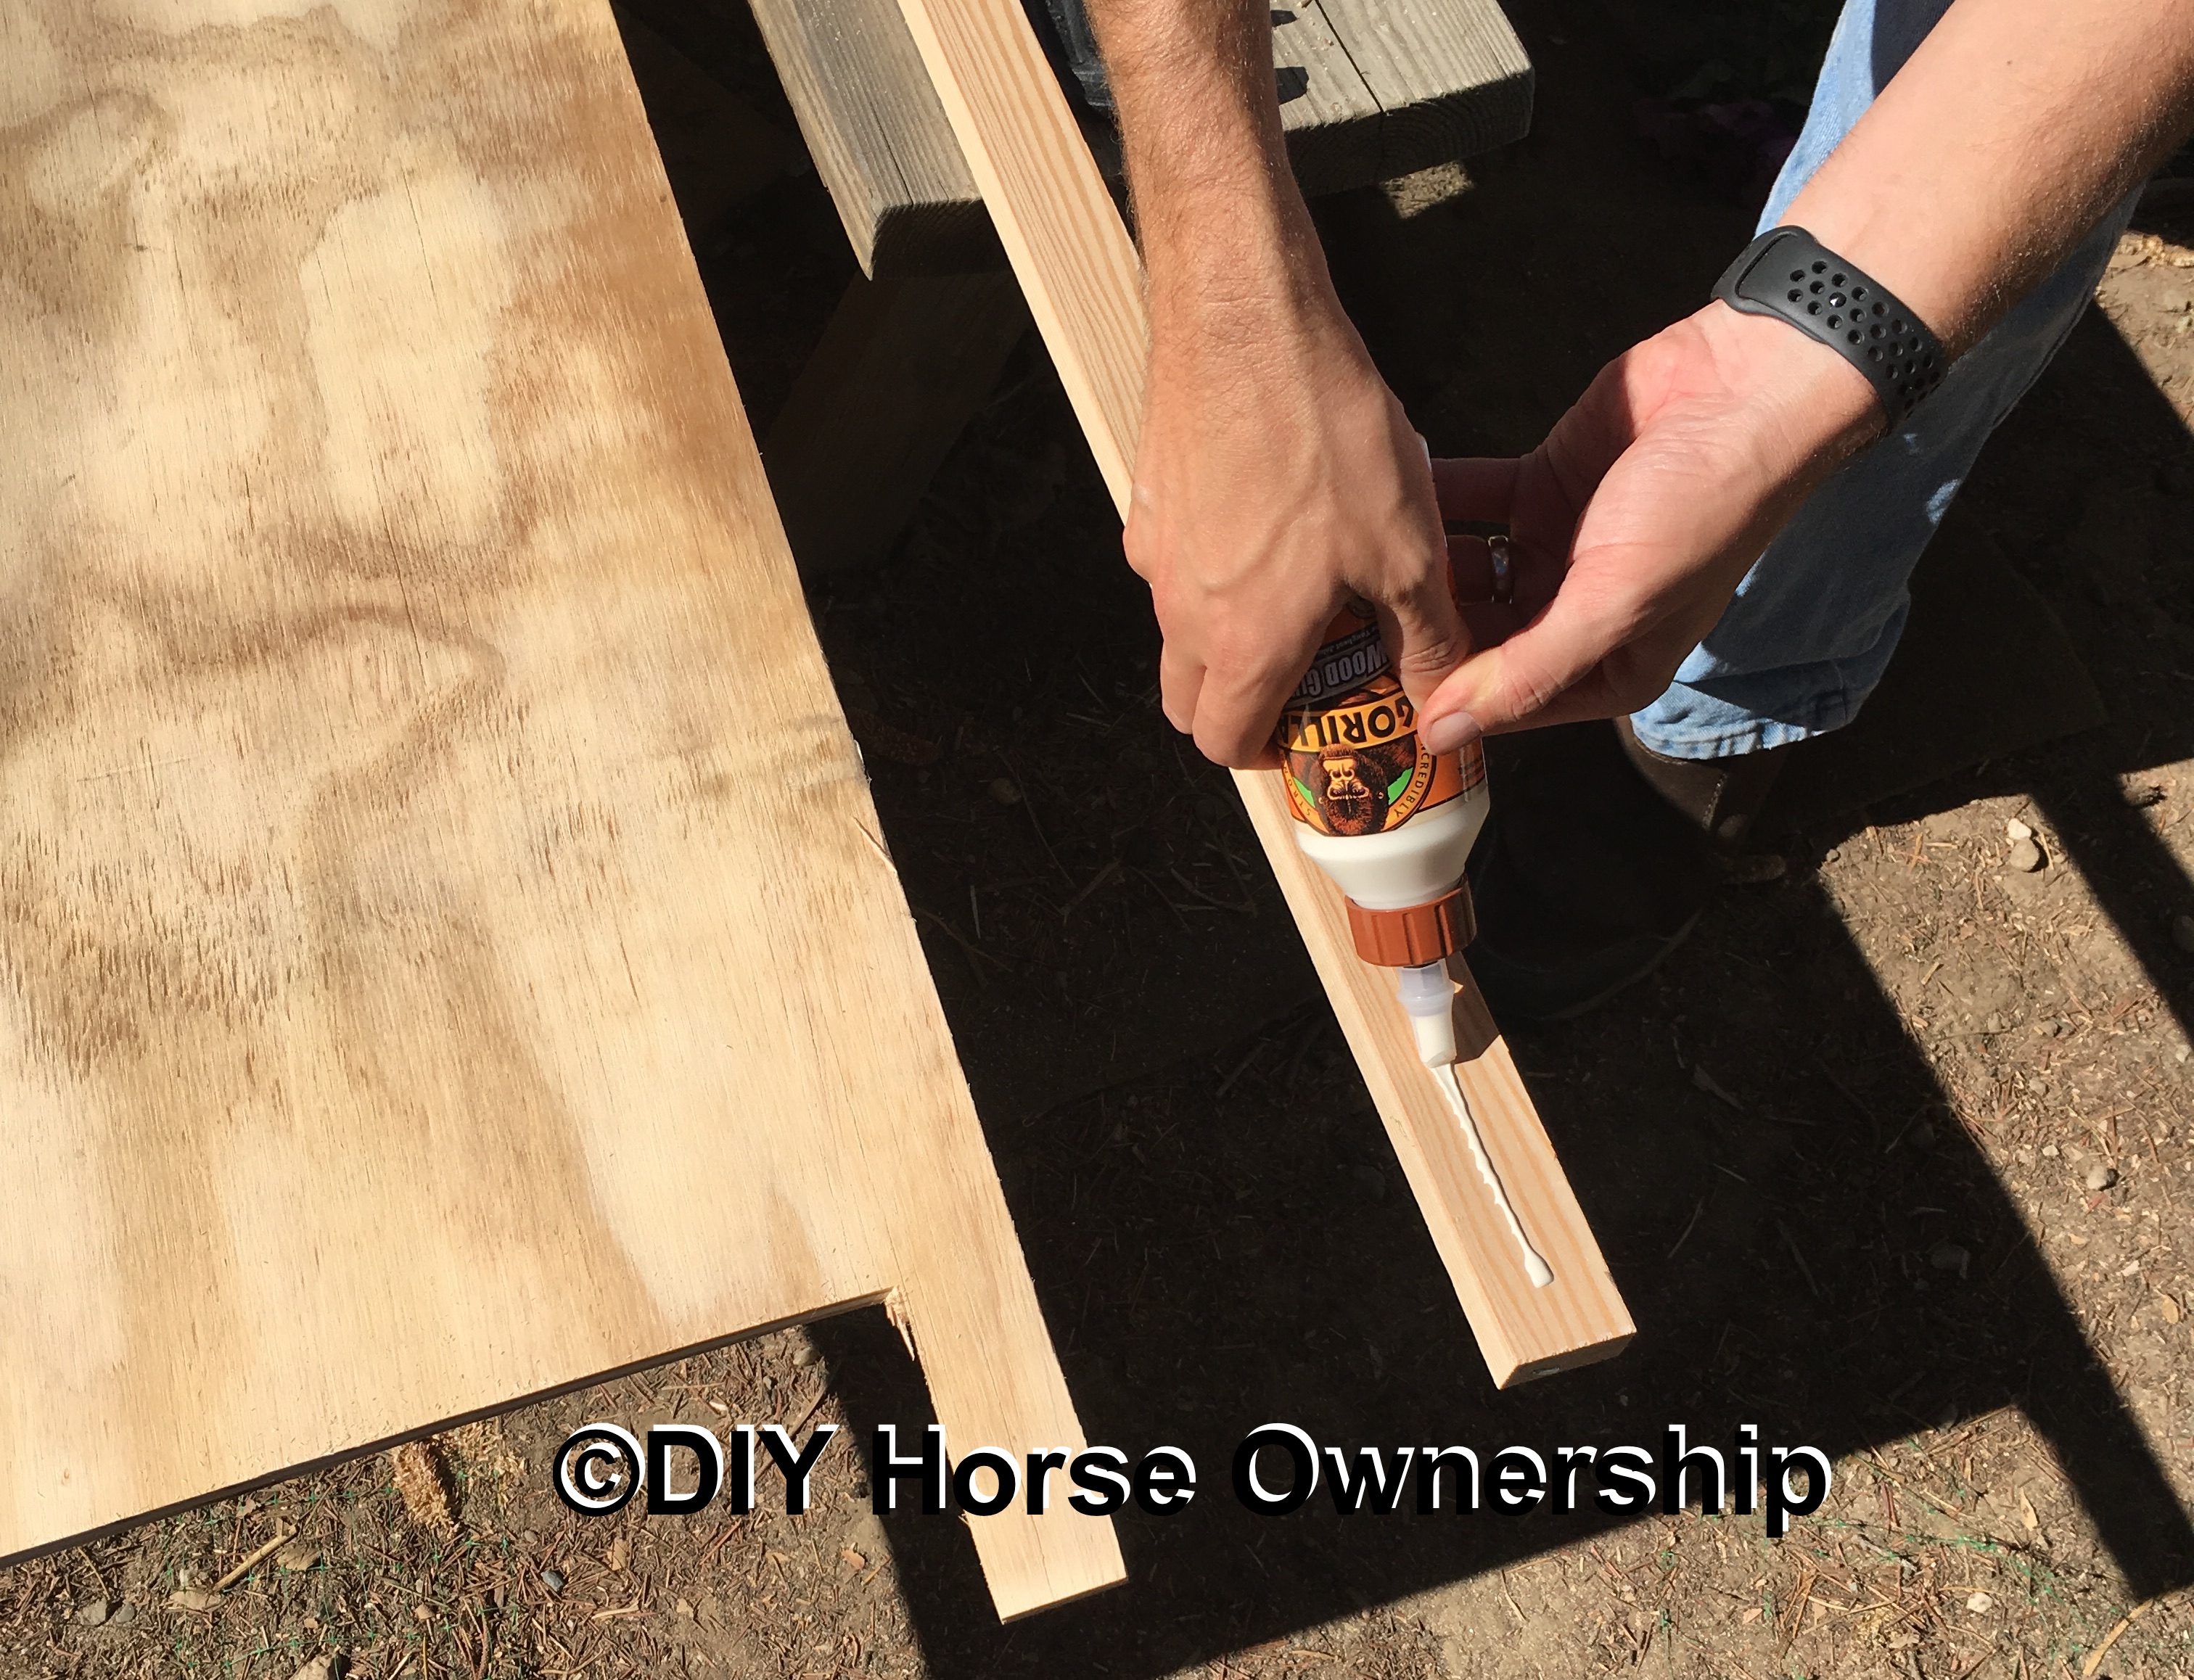
- Place the cutout plywood on top of the glued board and run a line of glue along the edge of the plywood board:

- Place a second 8′ board on top of this line of glue. Line up the edges of all 3 pieces and then clamp them down with your C-clamps:
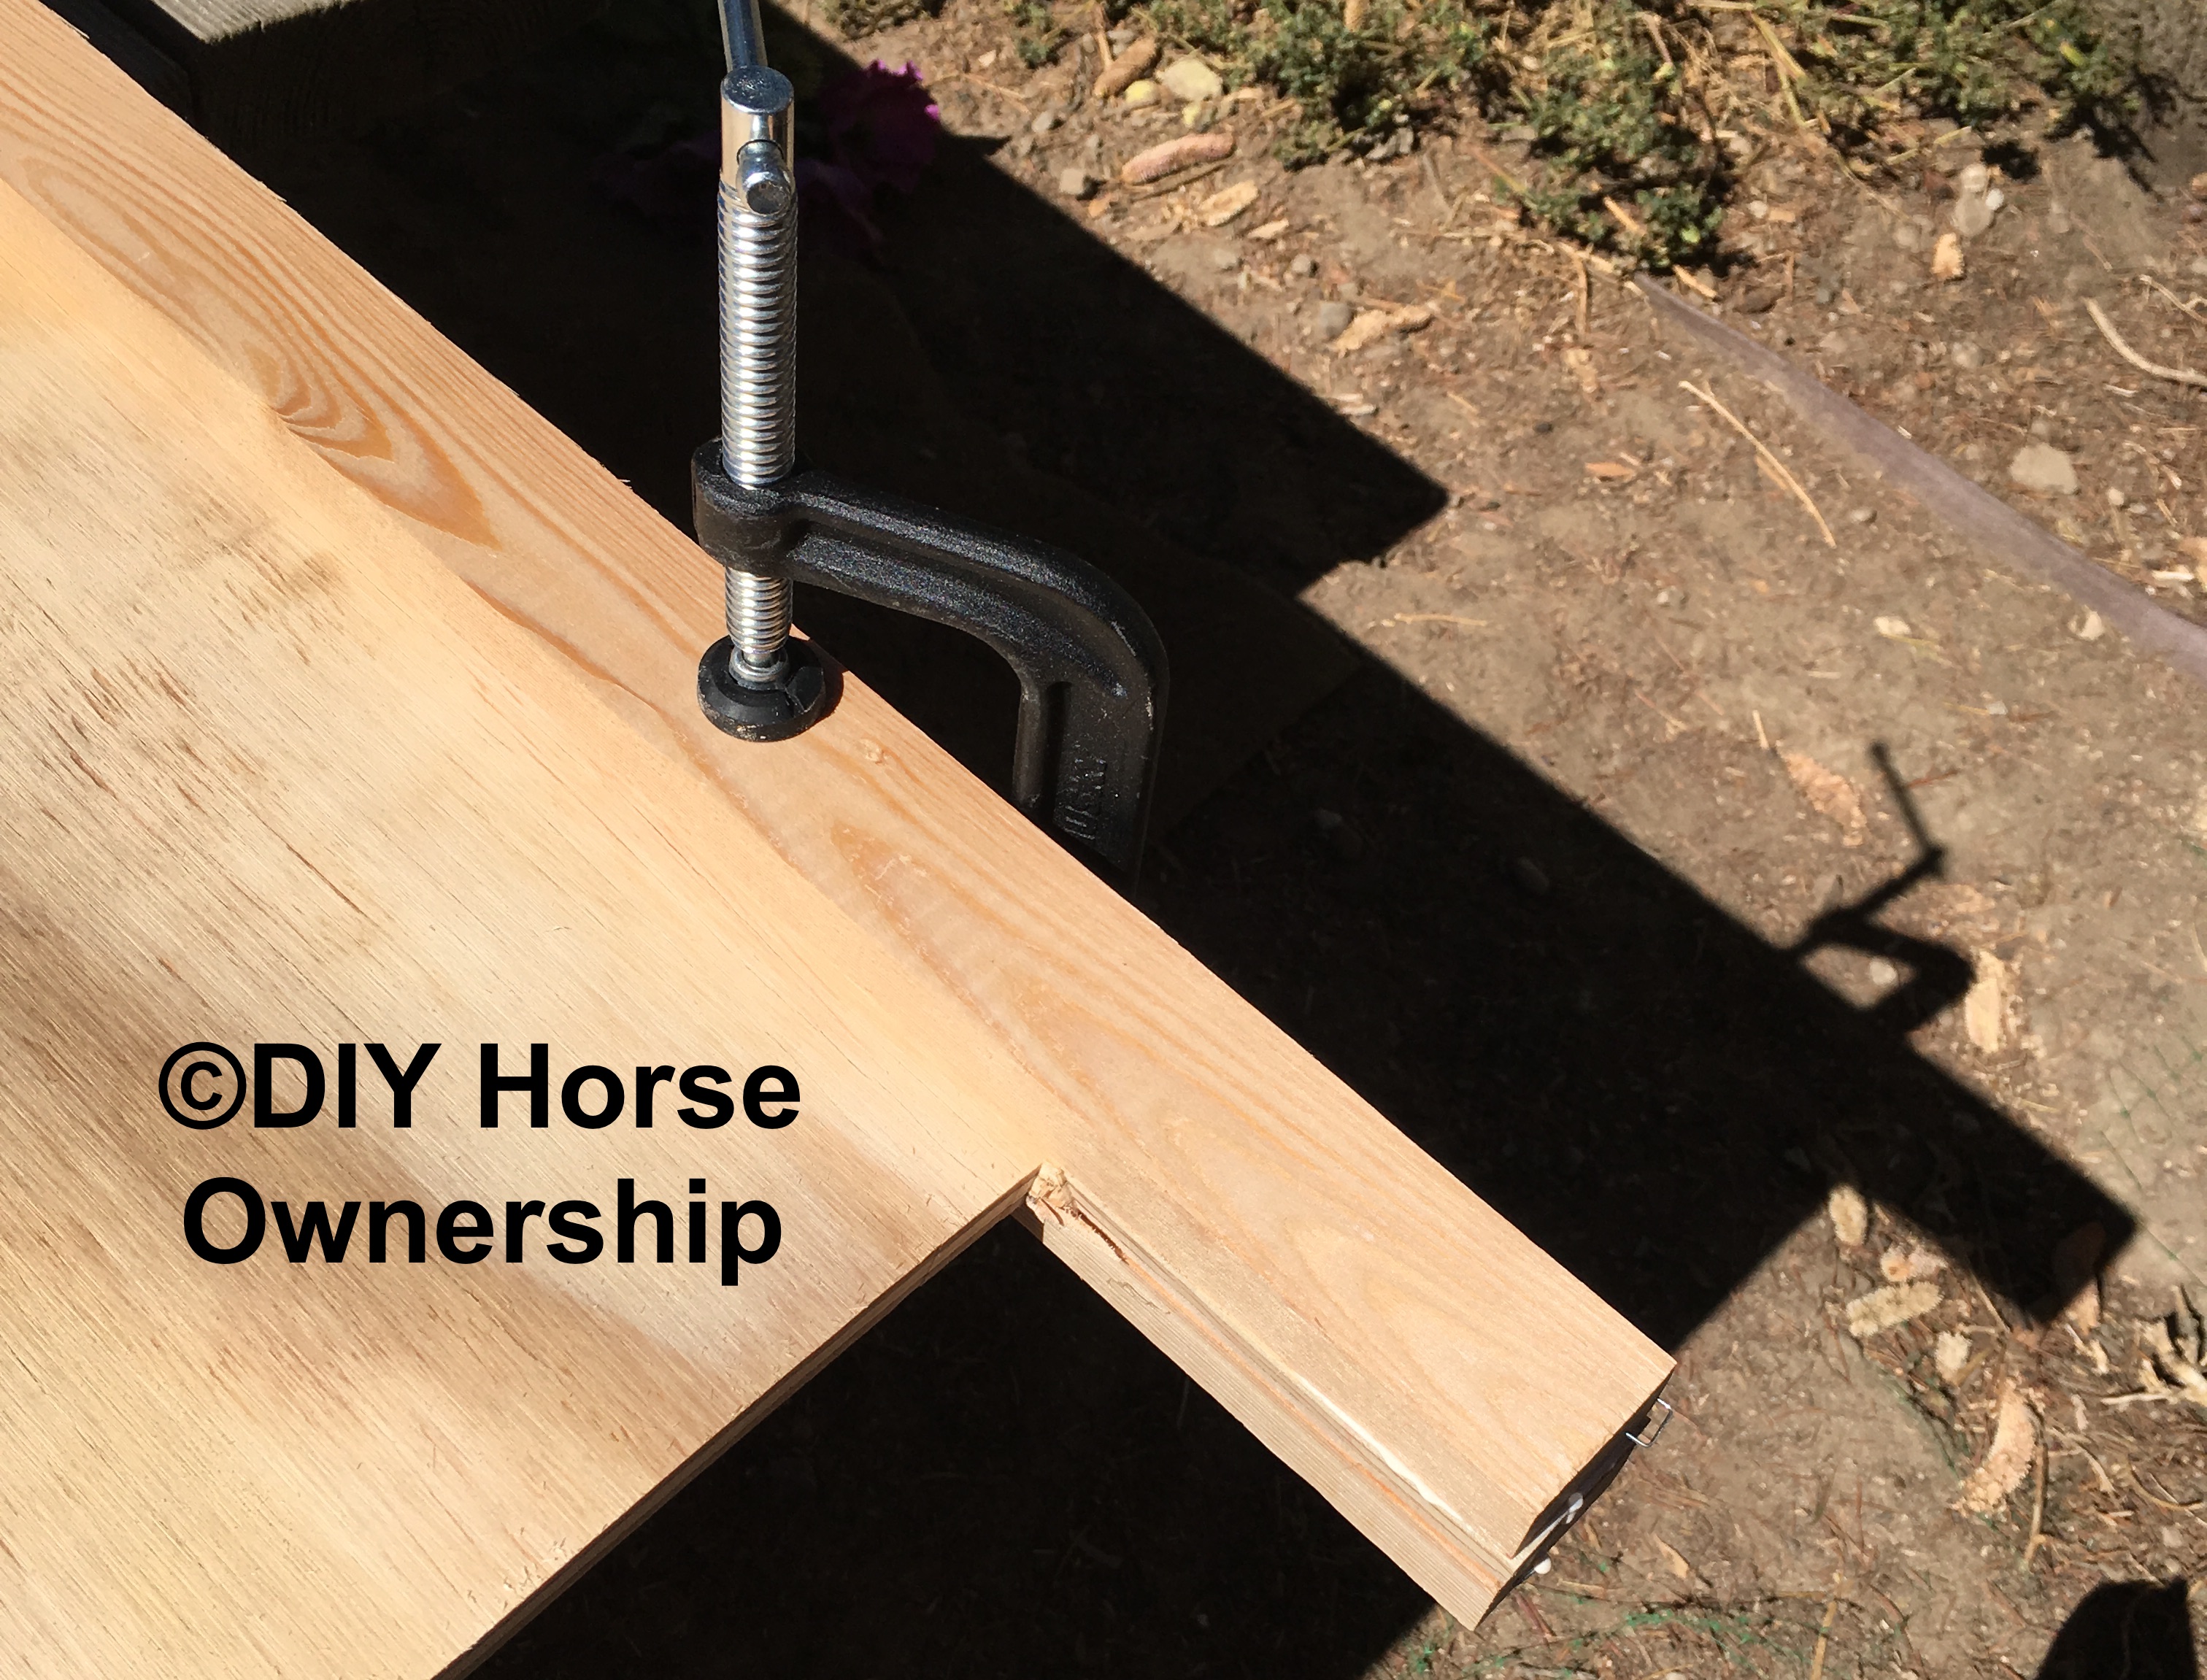
- Repeat steps 7-9 with your 2 shorter boards along the bottom edge of the plywood:

- While your boards are all clamped together, screw the boards together. We did 3 screws on each board from the front towards the back (left, middle, and right) and then flipped the panel and did 2 screws between those three from the other direction:
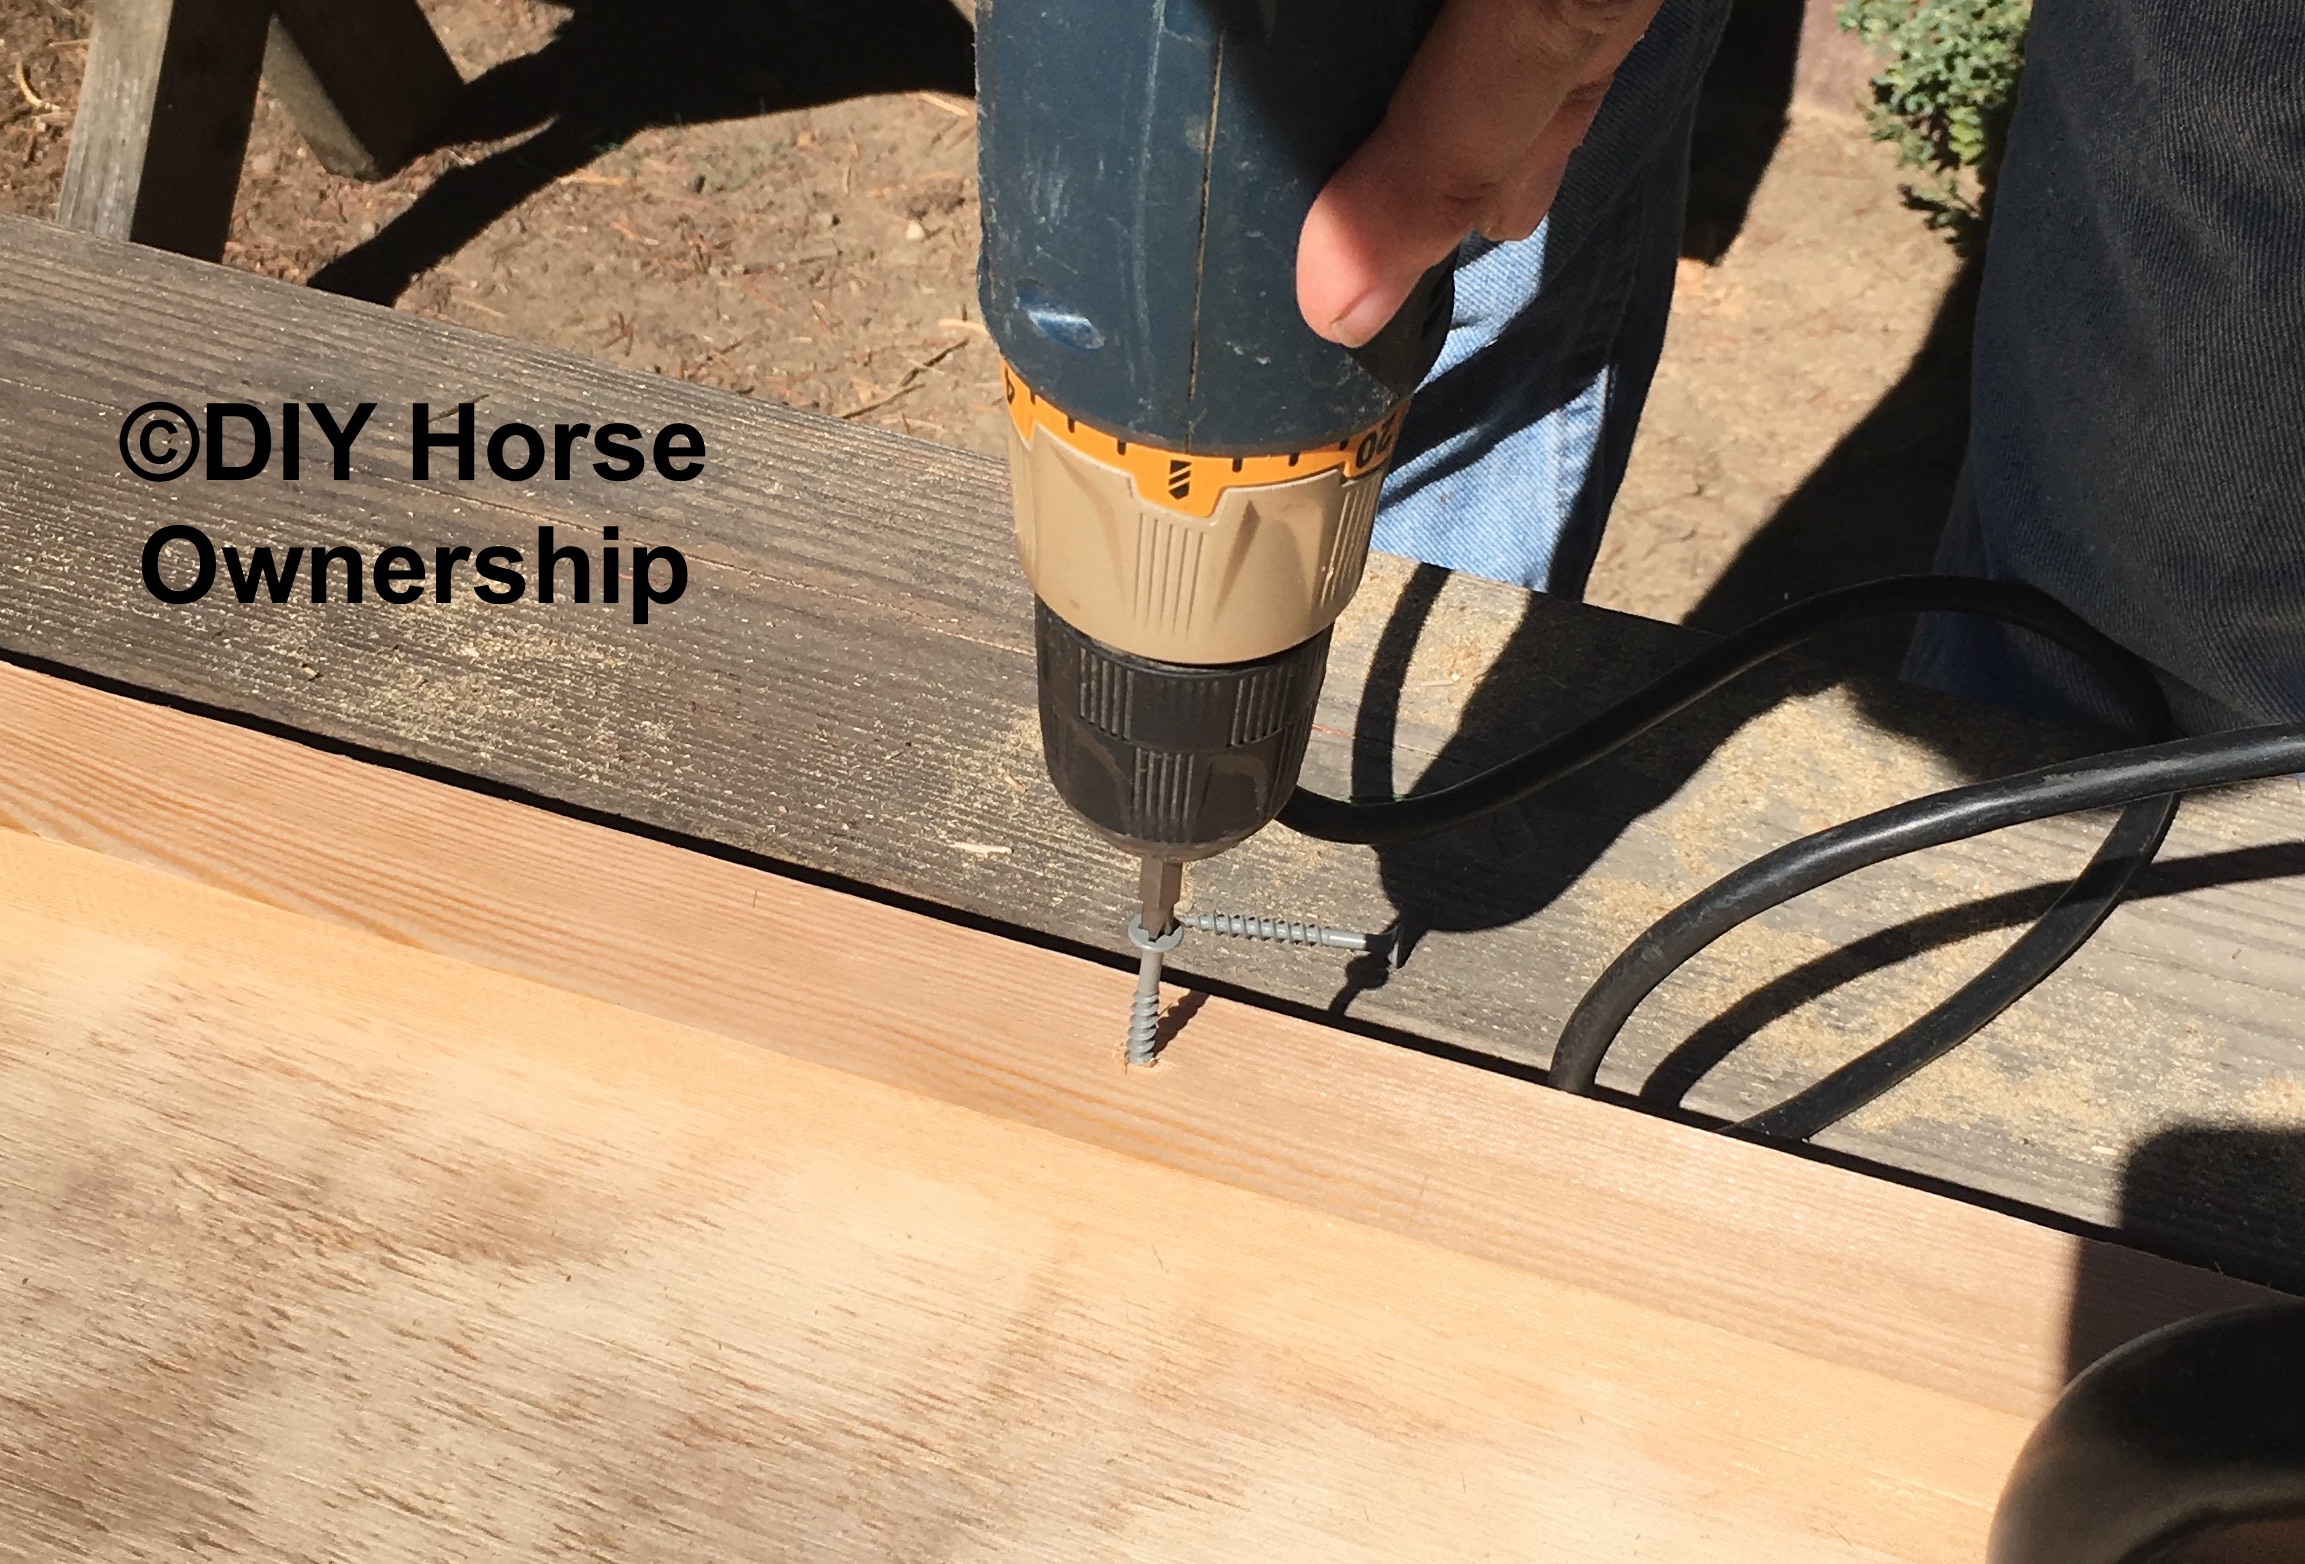
Once they’re screwed together, you can remove the clamps. Repeat steps 2-11 to make your second panel. Now you get to the fun part: painting.
Painting Materials:
Tarp
Exterior grade paint of various colors
Painters Tape
Foam rollers and roller pan
Foam painbrushes
1 real paintbrush
Depending on what designs you want to make you’ll need different colors or paint of different supplies. Painting is the fun part for me. I really like the opportunity to be creative and make whatever jumps make me happy. However, if you’re looking for some inspiration, here are the designs we made:
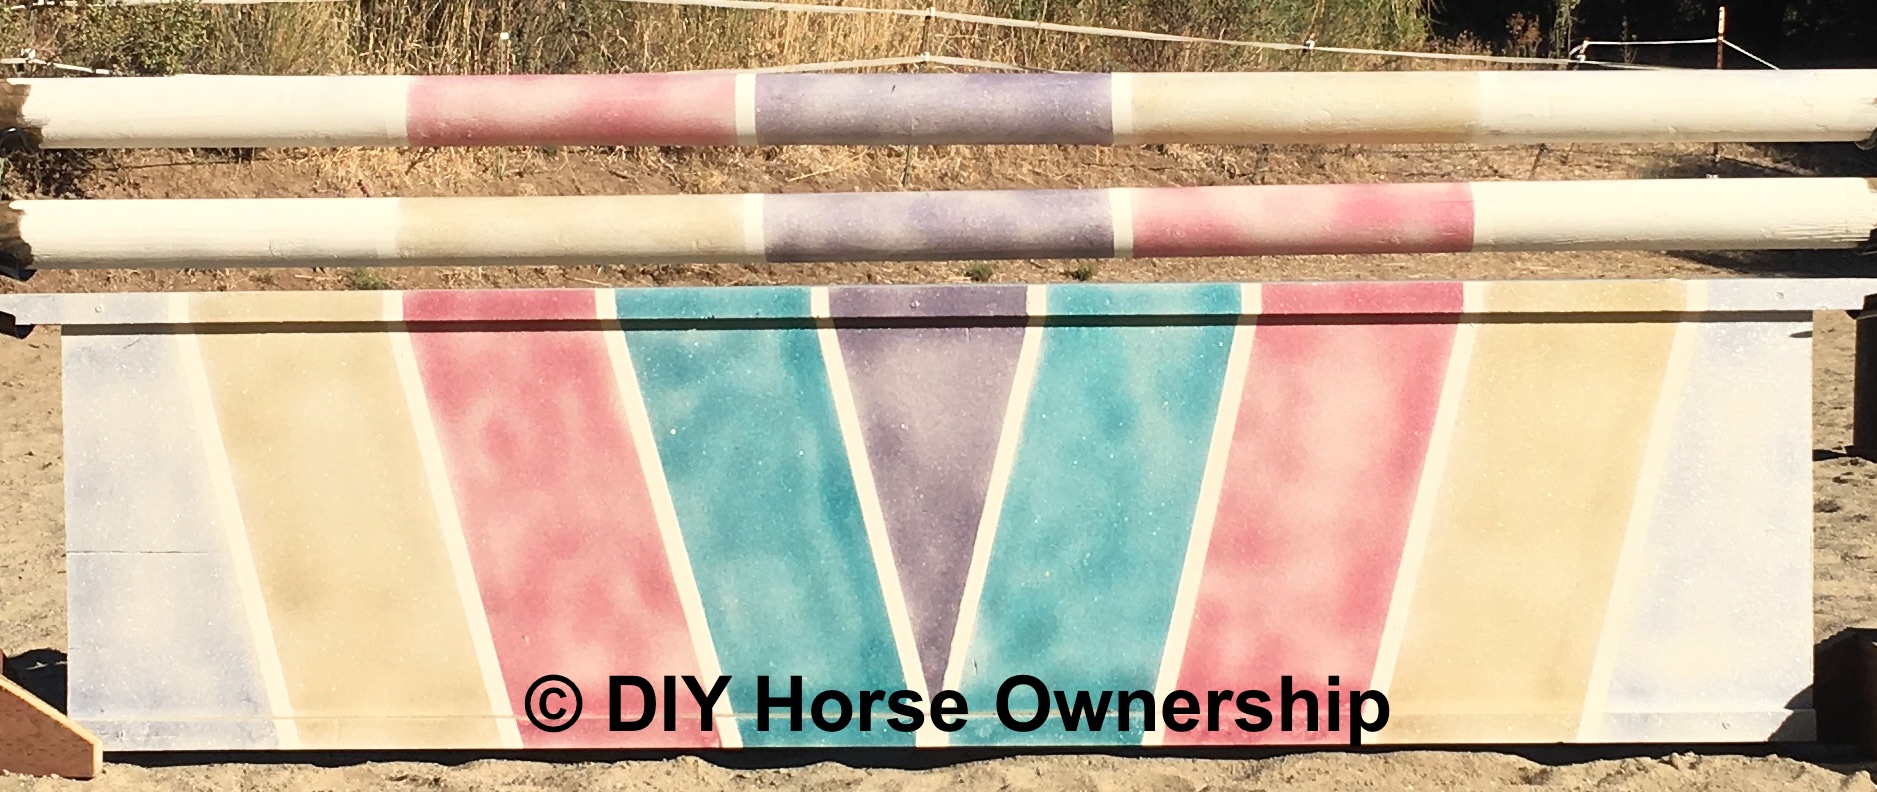
Glitter Rainbow
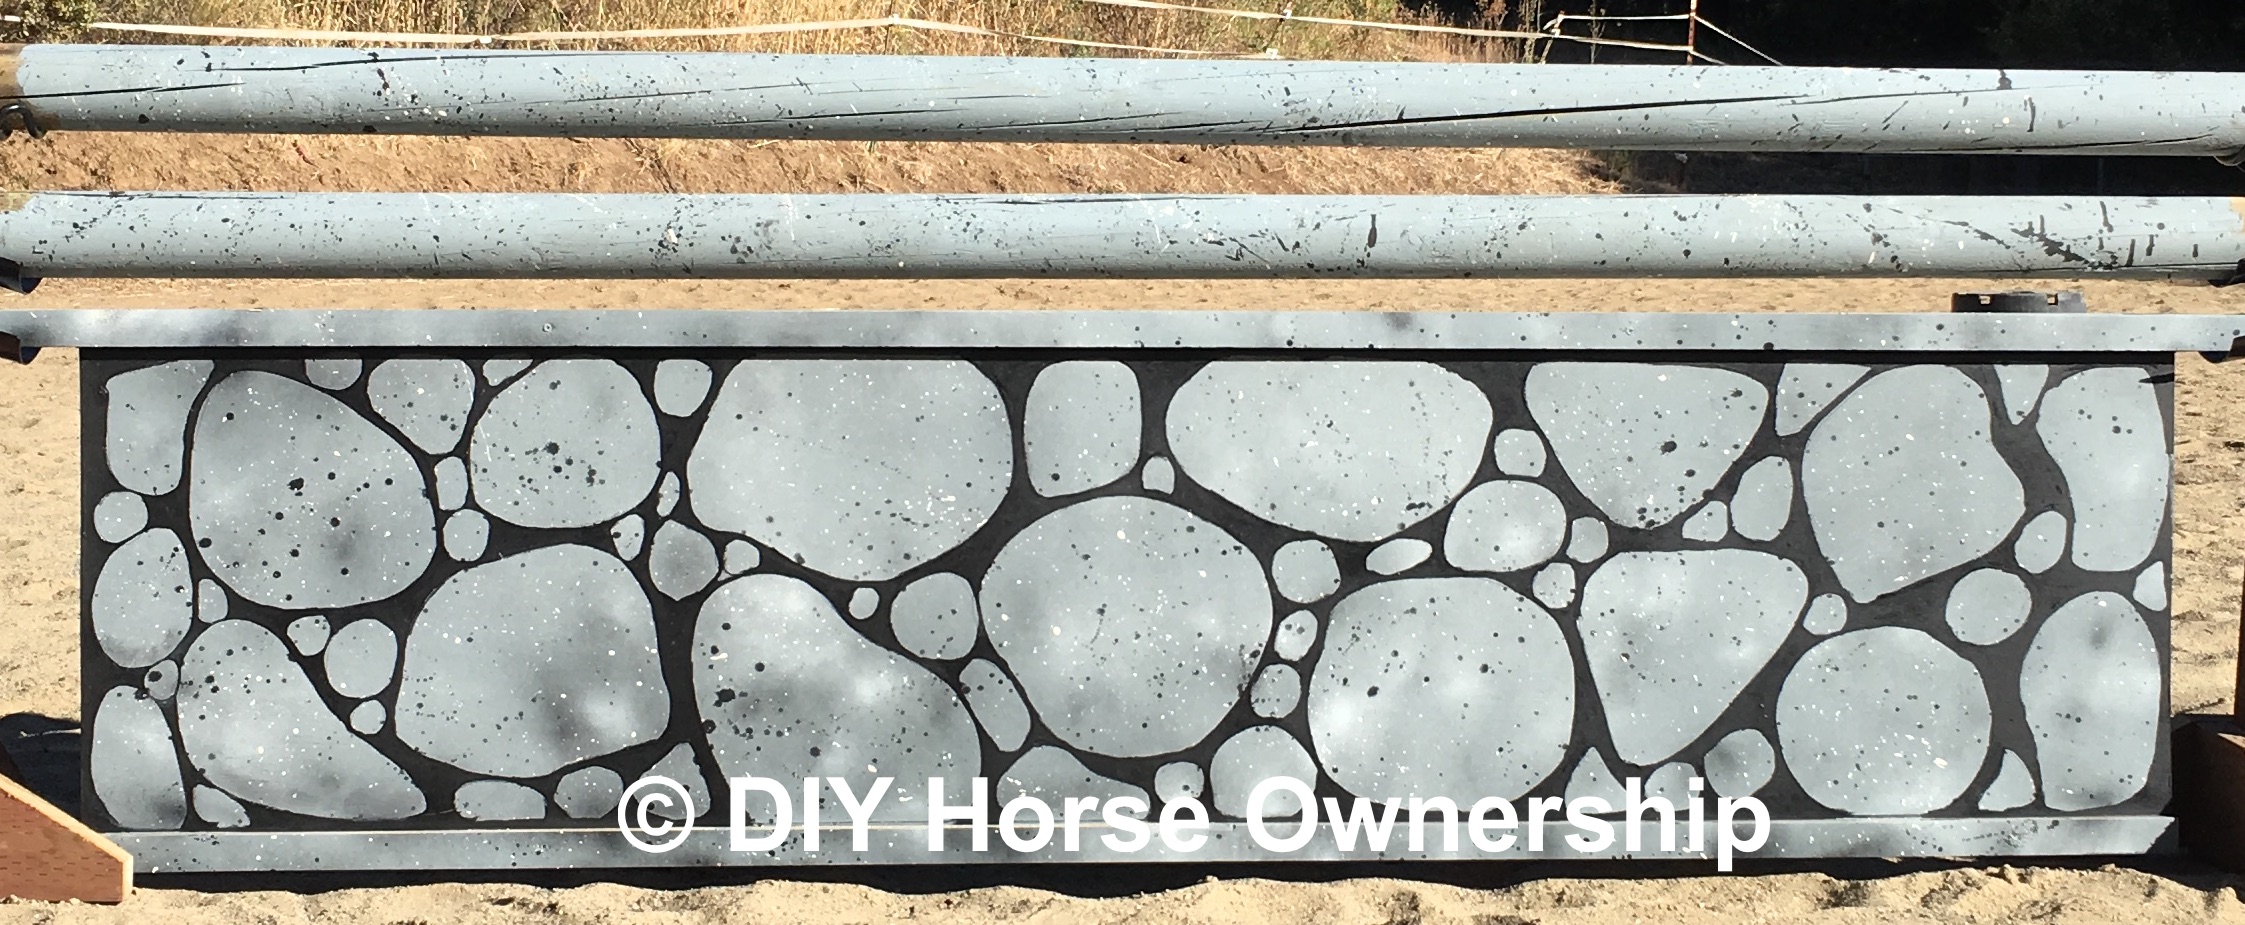
Stone Wall
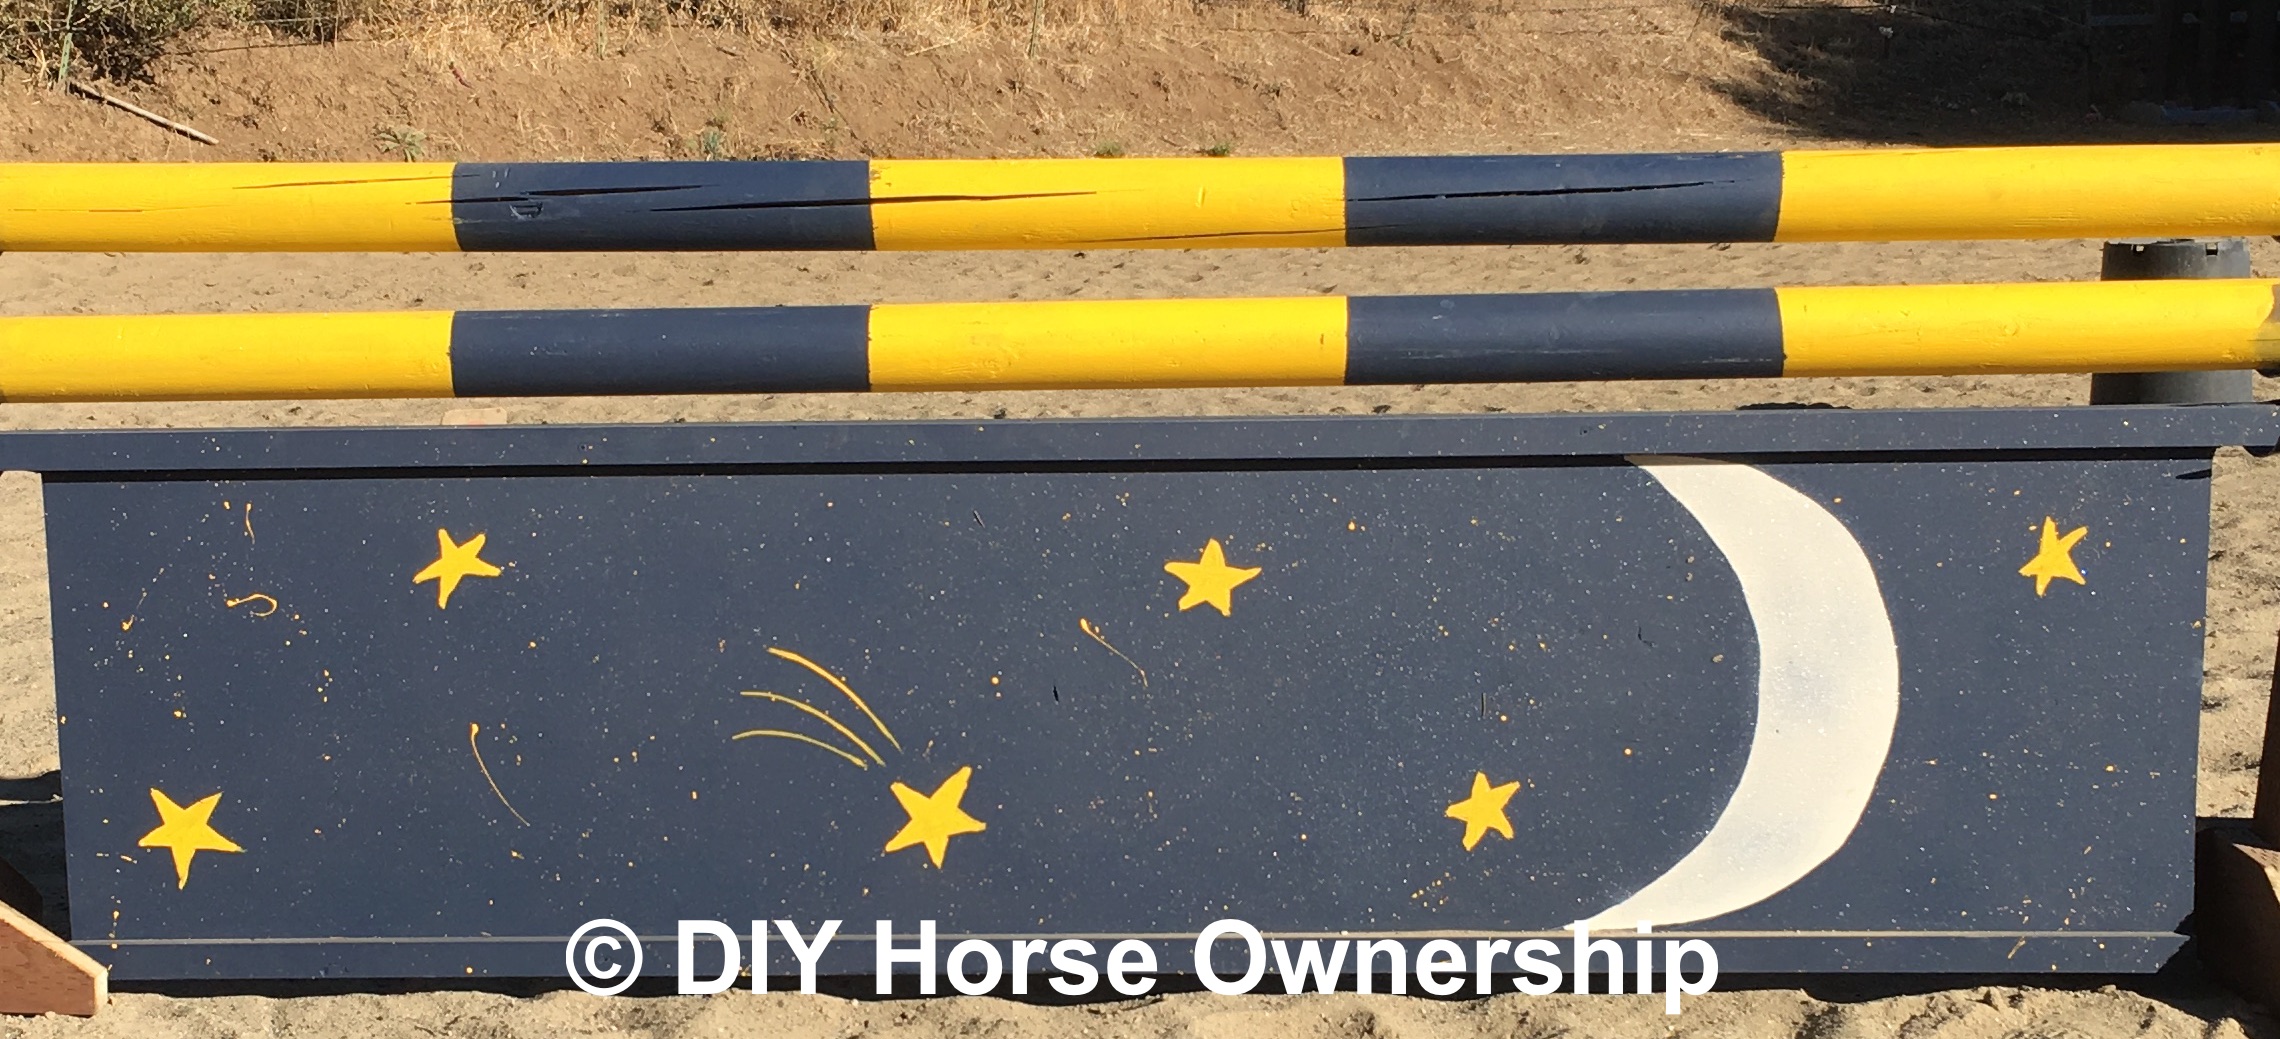
Moon and Stars
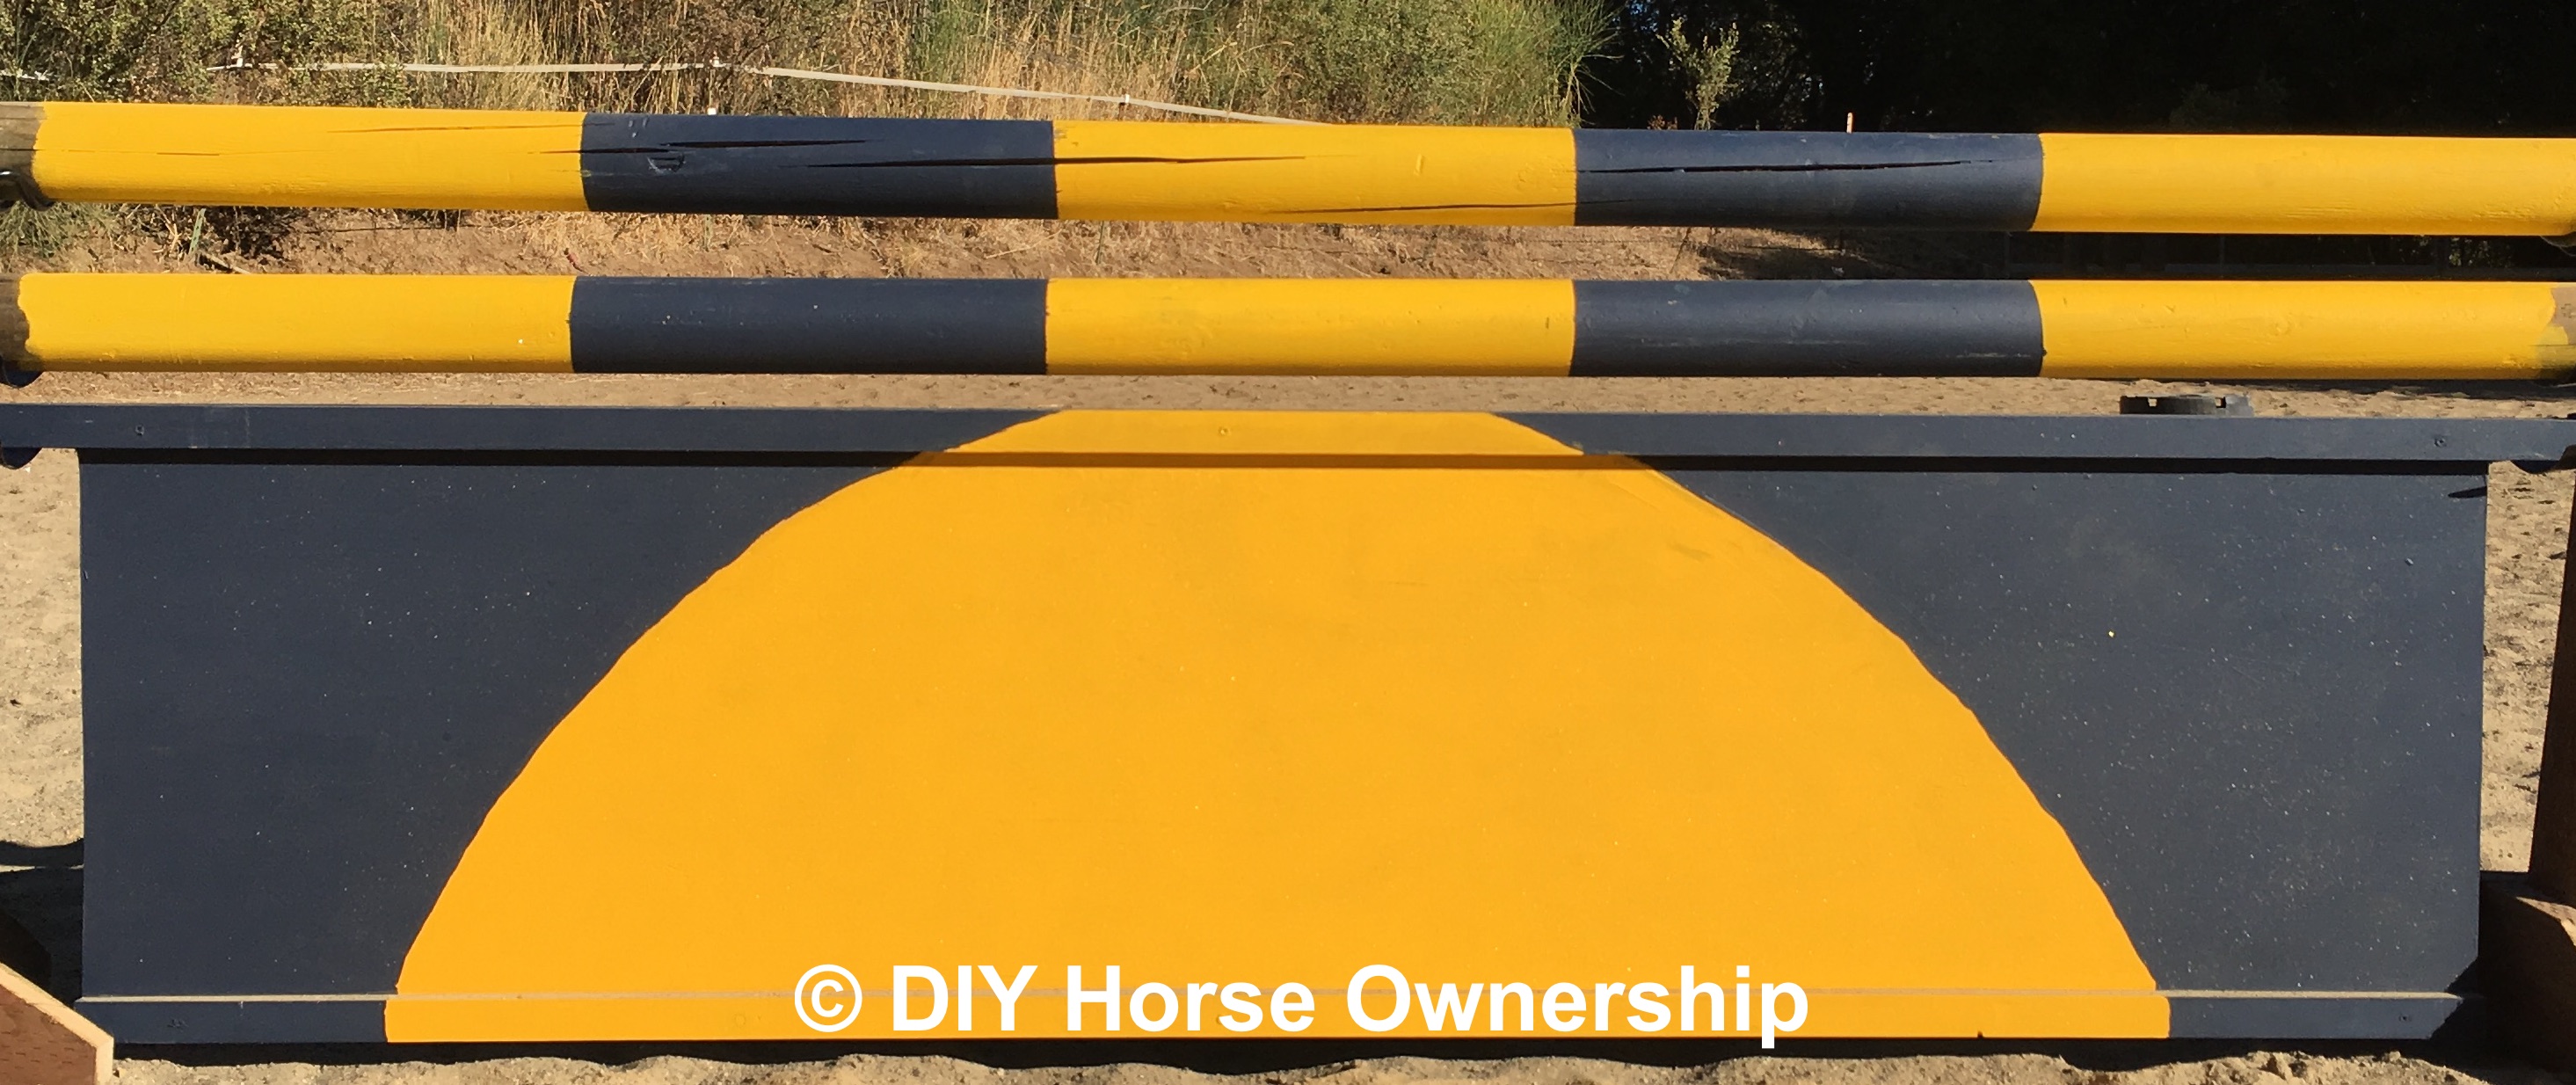
Rising Sun
The Day and Night ones are really great because they share the same color scheme and thus the poles can work for both directions. They’re both just hand painted so no real tips or tricks that I can share.
The rainbow and stone wall panels can’t share the same poles as well, but I really wanted a variety of designs to get Levi as much exposure to different types of jump as possible.
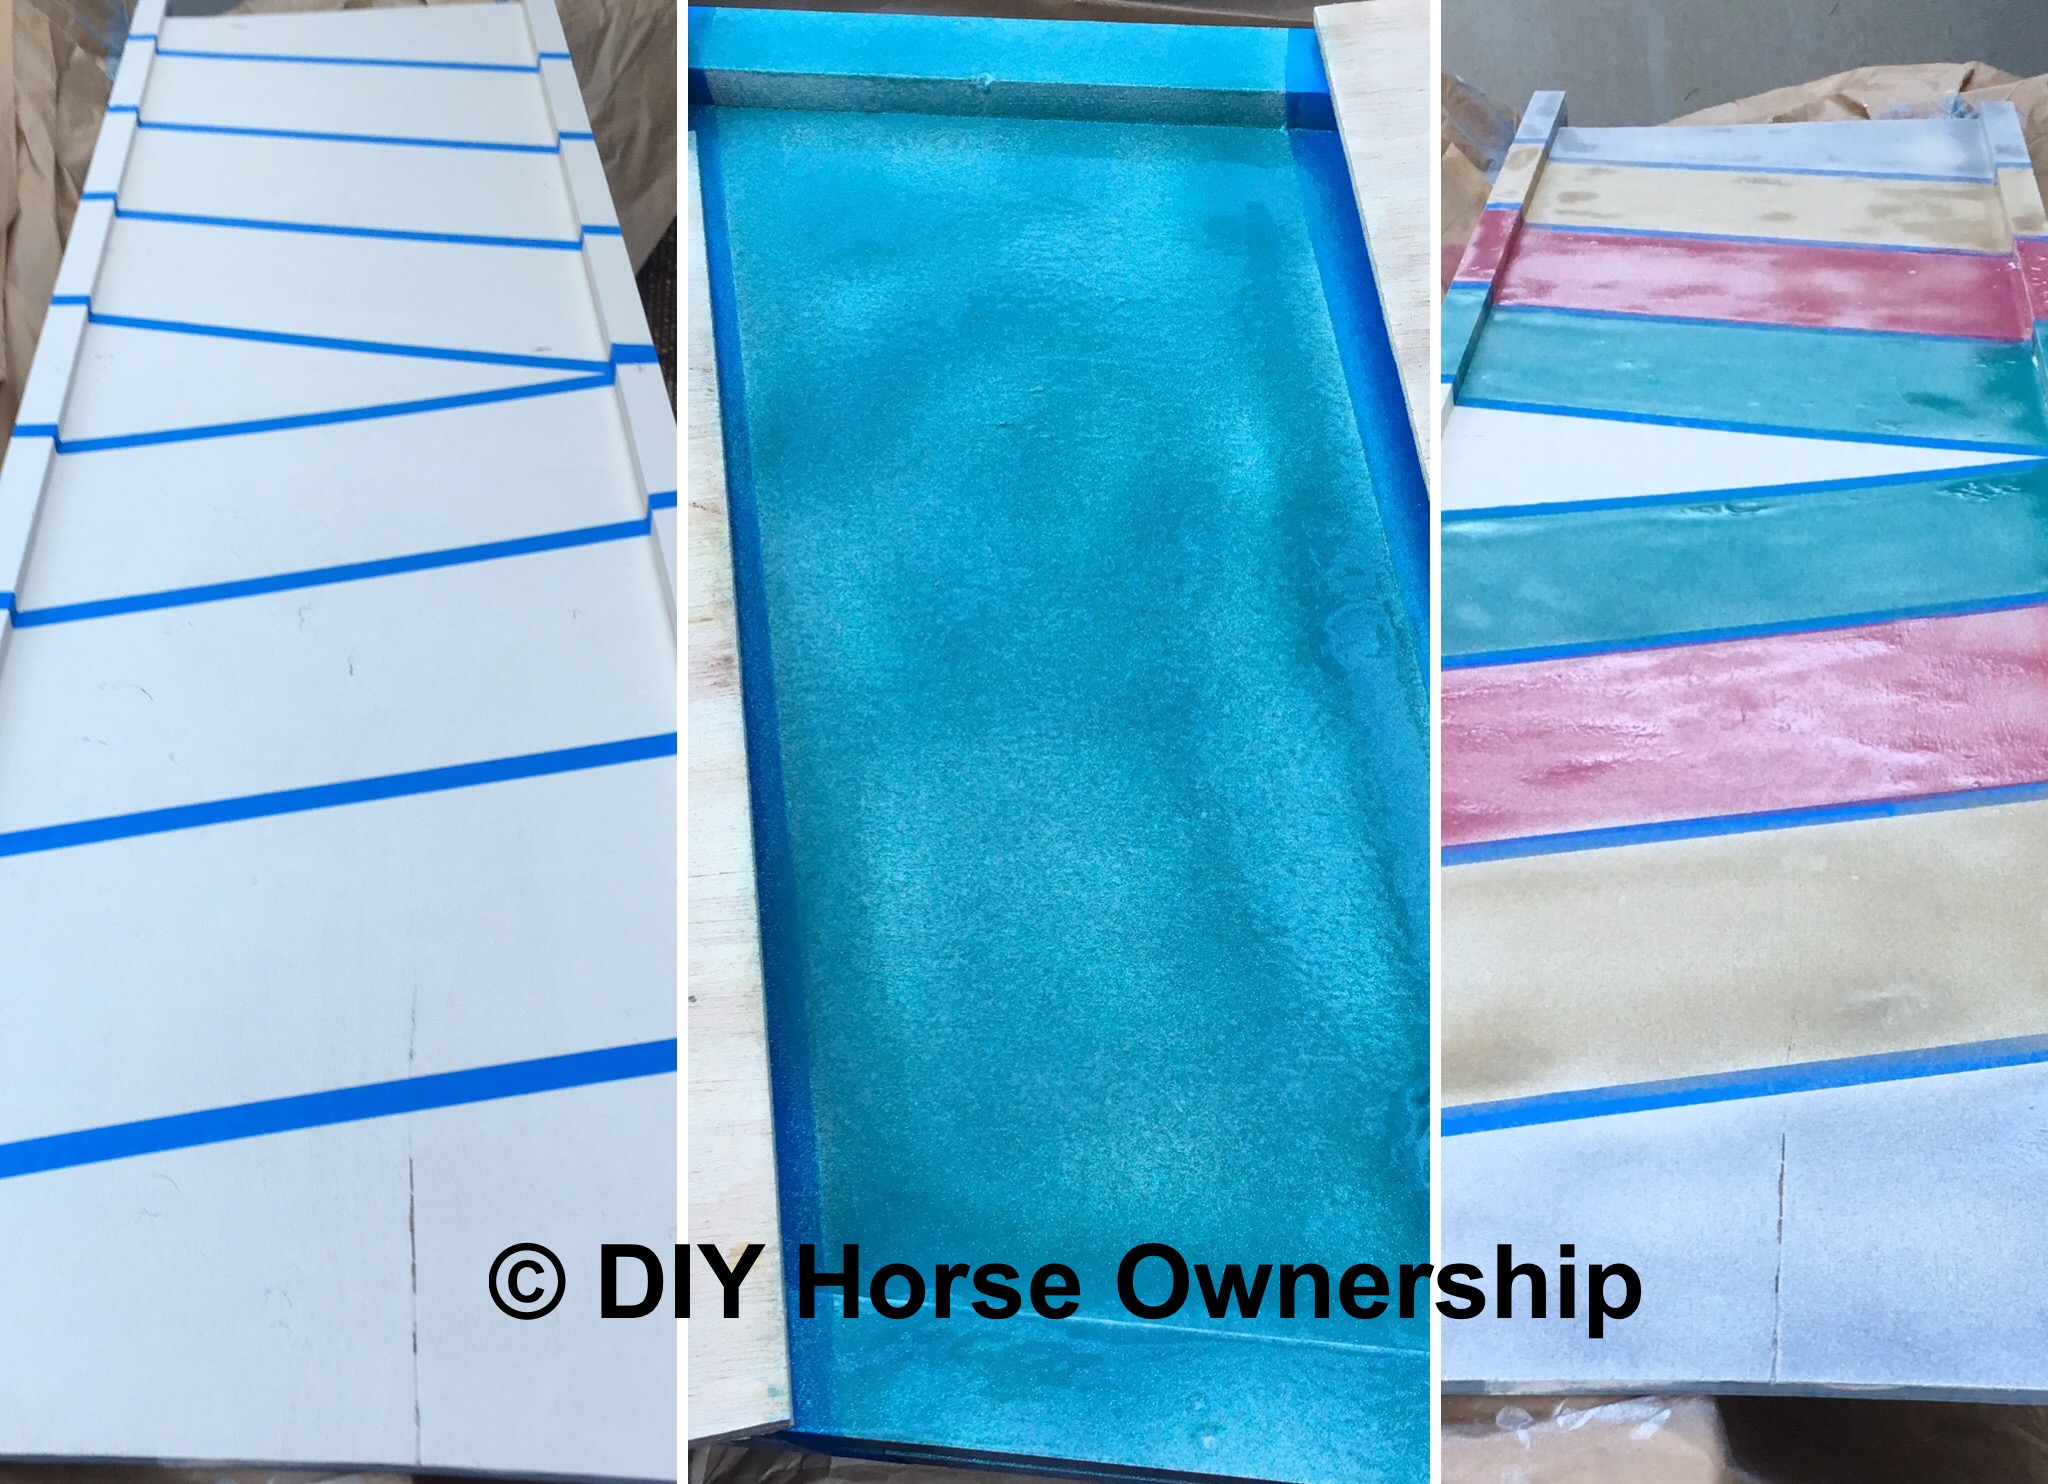
The rainbow jump was pretty easy to do. Paint the base white then use painters tape to mark out the diagonal sections. I used some scrap wood to further block the neighboring panels and spray painted each section with glitter spray paint. Now that I’ve tried it, I would not recommend the glitter spray pain. I went through the entire can making the just the sections and the poles and the cans were not cheap. They also jammed really easily and didn’t cover very evenly. If I were to do it over again, I’d paint the rainbow with real paint and add glitter afterwards.
The stone wall was really fun and a lot easier than I thought it’d be. I am really bad at painting so I was worried I wouldn’t be able to do a stone wall, but it turns out there’s a trick that makes it really easy.
First paint your whole panel gray. Then flick black and white paint all over it to give the panel a speckled look. Once it’s dry, start with a colored pencil and draw a bunch of larger circle shapes all over the panel. Then fill the gaps in with smaller circles. Trace over the circles with a Sharpie paint pen. Finally, use a small paintbrush to fill the gaps in with black paint. That’s it. No artistic ability required.
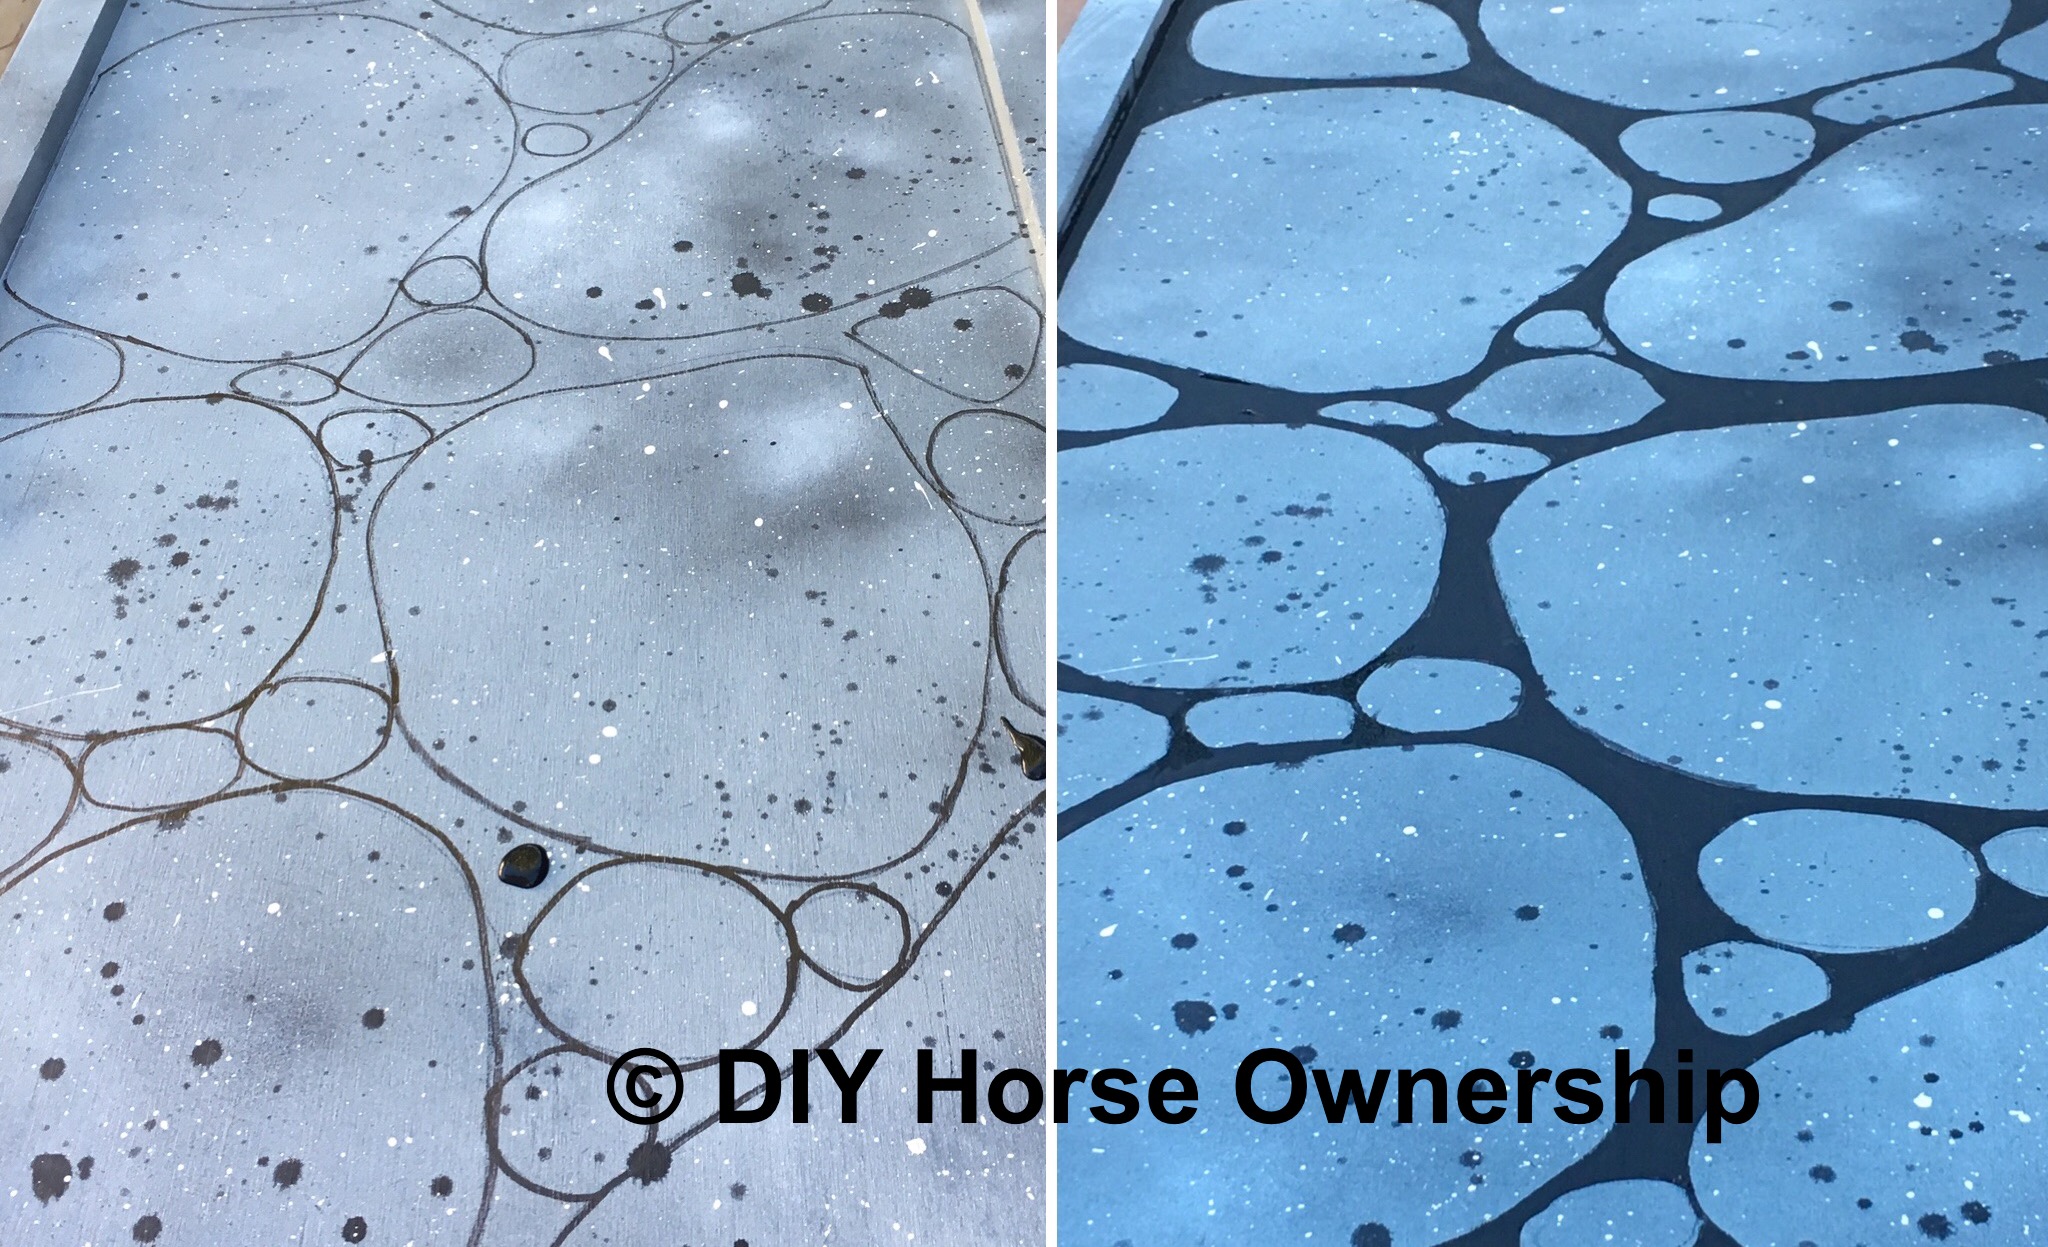
I used the same flicking paint process to cover the poles to match.

these are awesome! I think my favourite is the rock wall.
Thanks! I can’t get over the rock wall, I really thought it wasn’t going to work.
These are great! I will be building several jumps soon. Love the celestial design, gonna do my own version of that one. Thanks for the instructions and inspo!!
Have fun!
I LOVE these. I like the marbled pastel look that the spray paint gave the rainbow one a lot.
It’s very shimmery in person.
very cool. I am not creative at all but i love those jumps!! Great job!! i like the stone wall too (Well I like them all).
The stone wall came out so much better than I thought it would
These are so fabulous!! I love seeing creatively painted jumps 😁
They were fun to make too.
The rock wall is my favorite! Looks great!
I was shocked with how well that came out.
Love these! I’m going to get Husband on it one of these days.
They’re really easy.
The mottled colour on the rainbow panel looks pretty cool, even if it was unintentional!
I still like it, I would just go about creating it a whole different way if I had to do it again.
These turned out great! Bookmarked to steal the sun and moon idea for a winter project!
Awesome!
These came out great!
Thanks I’m really happy with them
Oooo I think the stone wall is my fave – nicely done!
It’s a really cool effect
Ooh, pretty. Next panel jump you do should be a lizard for Nilla.
Excellent idea! I don’t think I can paint a lizard though.
You guys did an amazing job!
Thanks!