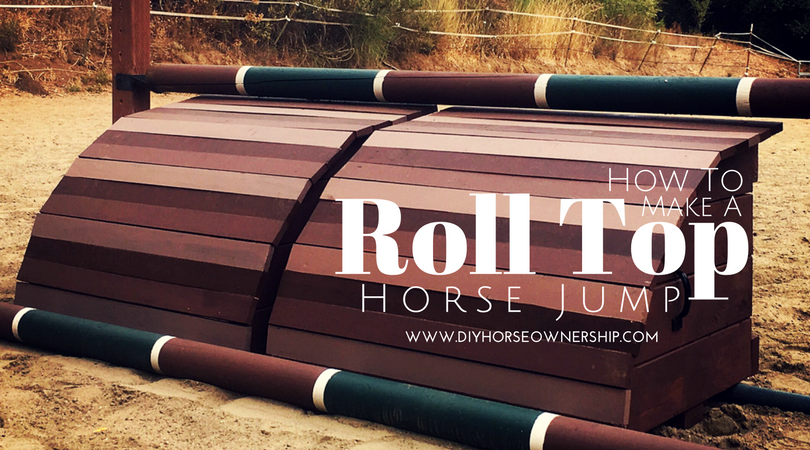
This project is a bit more complicated than the Jump Panels, but it is very doable. As with the panels, we use 8′ poles so we made two 3′ wide roll tops. If you’re making this for an official 12′ wide jump, you could either make three of them or make them 5′ wide each. I like them smaller as that way they weight less and are easier to move around.
Materials:
Four 2x6x10’ boards
Nine 1x3x6’ boards
Four 2x4x8’ boards
2.5″ #10 Wood Screws
2″ nails
4 Handles (optional)
Exterior paint and primer and a paintbrush.
You’ll also need a circular saw, C-clamps, a screwdriver, and a hammer.
Here’s a diagram to start off with:
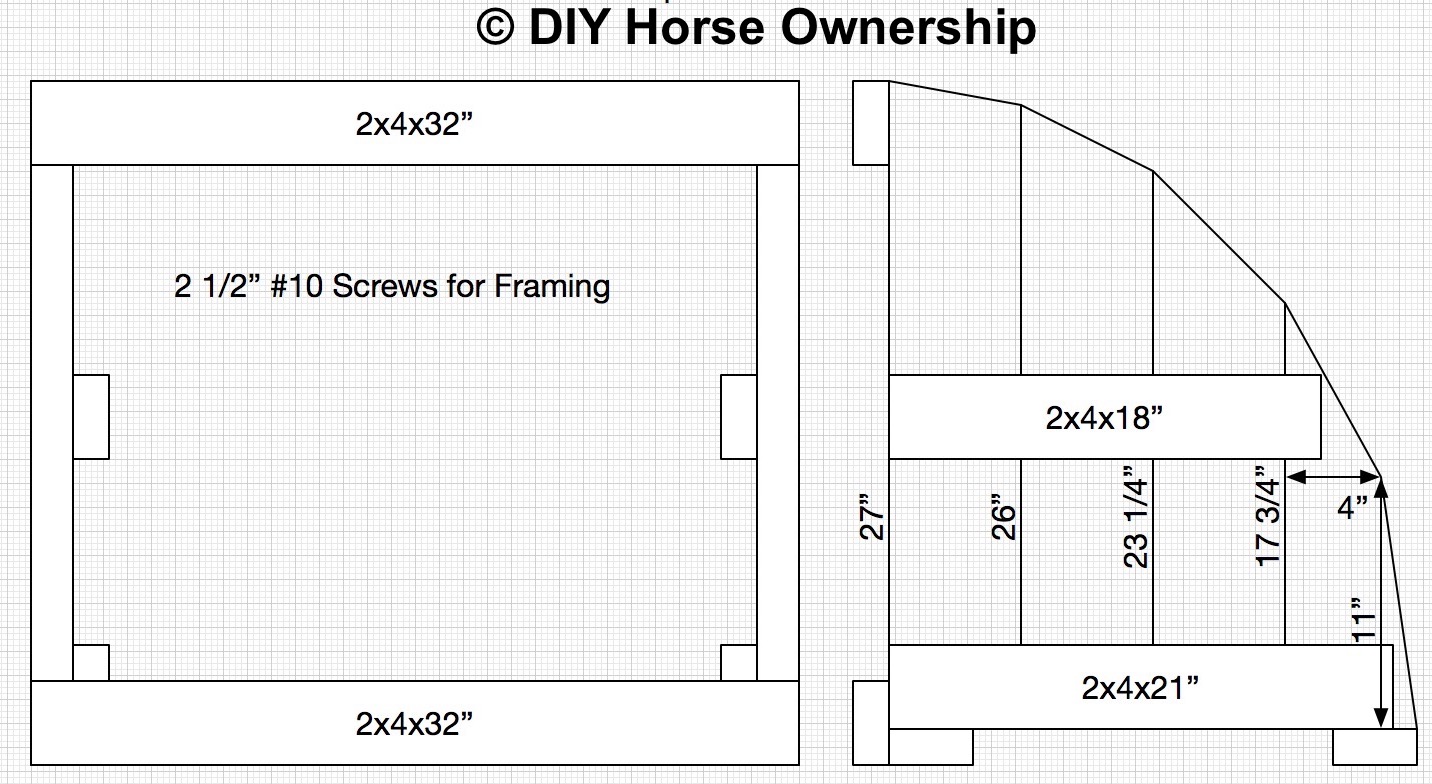
1. Start by cutting your 2x6x10′ boards into four each of the following lengths: 27″, 26″, 23.25″, 17.75″
2. Take one of your 2x6x27″ boards and cut the one end on an angle so the board is 27″ on the one edge and 26″ on the other edge.

3. Use this board as a guide to mark and cut your three other 27″ boards. The following picture is from a different cut, but gives you the right idea. You want all 4 of your boards to be identical.

4. Next, cut one of your 26″ boards so that one edge is 23.25″. Use that board to mark and cut your three other 26″ boards.
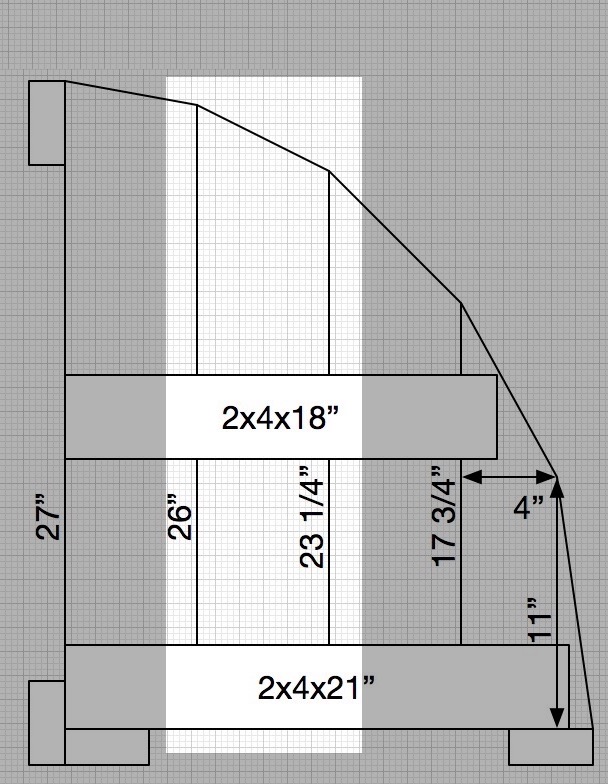
5. Repeat the same process to cut your four 23.25″ boards down so that one edge on each is 17.75″:

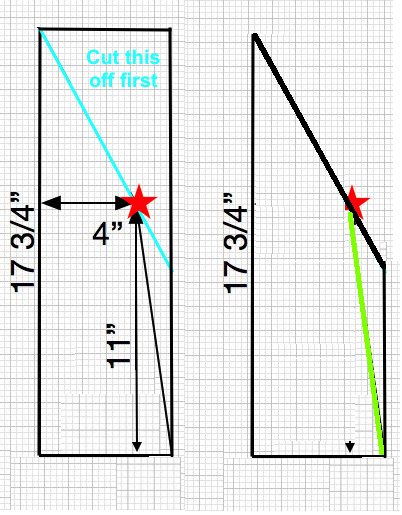
6. The last board – the 17.75″ board – is the most complicated as you’ll need to make 2 cuts. First, measure 4″ out and 11″ up from the bottom left corner of the board. Put a mark at that spot (red star) and draw a line from the upper left hand corner through the mark (teal line). Cut that upper right triangle off first.
7. Then draw a line from the mark (red star) through the bottom right hand corner (green line) and cut that piece off second.
At this point you should have 4 of each board like so:

8. Now you’ll need to cut your 2x4s into four 21″ boards, six 32″ boards, and four 18″ boards and cut your 1x3s into sixteen 3′ boards.

9. Use some of your 1×3 boards and C-clamps to make a straight edge to line your roll top boards up against. This ensures they’re all even with each other. Make sure to lay out half the boards going one way and half going the other way. See the picture below. Then lay your 2x4x18″ and 2×4″21″ on top in the pattern below:
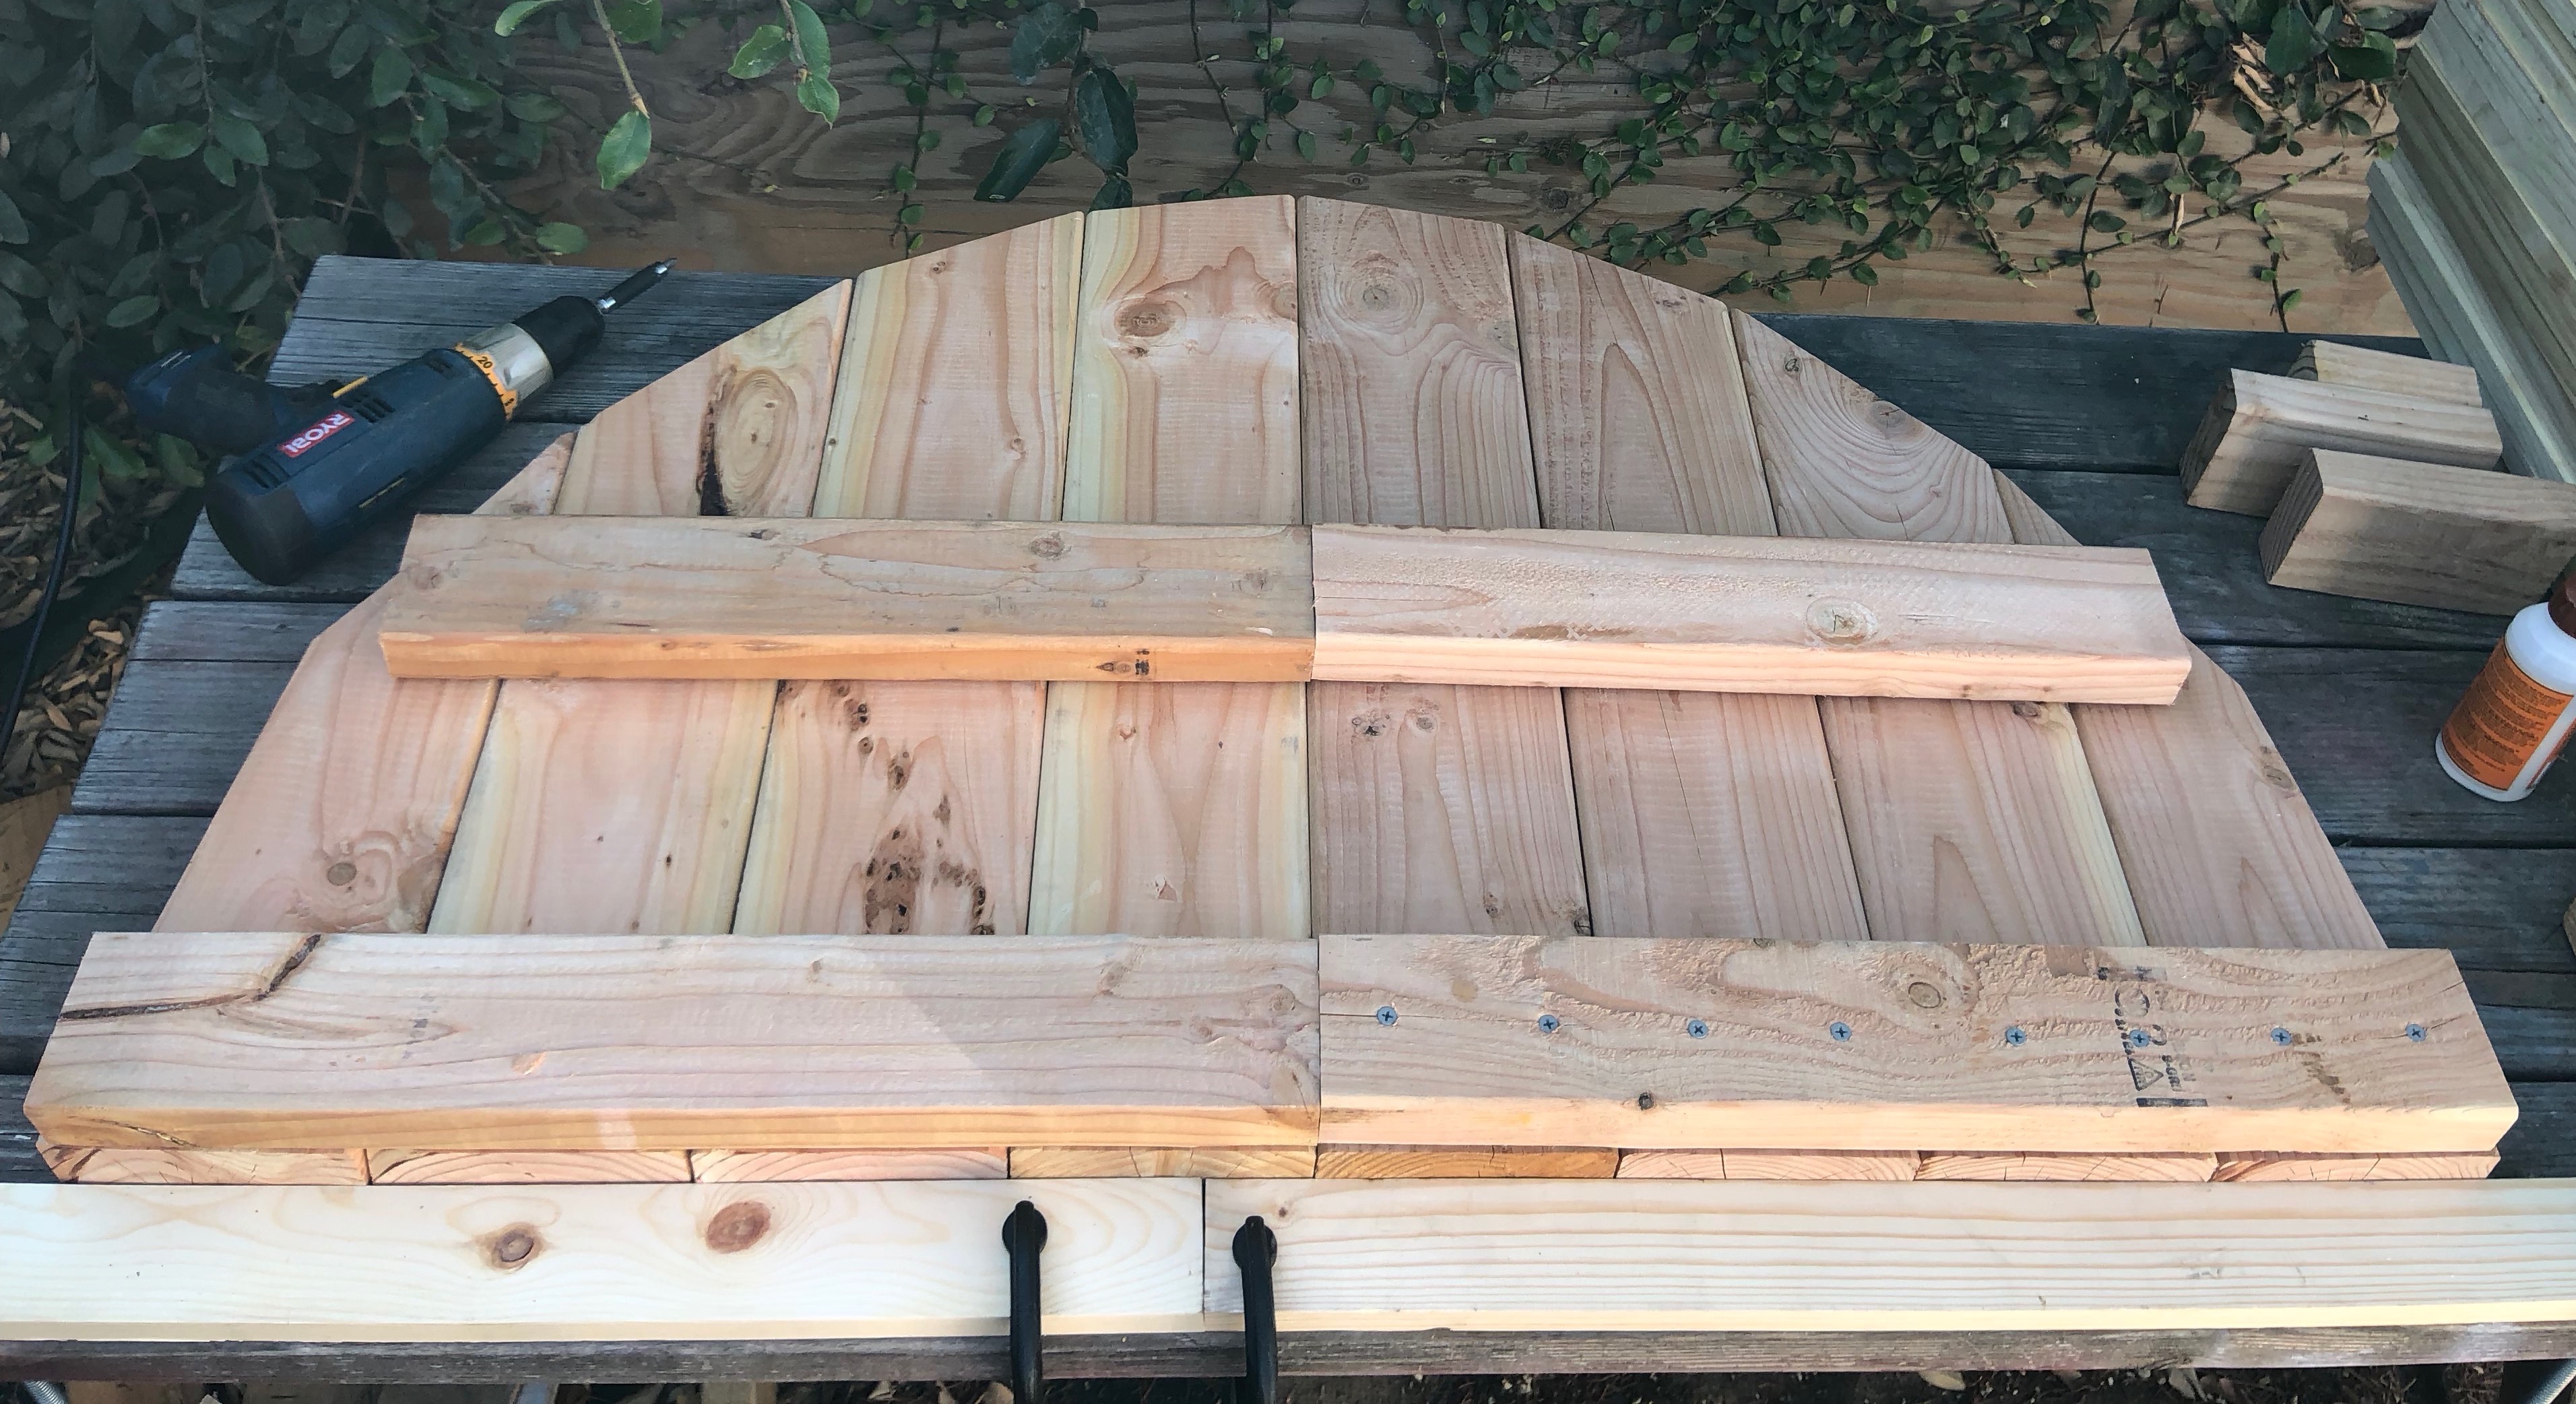
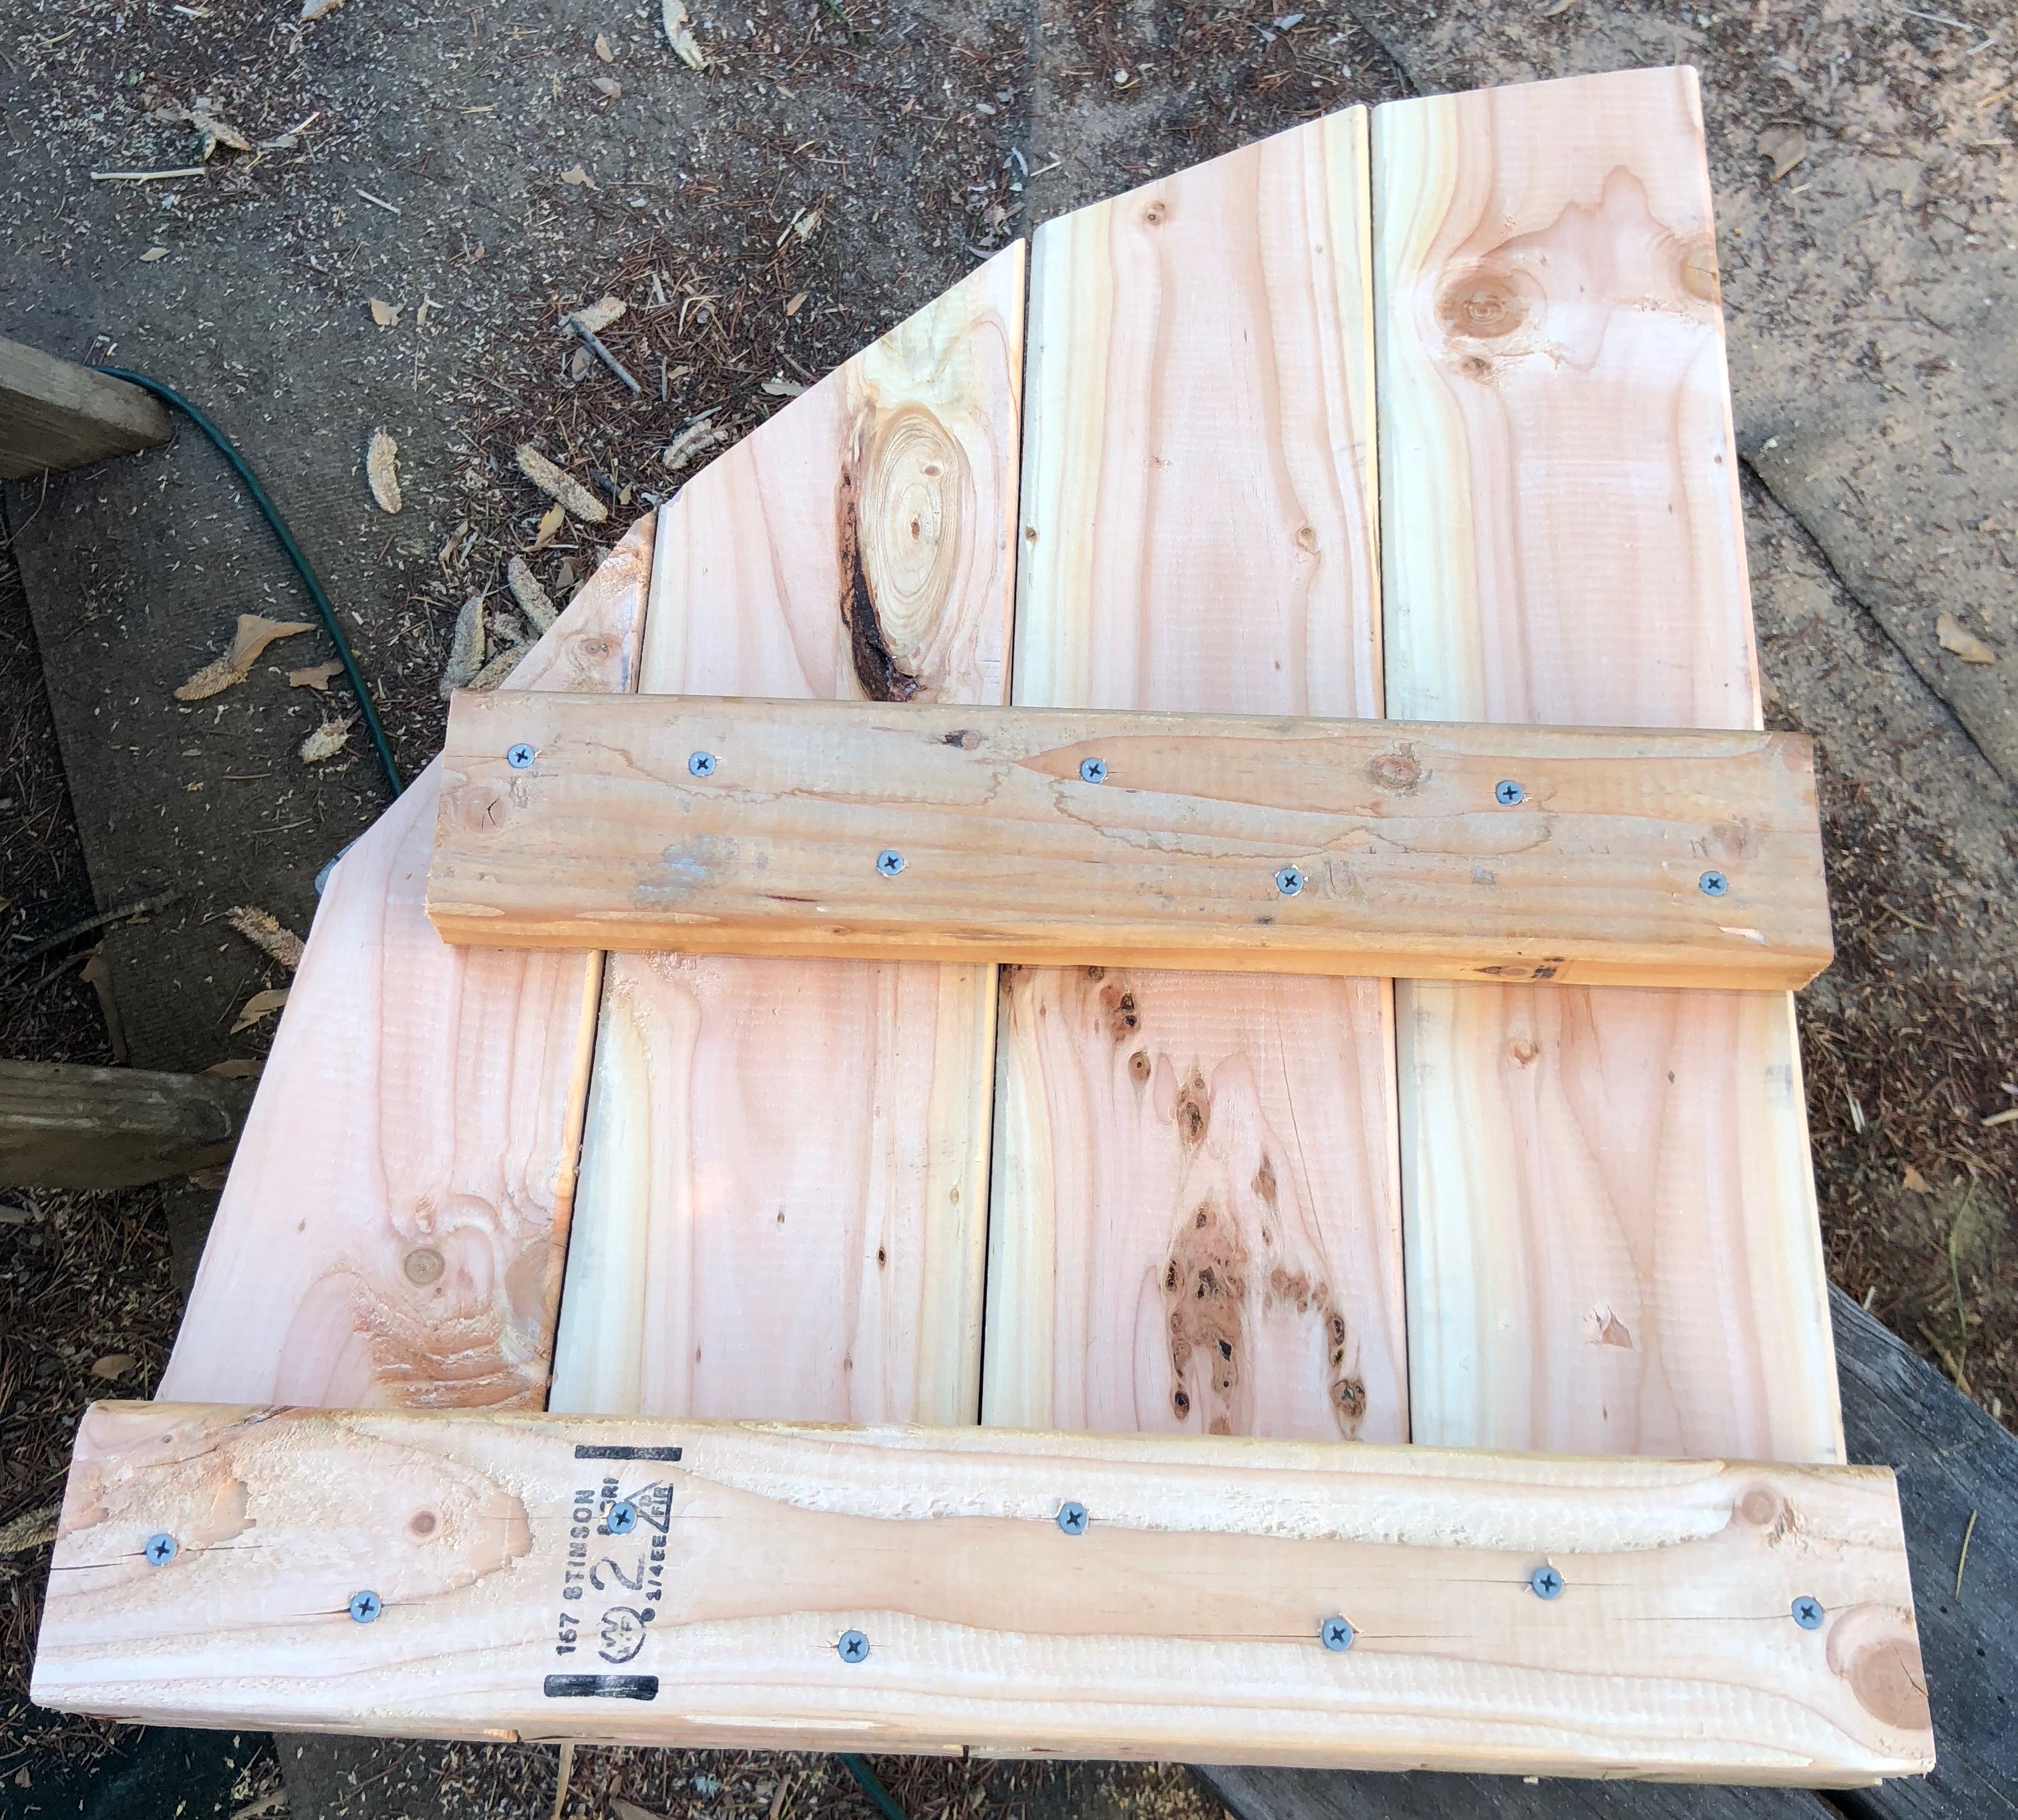
10. Screw the 2x4s onto the 2x6s using wood screws. Repeat until you have 4 roll top sides.
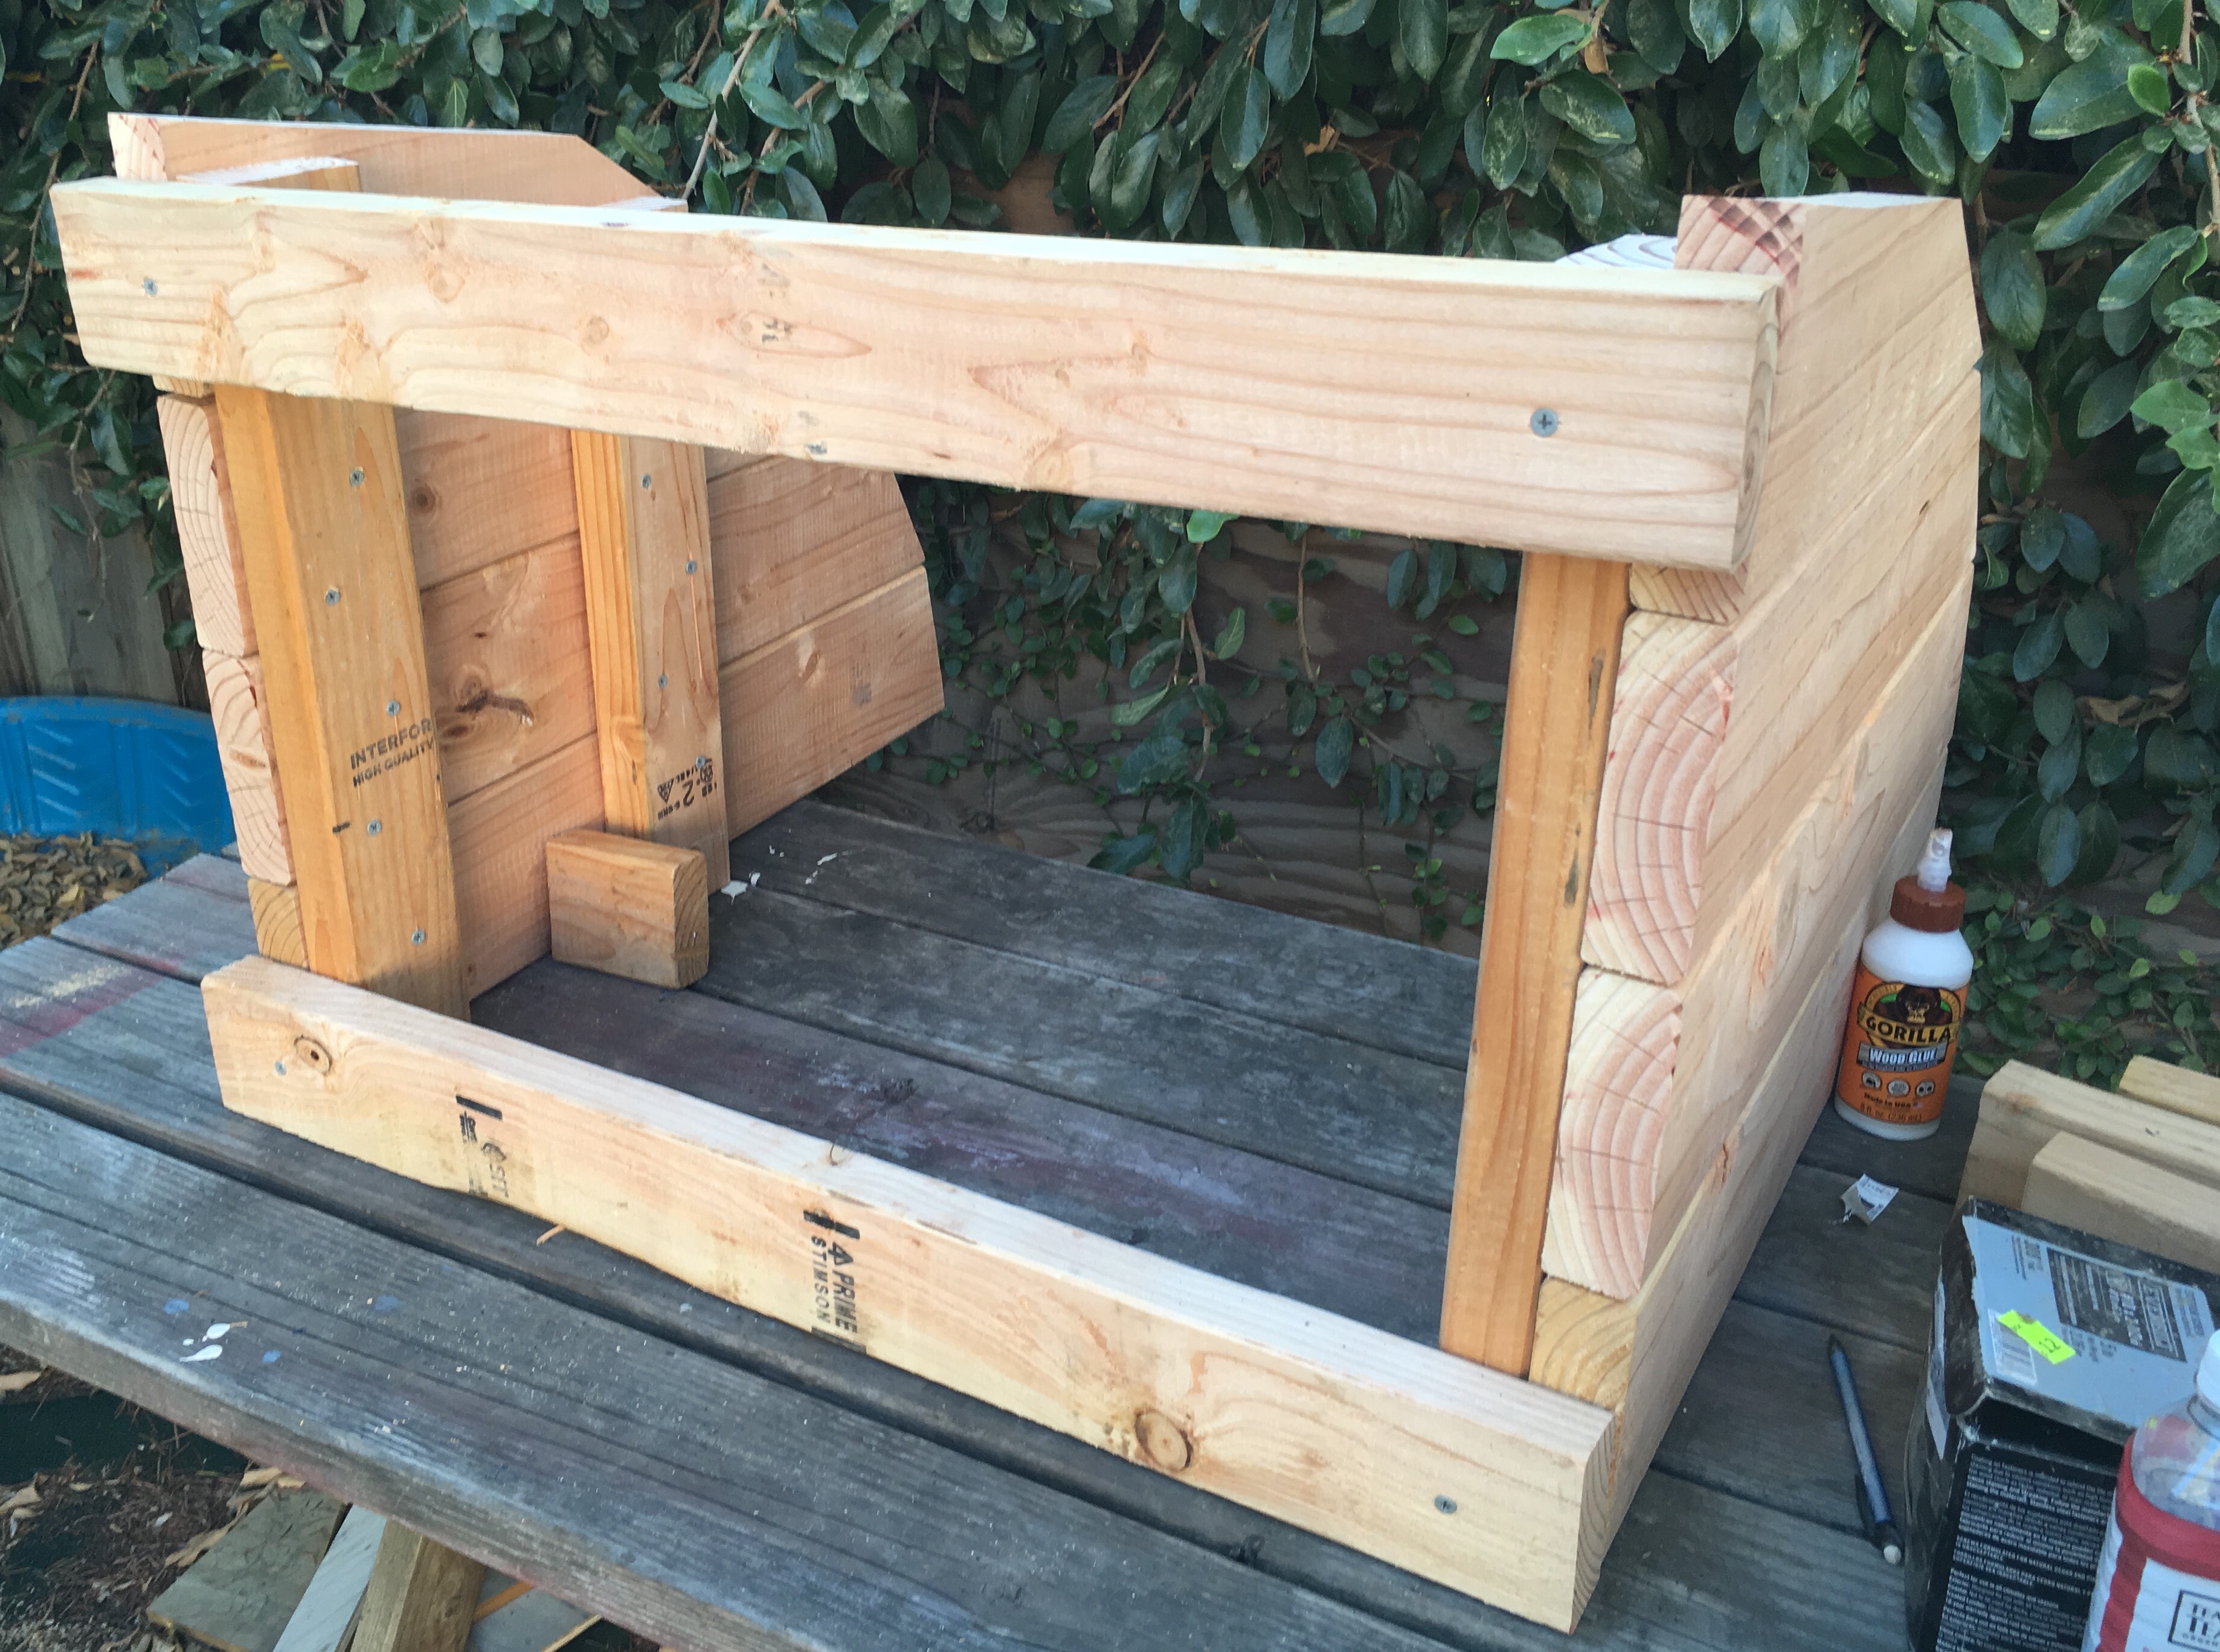
11. Face two opposite roll top side pieces and face them towards each other with the 2x4s on the inside. Screw two of your 32″ 2x4s onto the top and bottom as below:
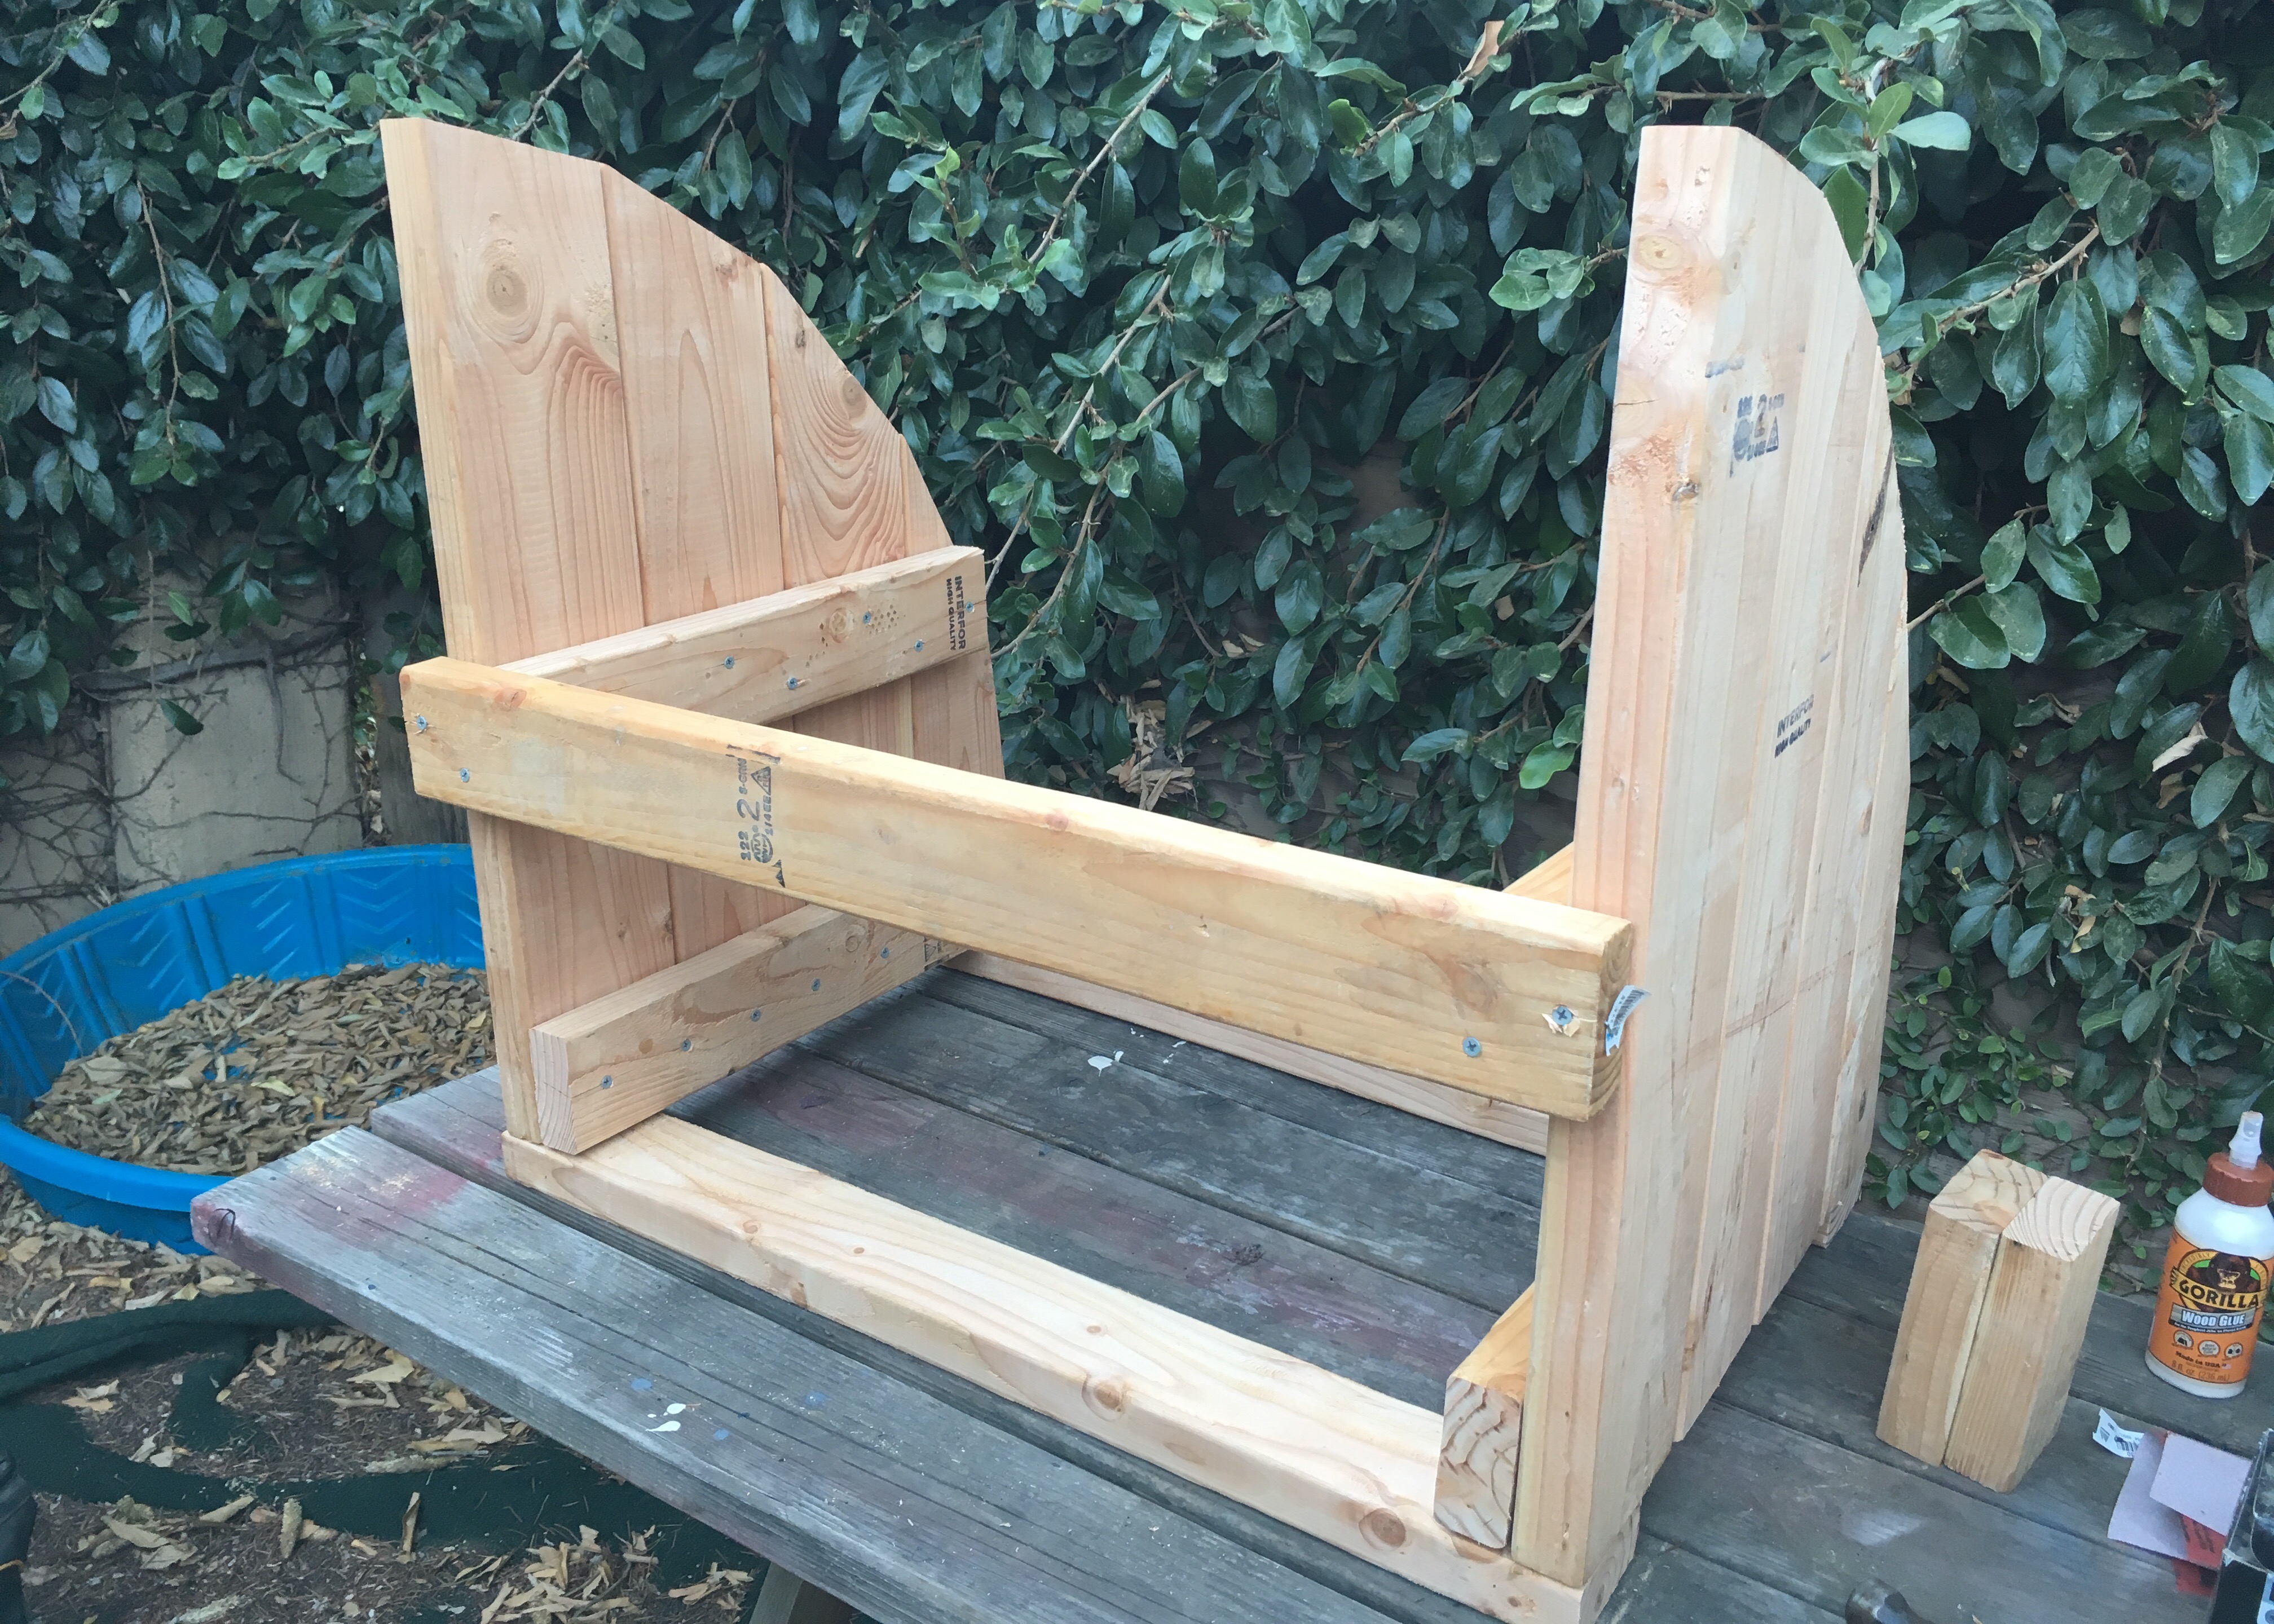
12. Flip your roll top upright and add a third 32″ 2×4 as a back brace as seen below. We chose to use the extra 2×4 scraps (seen to the right of the roll top here) to add “feet” to this side of the jump making the roll top reversible. This way it can be laid down to make a wider 2’3″ tall roll top or placed up right for a steeper 2’6″ roll top. Repeat for your 2nd roll top base.
13. Get your nails and 1x3s and start by aligning one of the 1×3 boards with the top of the roll top. The board will stick out 2″ on each side of the roll top base. Nail the board in with two nails on each side and then add the next board pushing it flush against the first board.
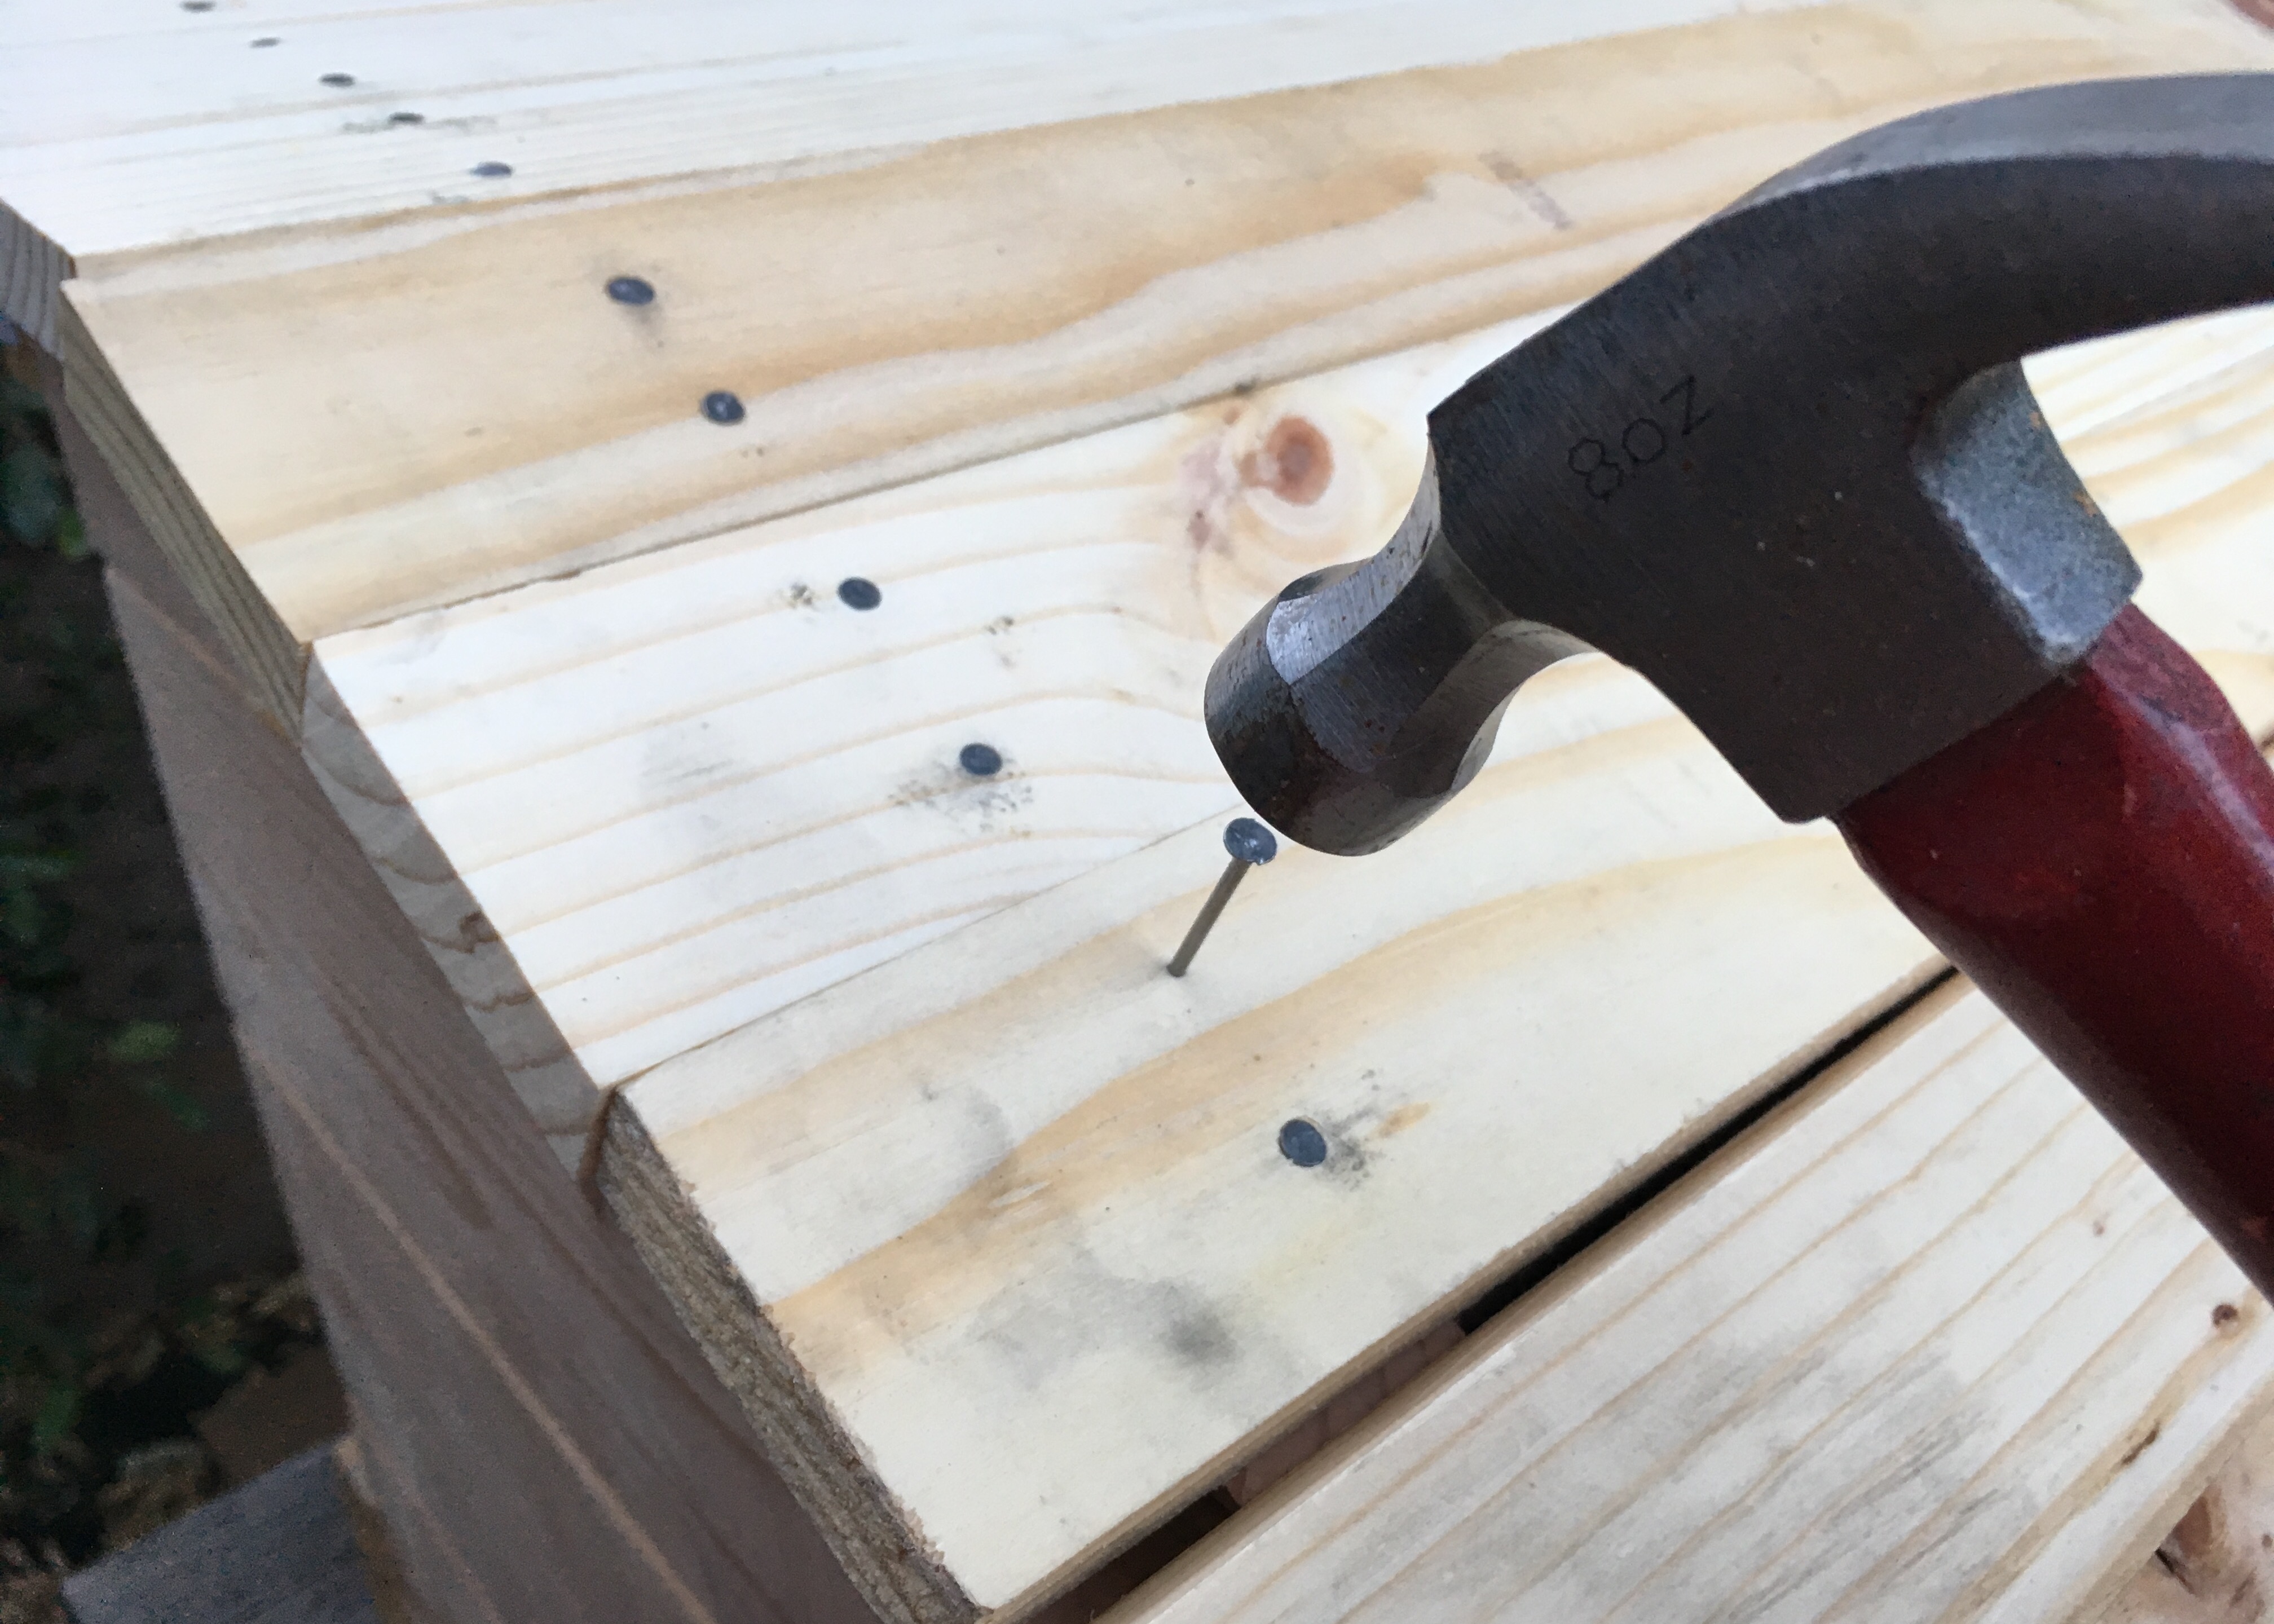
14. Continue nailing until all 16 boards are wrapped around the roll top. Then repeat with your 2nd roll top base.
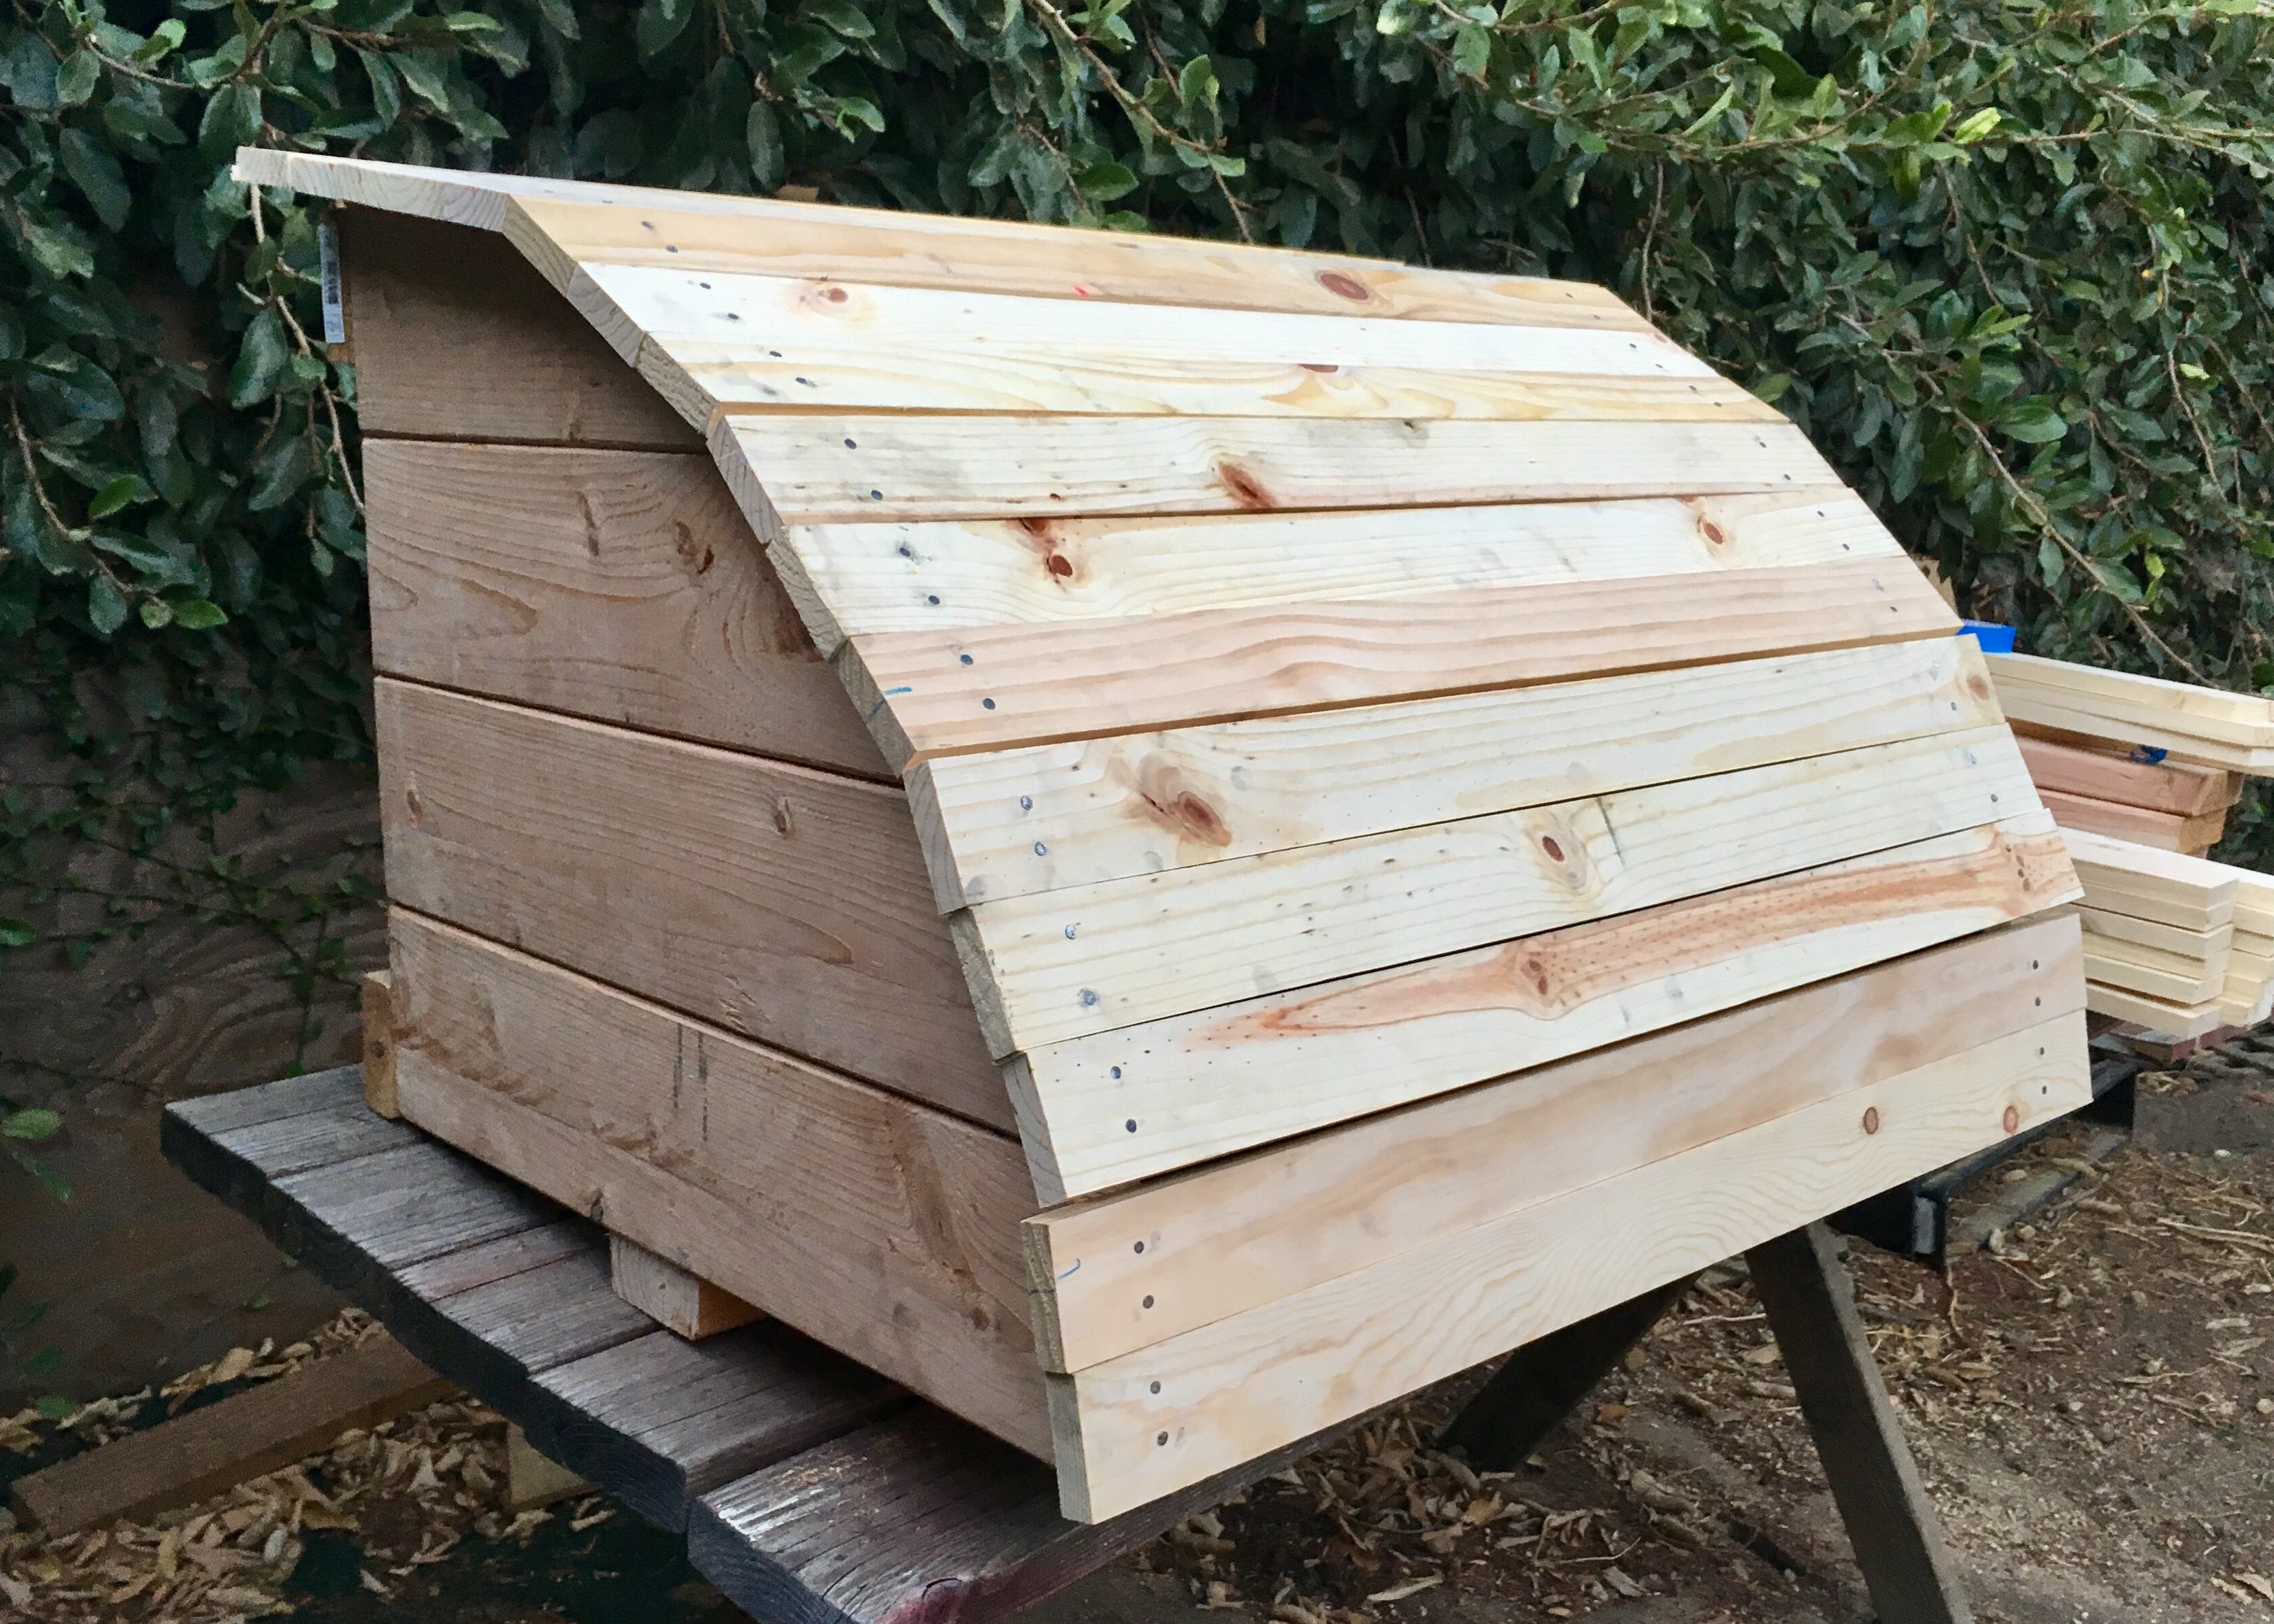
15. Paint your roll top. I chose to do three shades of brown, but I have seen some cute rainbow and other designs. I painted the poles with some green accents because I have green astroturf covers for the roll tops that attach by magnet. You could also stain the wood if you don’t want to paint, but you will need to do something to protect the wood if you want your jump to last.

Optional: Add handles to make them easier to carry and move around the arena.
** I’m not a professional jump builder or professional contractor. If you follow these directions, do so at your own risk. If you use any such jumps made from following these directions, do so at your own risk.

Are you kidding me?! 🙂 Did you just make all that? Love it!
These came out awesome! I love that you have removable astroturf too. Really like the color combo on the rails too.
Your templates rock! Well done 😀
omg that is almost too pretty to use as a jump (ALMOST) great job! you guys are SO handy! Ours would look like a mess I am sure 🙂 HA!
That looks great! I love the color scheme you chose for it.
Well done!! Always wondered about making these on my own. You’ve made me believe it’s possible! Great post.
You can do it!