
I posted this picture on social media months ago promising a DIY guide. Sorry for the wait, but here we go.

One of the things we were sad to leave behind in California was our handmade feed bin.
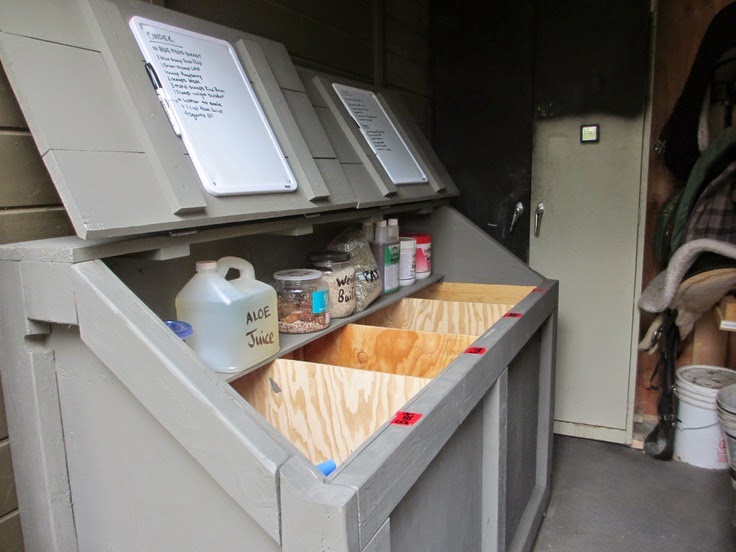
It was pretty sweet and had a lot of fun features like the shelf for supplements and the white boards that we kept track of our horses’ feed and supplements on. However, it was so big – and painted to match that barn – that it didn’t make sense to move it with us.
I’ve actually had multiple requests over the year for a DIY post on that feed bin. That lone picture is also my most frequently stolen picture on Pinterest. People really like to post that picture and link it to their own sites. I’ve managed to get most of the pins deleted over the years, but a quick search of Pinterest just now show it’s still being stolen.
Anyway, I’ve wanted to write up a post on it, but we made that feed bin back before I had a blog and I had no pictures of the process. When we set to making a replacement bin for our new barn, I took a ton of pictures so I could write up a post about it. However, I want to preface this entire post with a disclaimer: WE ARE NOT WOODWORKERS. We are DIYers. We don’t even own the tools we’d need to make a feed bin correctly. If you can do joinery, if you own a router, if you know how to do woodworking, go ahead and skip this post. This DIY post is for people who want to make a feed bin with the minimum amount of tools and ability. Got it? Okay, let’s go.**
While you don’t need a whole wood shop to make this feed bin, you are going to need some tools. We made the first feed bin with just a circular saw and a cordless screwdriver. It was a pretty redneck project; we used picnic table benches in place of sawhorses. This time around, we upped our game by using some additional tools, but you can get by with less if you need to. I actually think you might be able to do this project if you really luck out and get a very bored home depot employee to cut all your wood for you (they’re only supposed to make one cut for free, but I’ve gotten more done when it’s slow there and a nice guy feels like helping me out). Honestly though, circular saws aren’t too expensive and your chances of getting all the cuts done correctly at Home Depot is low.
Tools I recommend:
- Circular saw
- Impact driver/electric screwdriver with drill bits and screws
- Clamps
- Hammer
- Saw horses
Supplies:
- 1/2″, 1″ ,and 3″ wood screws
- finishing nails
- wood glue
- stain (optional, may substitute paint)
- hinges
- handles
- latches (optional)
While I am providing all of our measurements, you’ll want to modify the measurements for your own. Our feed bin was built to measurements we took of our feed room. You’ll want to modify all of the measurements for your own bin. One measurement I really recommend adjusting is the height of the feed bin. We actually messed the height up a little on the first bin and it was always hard to reach little bits of grain at the very back and bottom of the bin when trying to scrape it clean. For the second bin, we lowered the height of the front a little bit, and it’s much easier to scoop grain out. I’m pretty tall so I would guess that a shorter person might like an even shorter feed bin.
Because you’ll be adjusting the measurements, you may need different amounts of wood, but here’s what we needed:
- 10 2″x4″x8′ boards
- 5 4’x8′ plywood boards(we used 5/32, but you can use another thickness)
- 3 1″x12″x8′ boards
- 1 1″x10″x8′ boards
- 4 1″x1″x8′ trim boards
- 2 1″x4″x8′ boards
Do NOT use pressure (or otherwise) treated wood. You don’t want those chemicals affecting your feed.
Base construction:
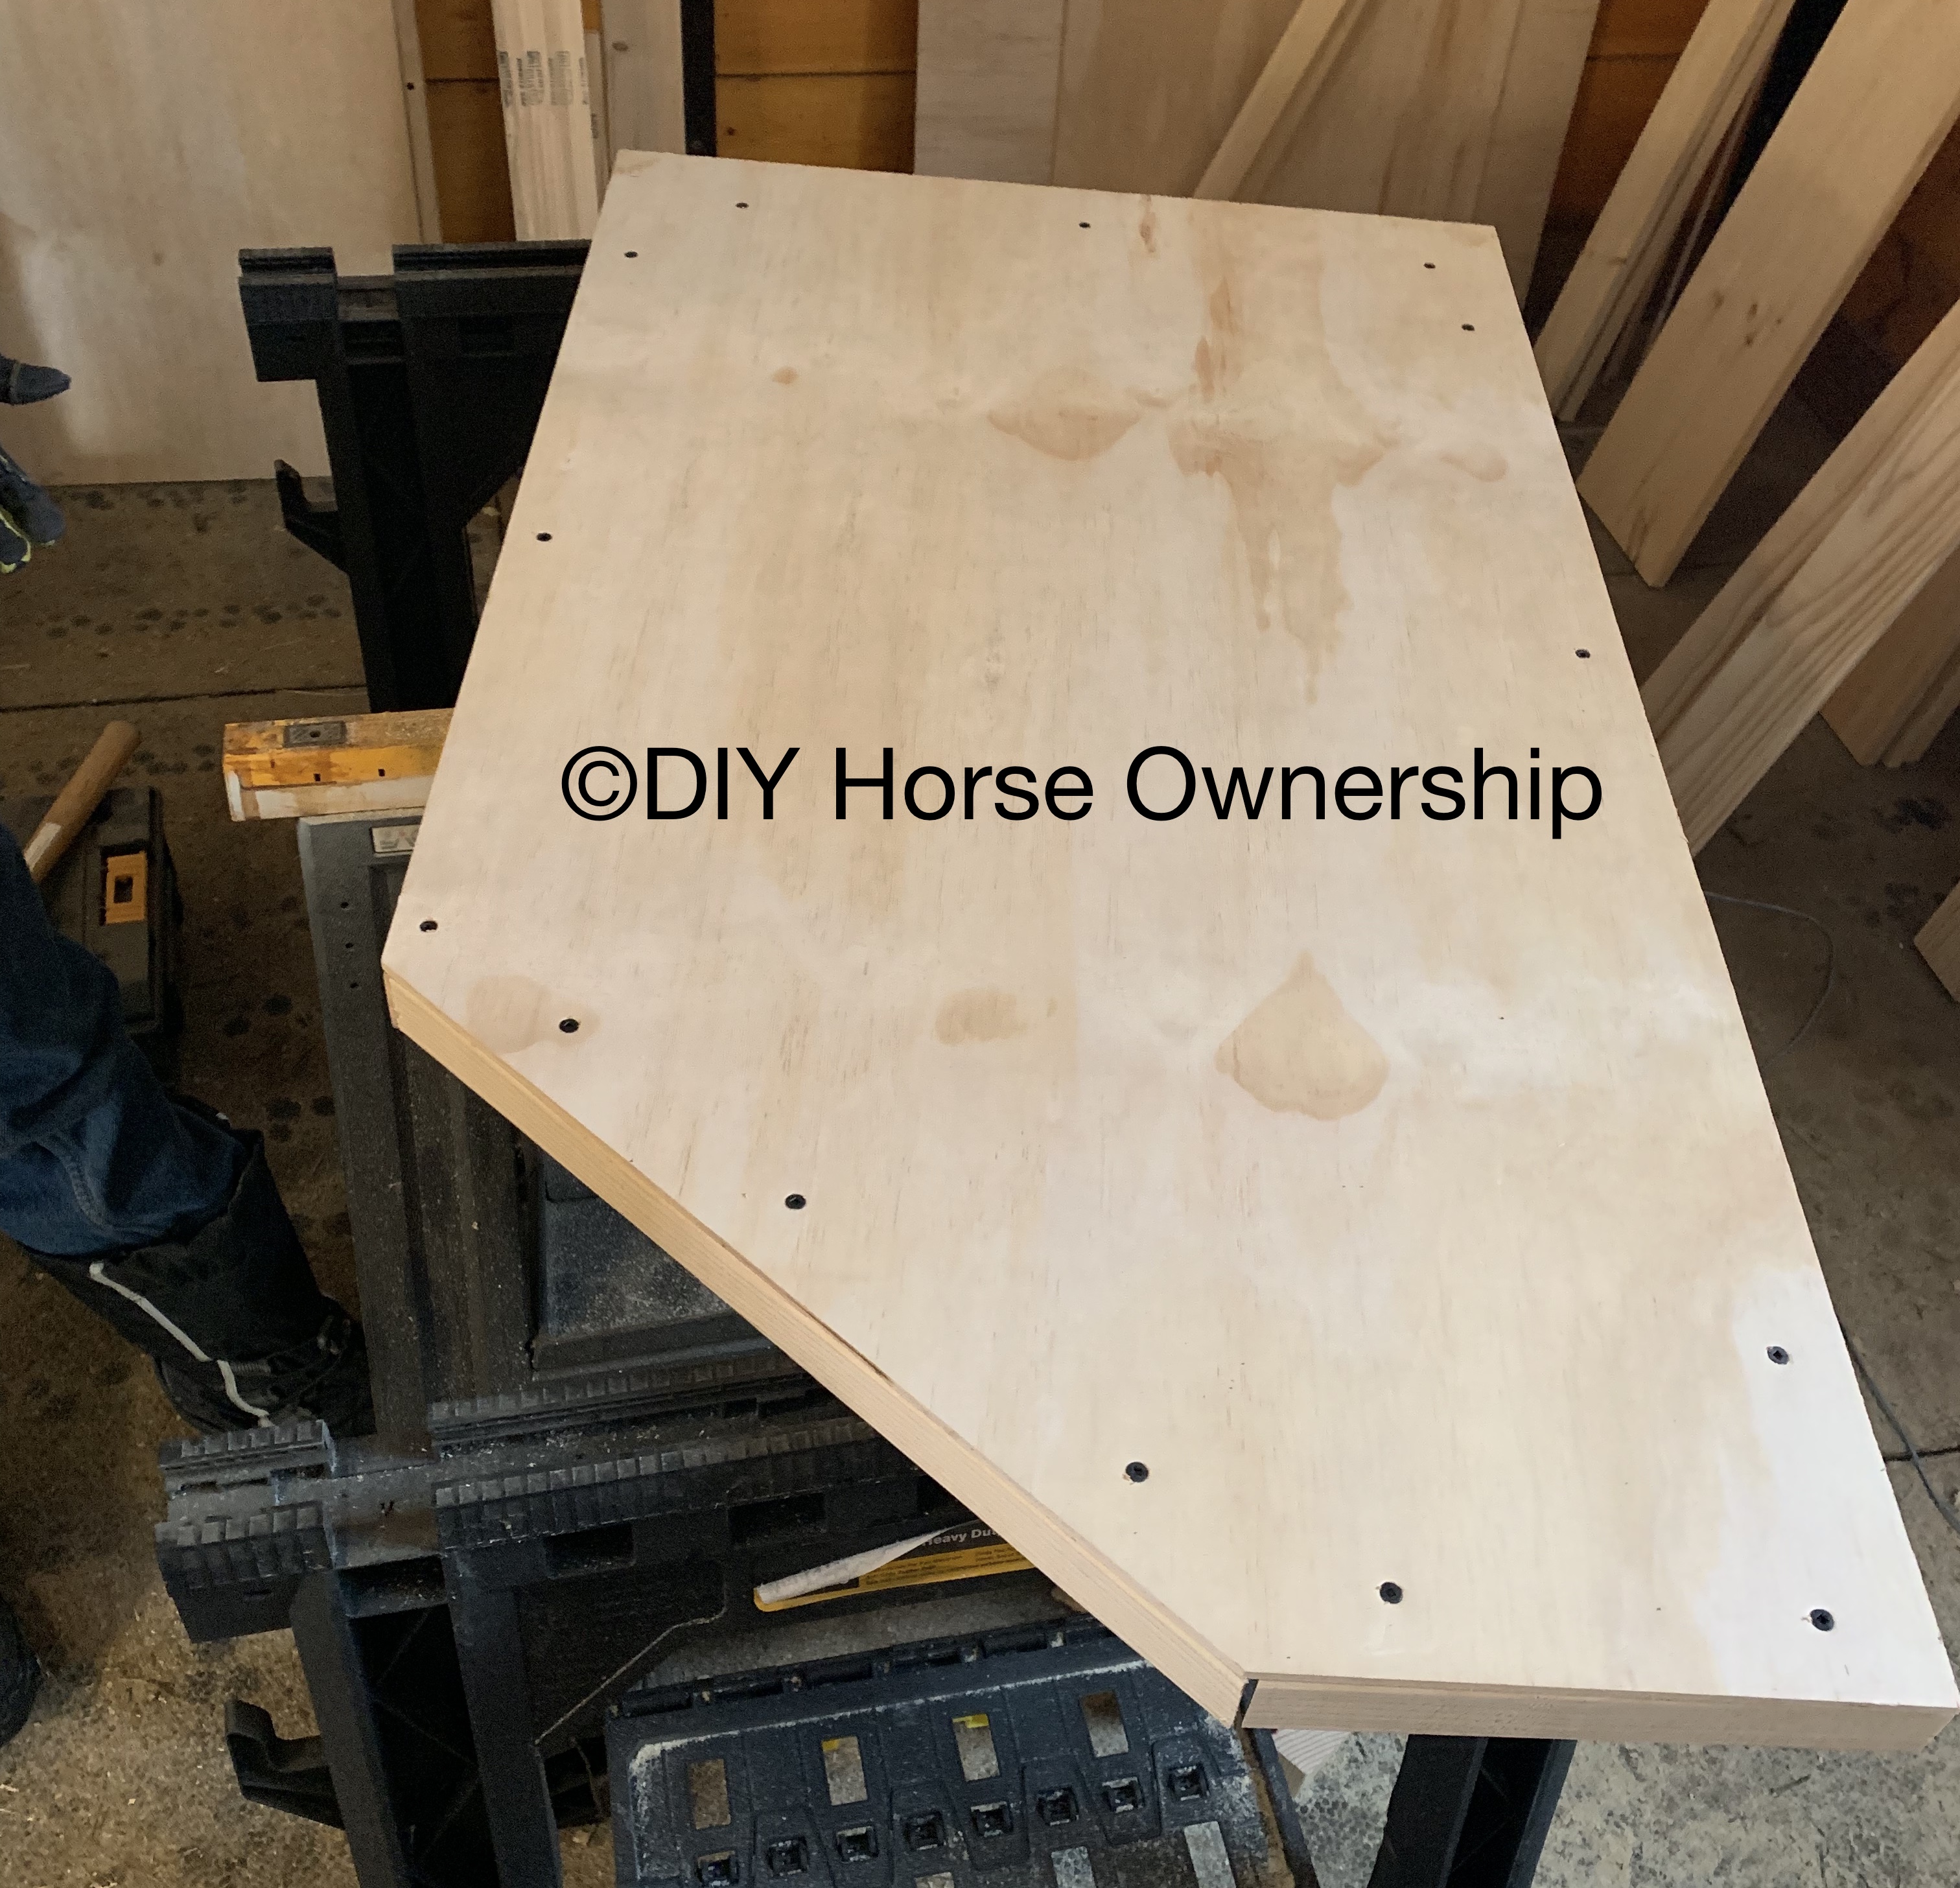
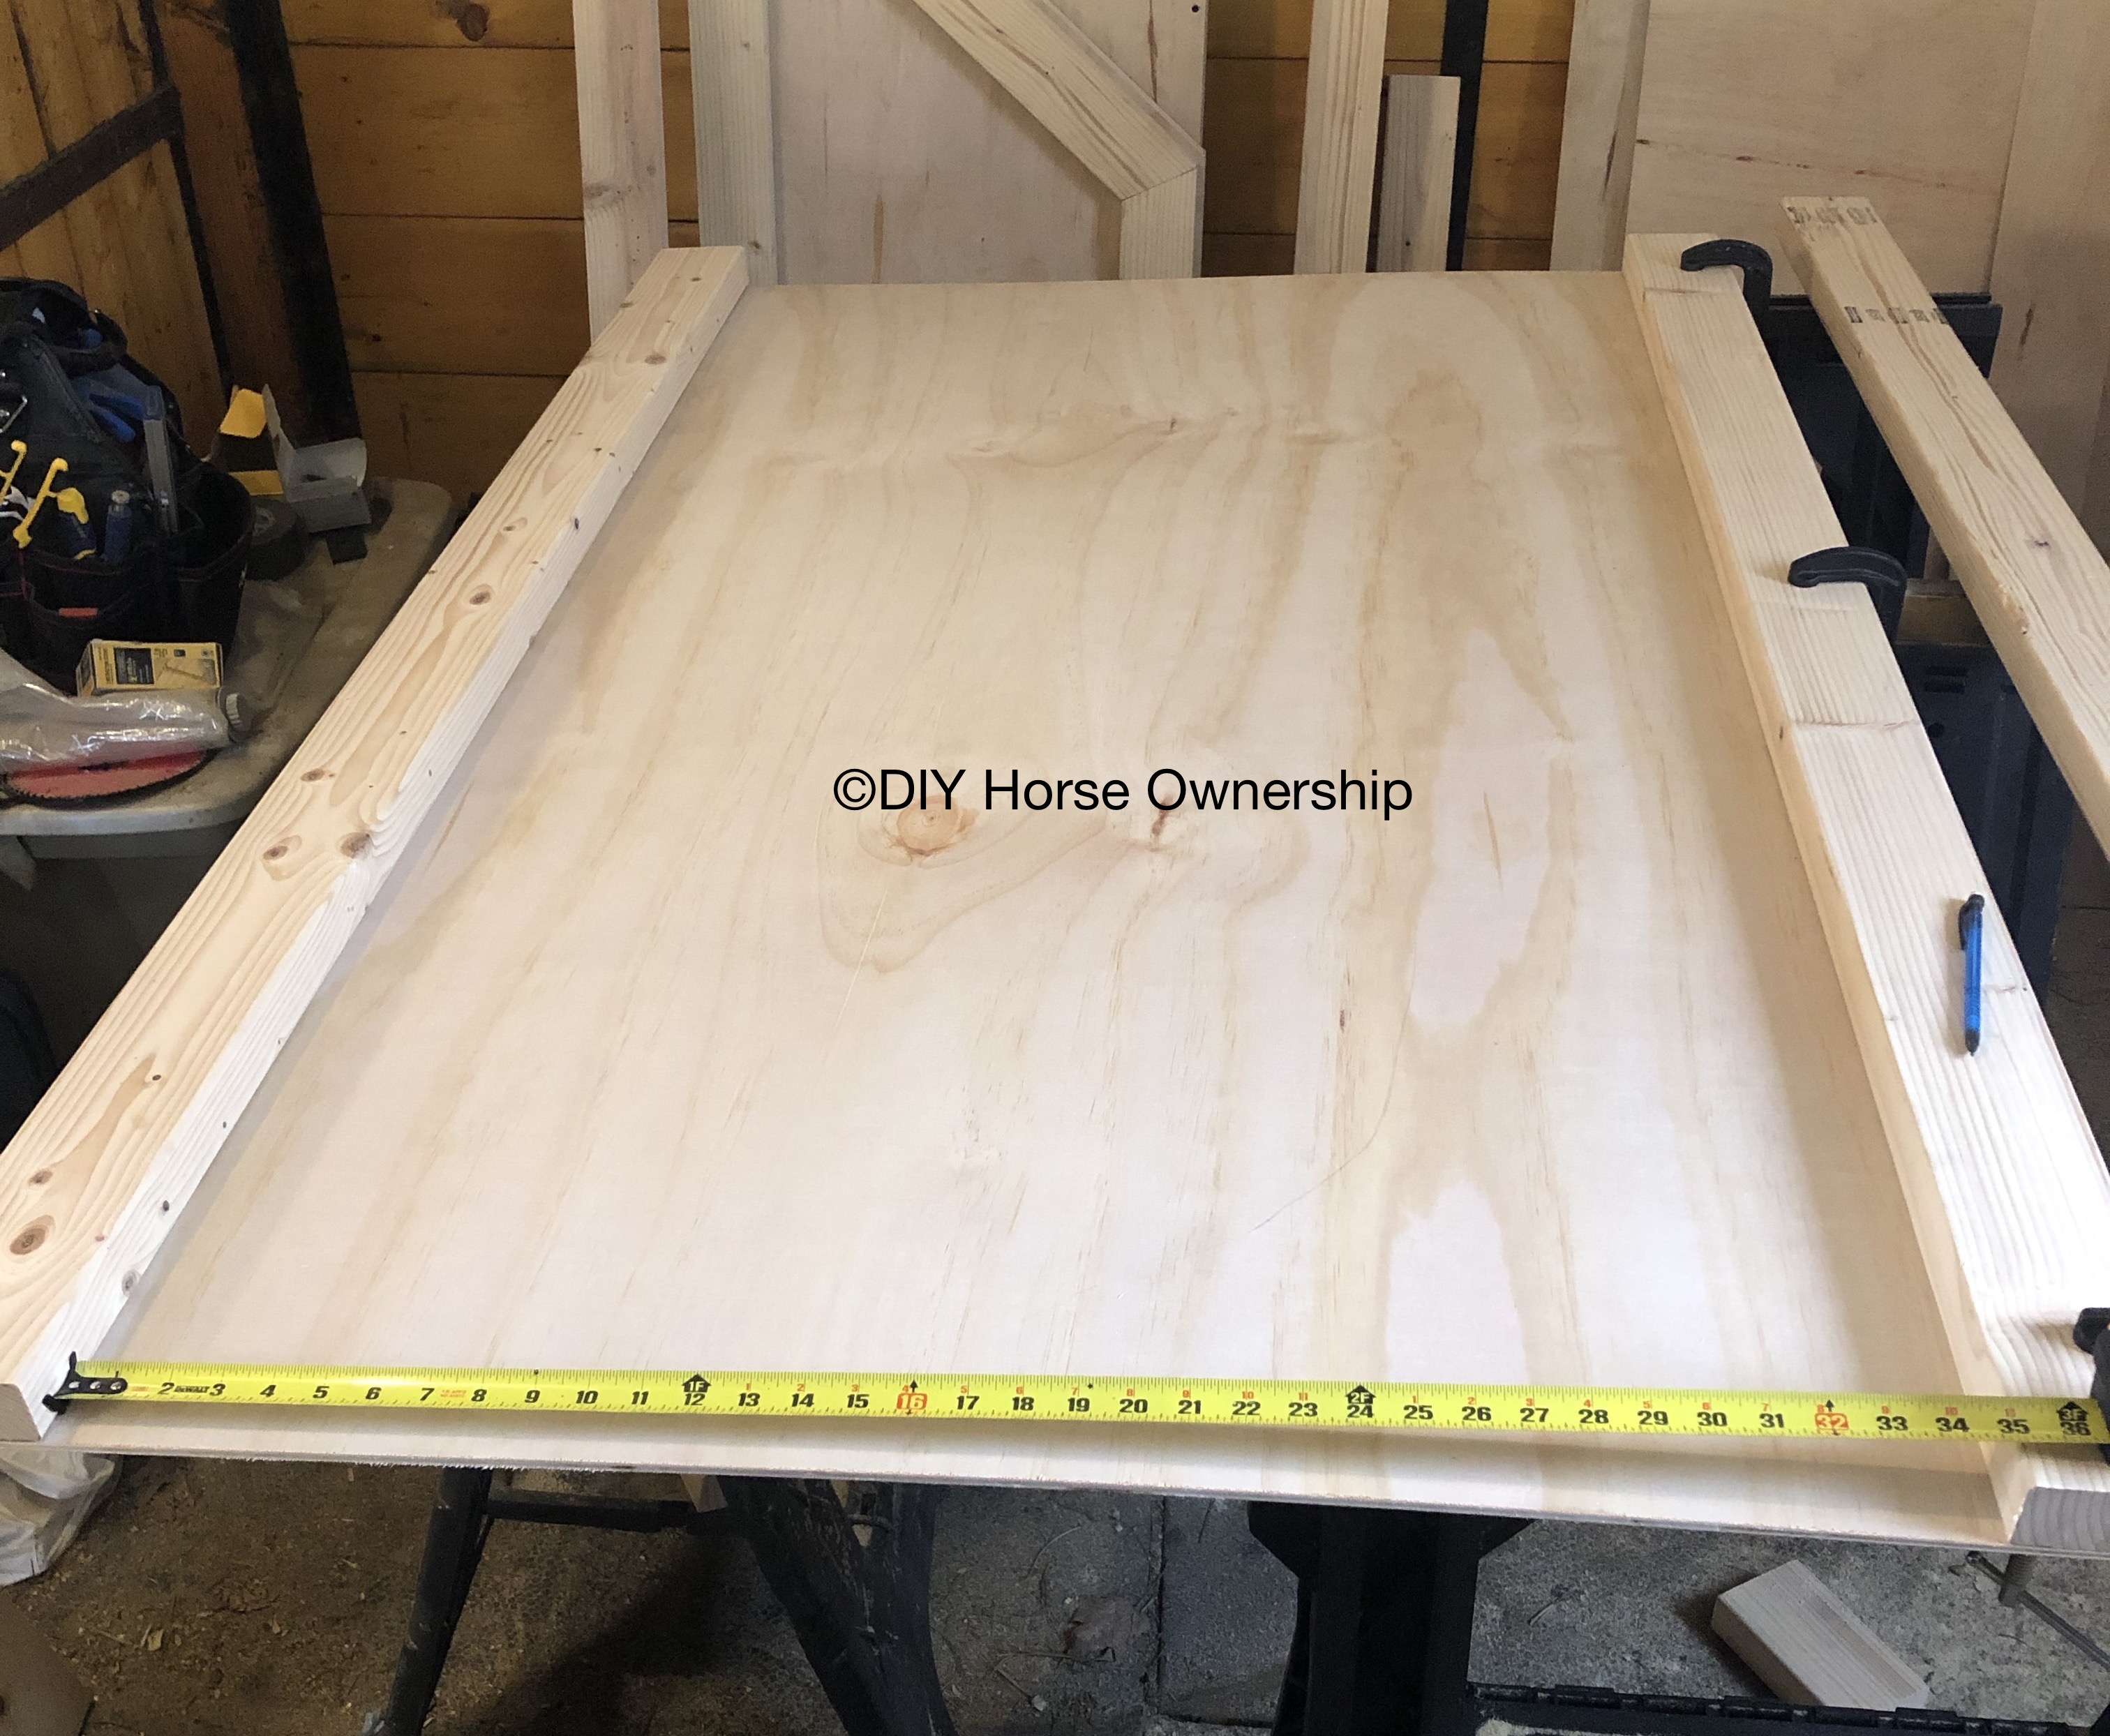
- Cut a 2’ x 5’ sheet of plywood (your measurements may vary).
- Cut two 5’ lengths of 2×4.
- Place them on top of the plywood, on each at the front and back, along their thin edges.
- Cut 4 21” lengths of 2×4. For each length, ensure that it fits neatly between the front and back 2x4s already placed on the plywood. Adjust the length accordingly.
- Starting with the edge pieces, place 2 screws at each junction between the 2x4s, through the front and back pieces and into the perpendicular, shorter pieces.
- Place the 2x4s evenly separated (18” apart) perpendicular to and between the front and back pieces.
- Remove the plywood from underneath the frame.
- Place a thin line of wood glue along the top edge of each of the 2×4 pieces.
- Place the plywood on top of the frame, ensuring that the edges line up neatly.
- Starting in the corners, screw the plywood into the frame at intervals along each edge.
Side construction:
Do the following twice, once for each side; place the 2×4 sections on one side of the plywood for one side and the opposite side of the plywood for the other; the 2x4s should be on the *outside* of the plywood in each case. One should be a mirror image of the other.)
For ease of understanding the following steps, here’s a shot of the side pieces laid out.

- Cut the plywood to 24” x 42”. (For the 24”, measure the narrow length of your base and use that, as the side should fill that length as precisely as possible.)
- From one of the corners of the plywood, measure out 10” along a short side and make a mark.
- From the corner opposite the first on the diagonal, measure up 30” (your measurement may vary if you want a taller or shorter front wall) along the long side and make a mark.
- Draw a line between the two marks and cut along the line.
- Cut a length of 2×4 to 24” or the width of your plywood.
- Lay a couple thin strips of glue along one of the wider sides of the 2×4, and affix along the short side of the plywood opposite the side with the cut-off corner. Apply clamps.
- Cut a length of 2×4 to 10” and lay it on its side at the top of your piece of plywood. Glue and clamp.
- Measure the distance between the two existing lengths, which should be 35”. Cut another length of 2×4 to 35” (or your measurement) and lay it between the first two lengths. Glue and clamp.
- Cut a length of 2×4 to 26.5” and lay it opposite the previous one; it should fit between the base and the start of the cut-out corner.
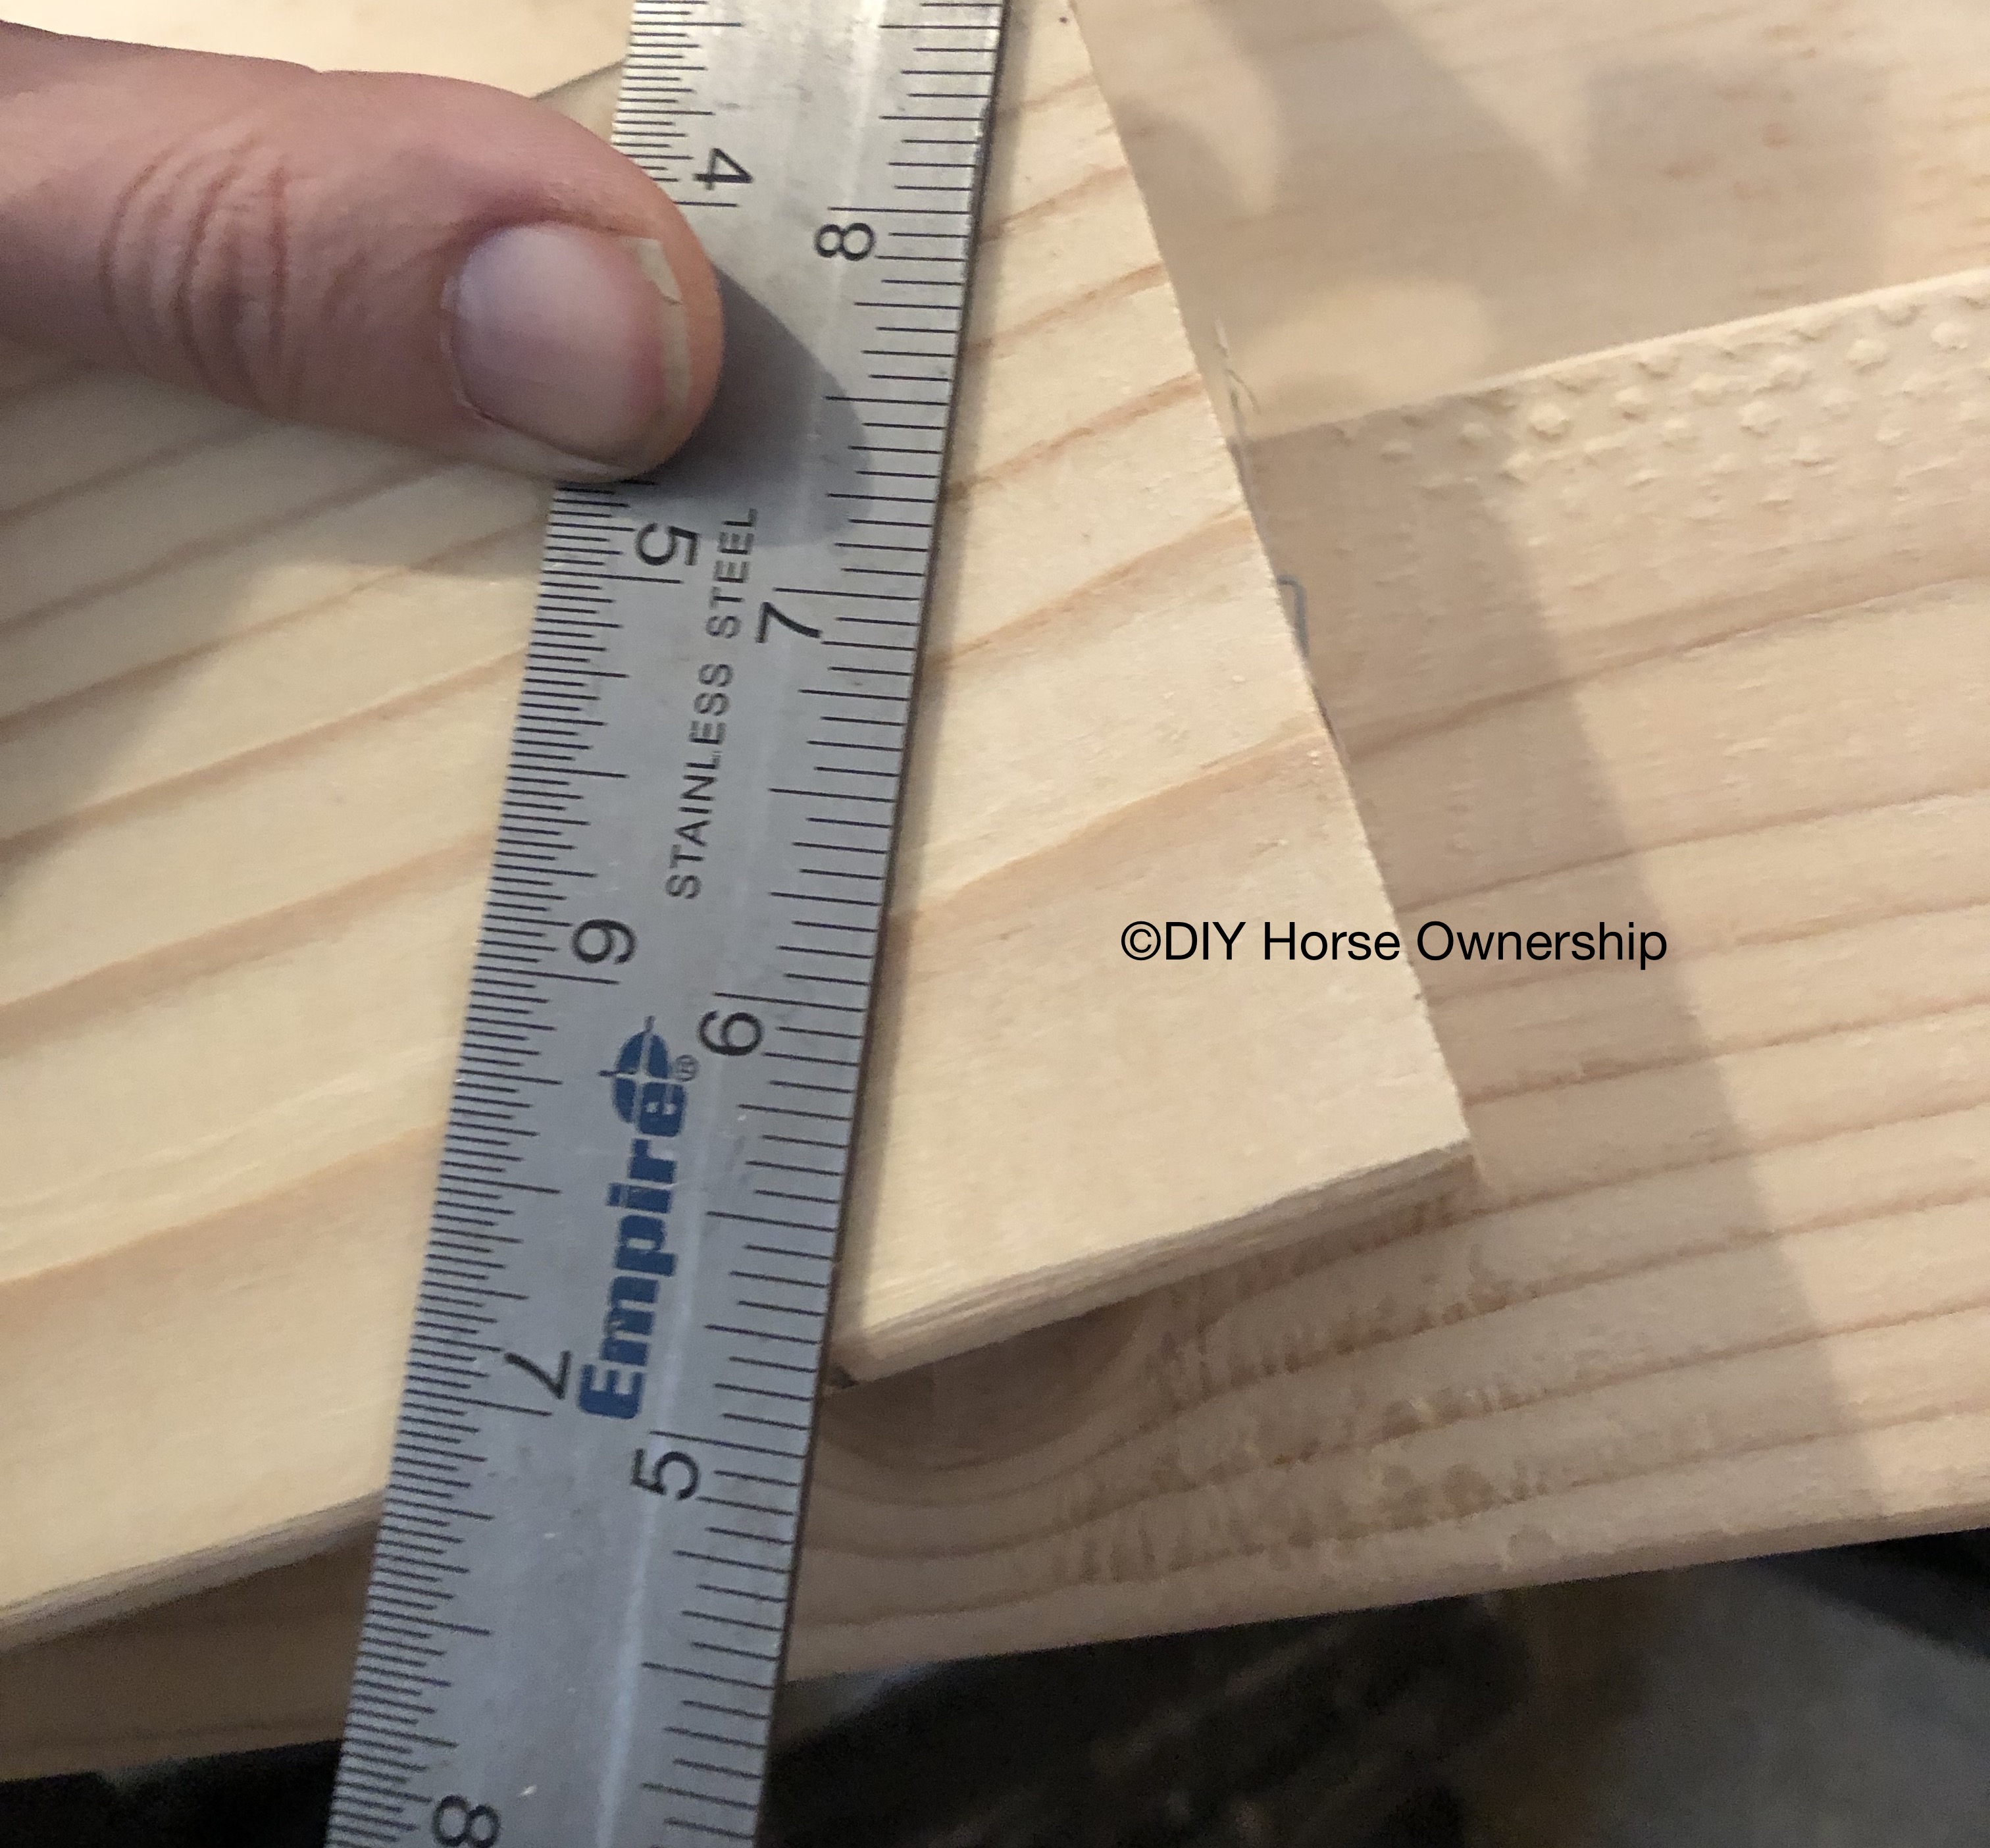
- Measure the length of the diagonal of your cut-out, which should be just under 18 1/2” long. Cut a length of 2×4 to that length.
- Lay this piece along the diagonal, resting it above the 10” and 26.5” pieces on the two adjoining sides.
- On each piece, mark where the boards cross each other on the inside.
- Draw a line from that point to the corner opposite it on each board, and cut along the line.
- Set the lengths back onto their appropriate locations on the plywood and ensure that everything fits neatly along the edges of the plywood.

- Glue the piece down with a couple thin lines of wood glue and clamp.
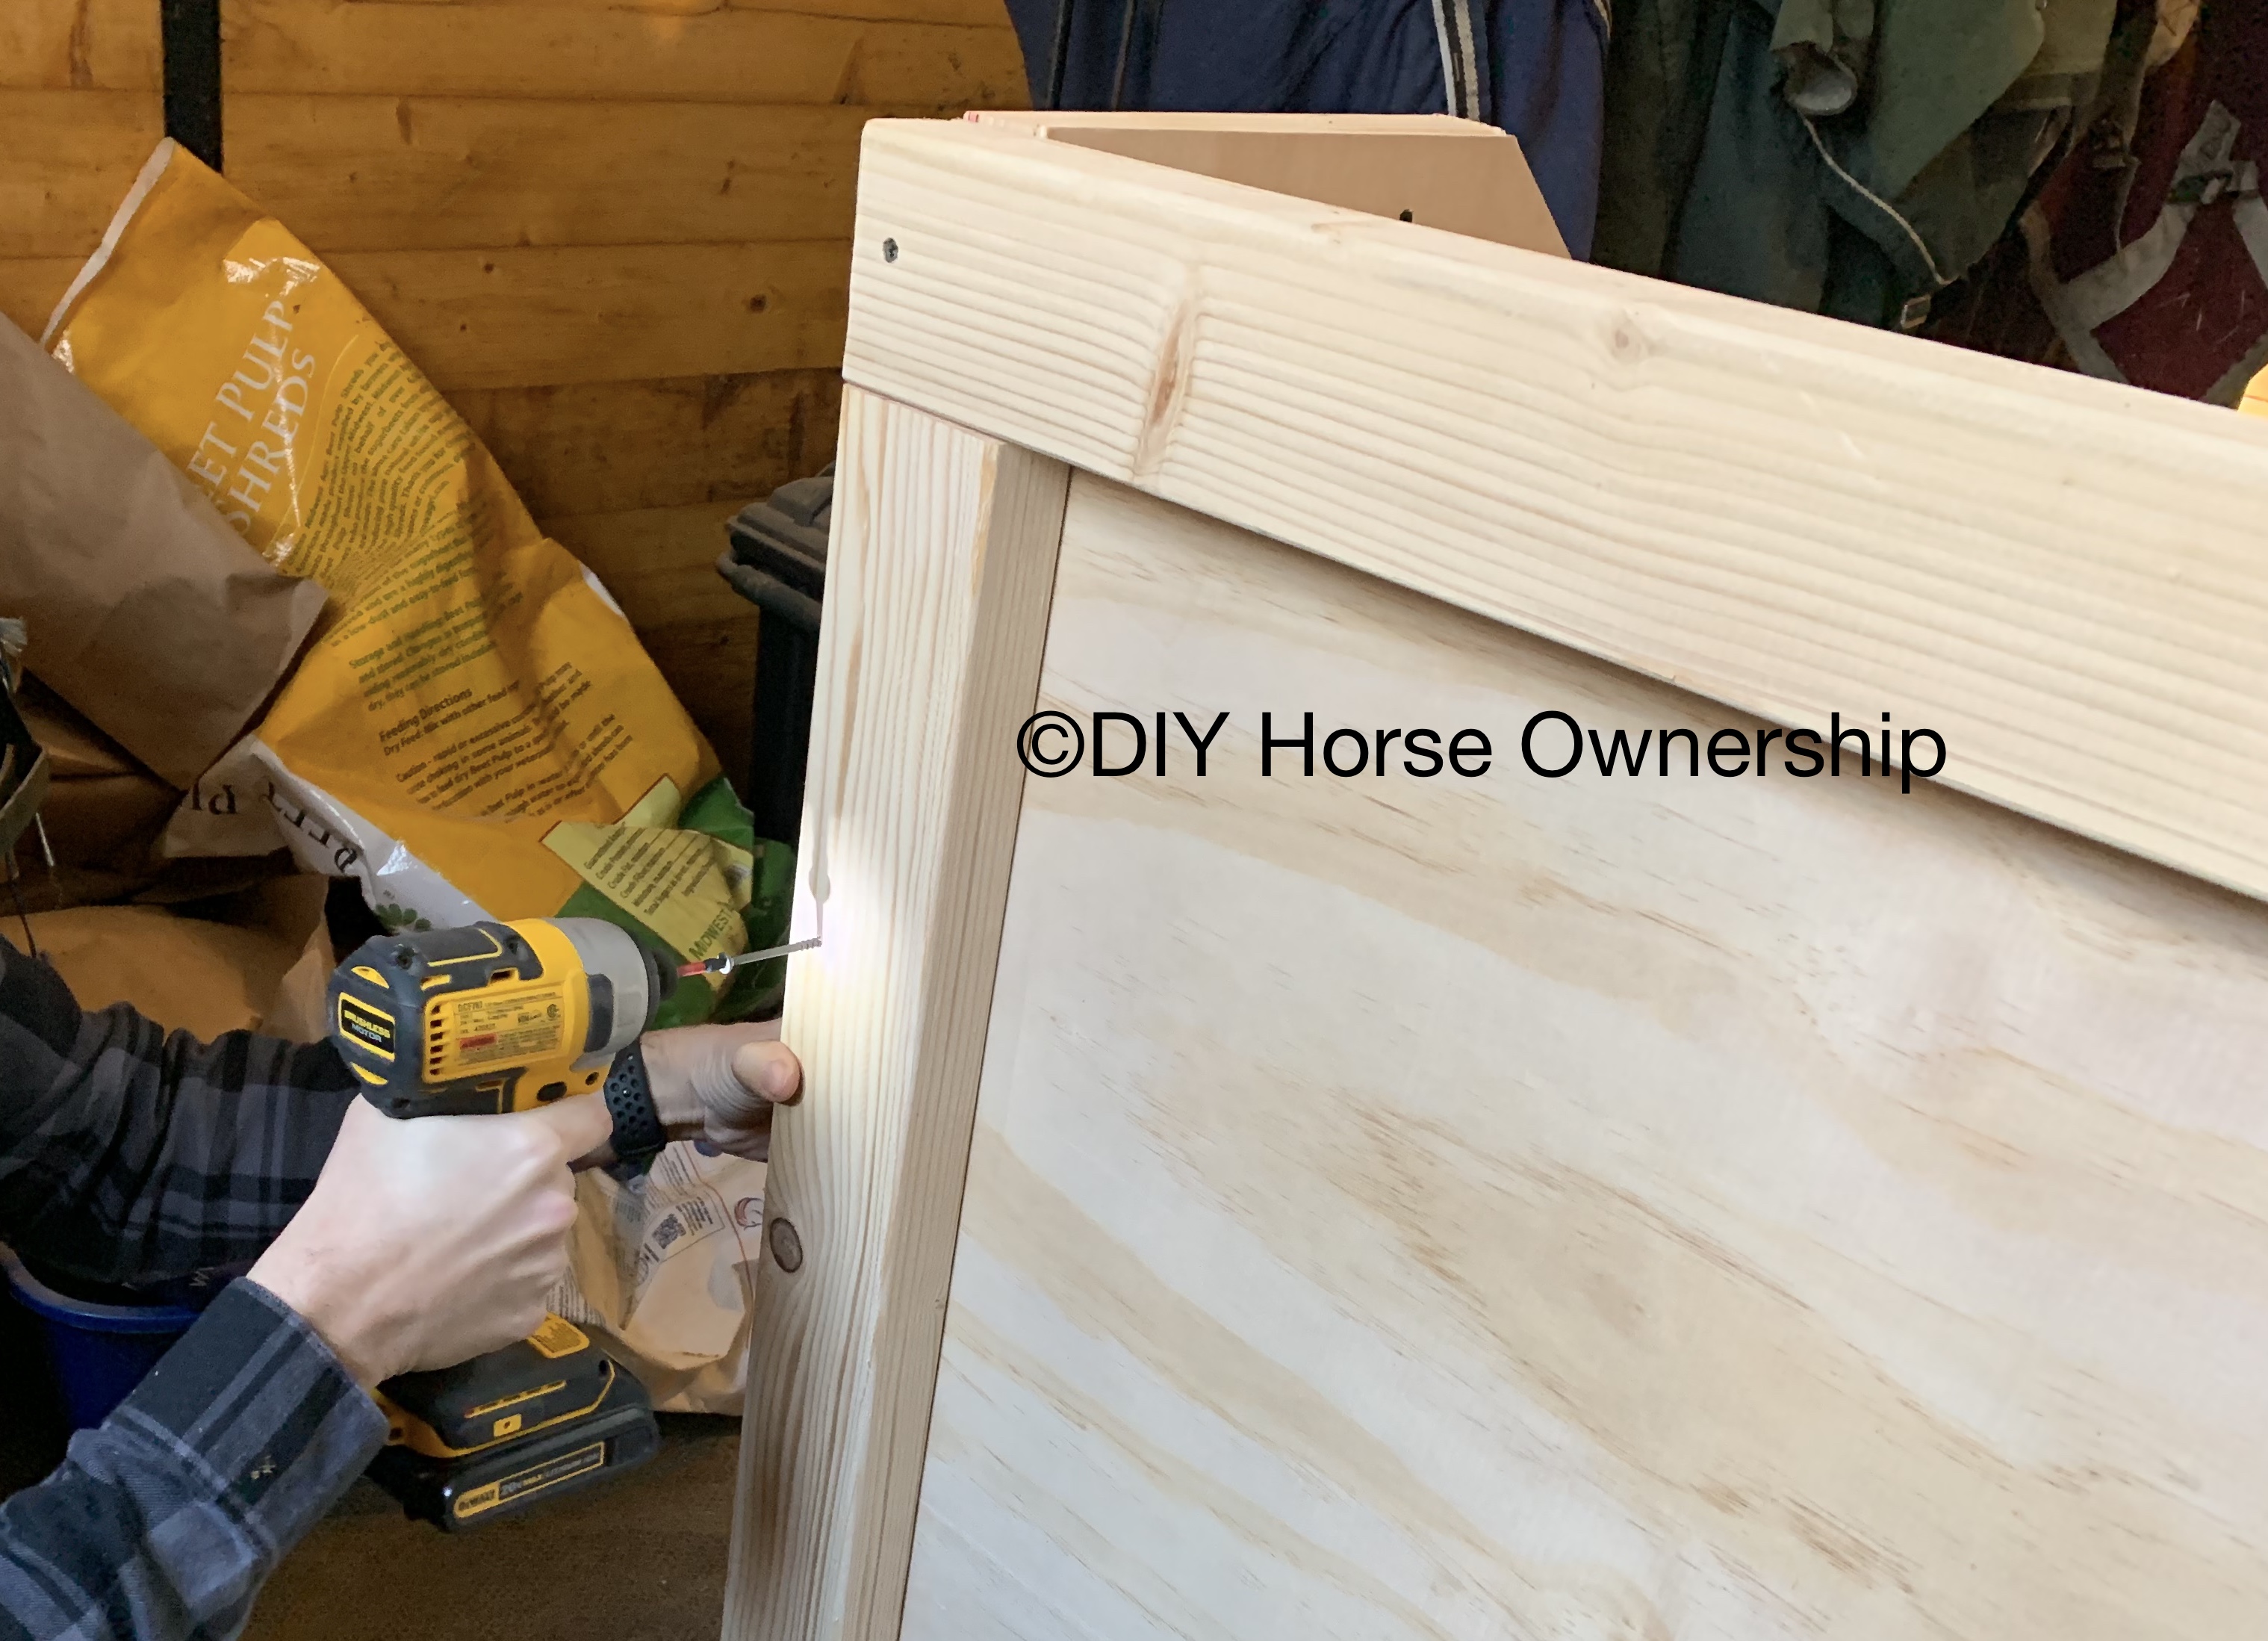
- Allow to dry, then flip over and screw the plywood into the 2x4s with 1” screws.
- Stand the sides up against the short sides of your base, plywood to the inside.
- Using 3” wood screws, screw through the bottom 2×4 of each side and into the base to fasten it into place.
Make sure you reverse your second piece of plywood when you lay out and construct your second side. If you make 2 identical side pieces, the 2x4s will not face out on the second side piece. You want mirrored side pieces, not identical side pieces.
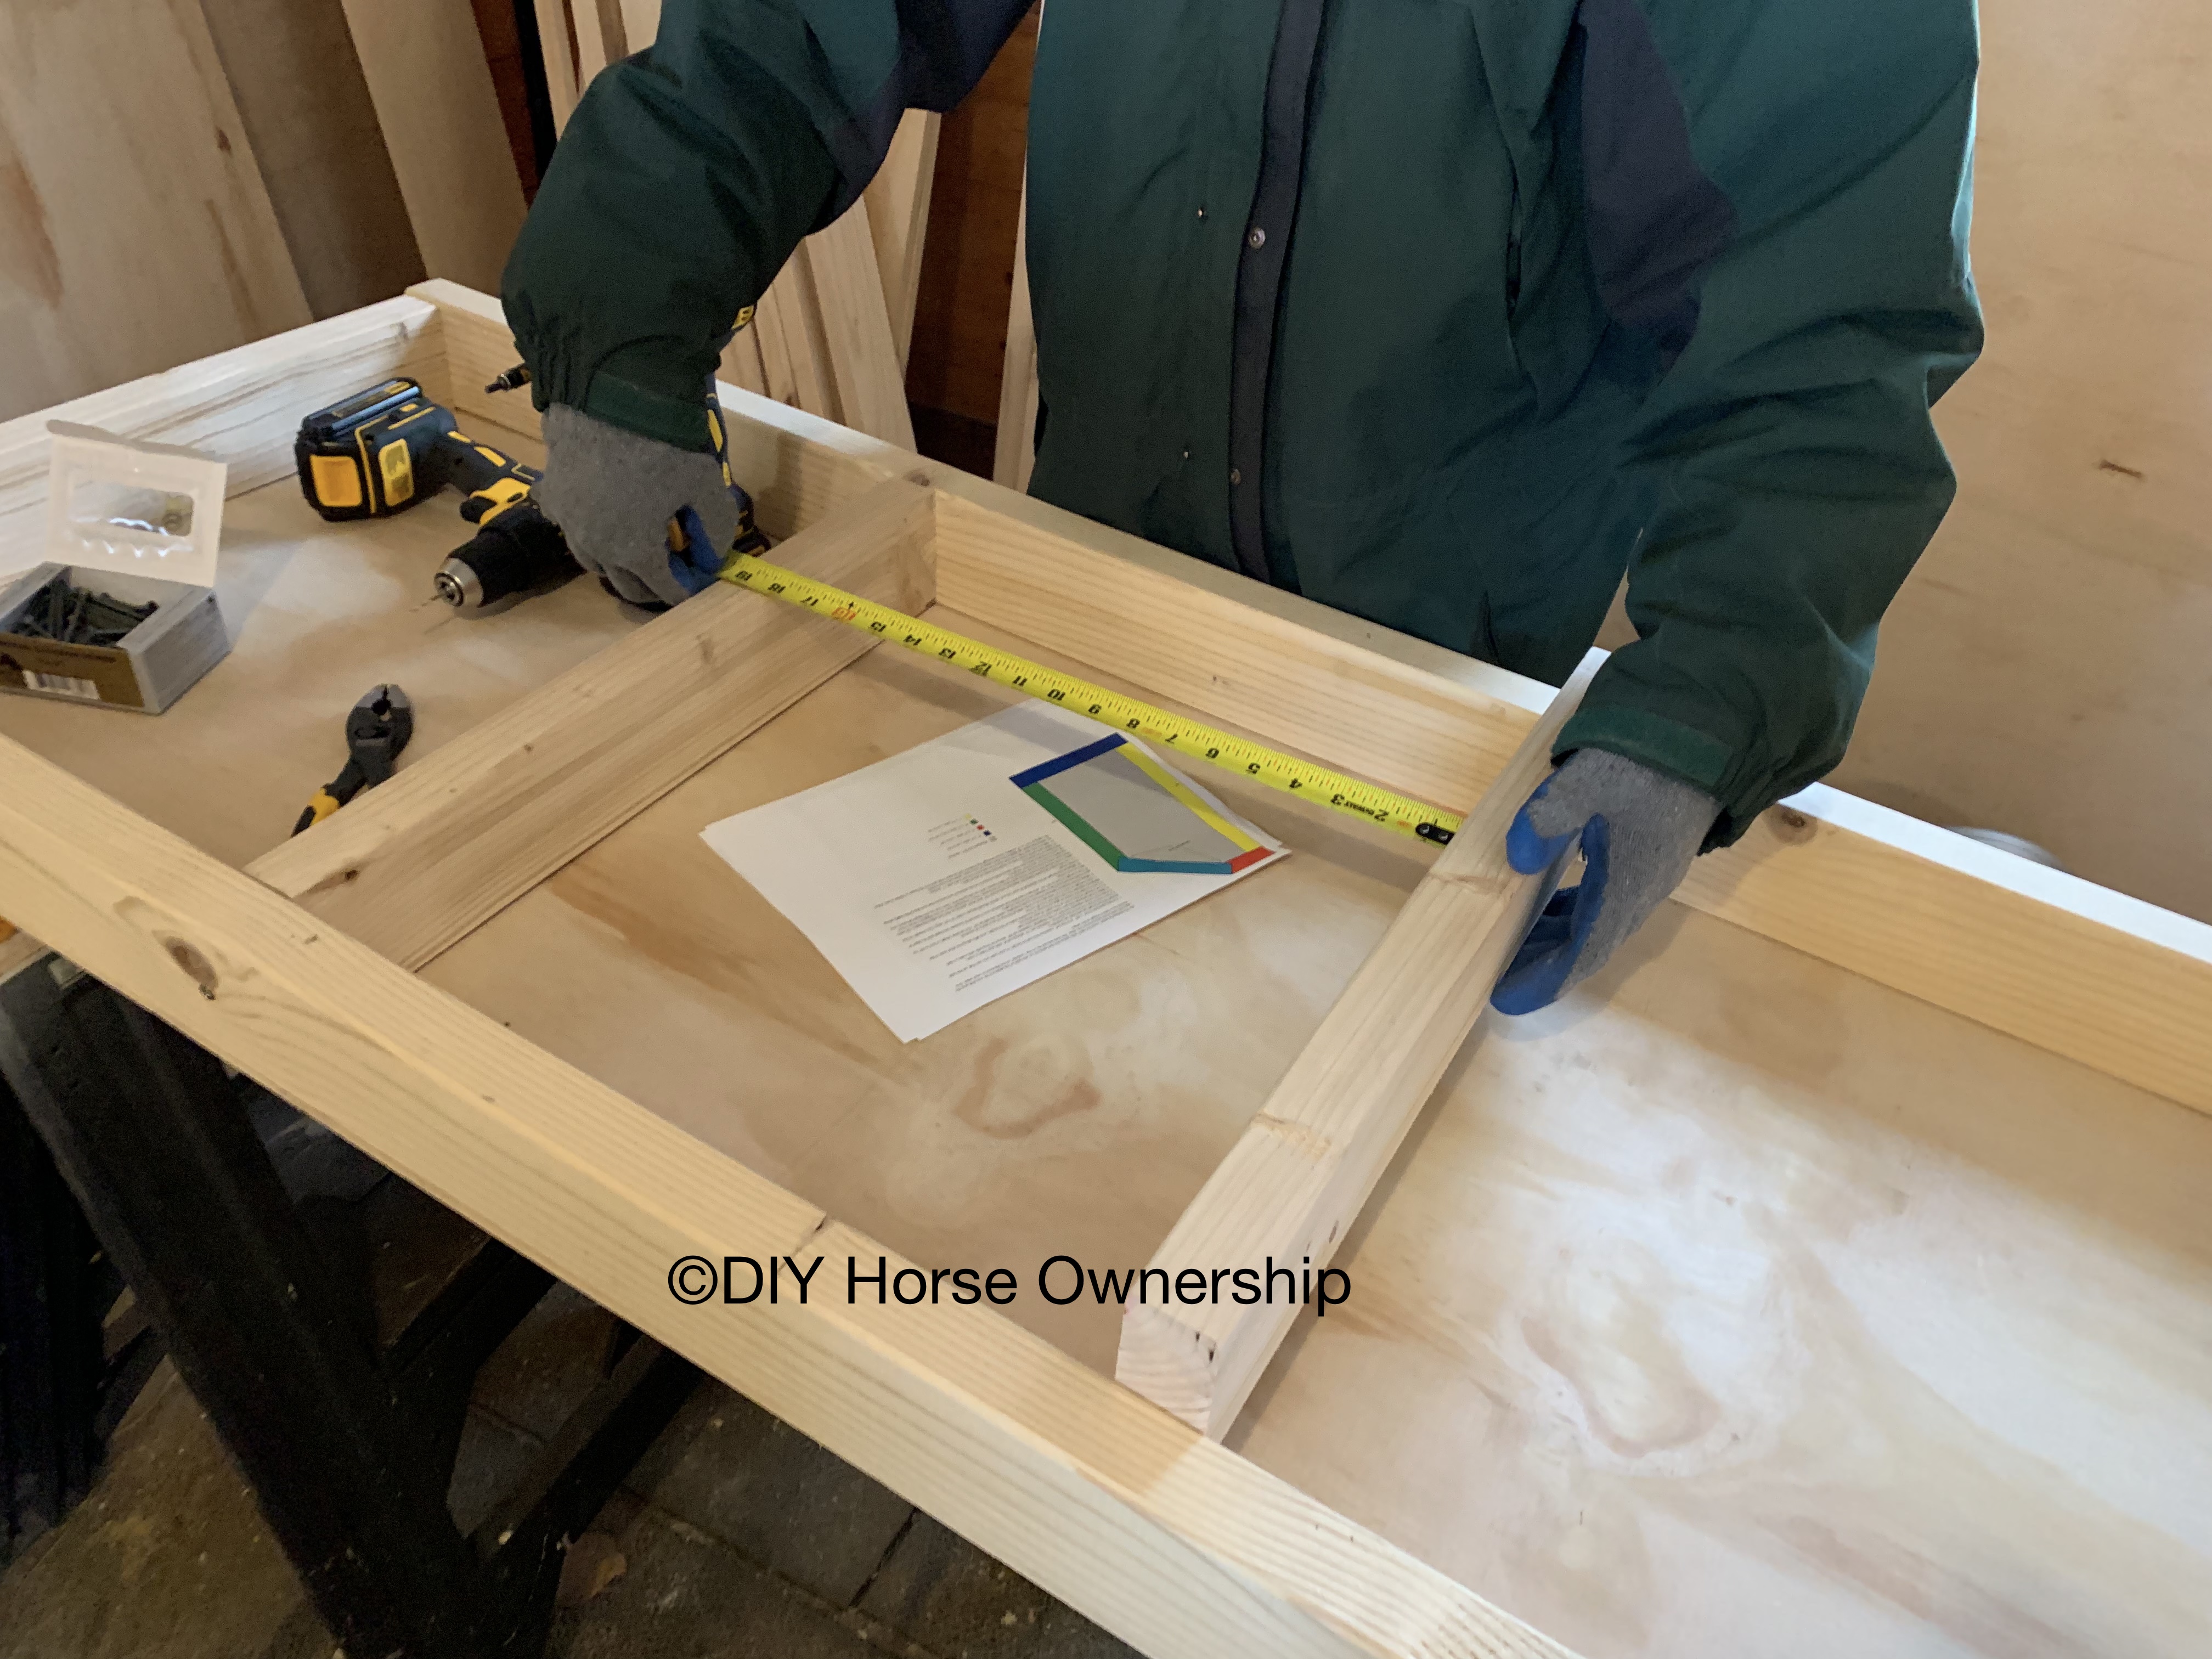
Front Construction:
- Measure across the front of your base and side assembly, which should be 64 14/32” wide.
- Cut a piece of plywood to 30” x 64 14/32” (or whatever your measurement was).
- Cut two lengths of 2×4 to the same length as the plywood.
- Place them flat on top of the plywood, one along each of the long edges.
- Cut 3 23” lengths of 2×4. For each length, ensure that it fits neatly between the top and bottom 2x4s already placed on the plywood. Adjust the length accordingly.
- Start with the two edge pieces and then place the third 2×4 in the middle with all 3 short pieces perpendicular to and between the top and bottom pieces.
I didn’t get a picture of these step, so here’s a later picture for reference
- When all pieces fit neatly, glue each to the plywood using a couple thin strips of wood glue. clamp and allow to dry.
- When dry, flip over and screw the plywood to the 2x4s.
- Stand the front up and place it, plywood-side in, against the front of your base and side assembly.
- Using 3” screws, screw through the bottom length of 2×4 and into the matching 2×4 of the base.
- Using the same screws, screw through the front pieces into the side pieces.
Back Construction:
The back is essentially the same as the front, just with a different height.
- Measure across the back of your base and side assembly, which should be 64 14/32” wide. Measure the height, which should be 42″.
- Cut a piece of plywood to 42” x 64 14/32” (or whatever your measurement was).
- Cut two lengths of 2×4 to the same length as the plywood.
- Place them flat on top of the plywood, one along each of the long edges.
- Cut 3 35” lengths of 2×4. For each length, ensure that it fits neatly between the front and back 2x4s already placed on the plywood. Adjust the length accordingly.
- Place the 3 short 2x4s evenly separated perpendicular to and between the front and back pieces.
- When all pieces fit neatly, glue each to the plywood using a couple thin strips of wood glue. Clamp and allow to dry.
- When dry, flip over and screw the plywood to the 2x4s with the 1″ wood screws.
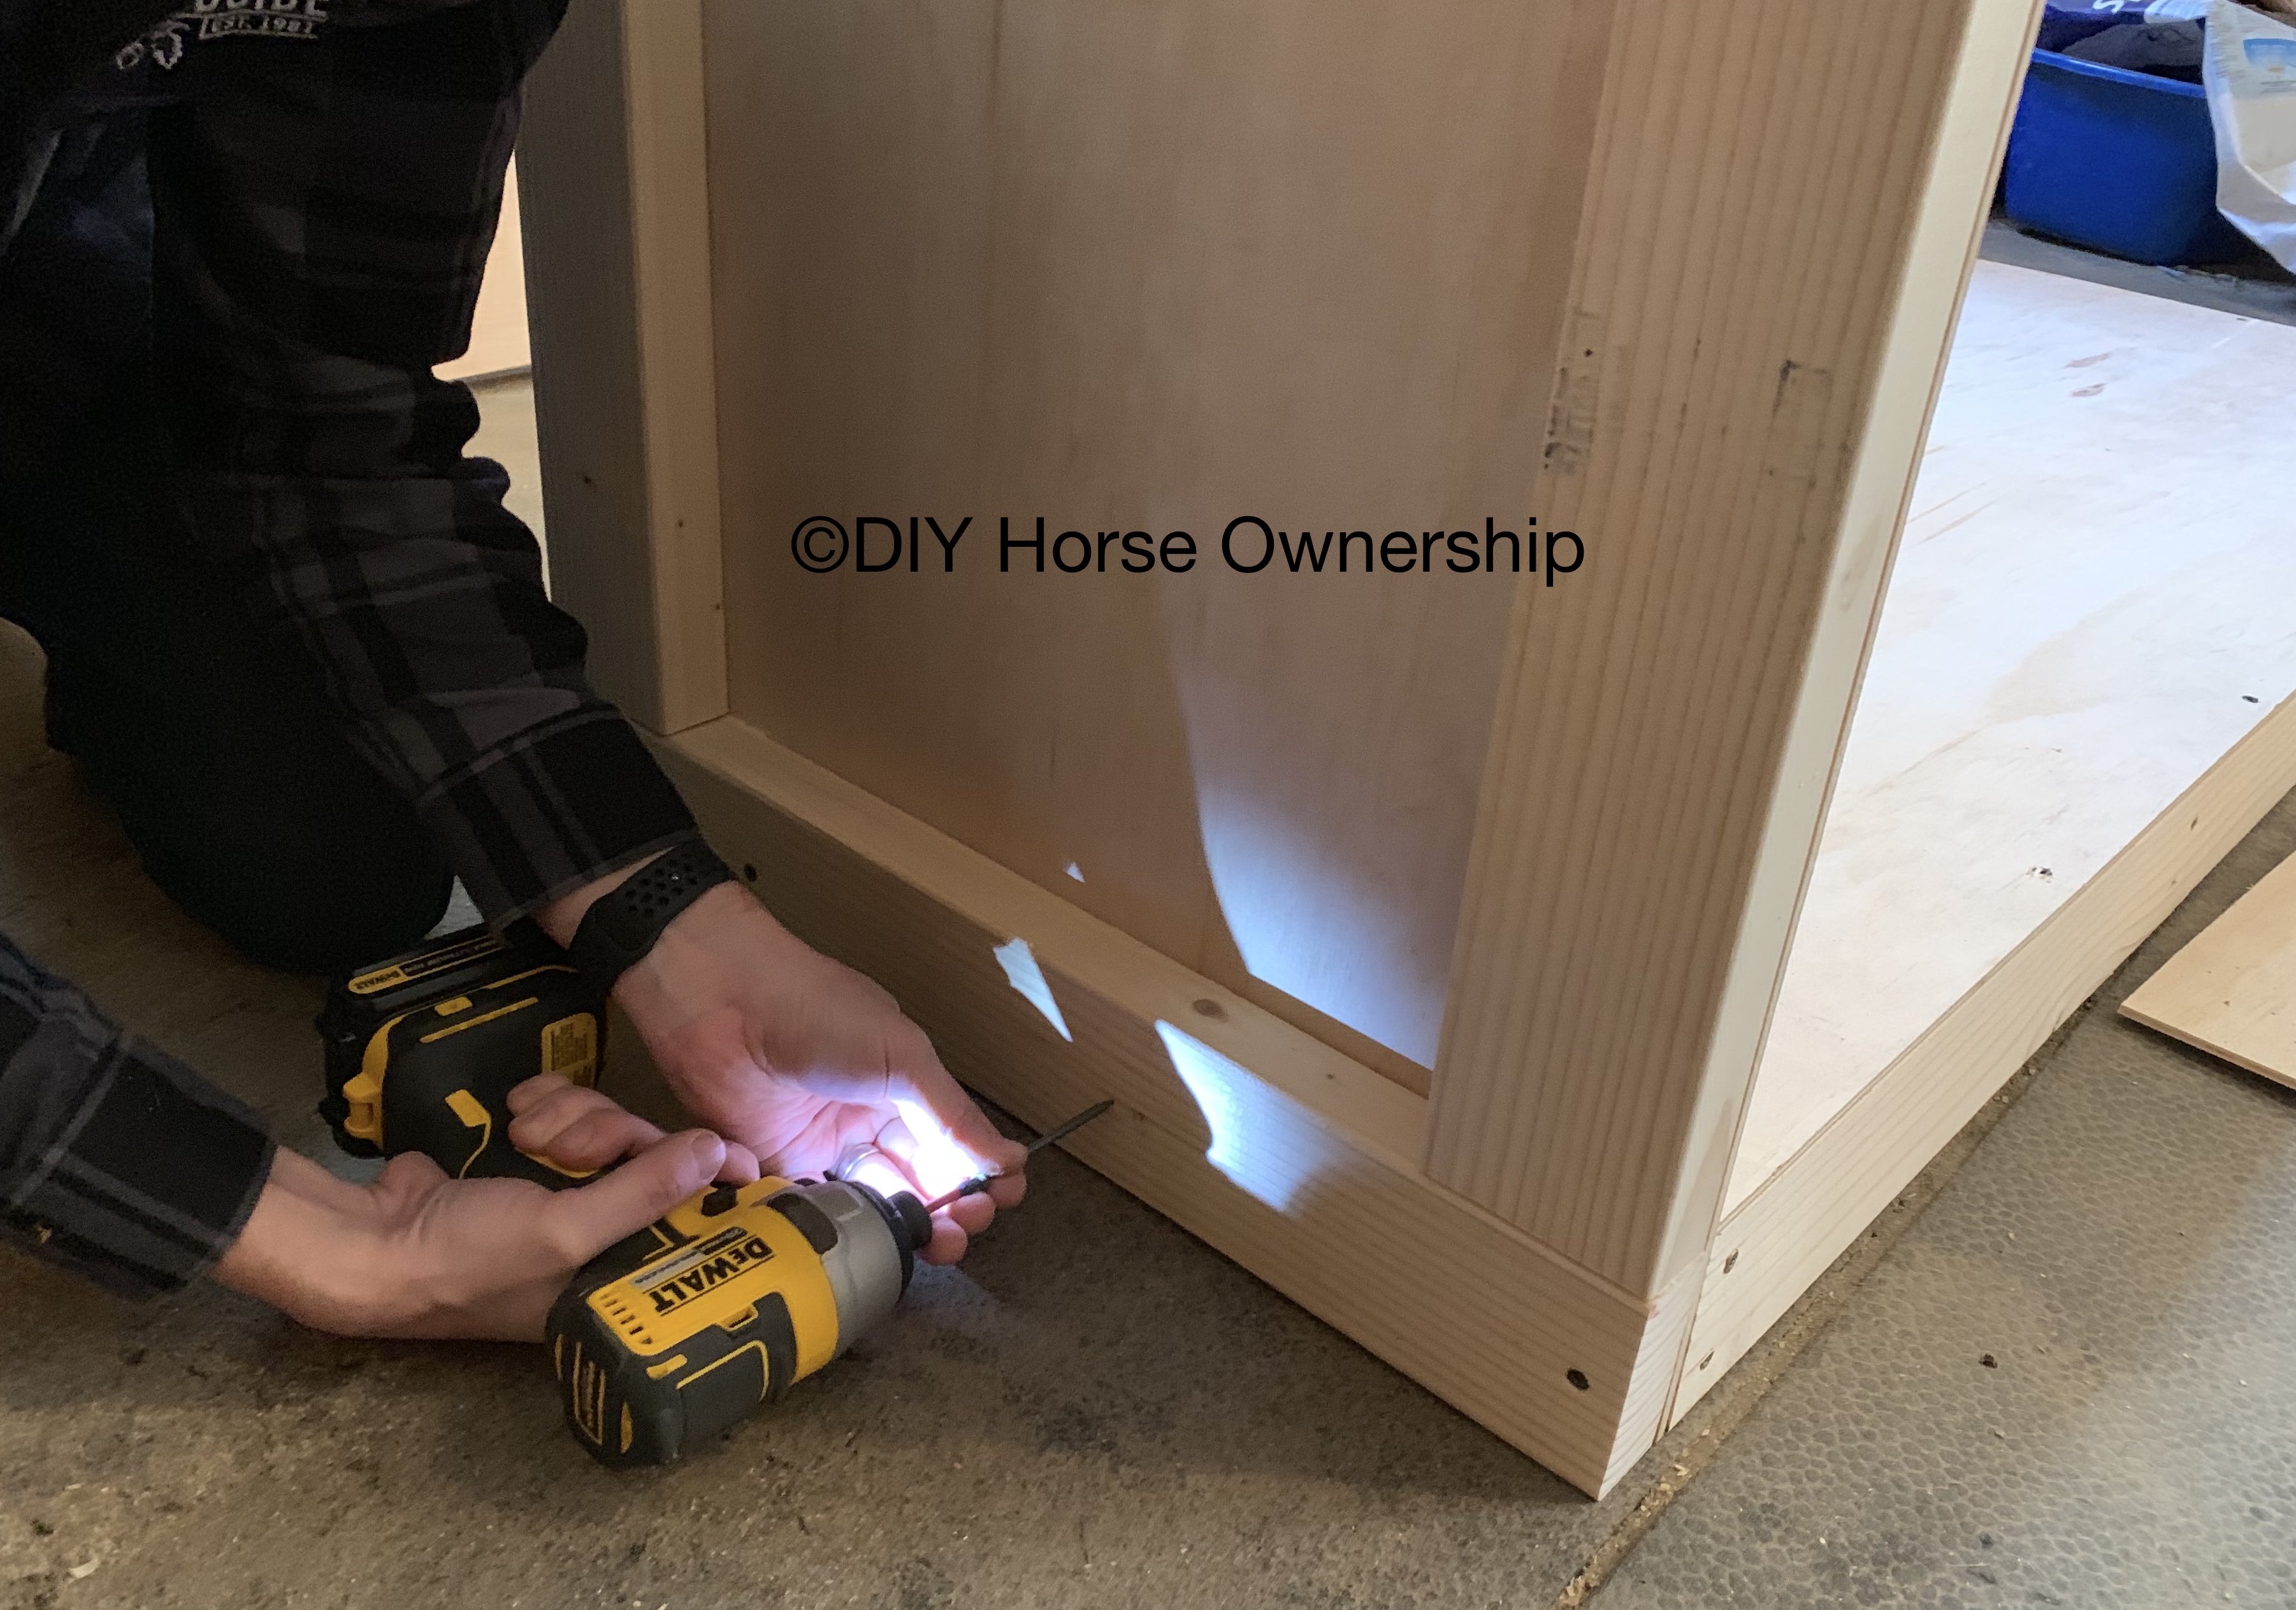
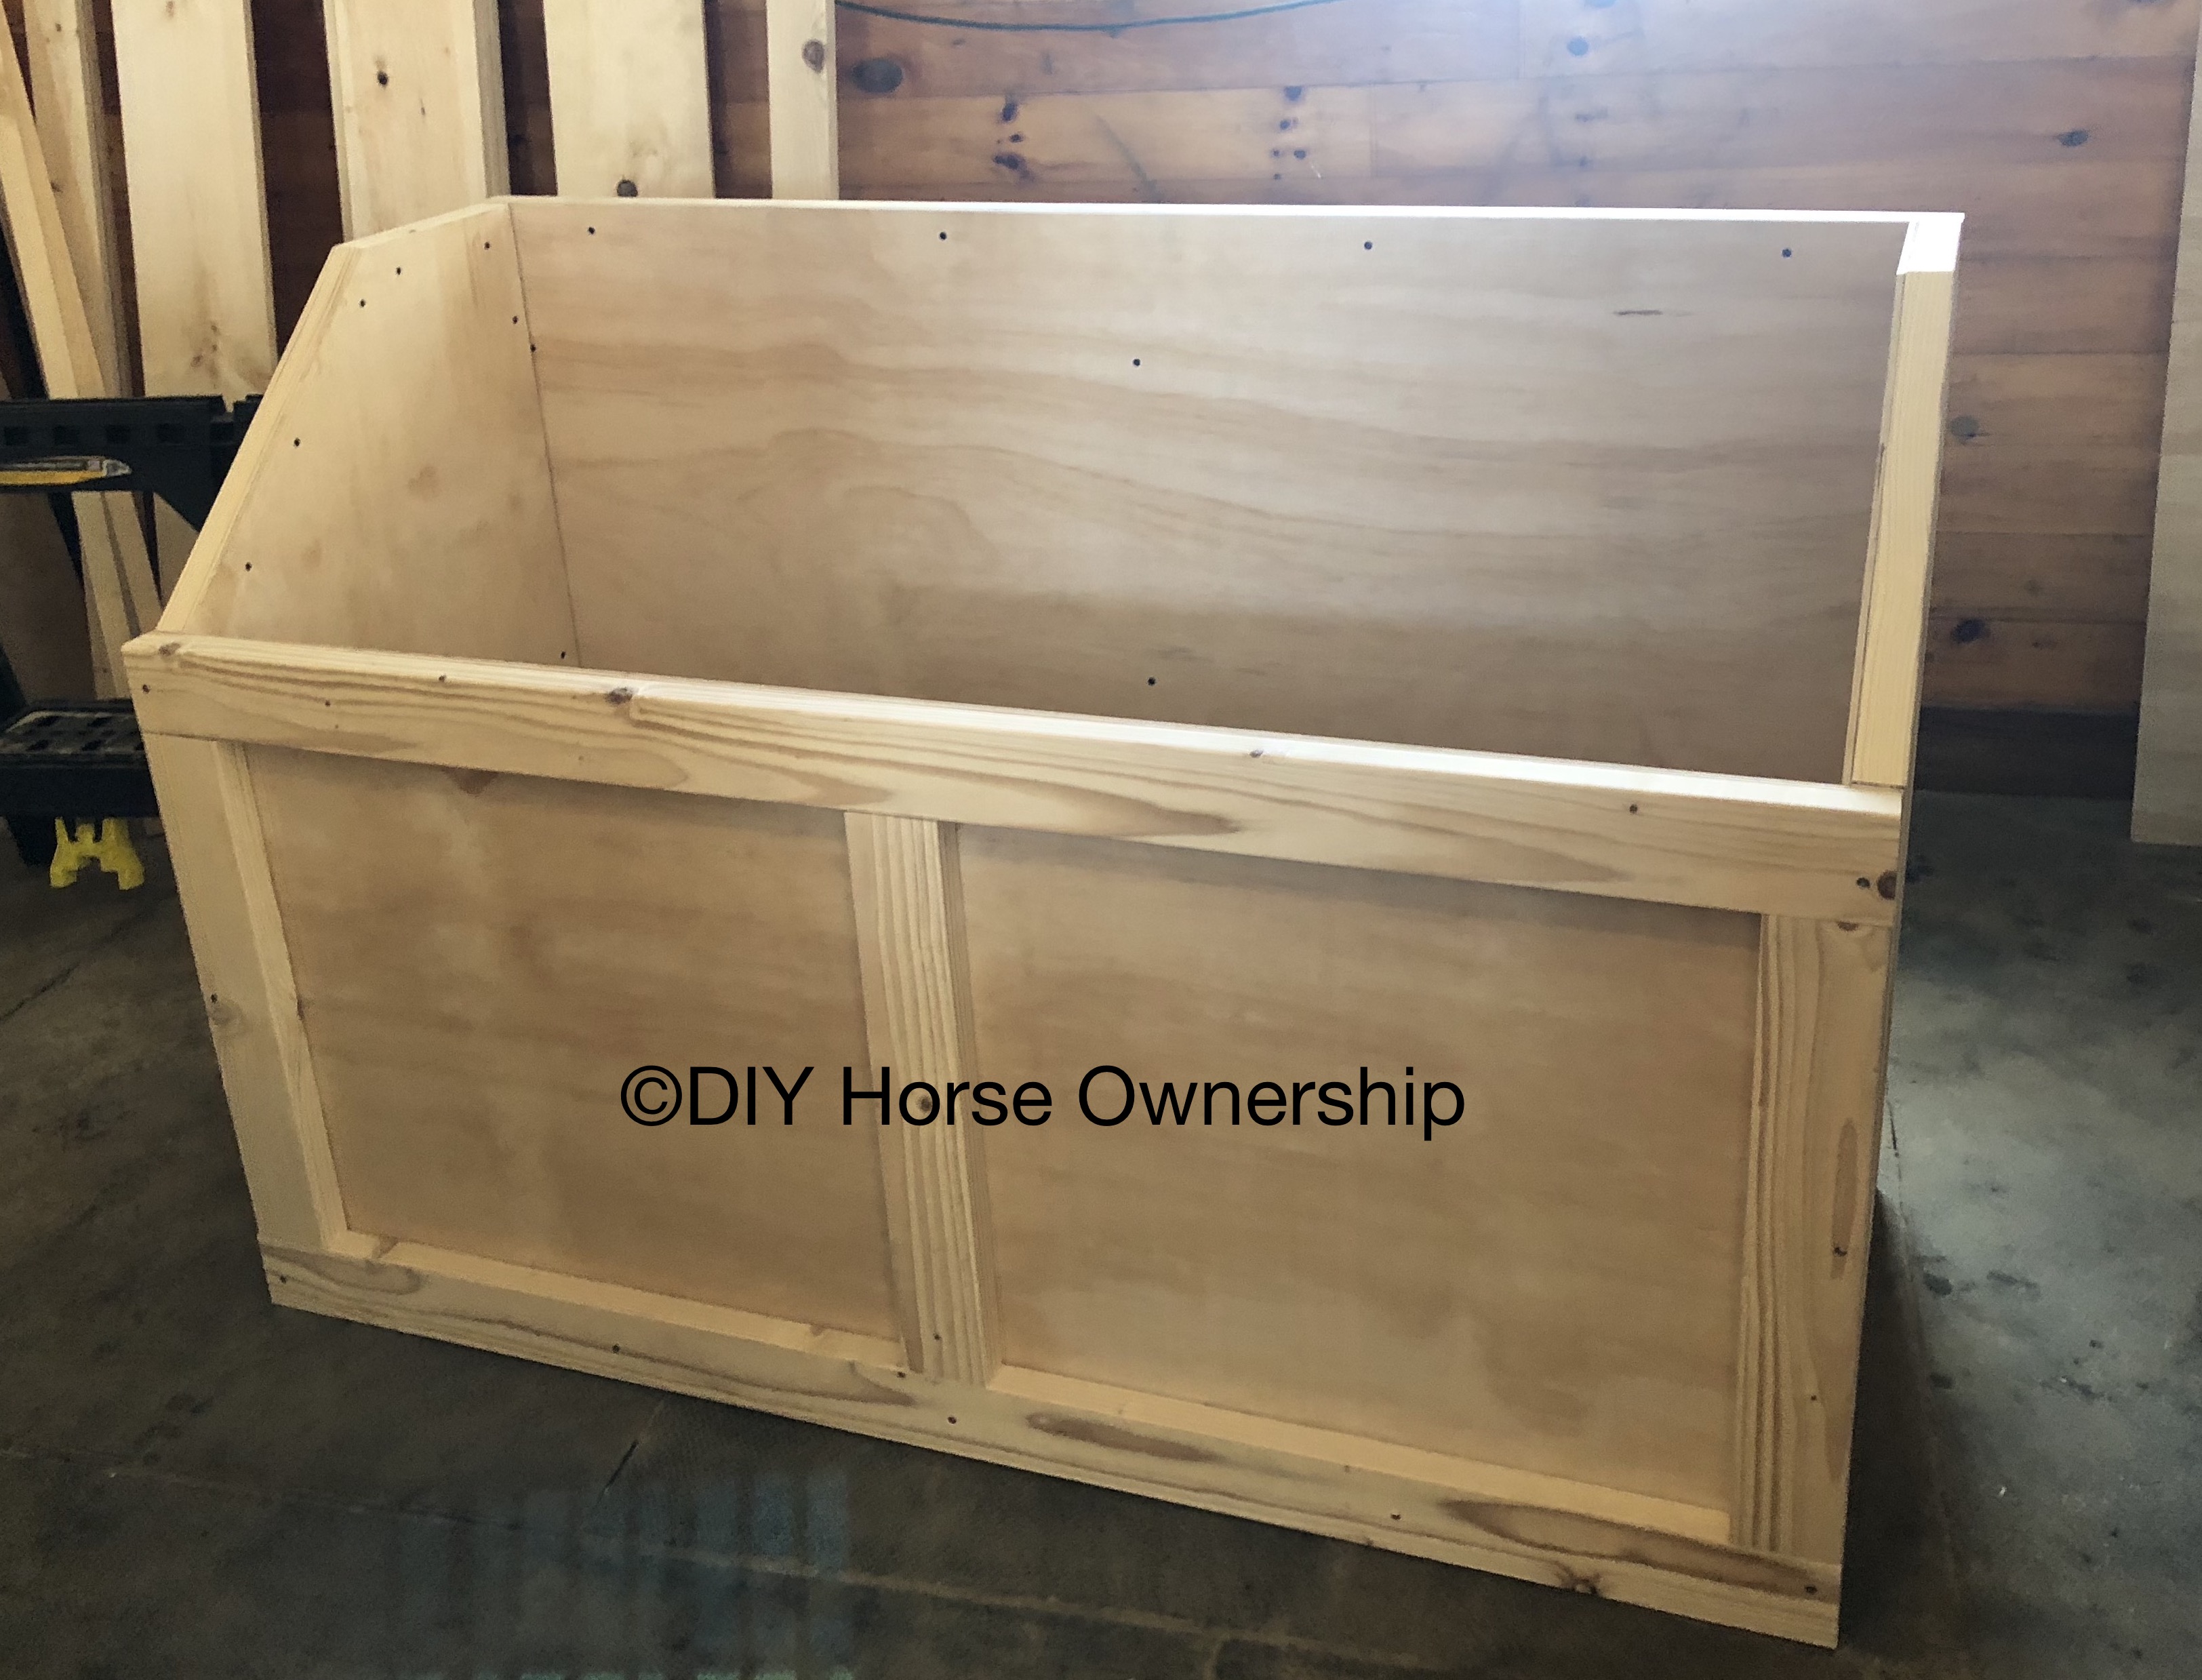
- Stand the back piece up and place it, plywood-side in, against the back of your base, side, and front assembly.
- Using 3” screws, screw through the bottom length of 2×4 and into the matching 2×4 of the base.
- Then screw through the side 2x4s and into the 2x4s along the back edge of each side piece.
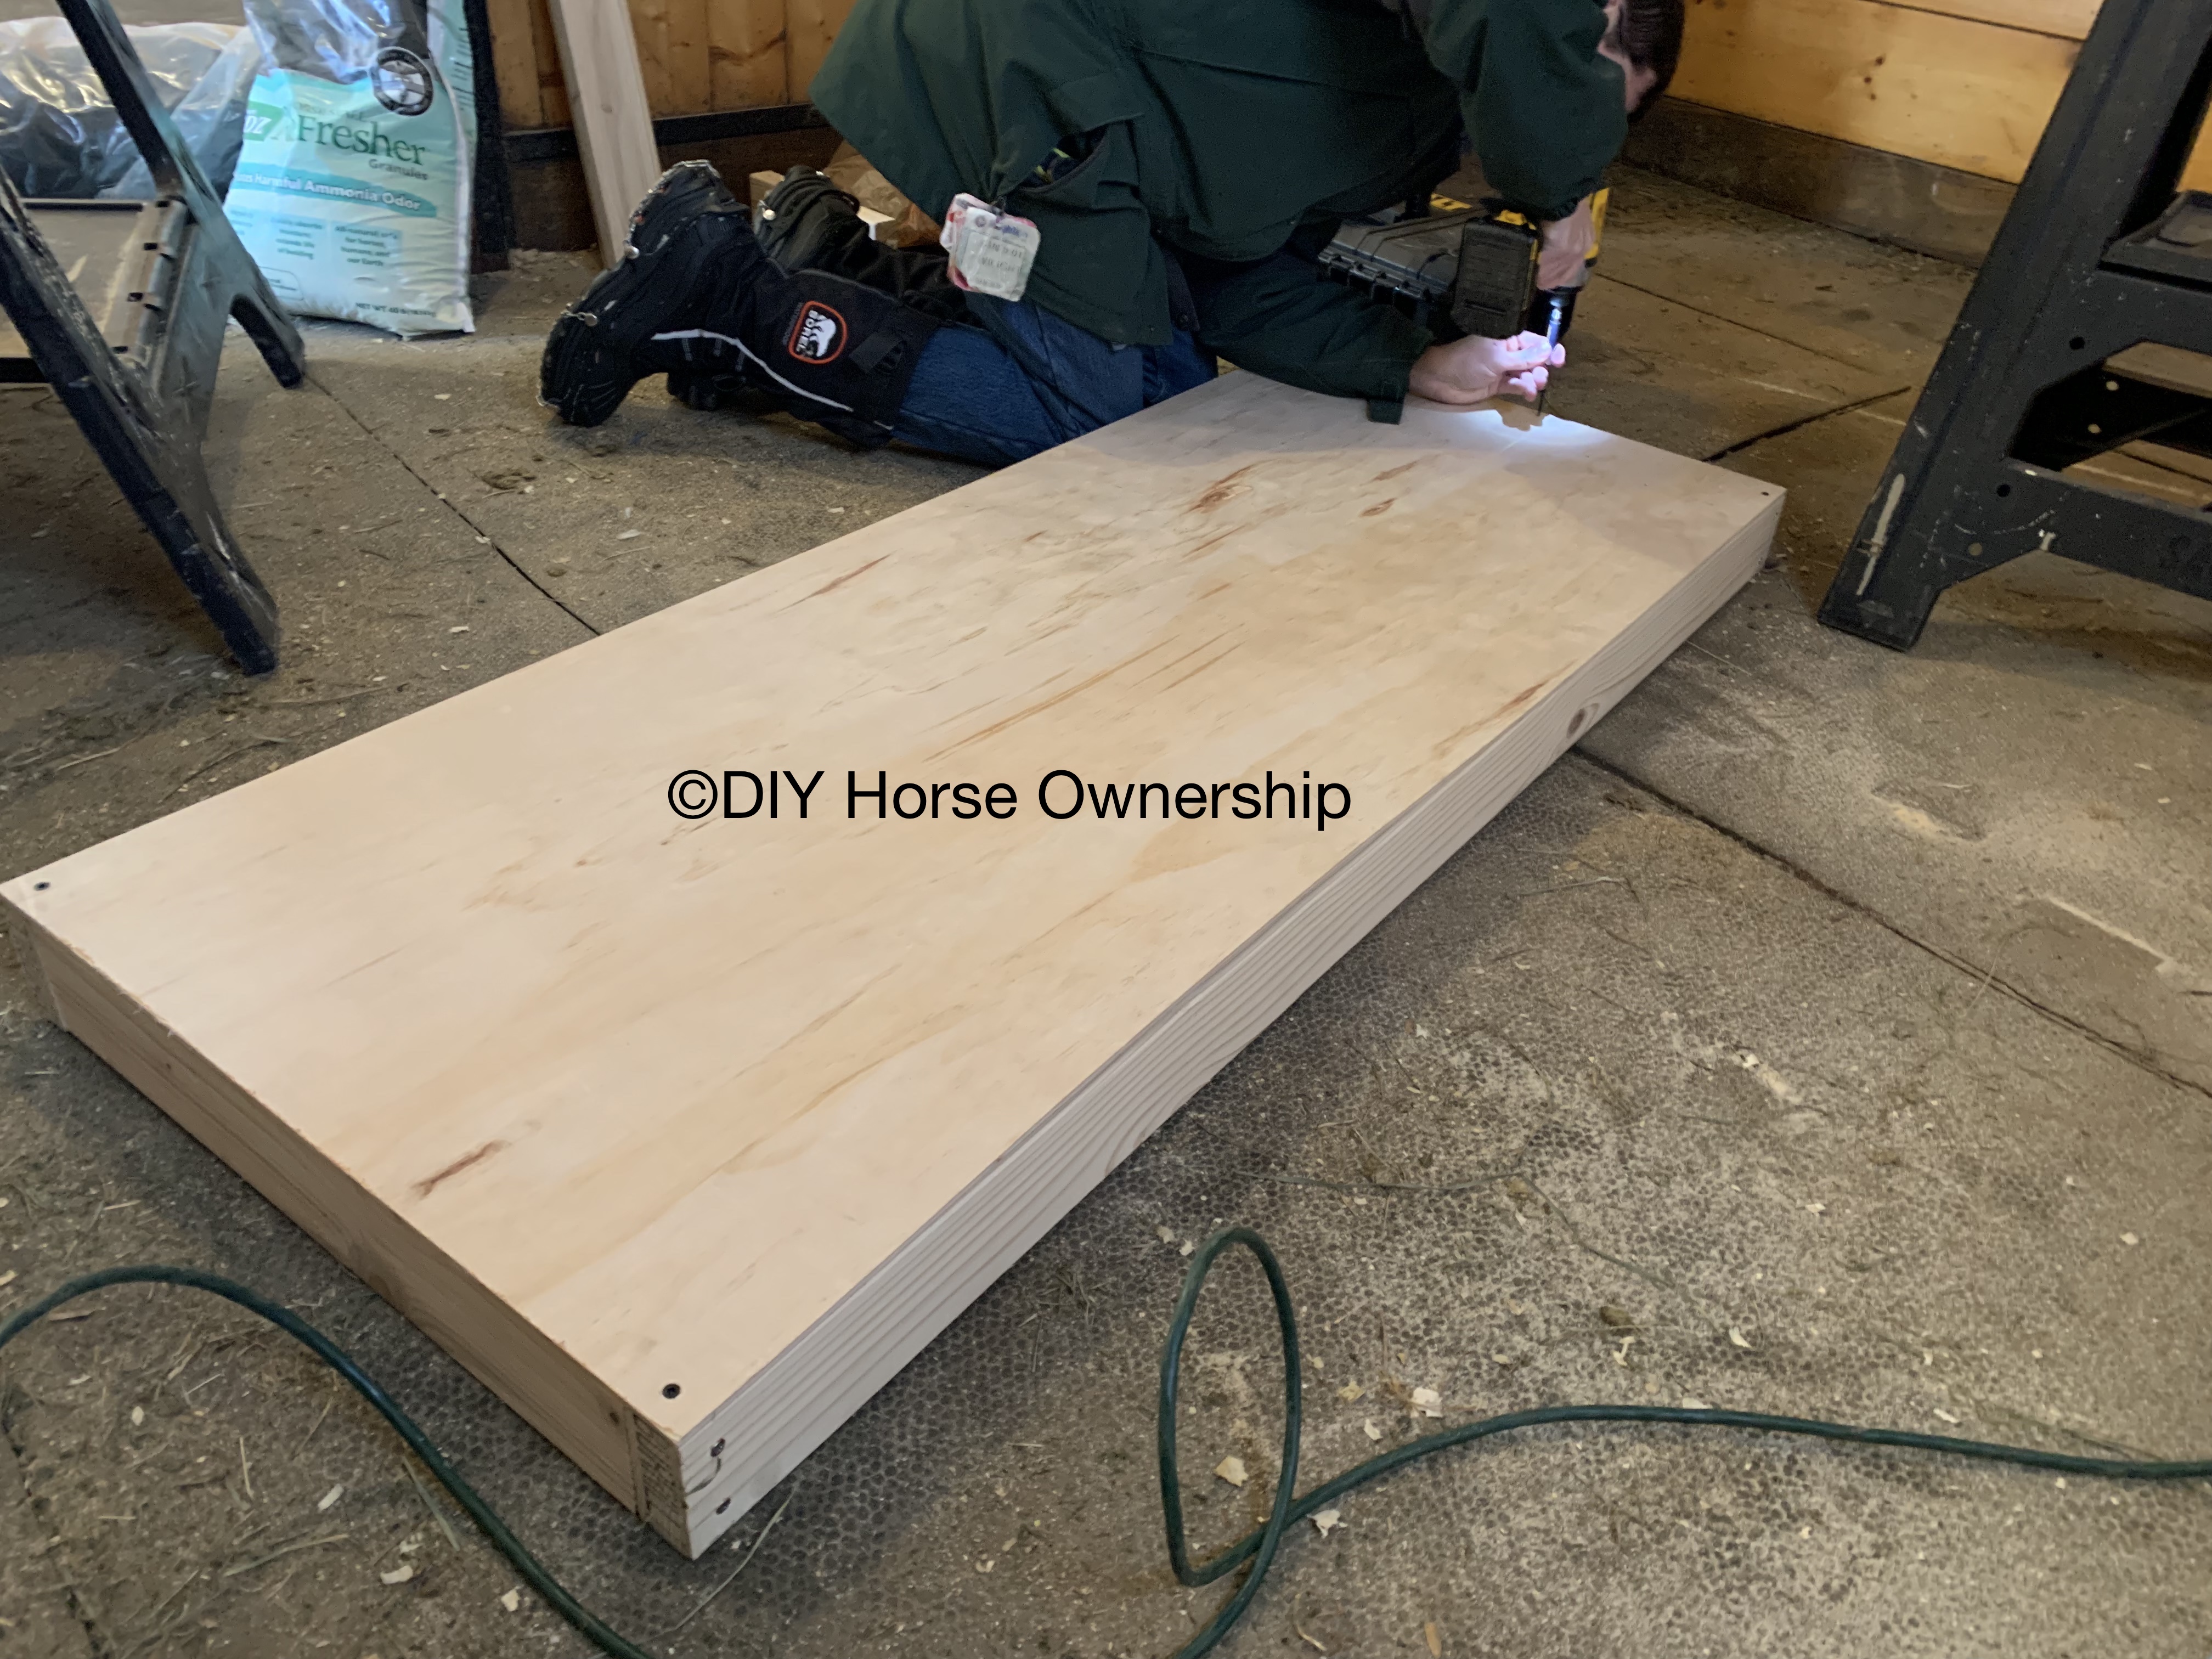
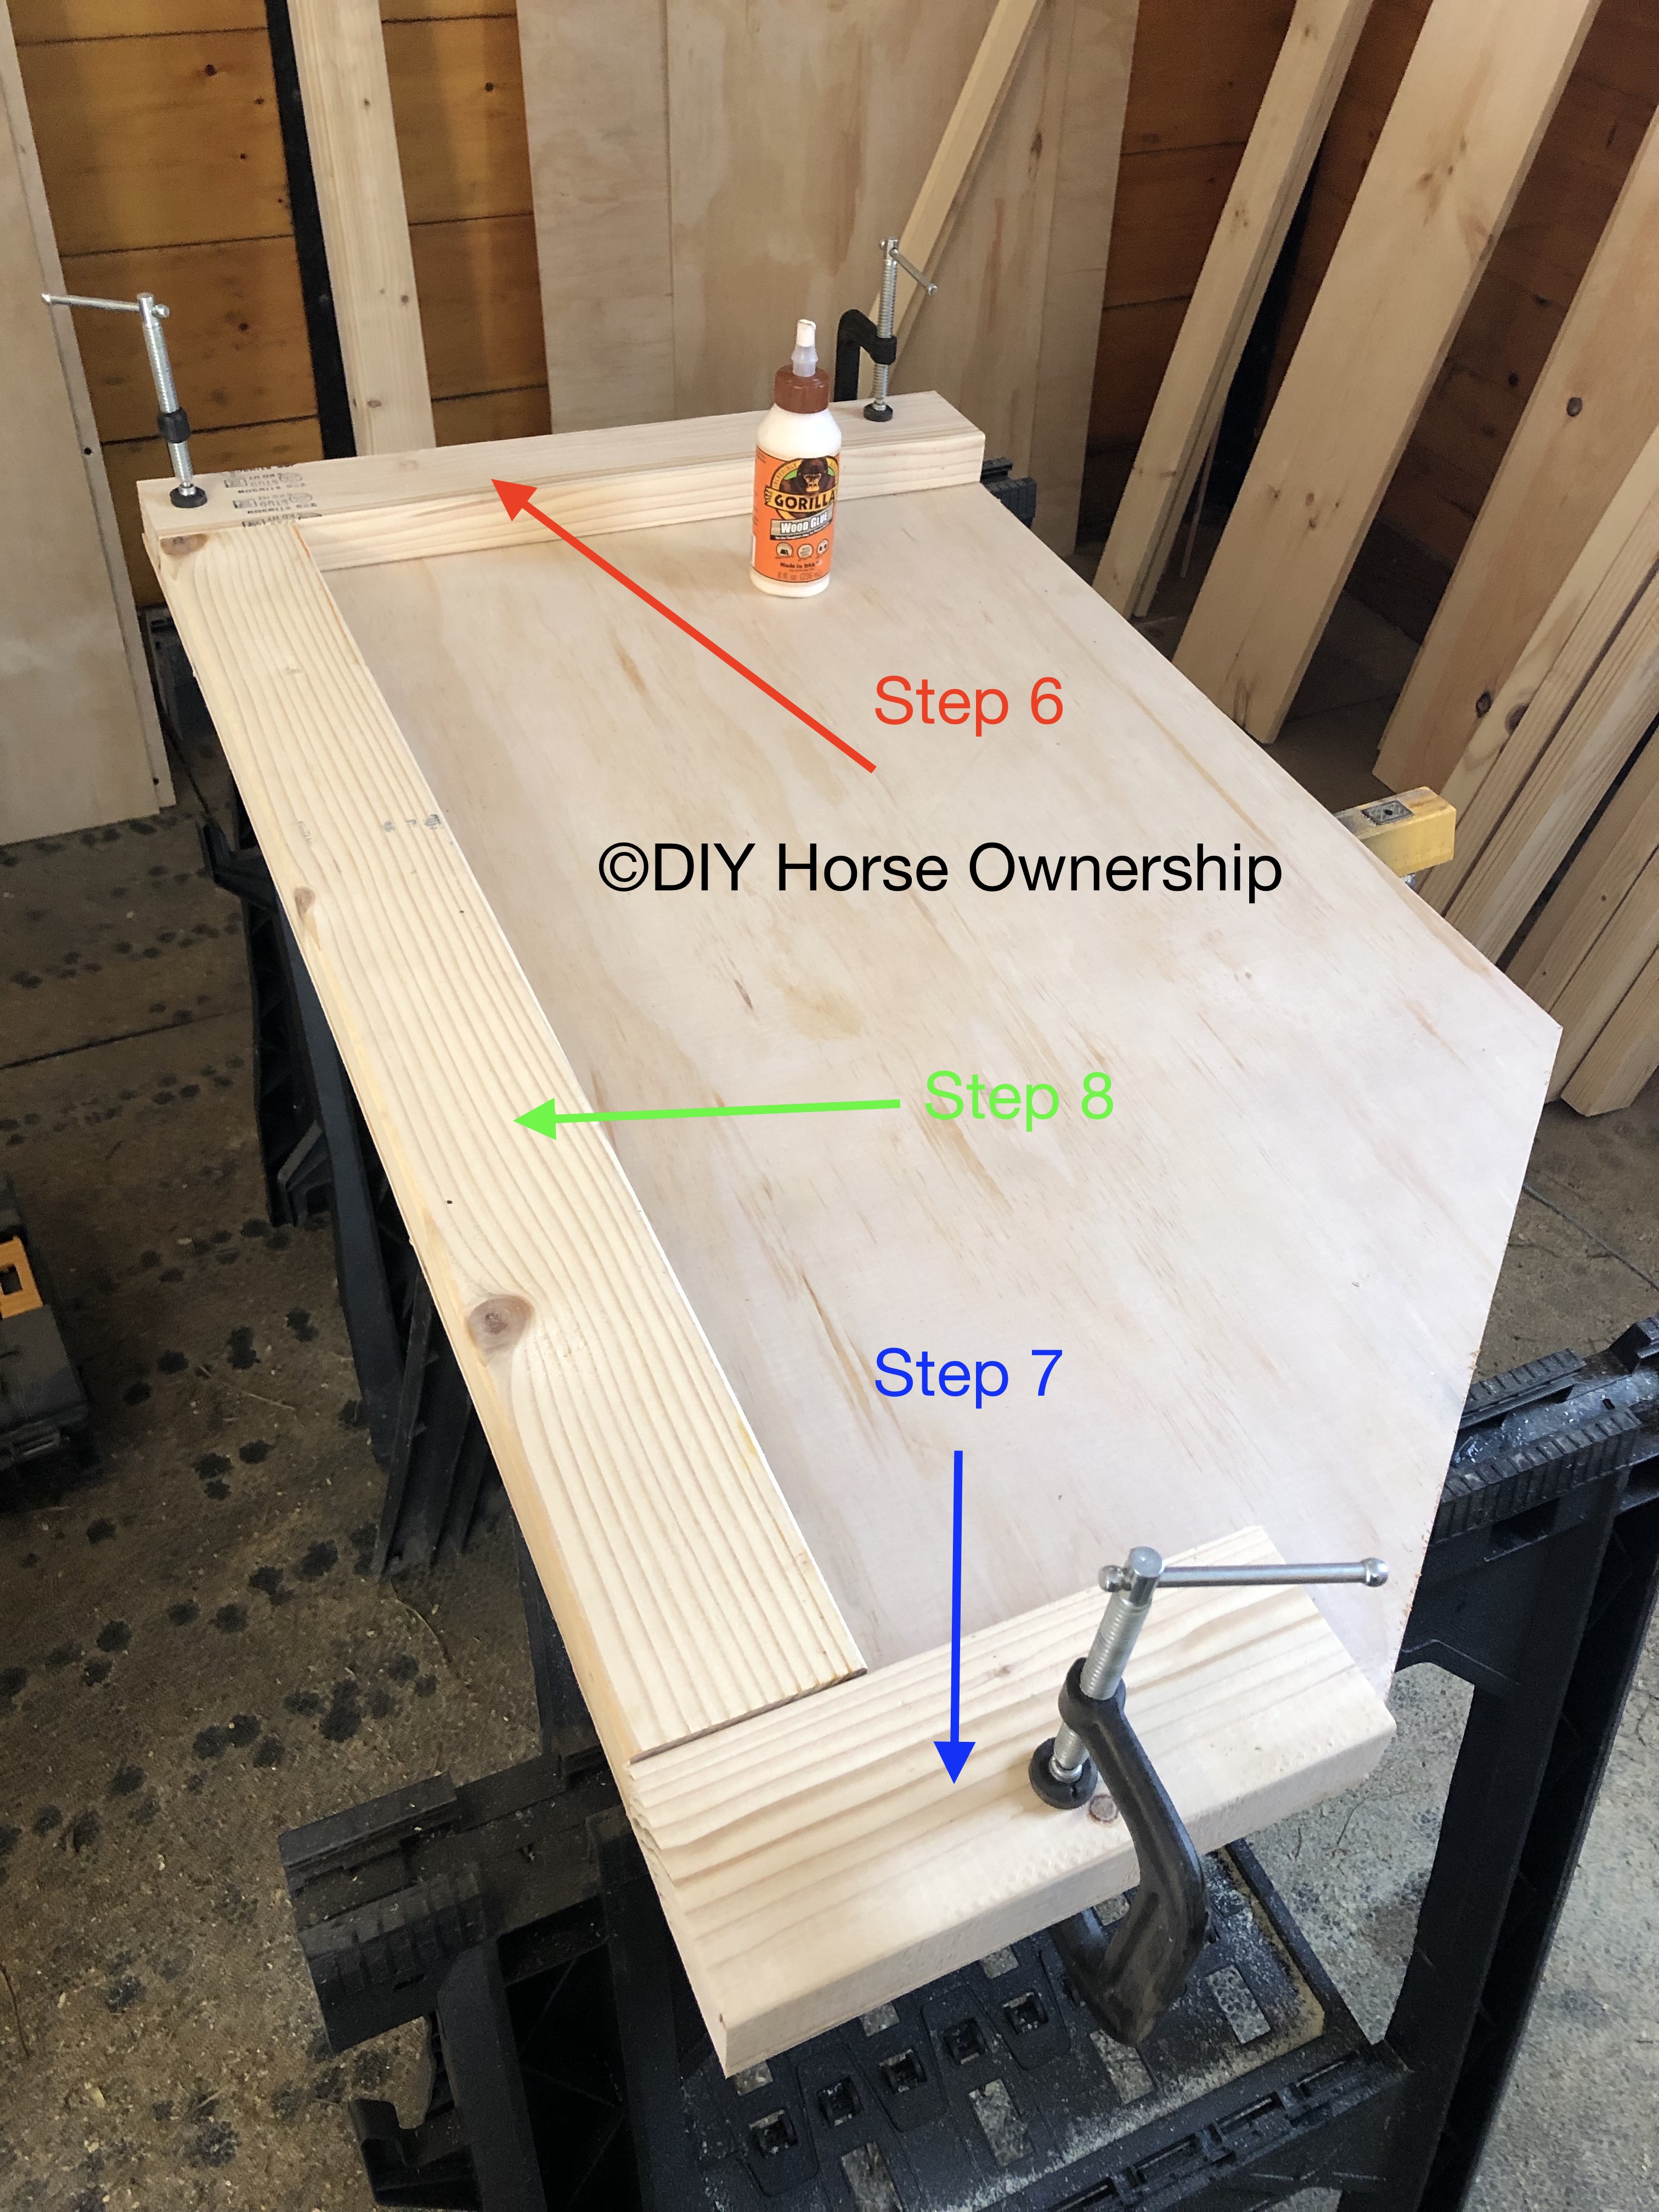
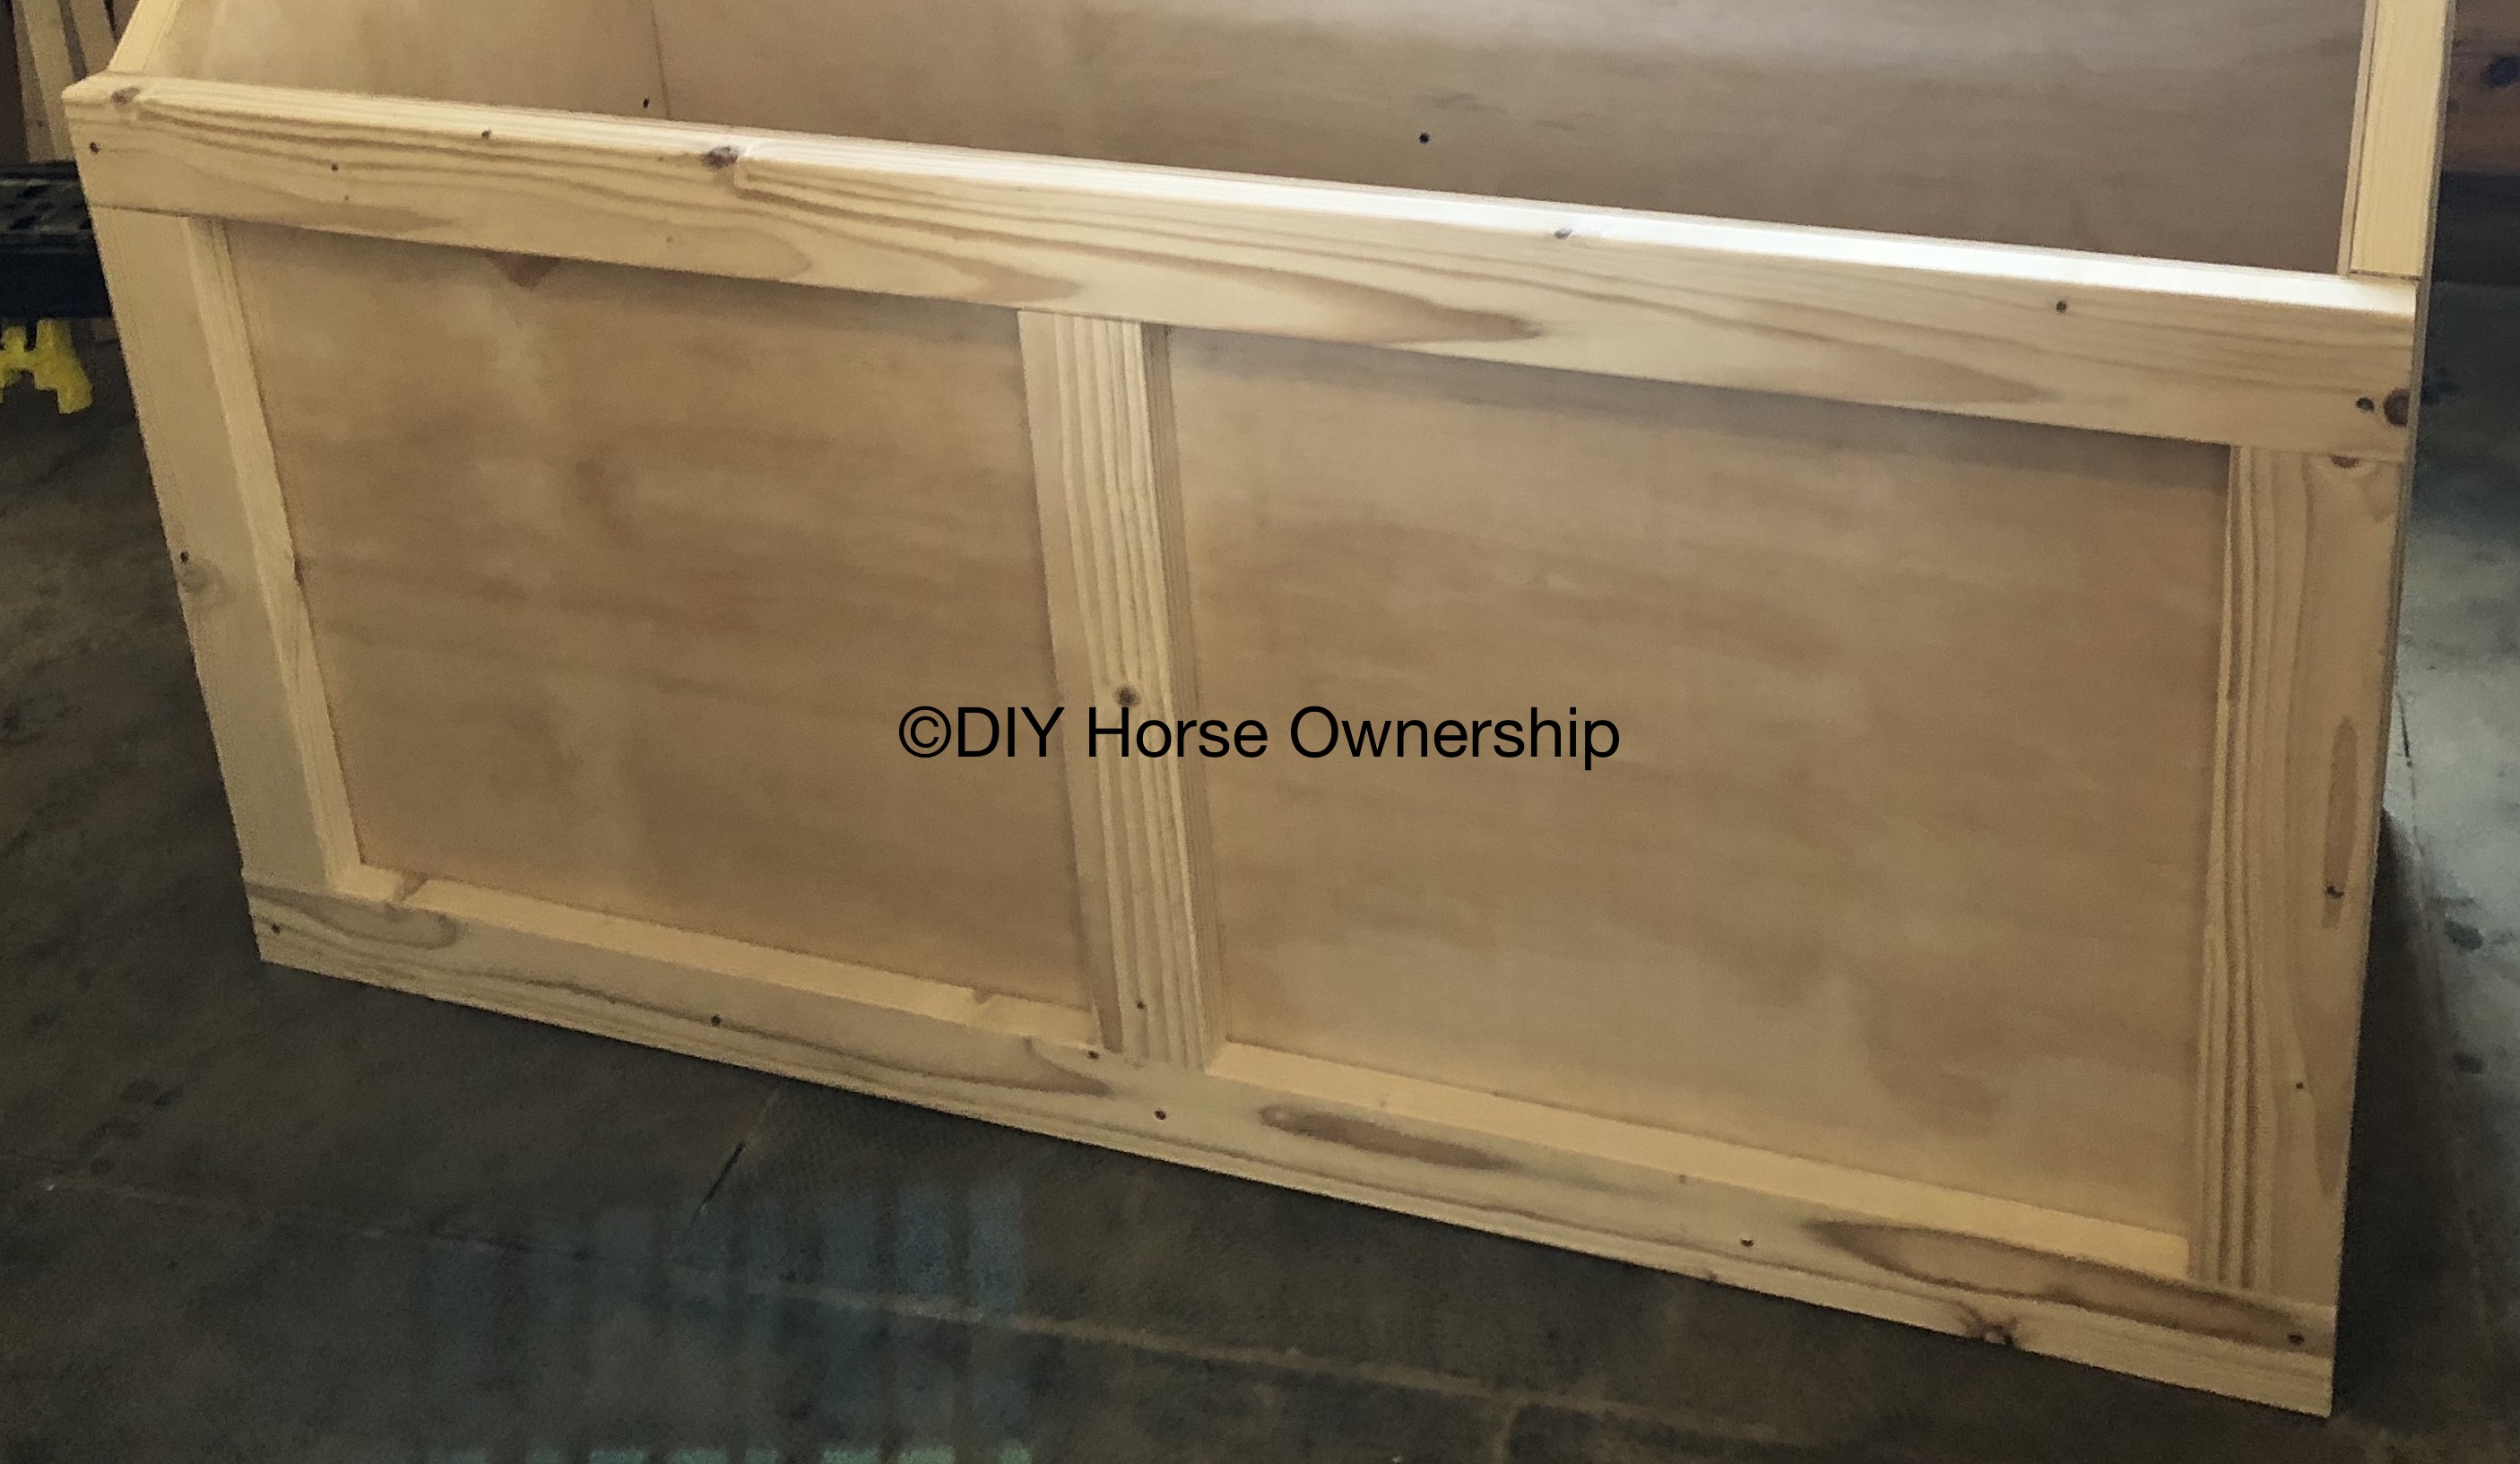
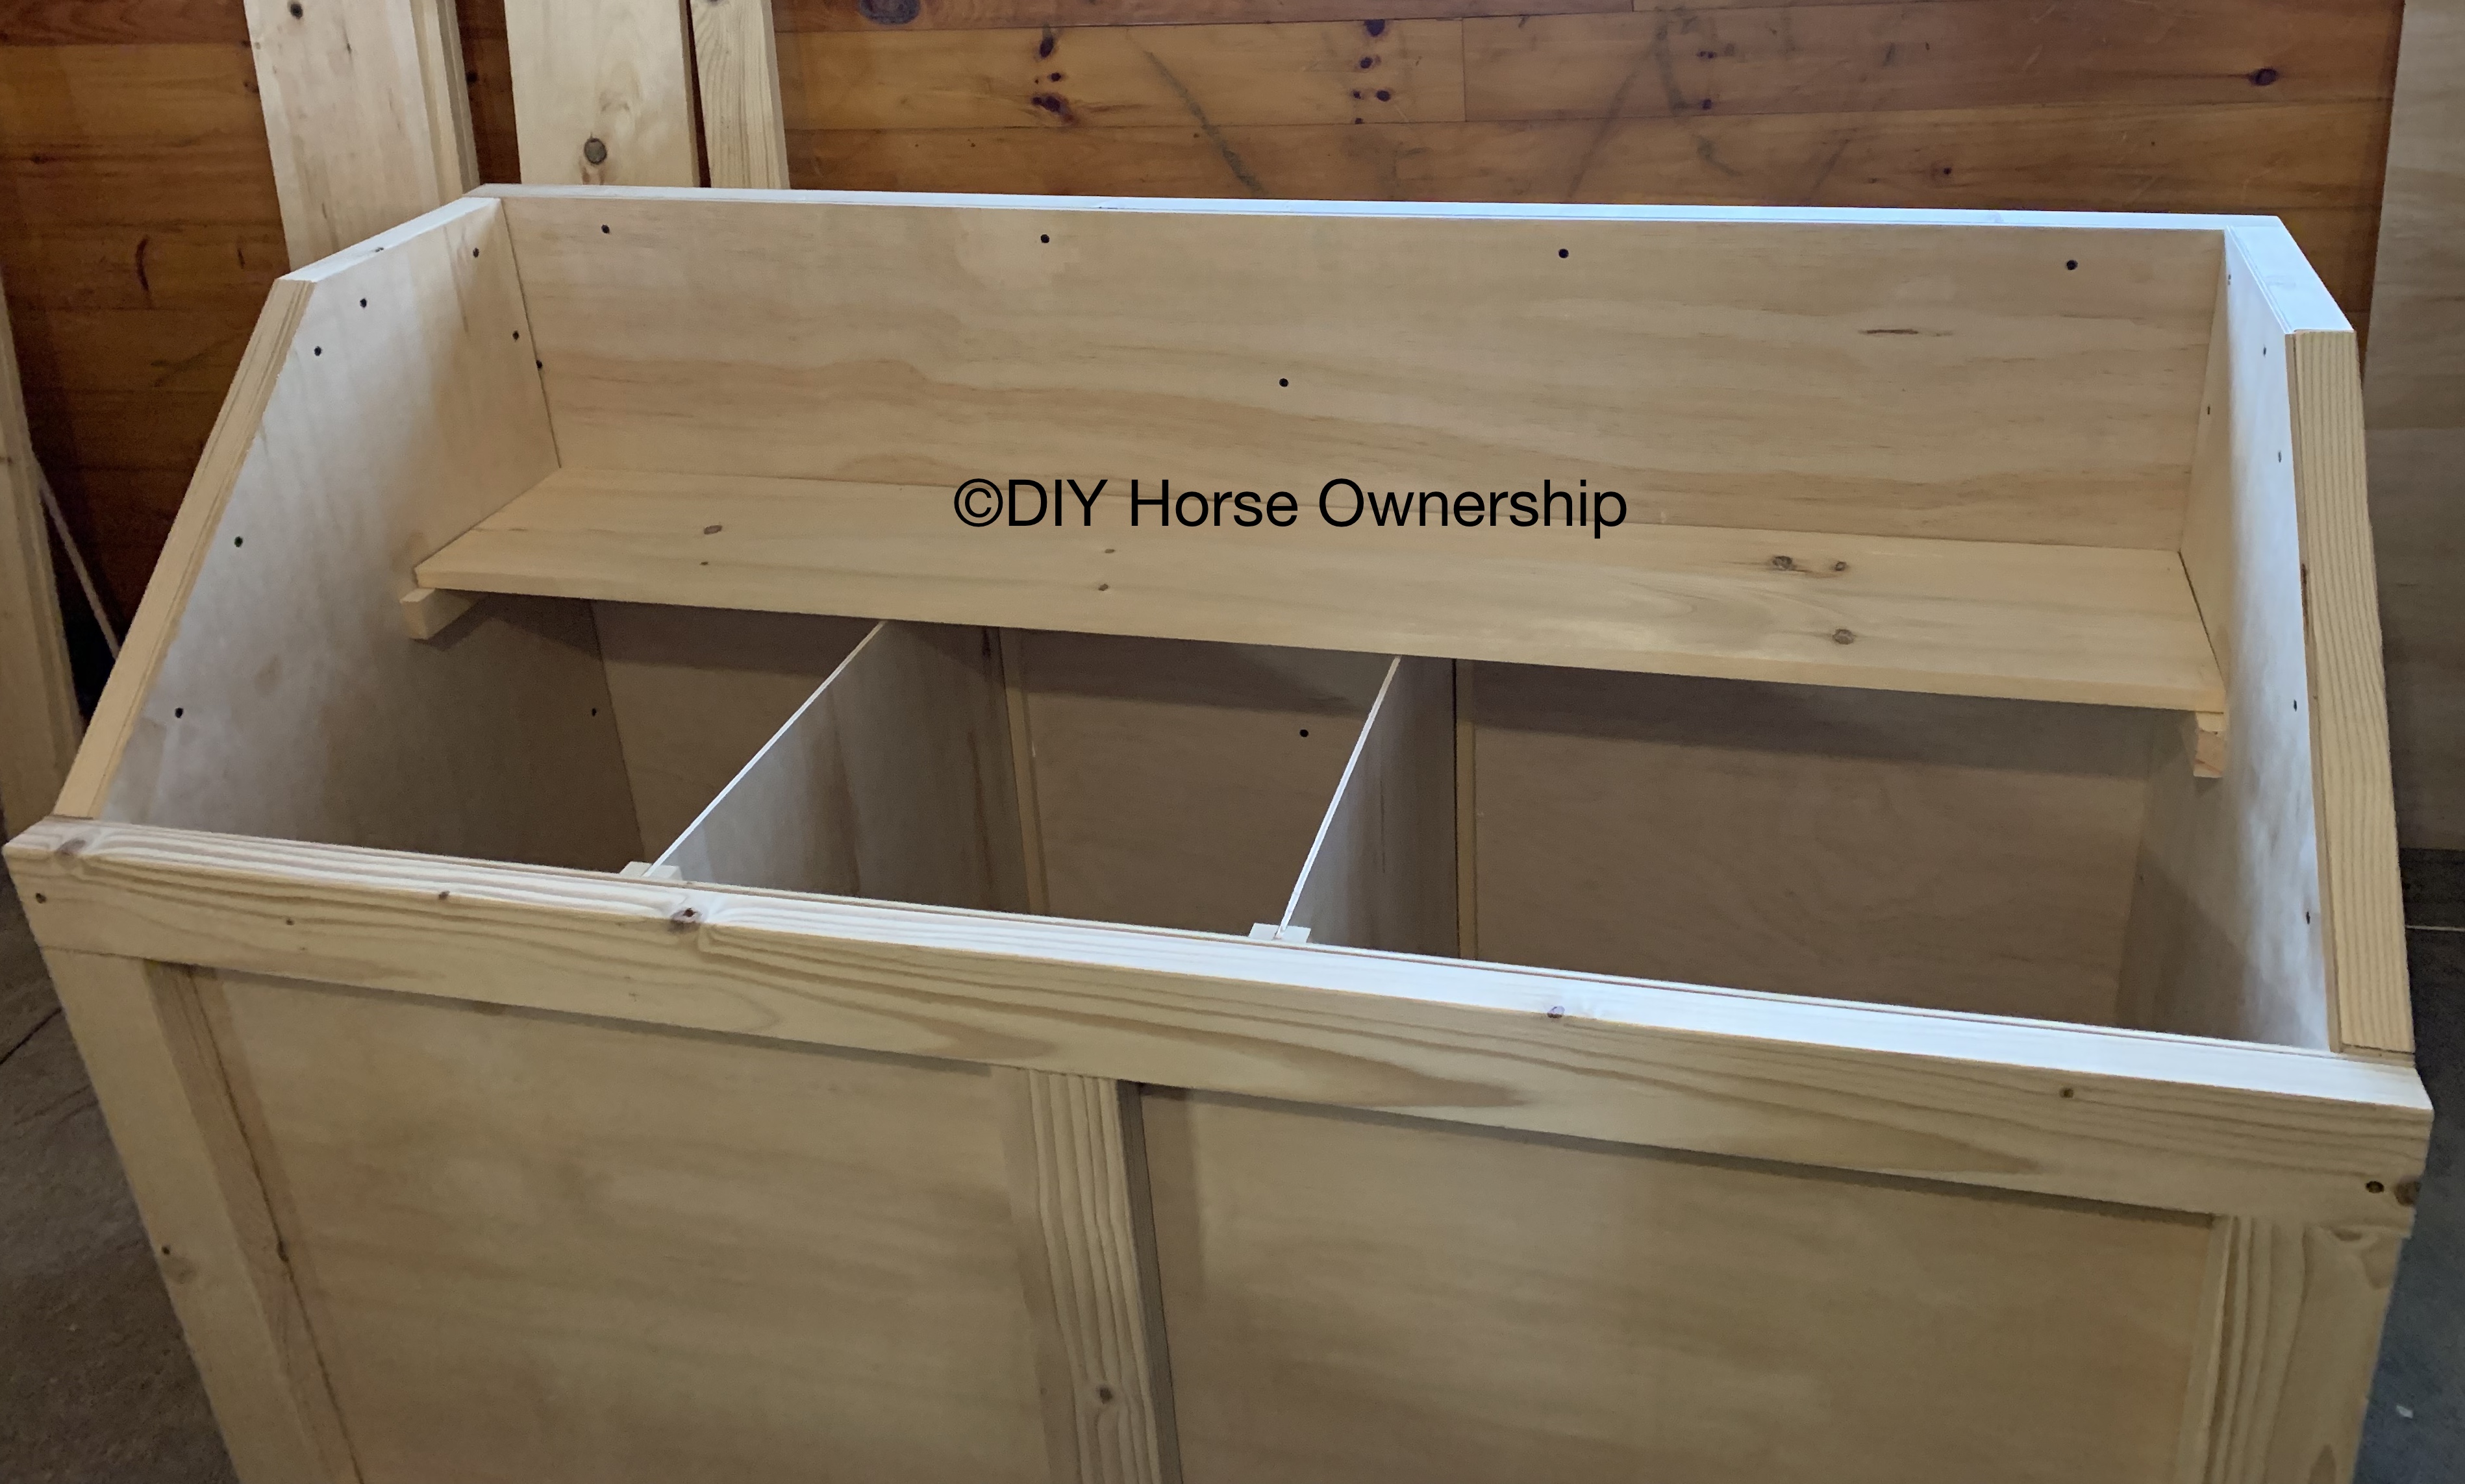
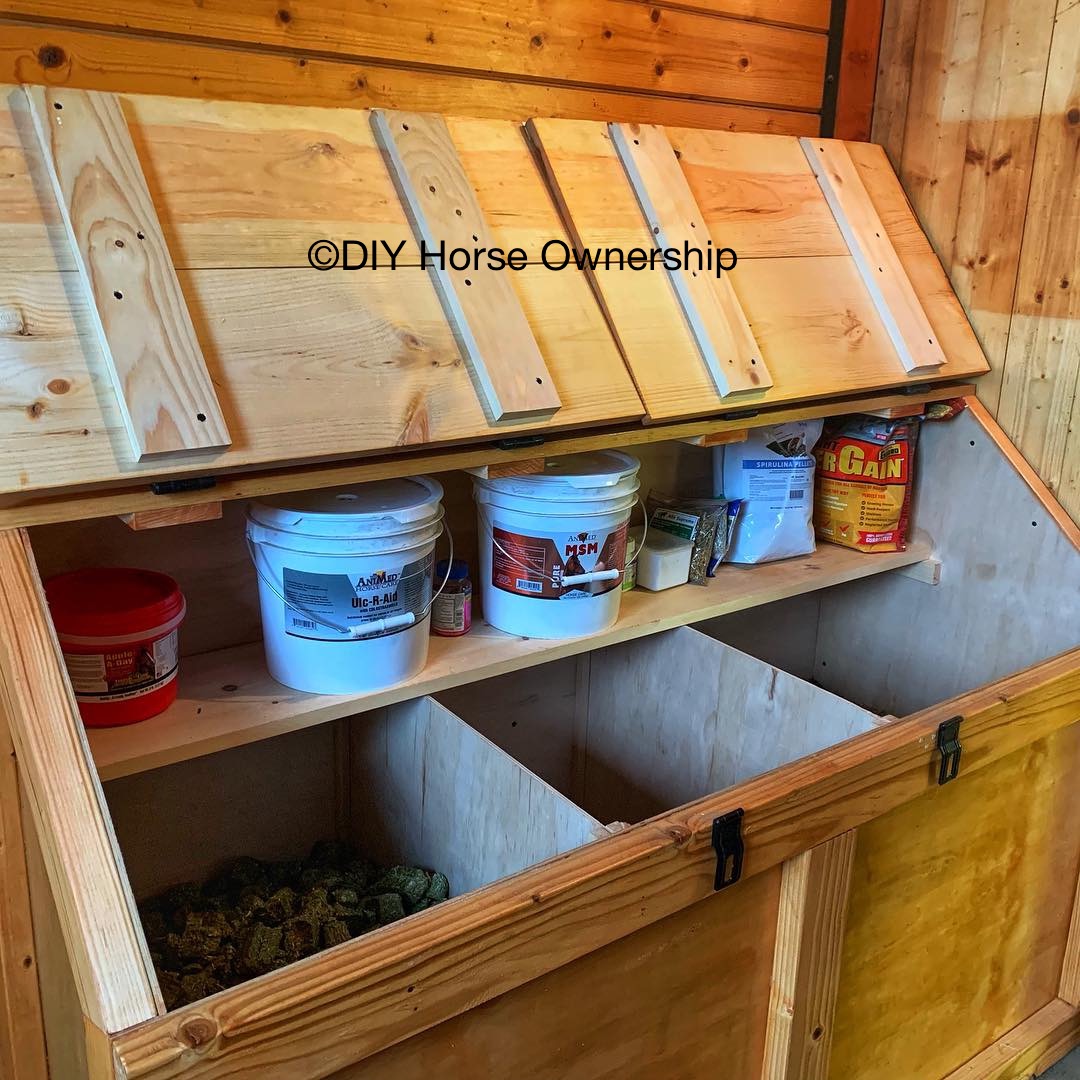
At this point you have most of your grain bin built. It should look like this:
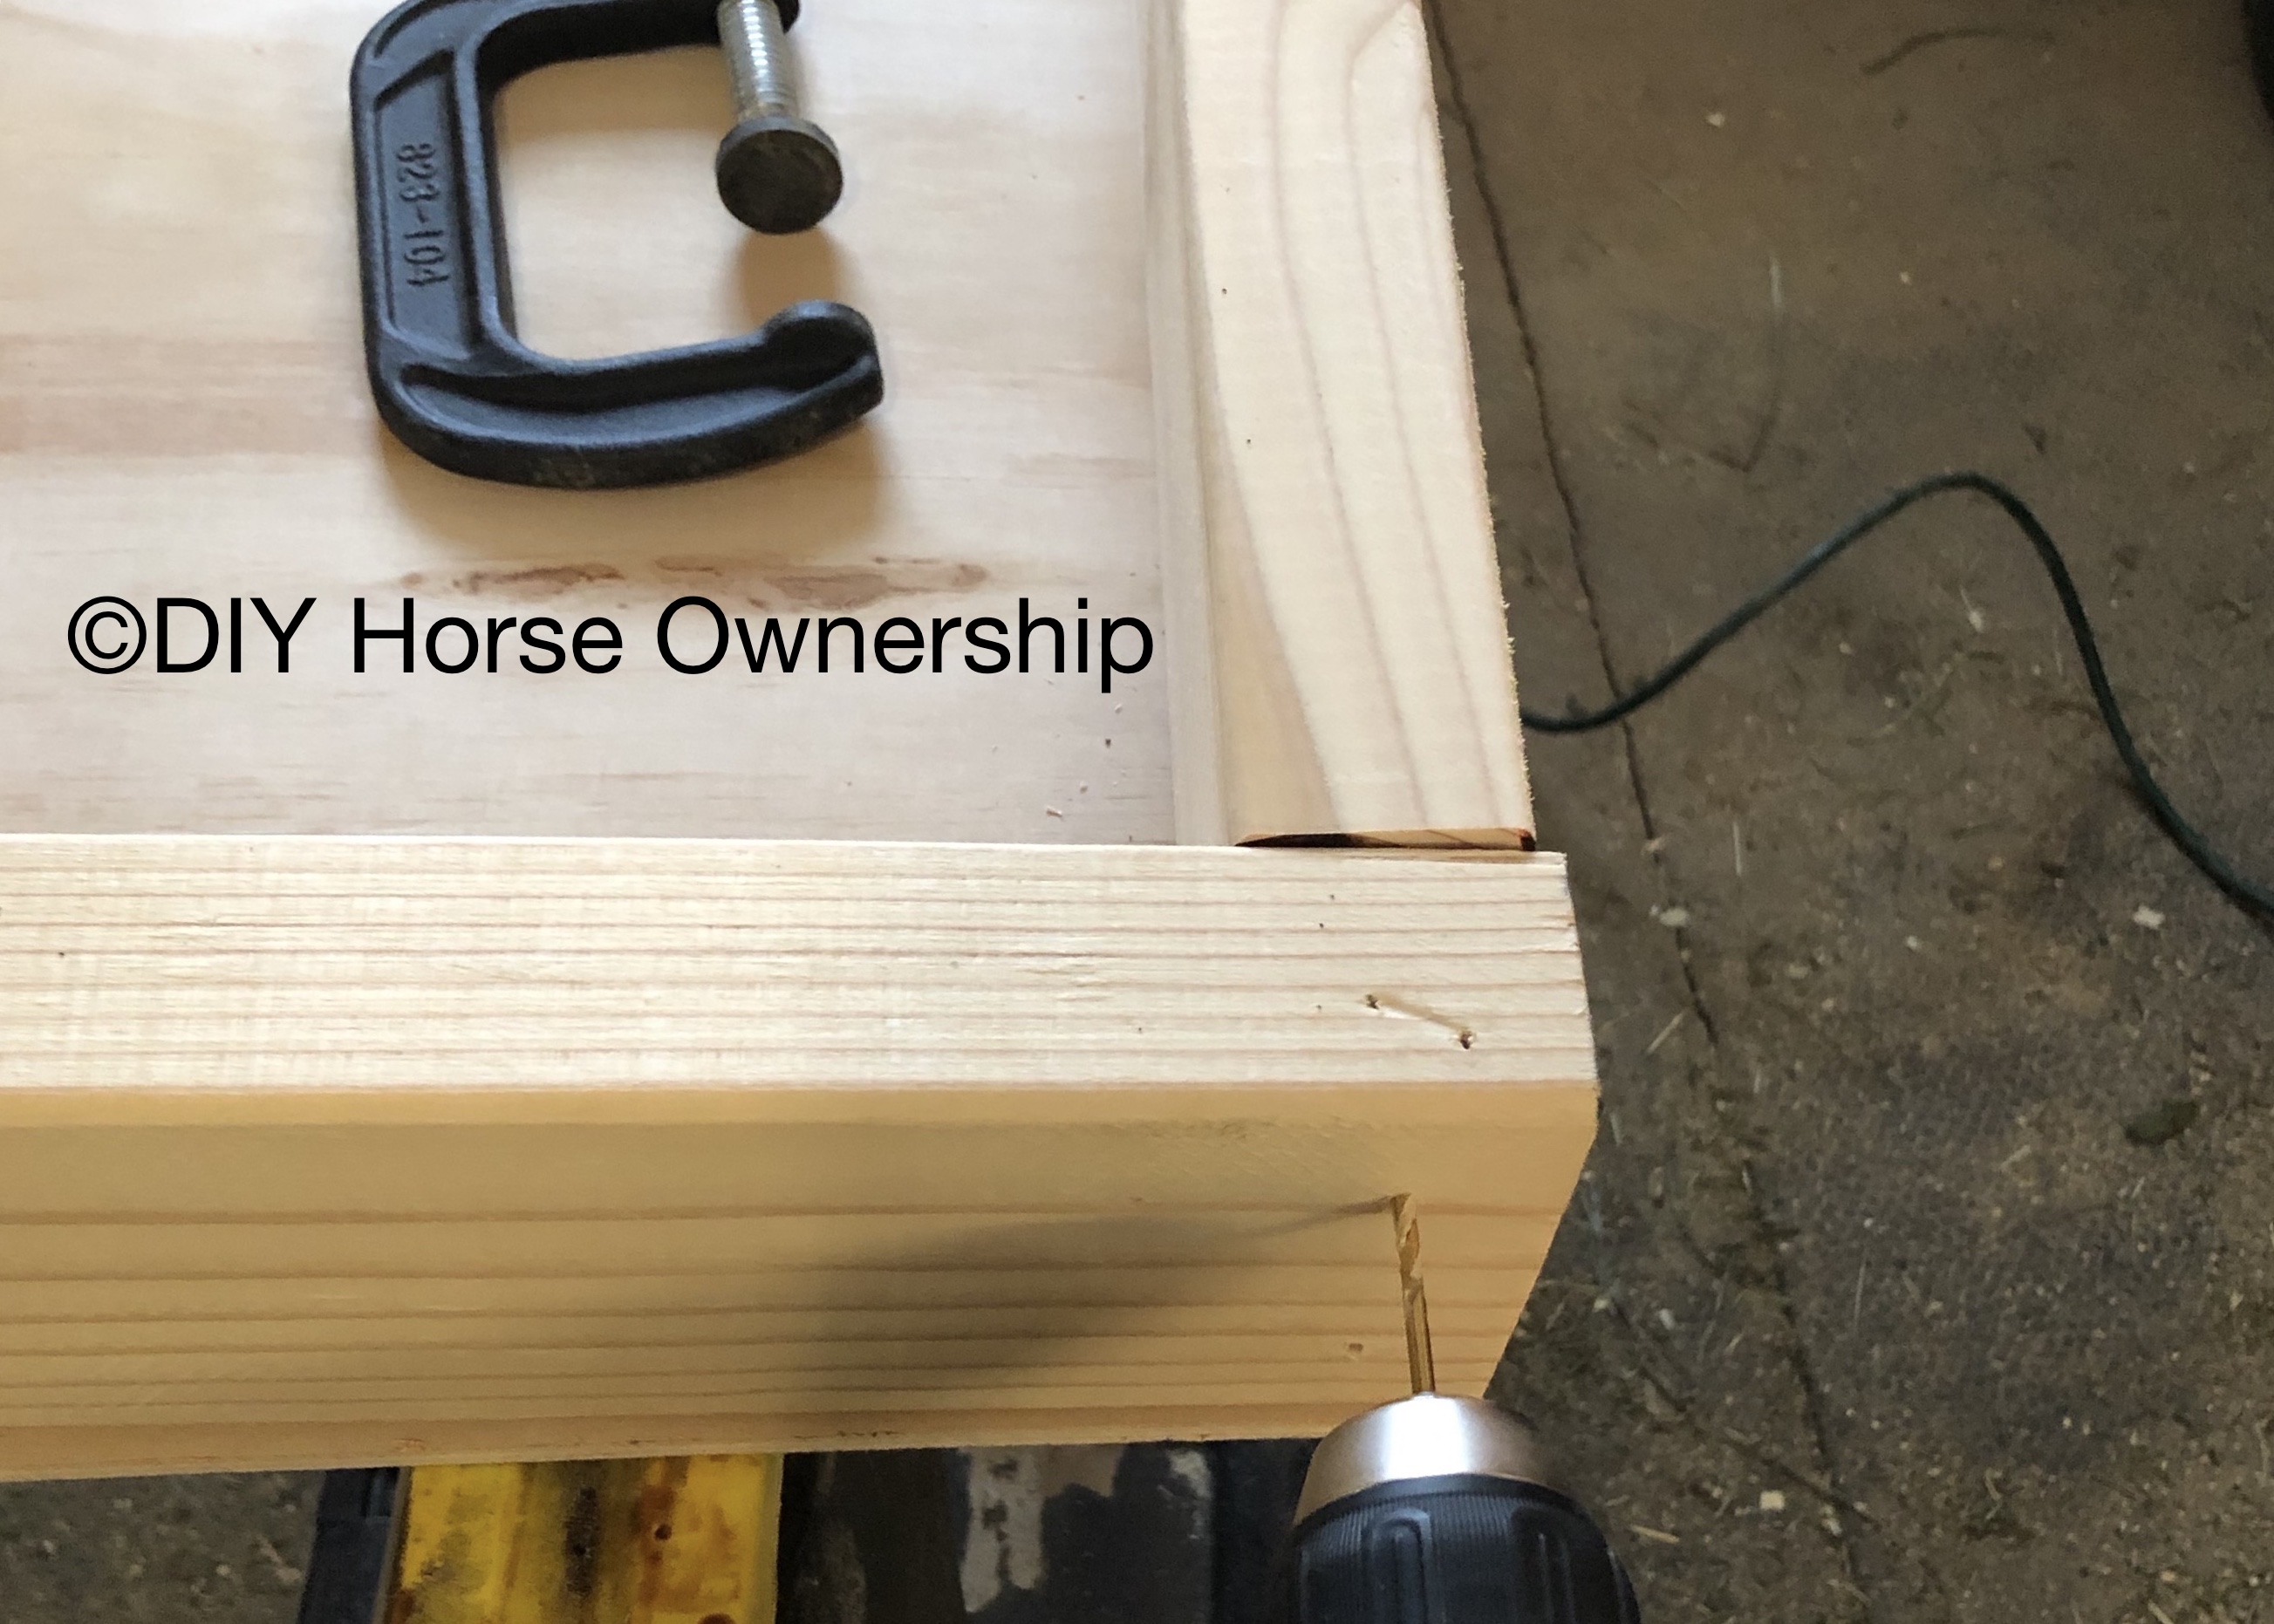
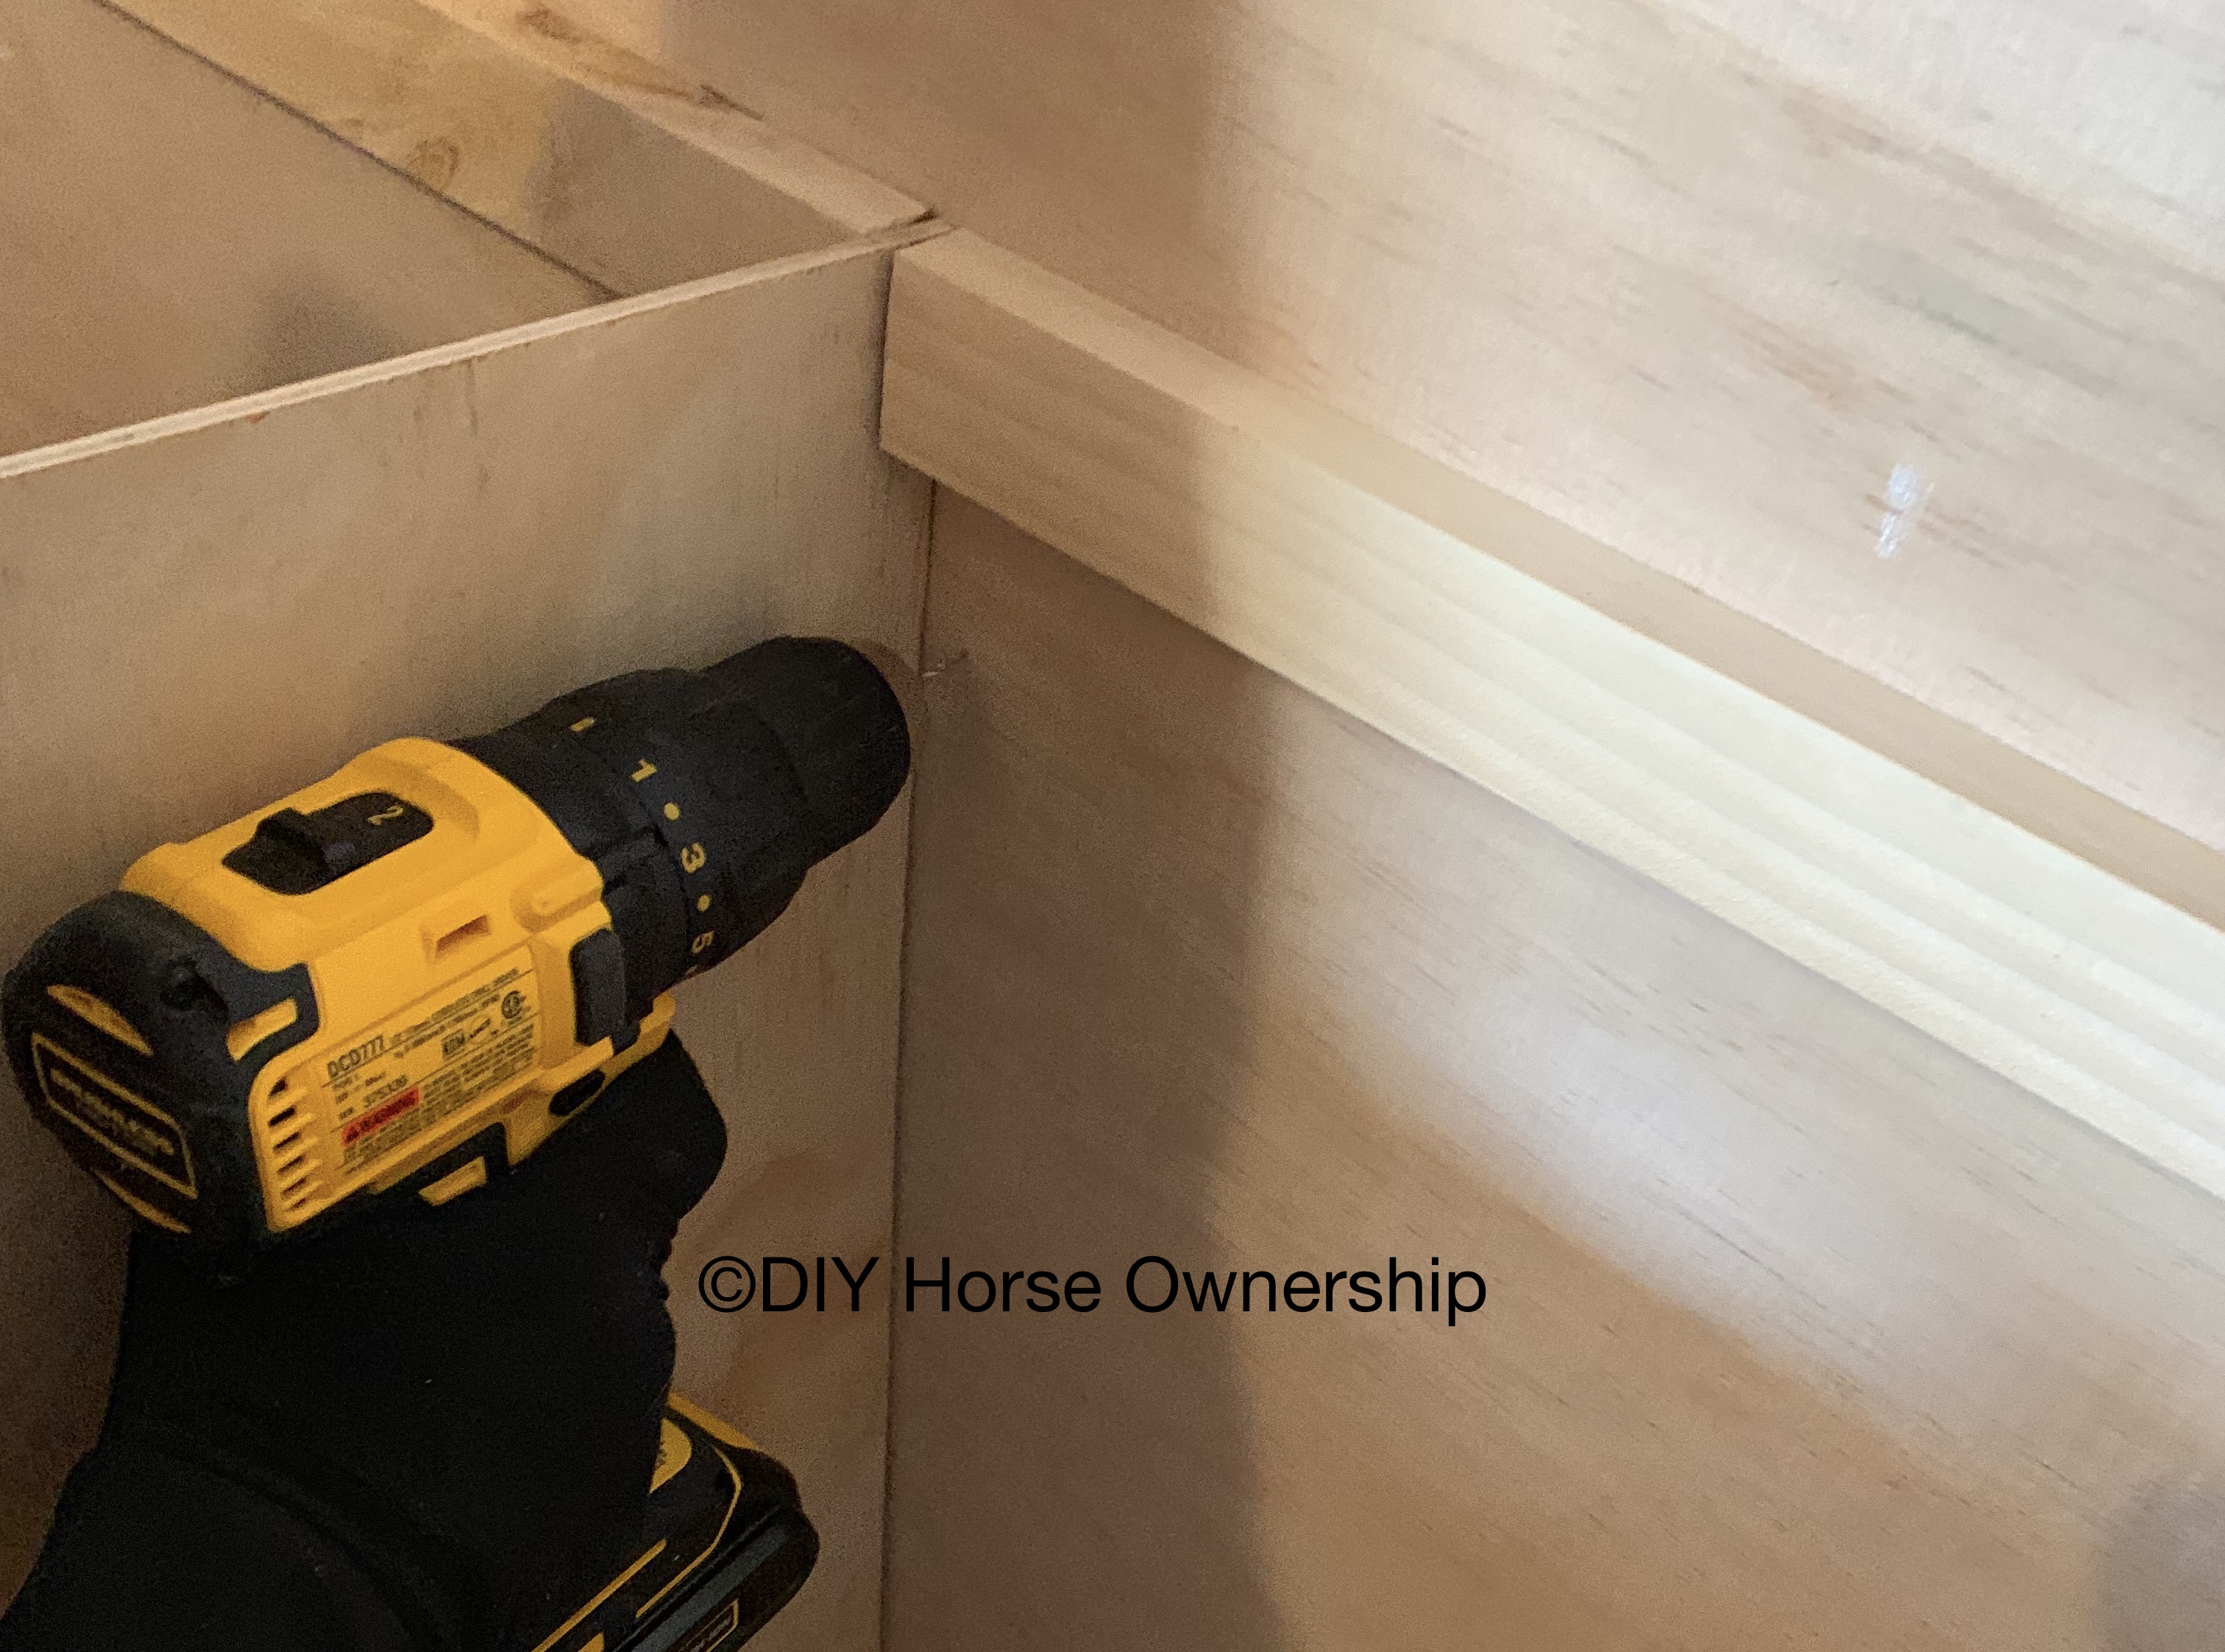
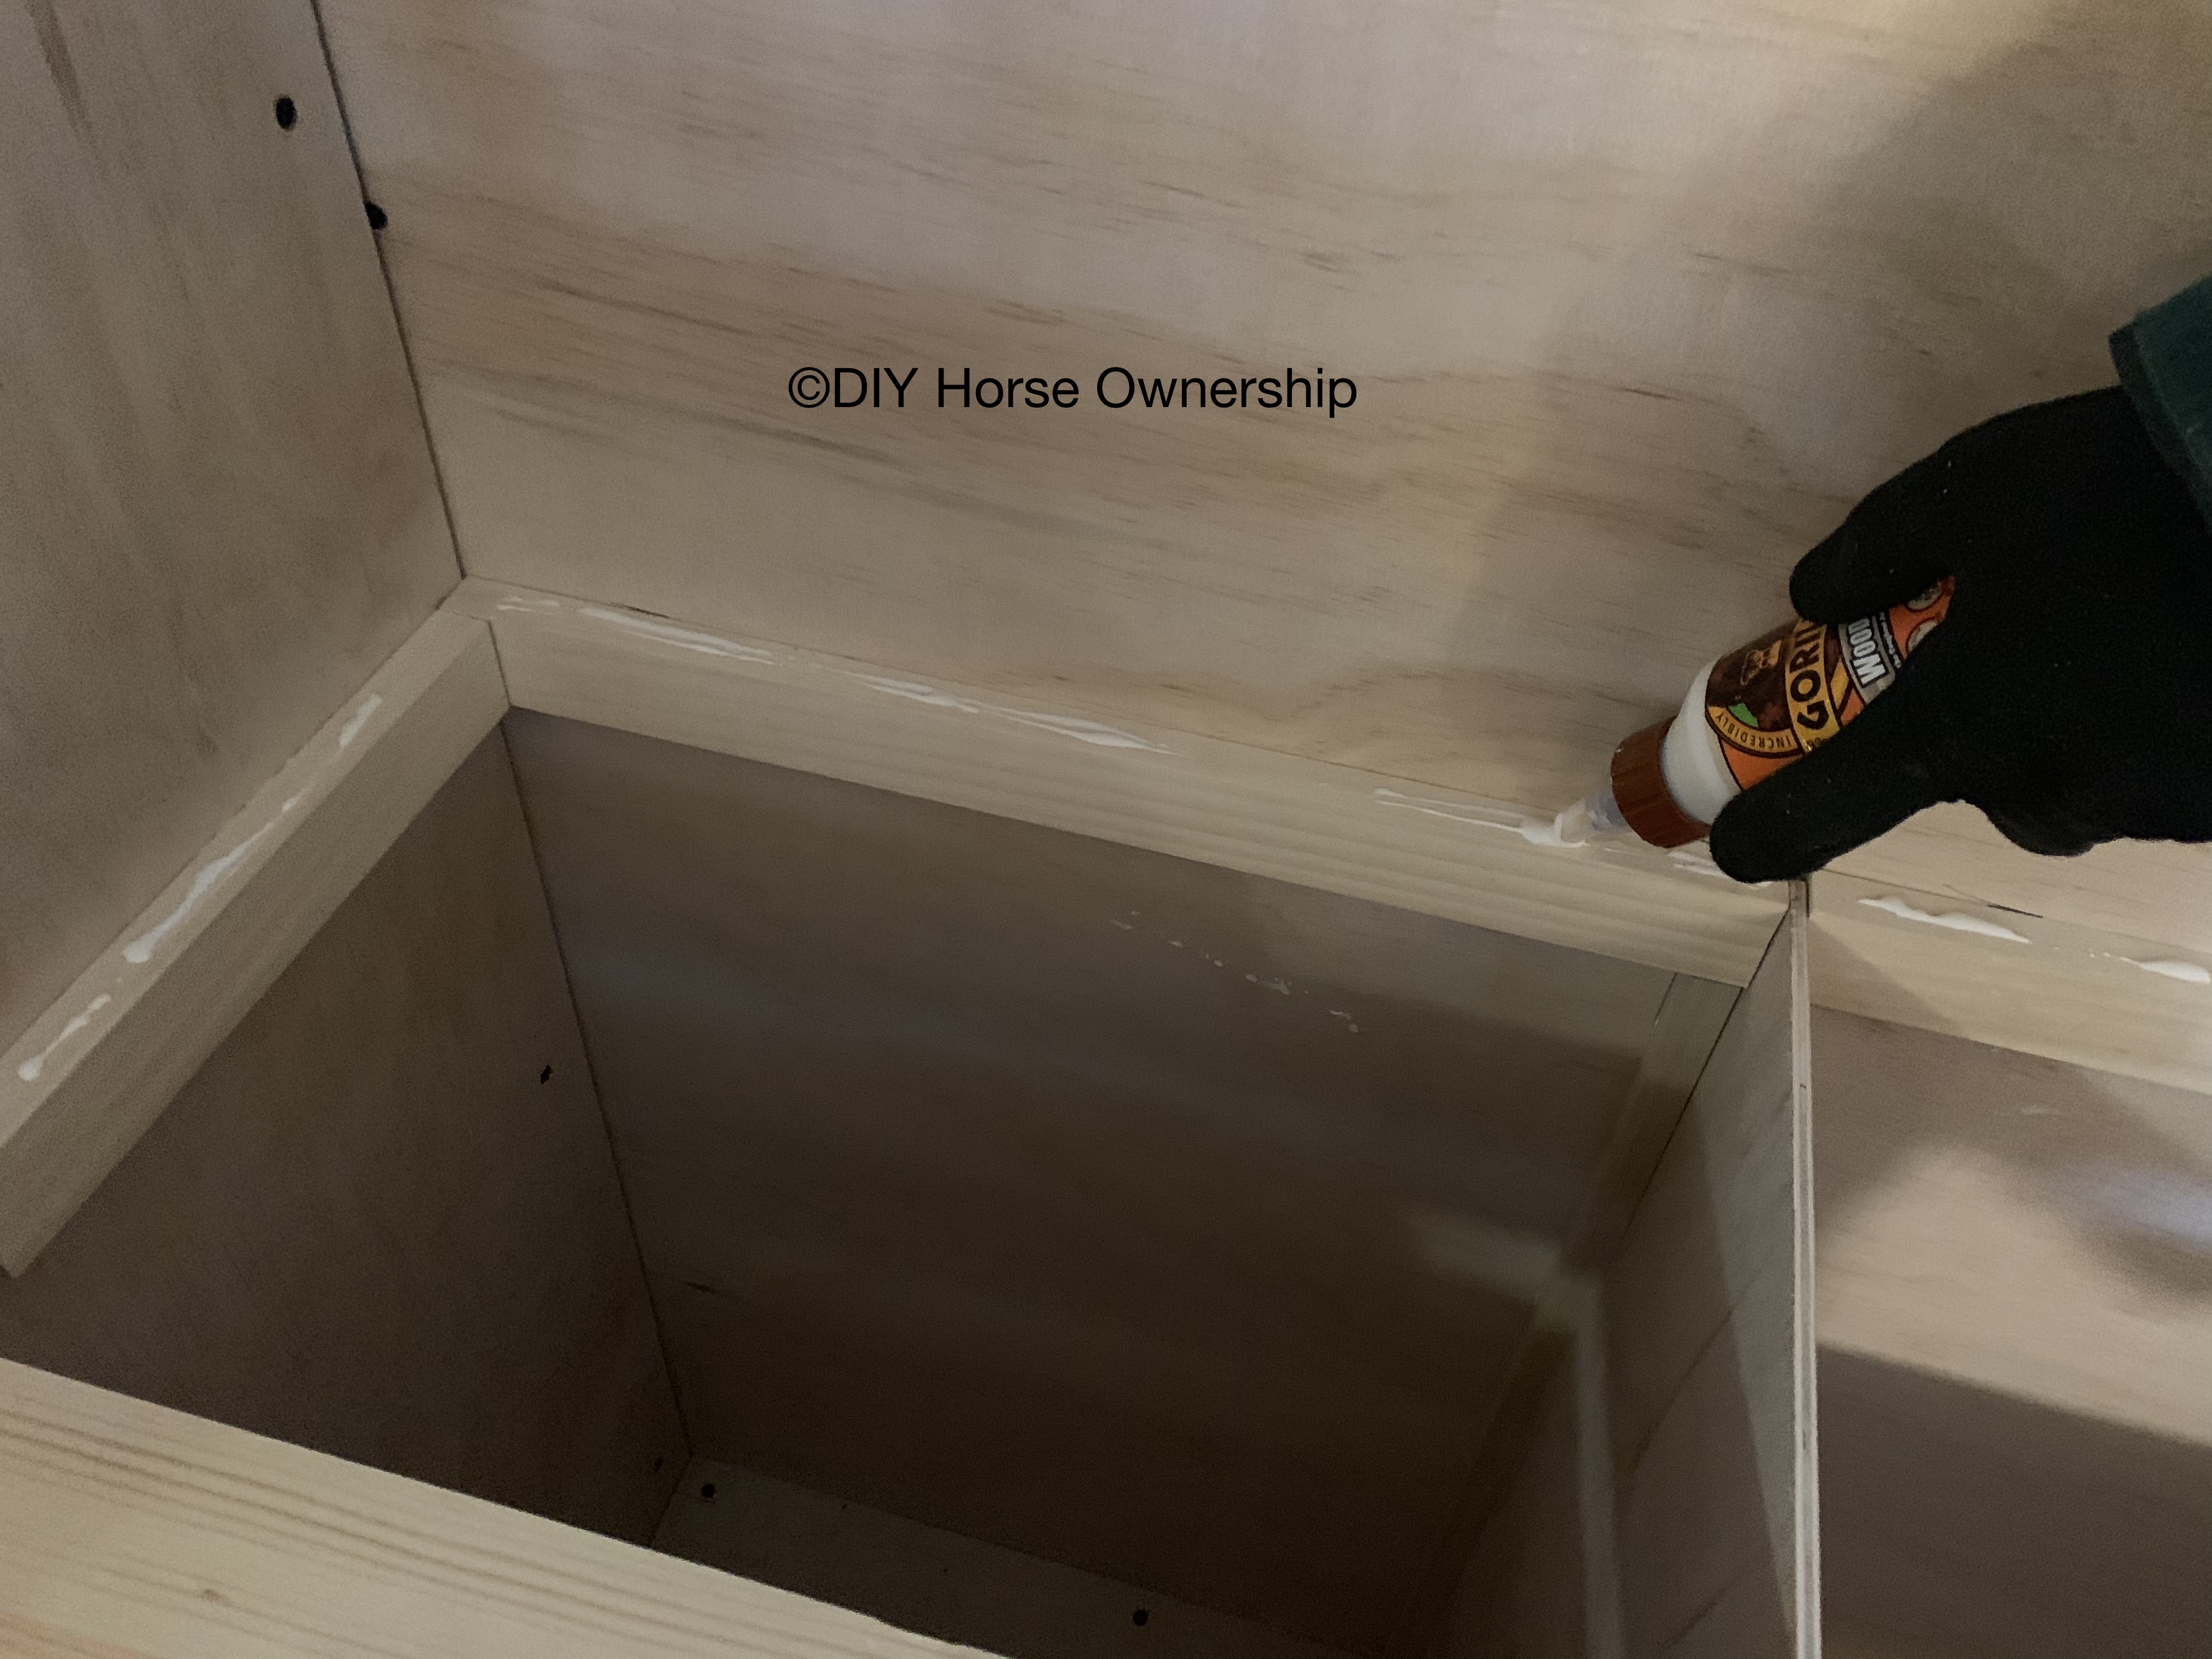
This next step is where we’re really going to deviate away from proper woodworking techniques. There are certainly better ways to do this, but we’re not going for proper joinery; we’re going for what’s possible to do with the tools we have.
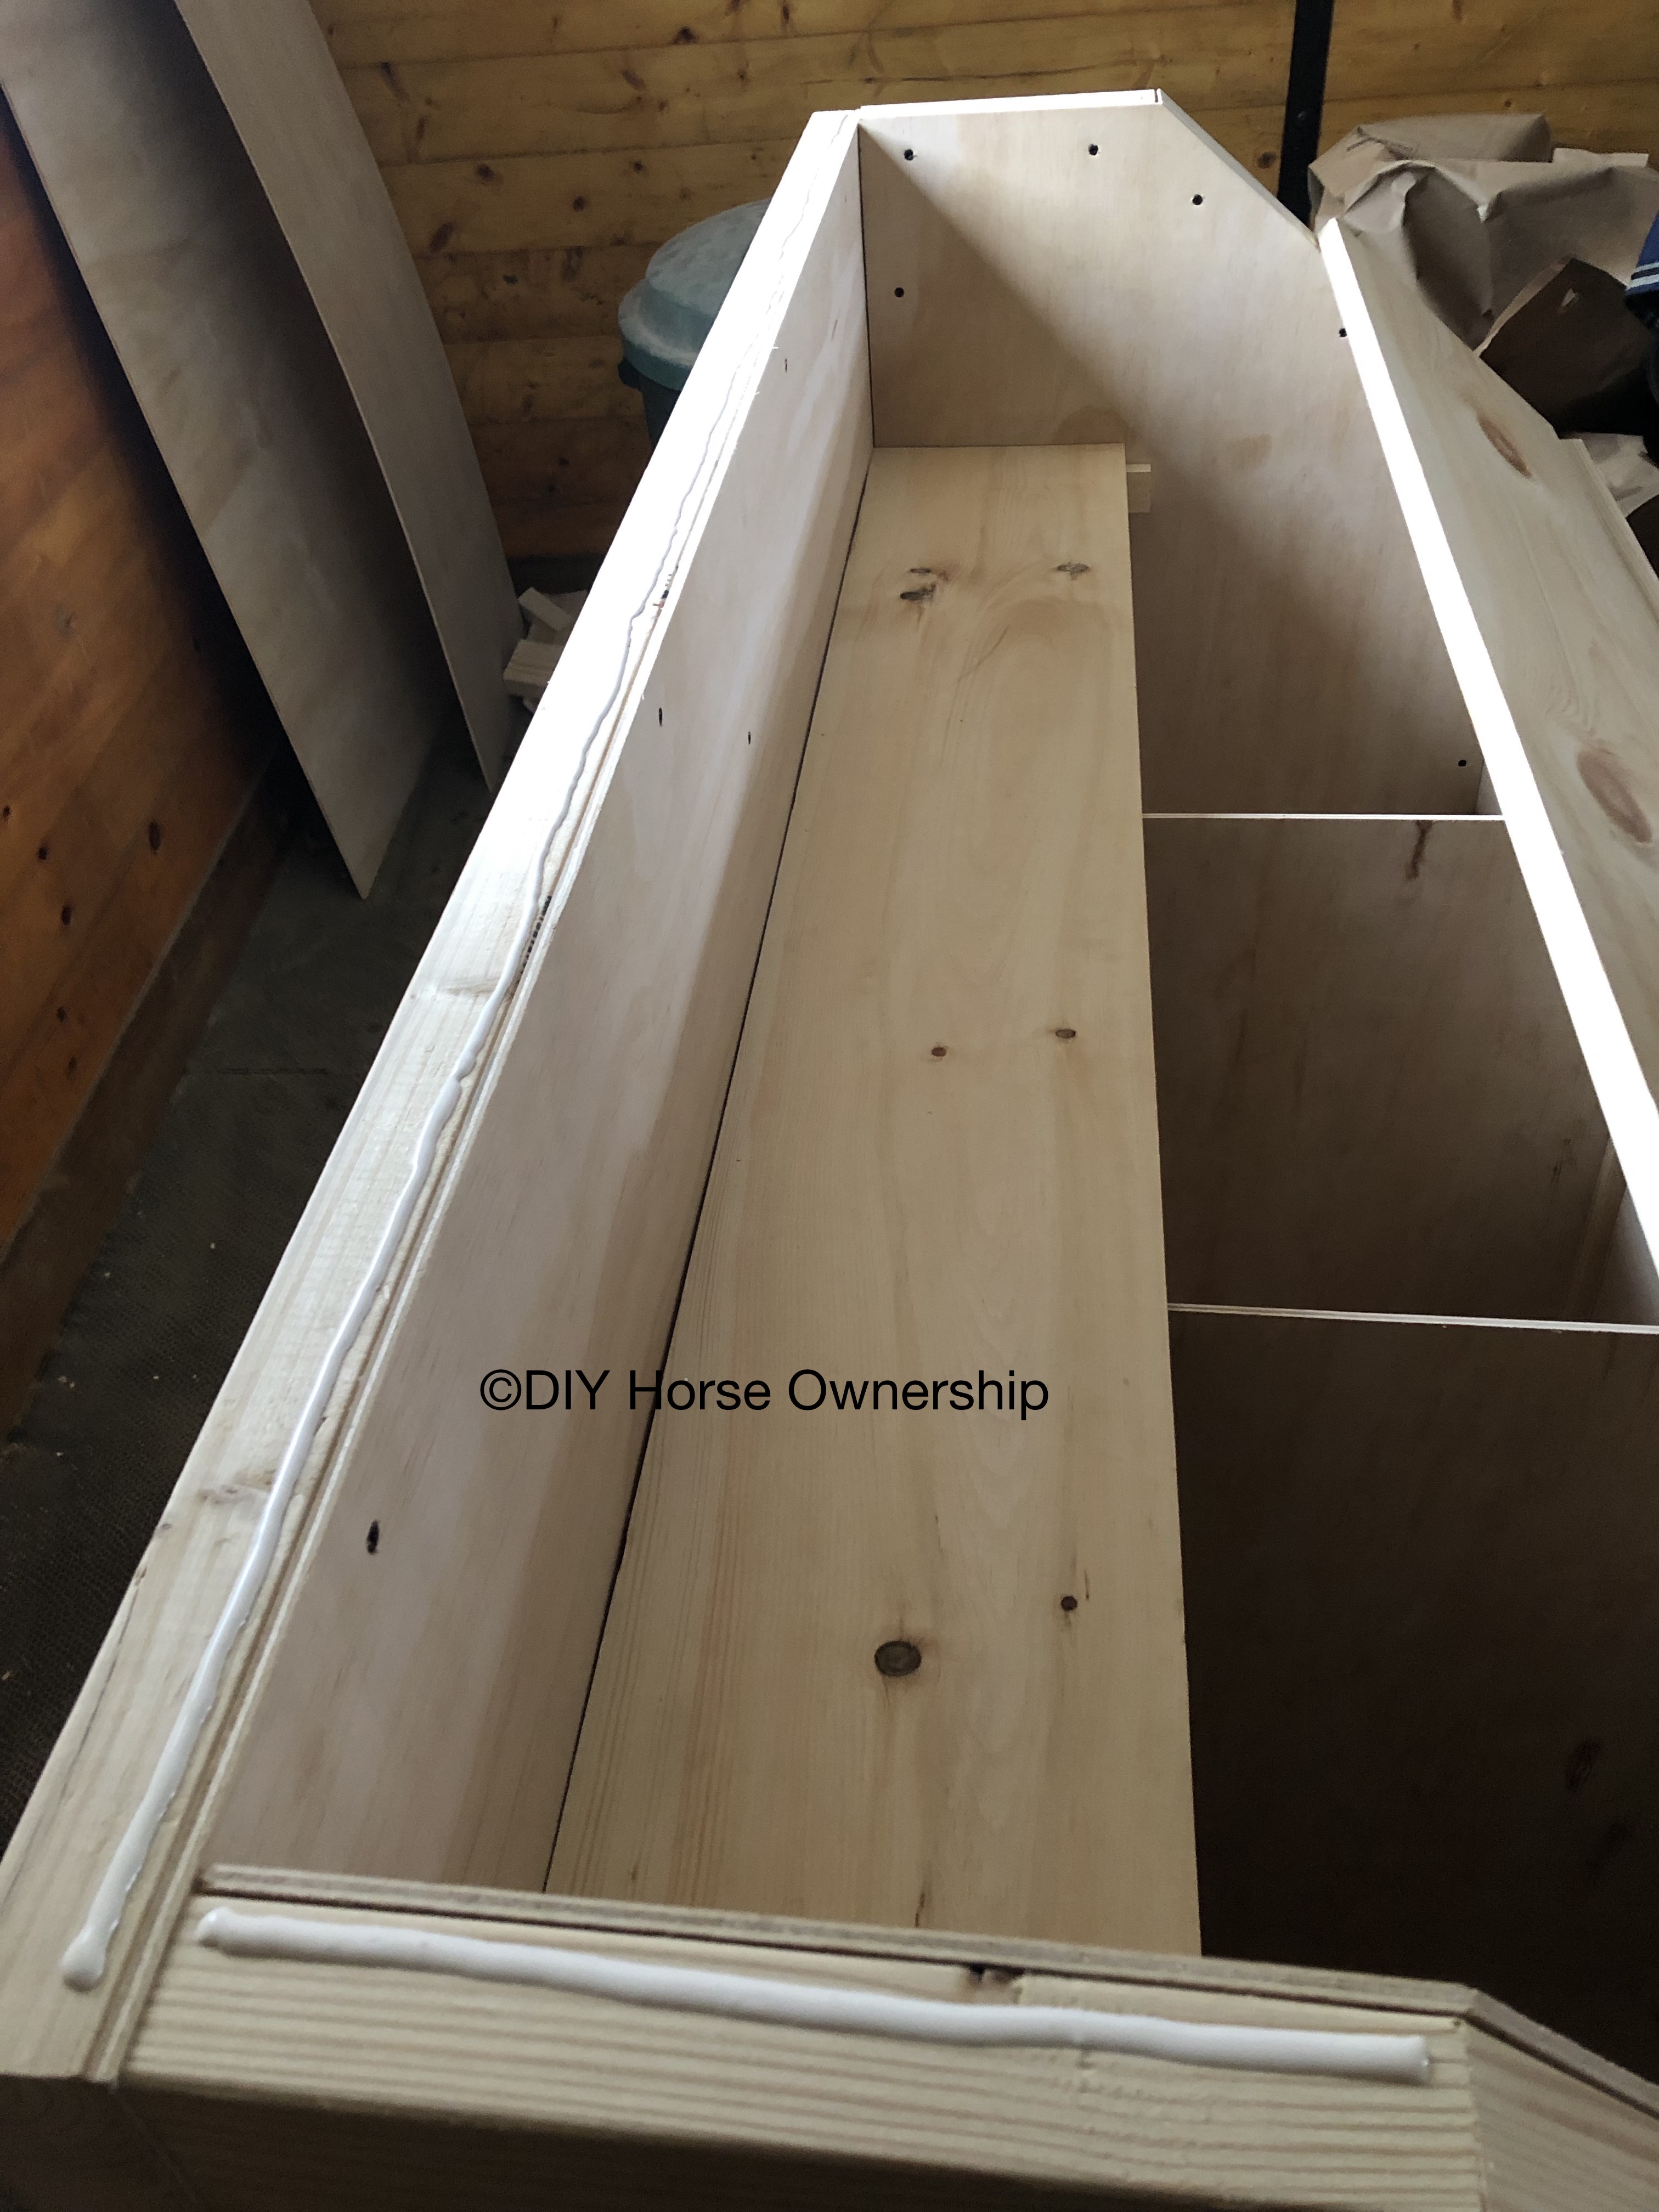
Adding the Dividers:
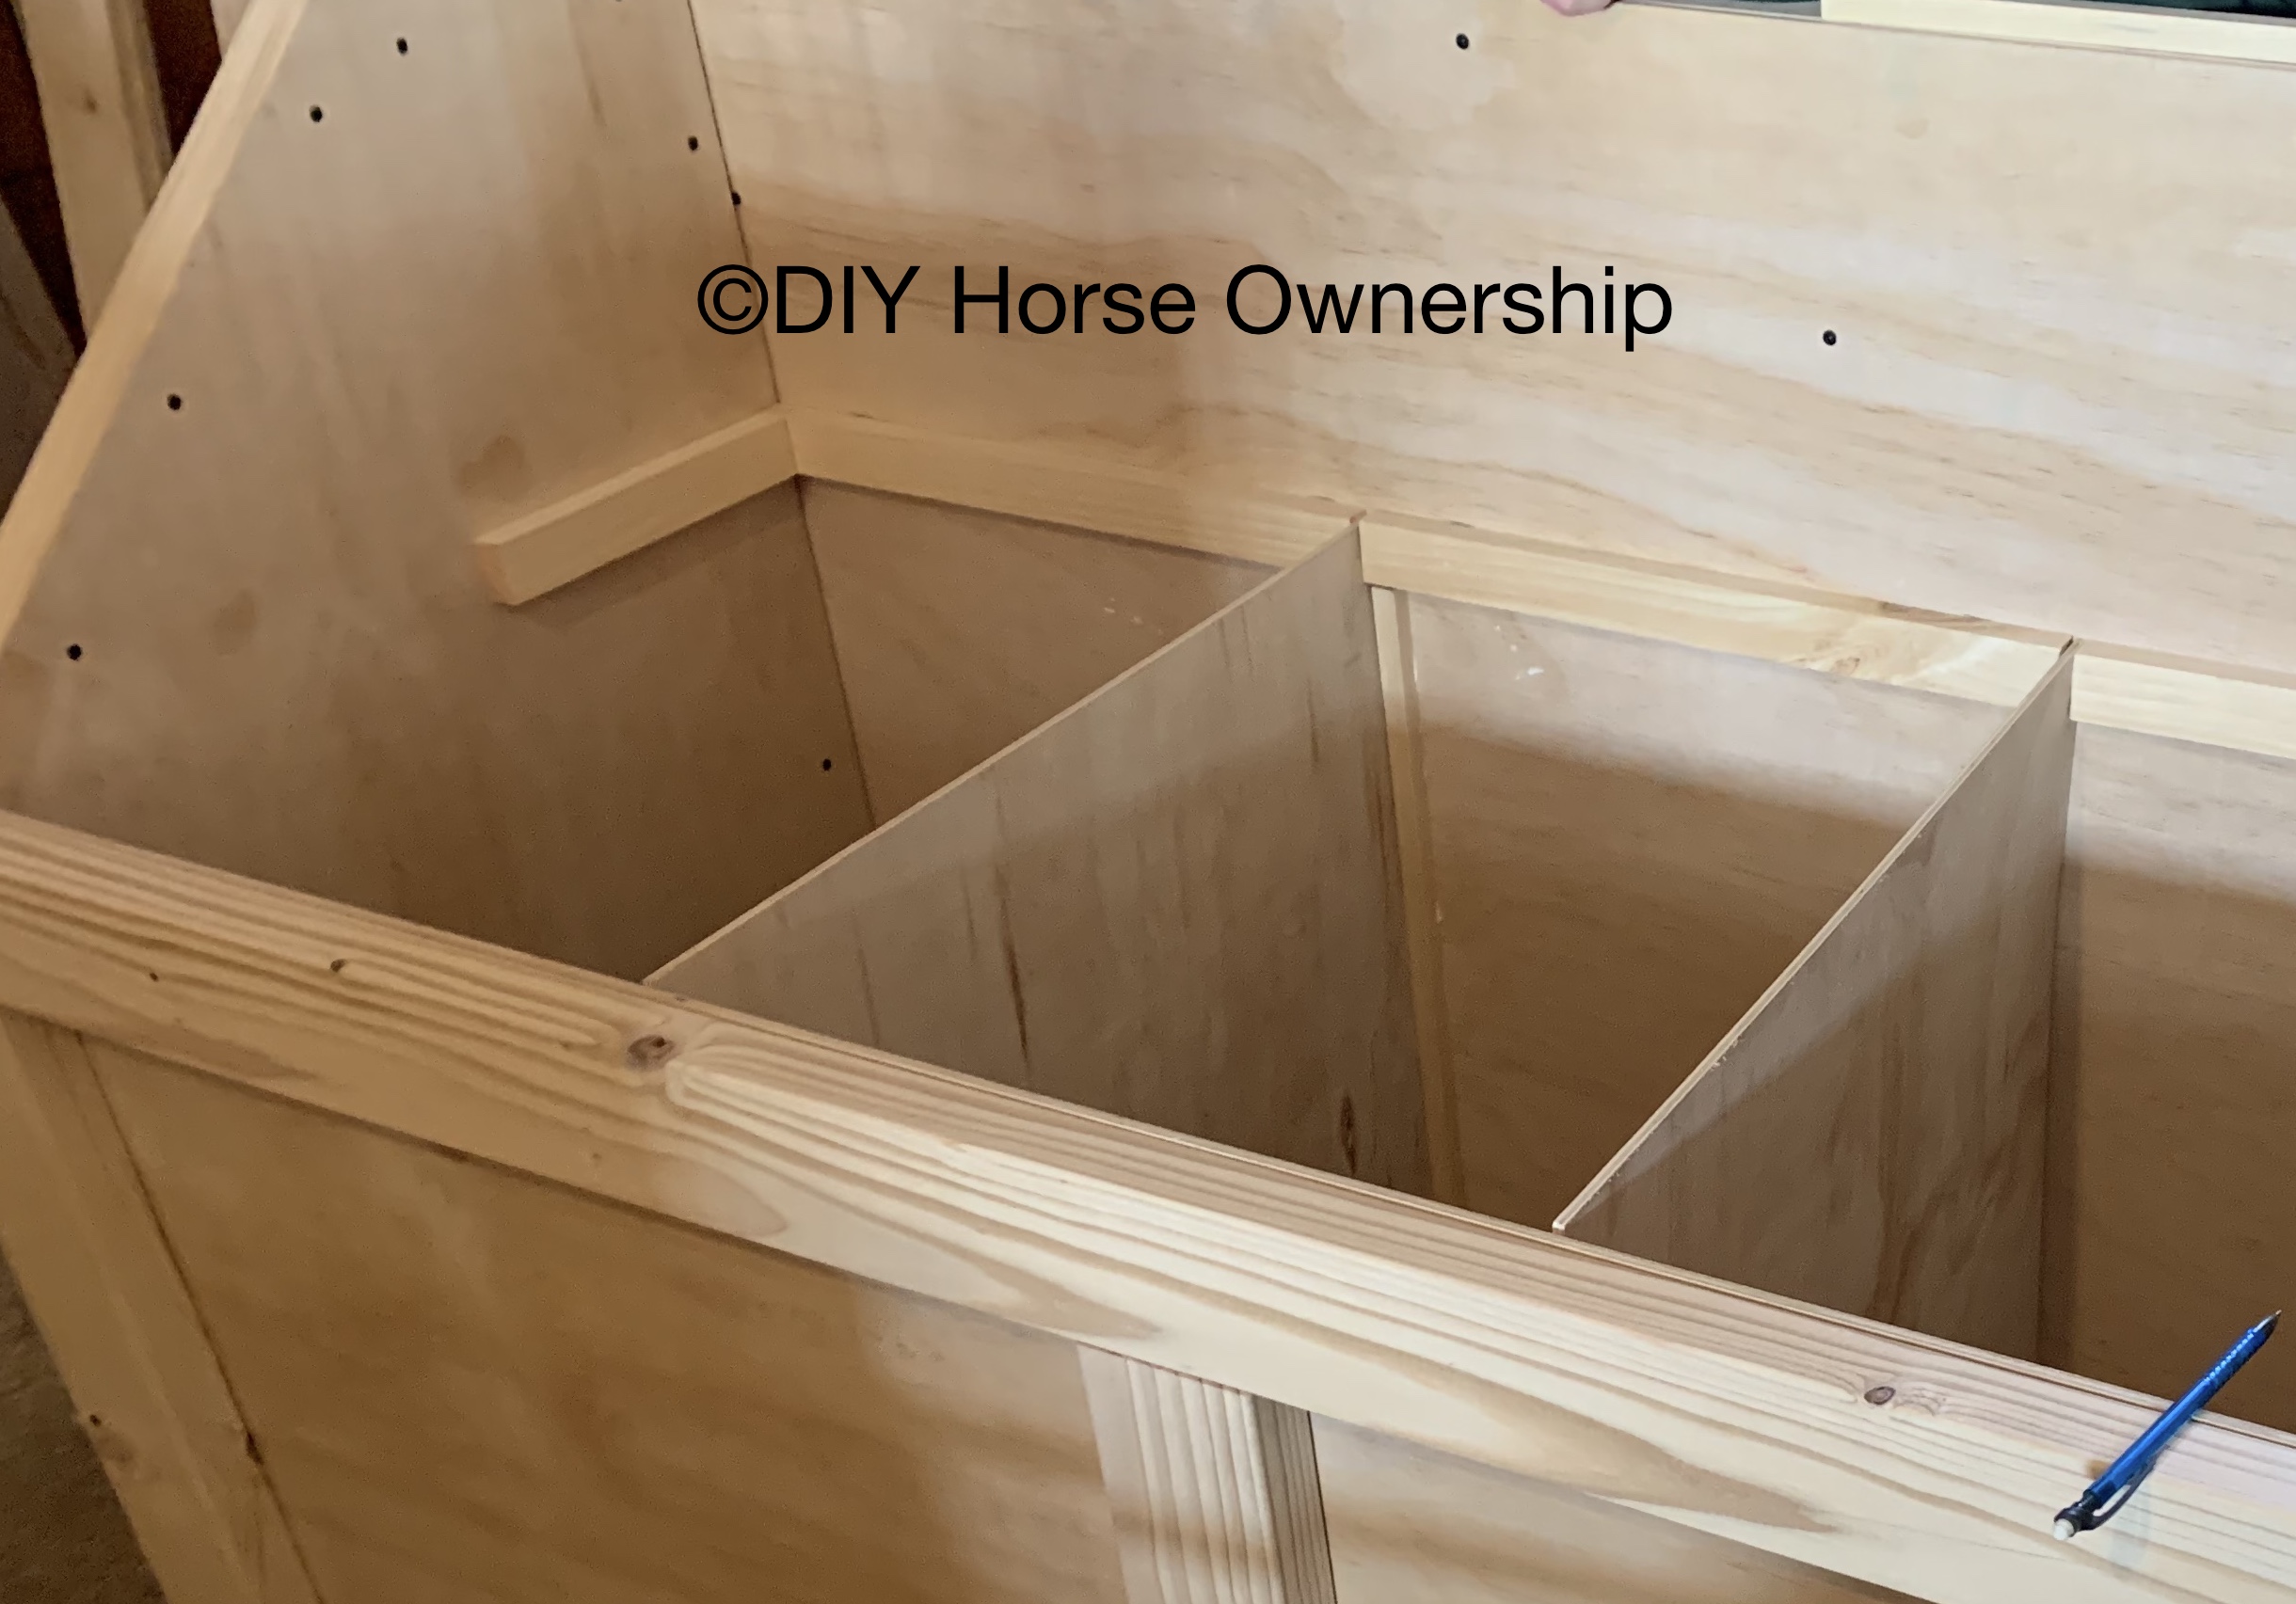
I’m going to start with a picture of the end result to make it easier to follow the next series of steps to add the dividers.
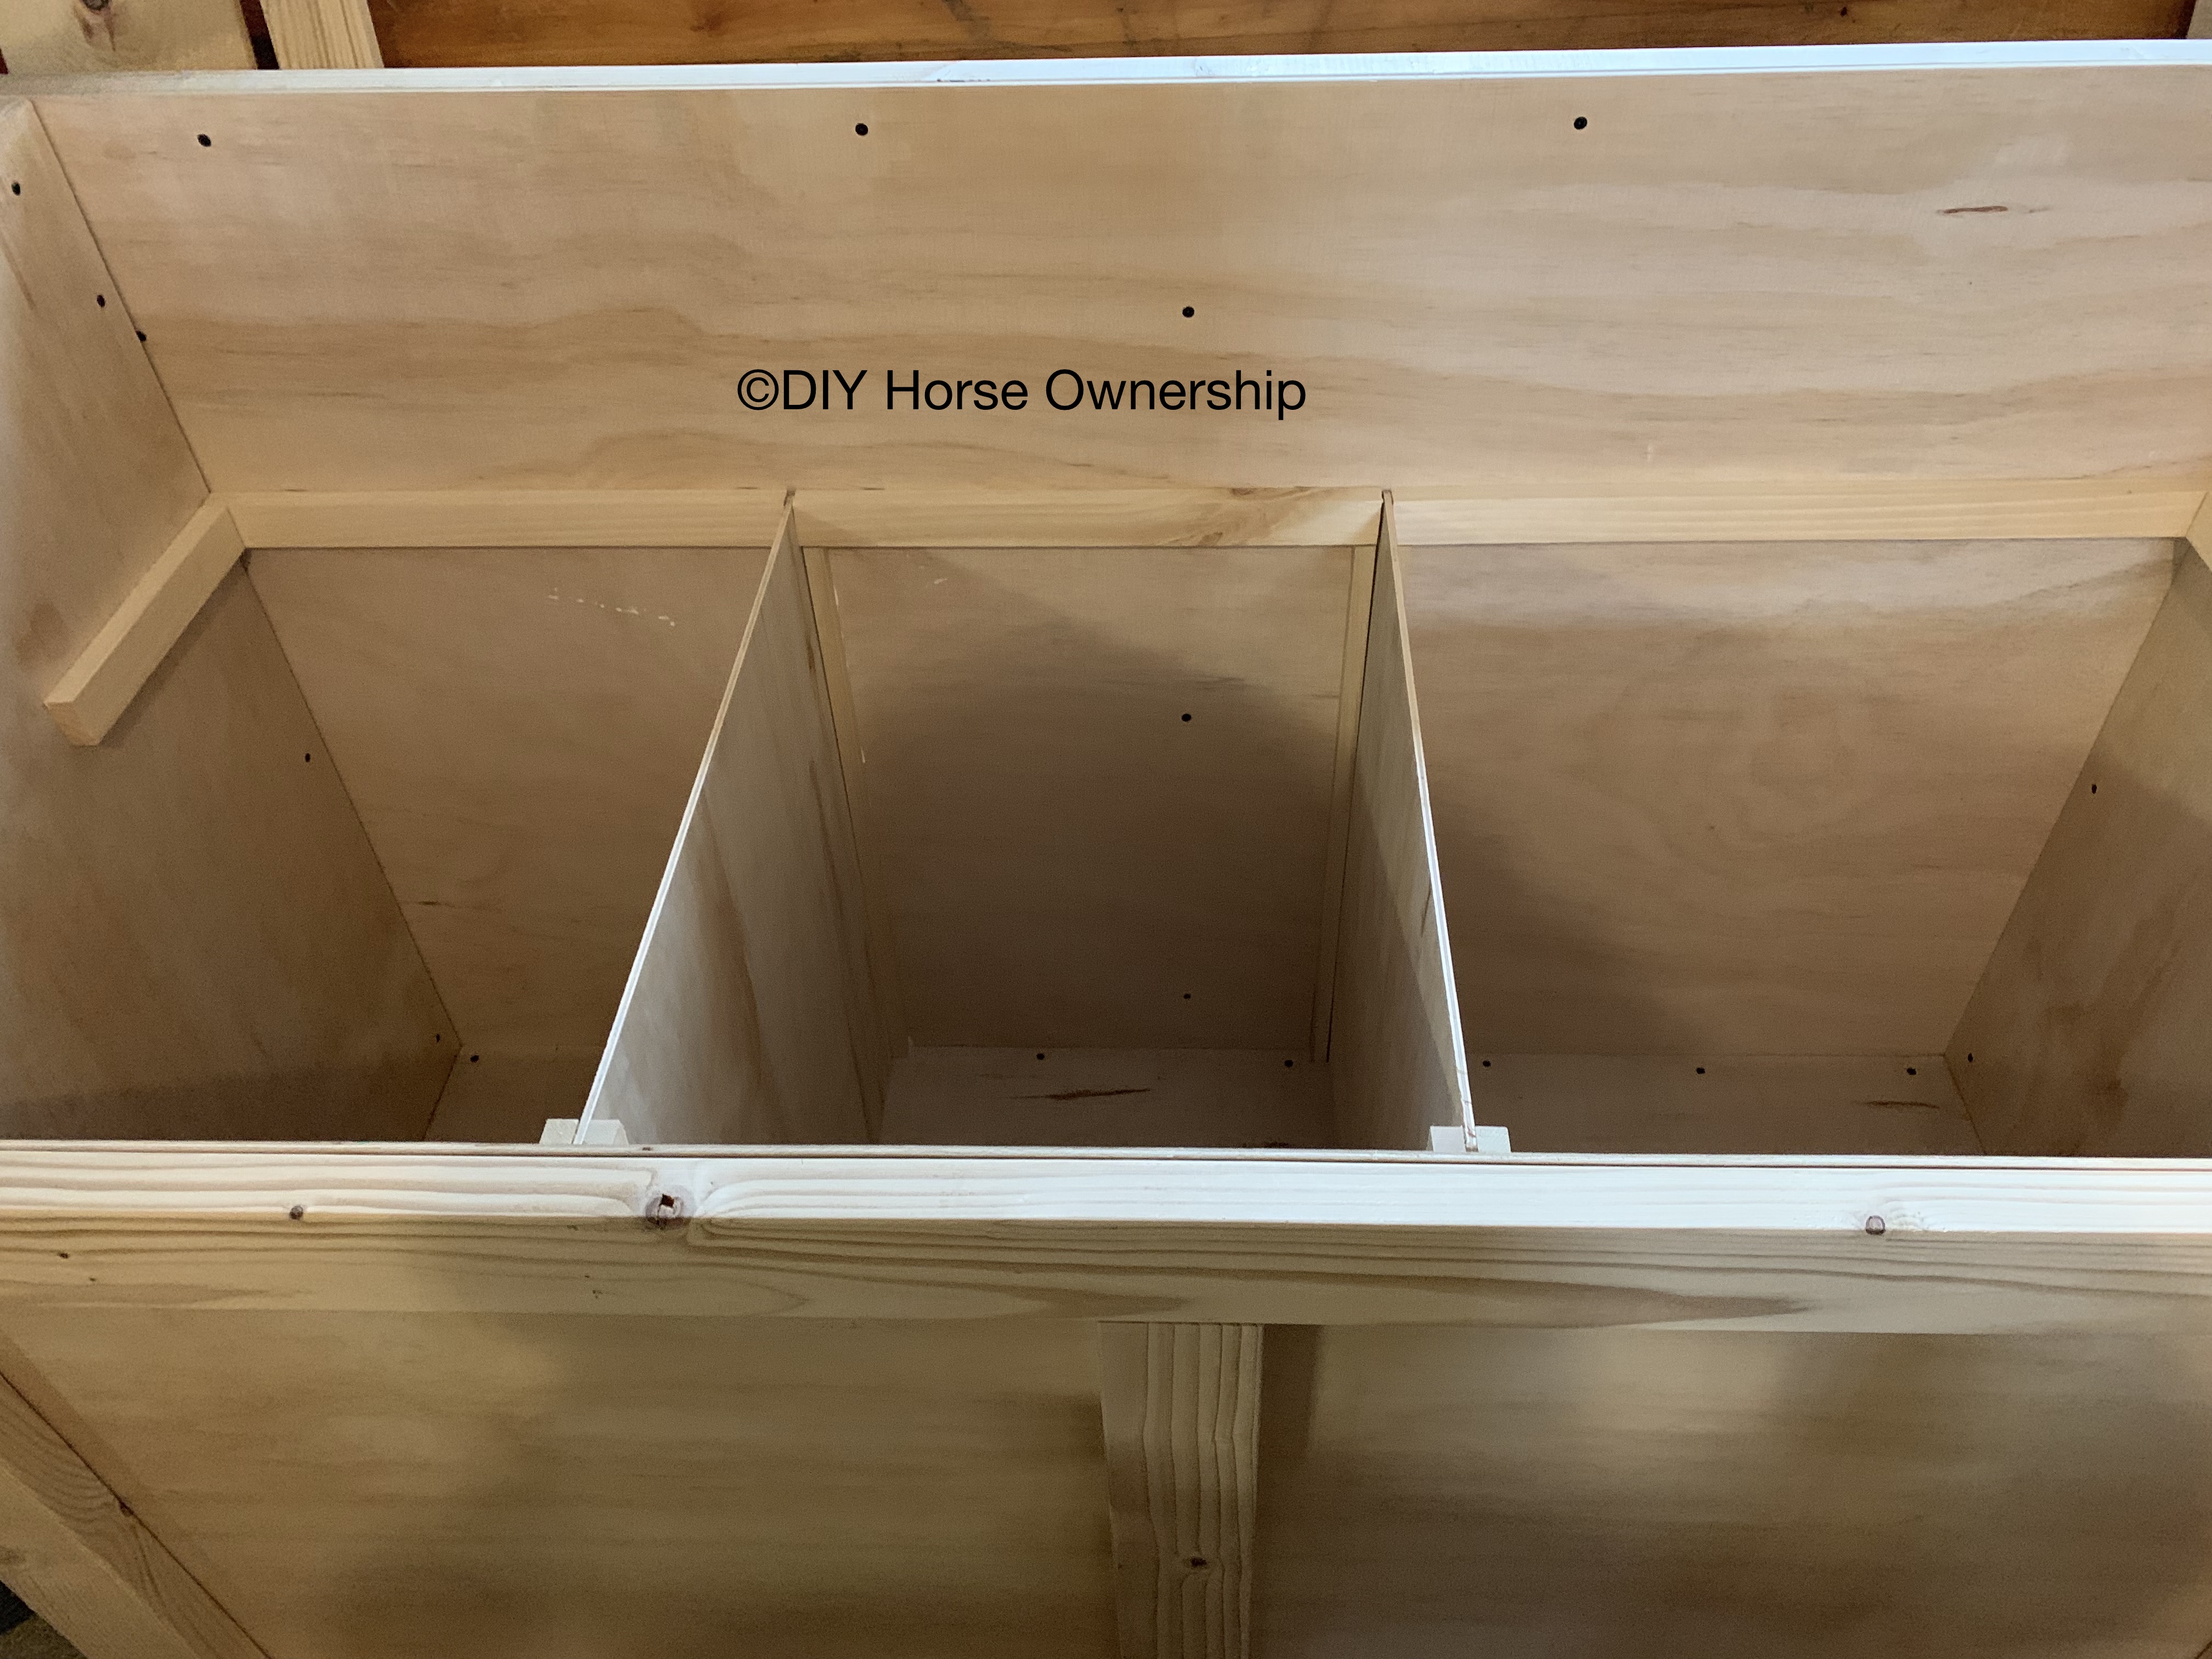
- Measure the depth and height of the inside of your feed bin and cut 2 pieces of plywood to fit this. Our measurements were 24″ wide by 26.25″ high. Always measure the actual bin and don’t go straight off my measurements – especially if you have adjusted the height of your bin for ease of scooping. Cut 3 pieces if you want 4 sections. Our first feed bin had four sections, but we mostly used that forth for random storage like pre-bagged feed for when we were away. For this new bin, we decided to go with just 3 sections.
- You’ll want to decide how big you want your sections to be at this point. Our 3 sections are not equal on purpose. We go through a lot more beet pulp than anything else so we made the one section bigger than the other 2.
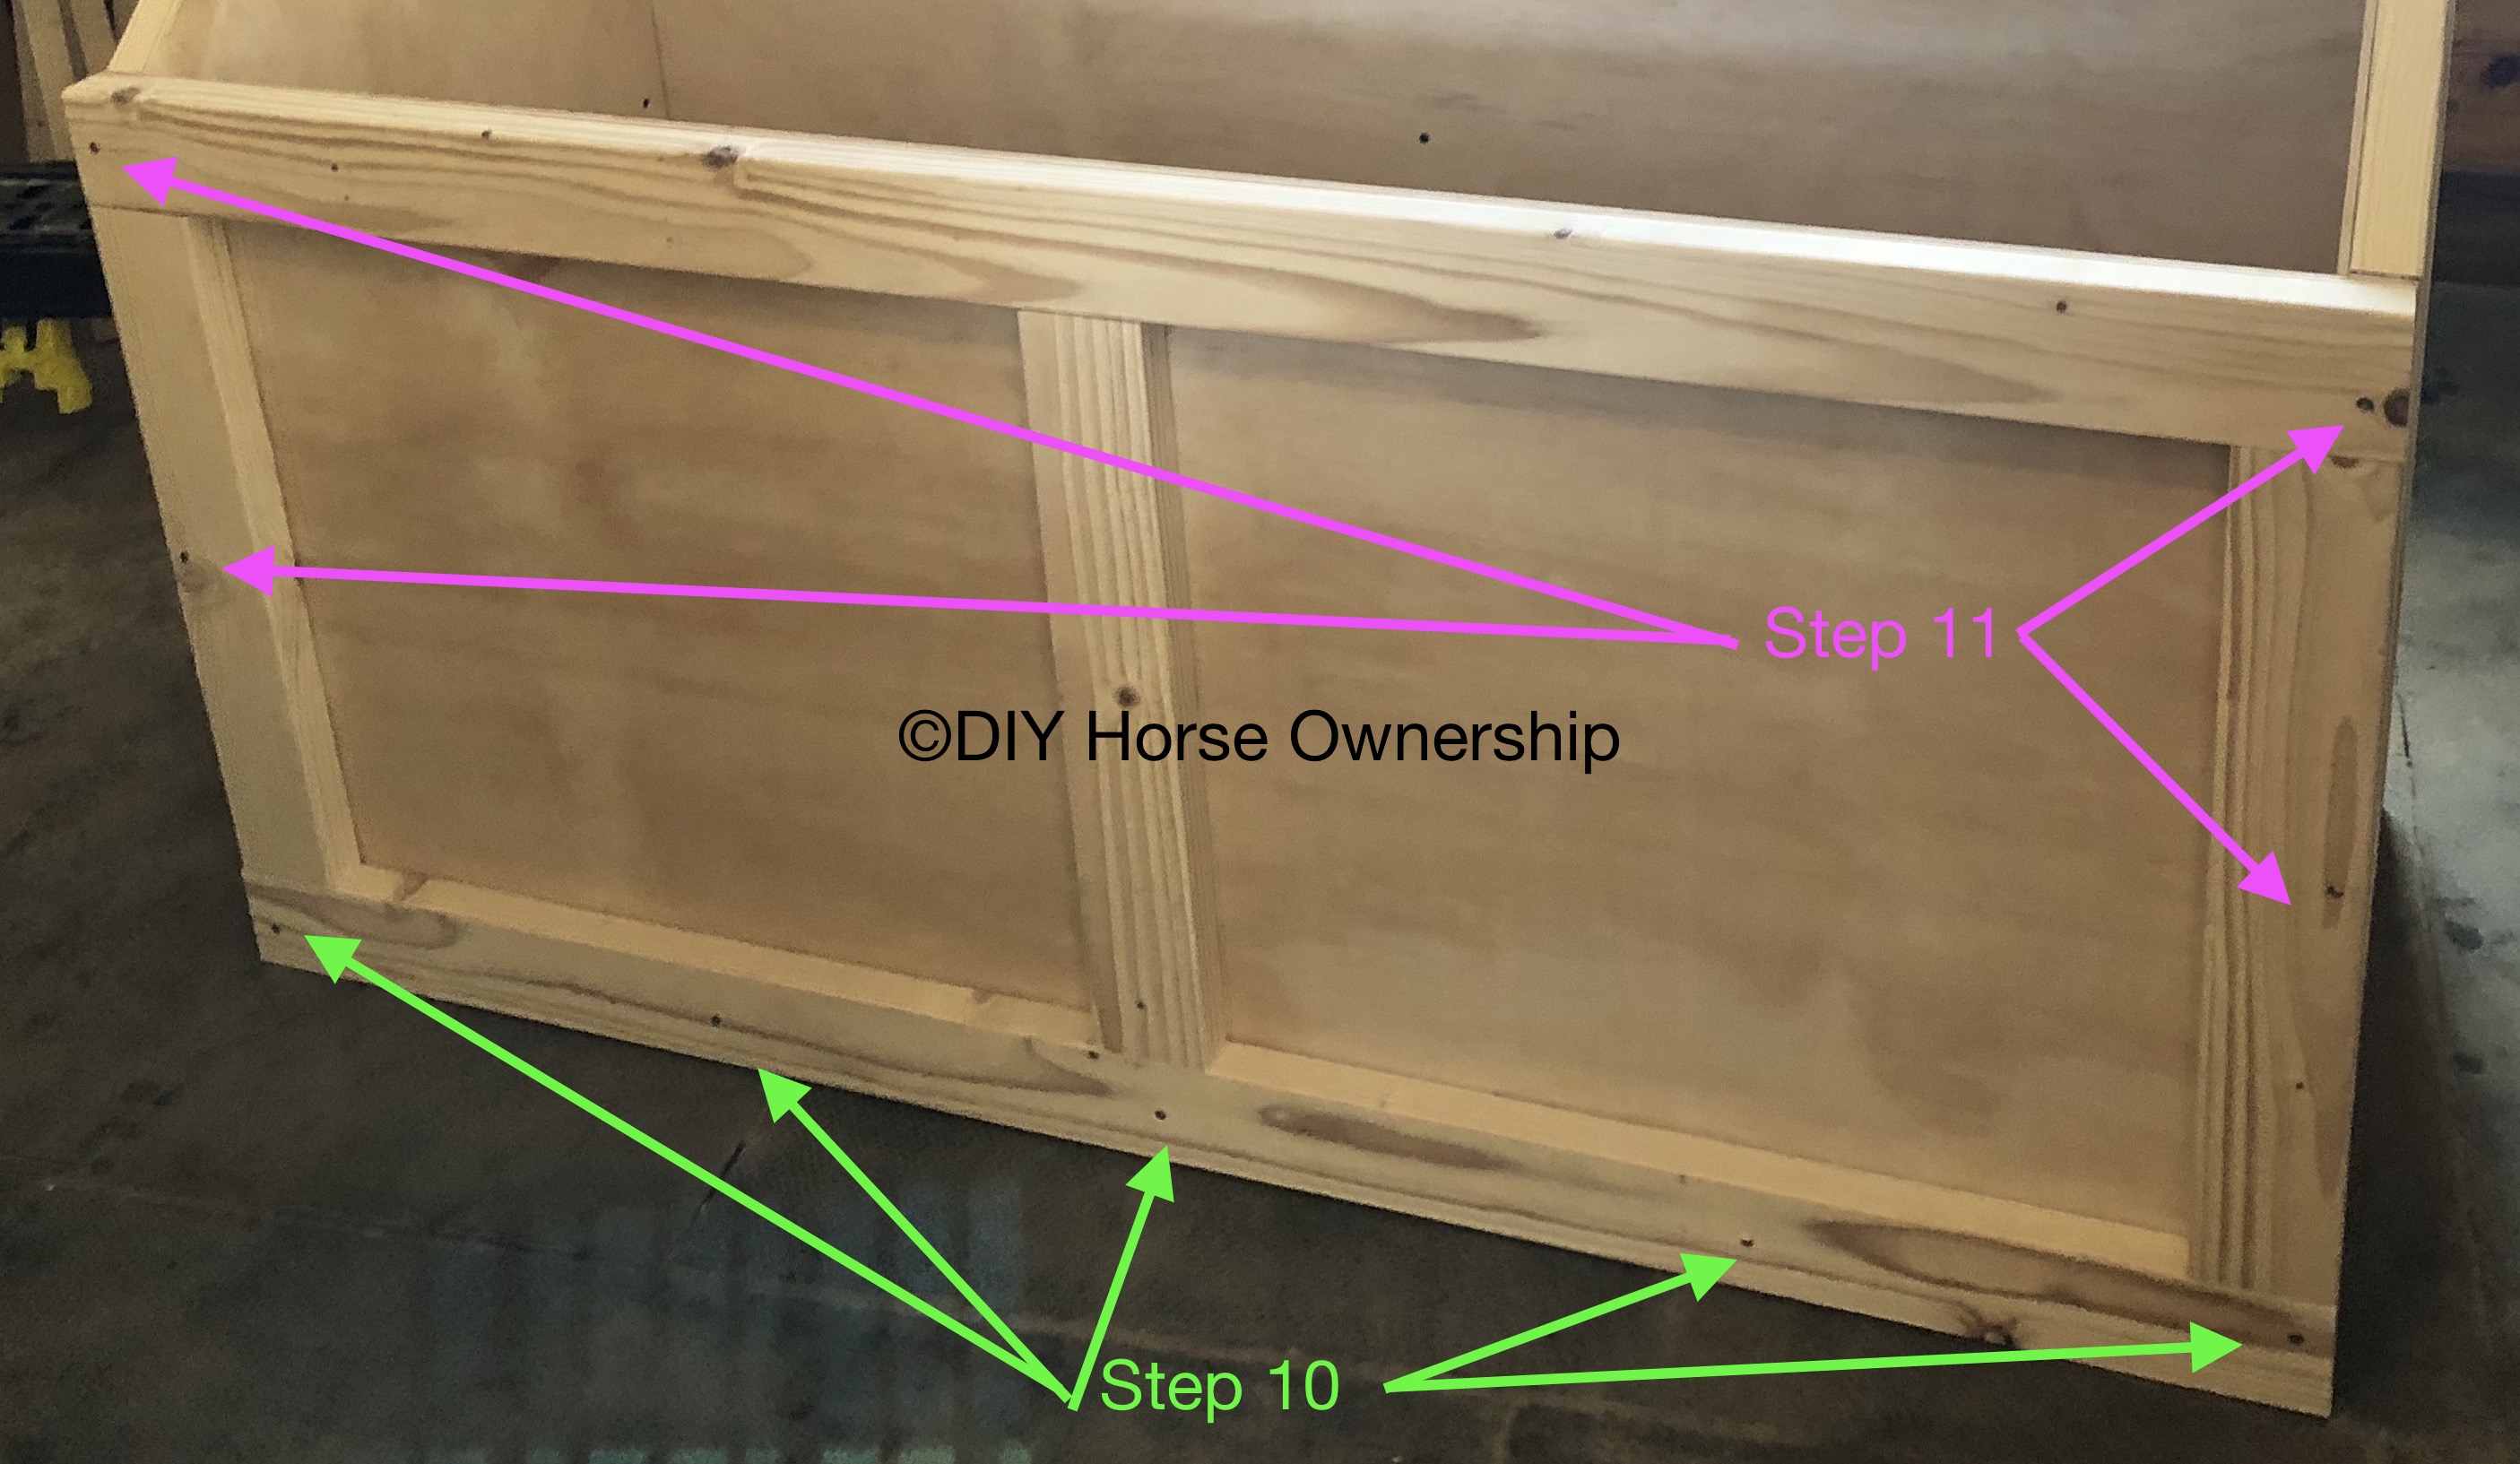
- Measure from the edge of the inside of the feed bin to where you want your first divided. Cut a piece of 1×2 board to this length.
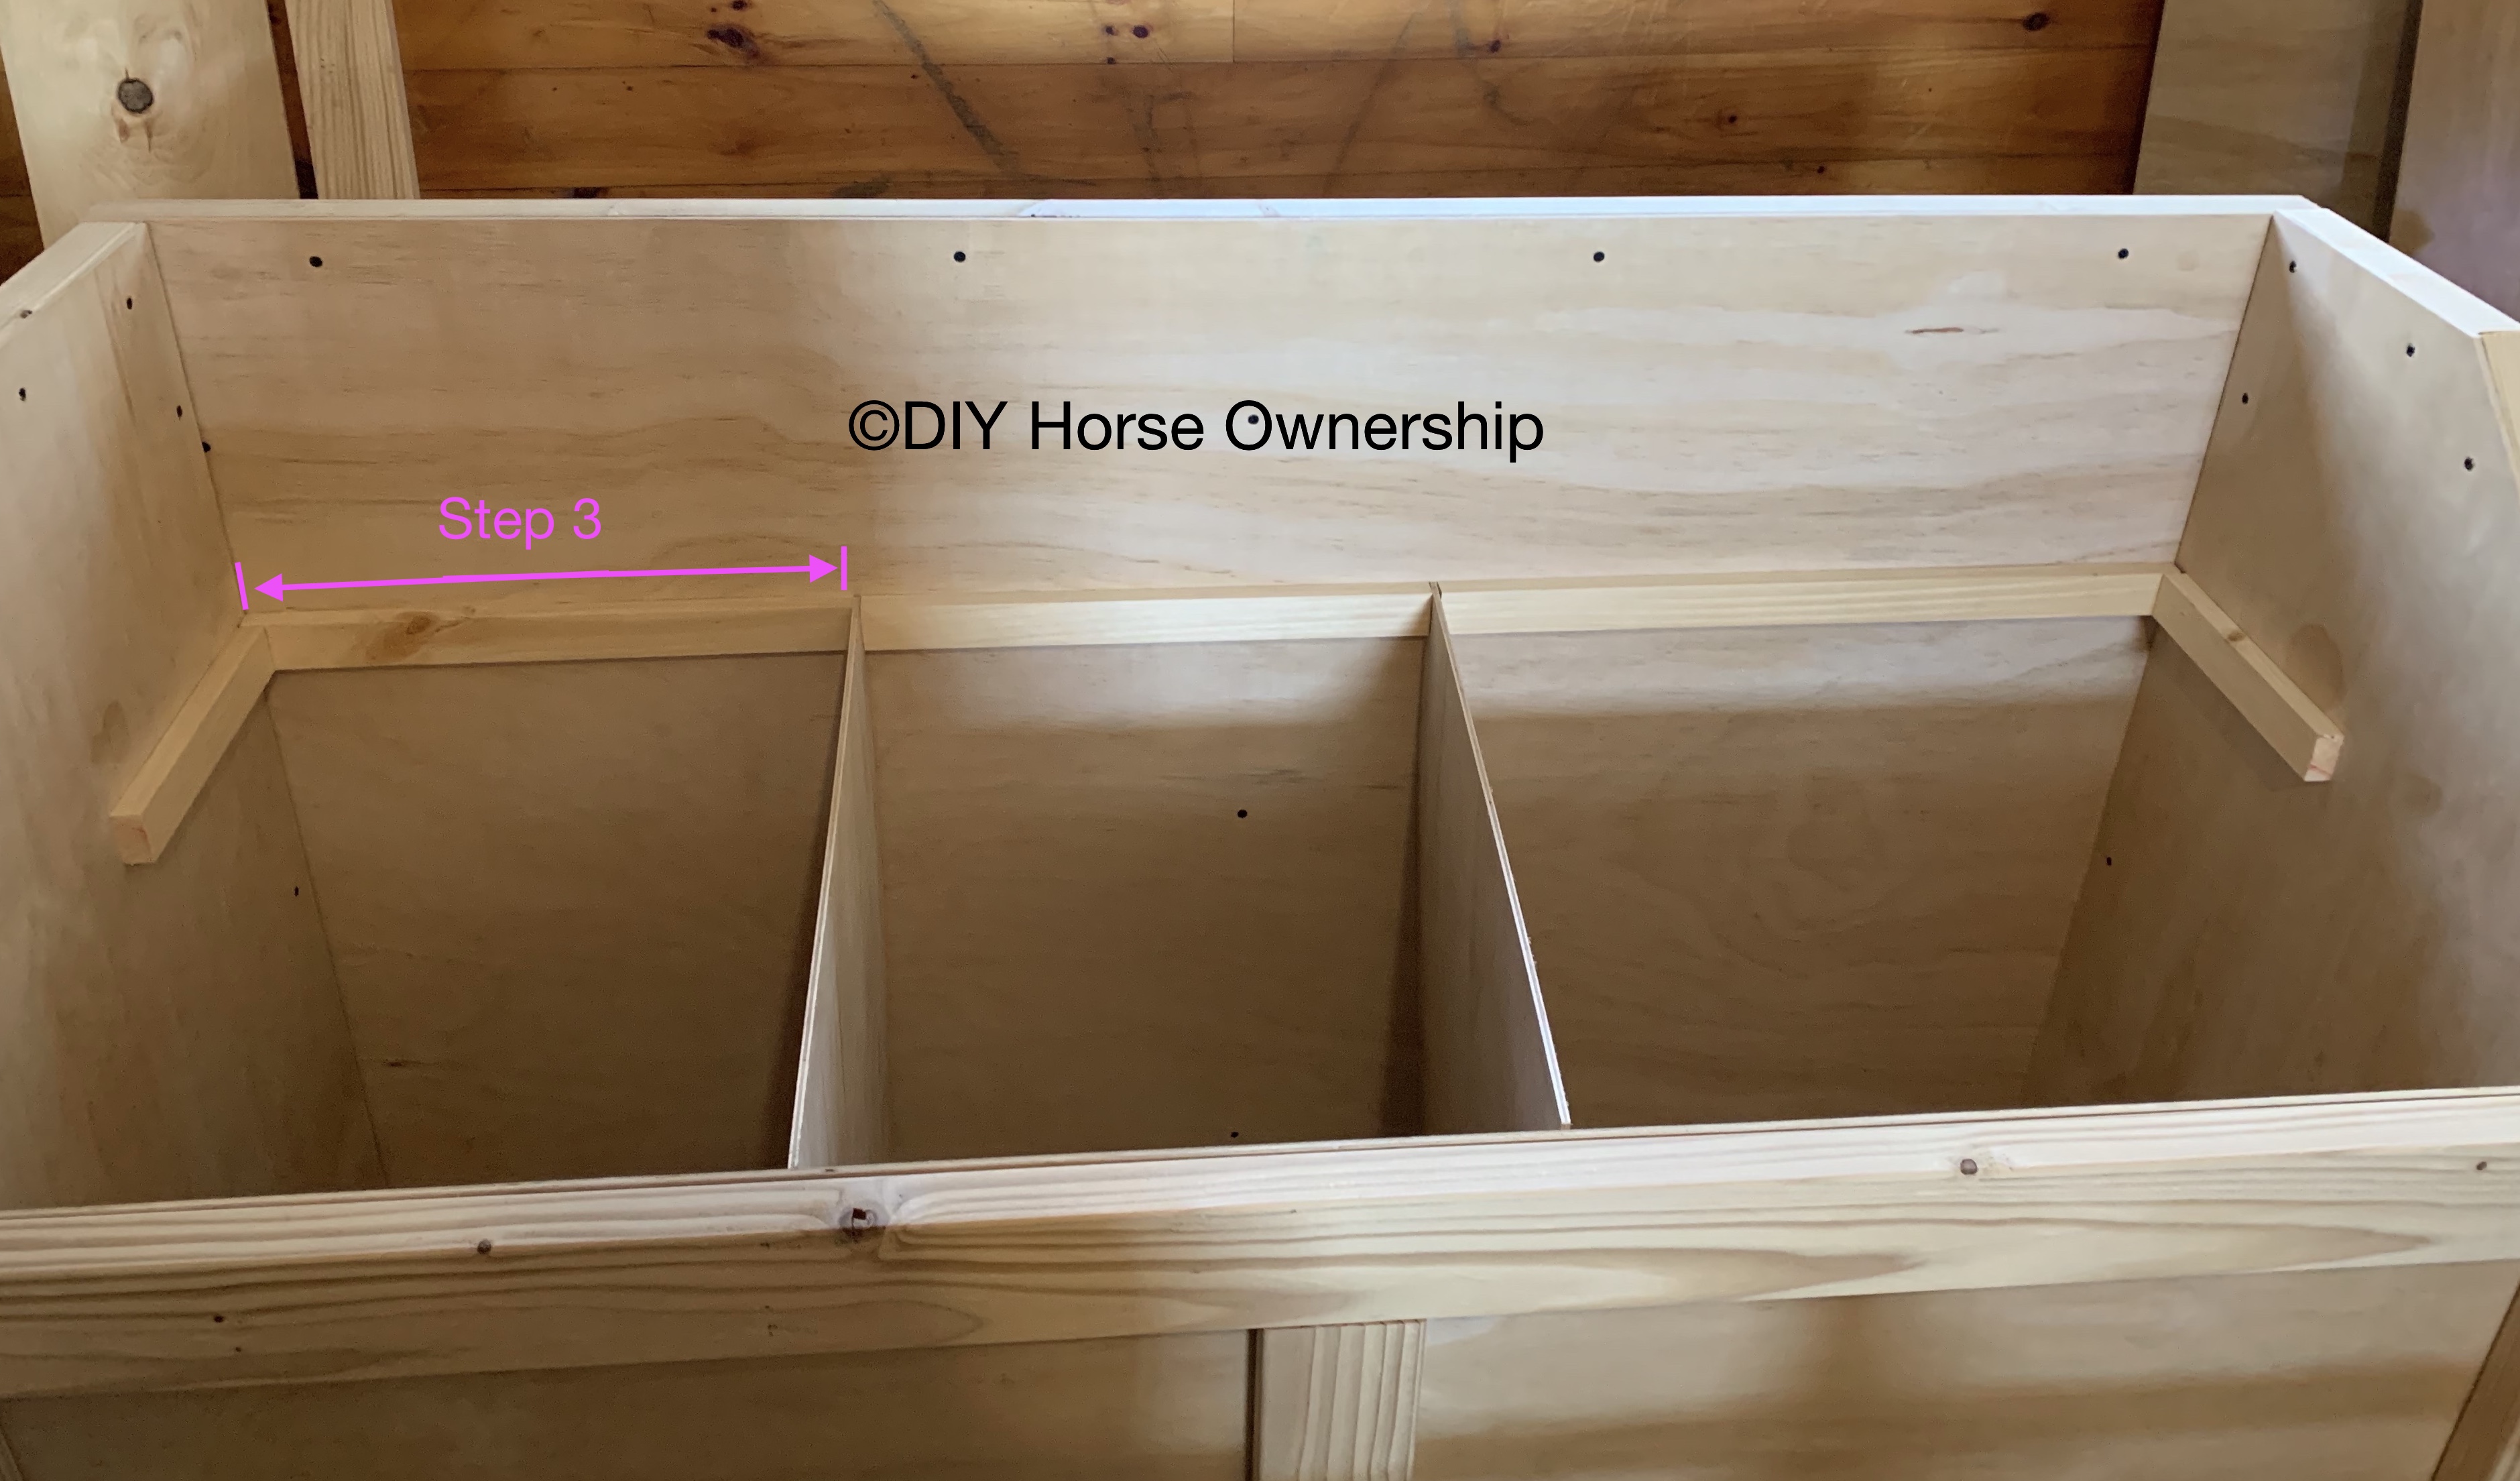
- Add a strip of glue to this piece of board and place it perpendicular to your divider plywood so that the top of this piece is the same height as your plywood piece. Screw from the back into this piece with your 1″ screws.
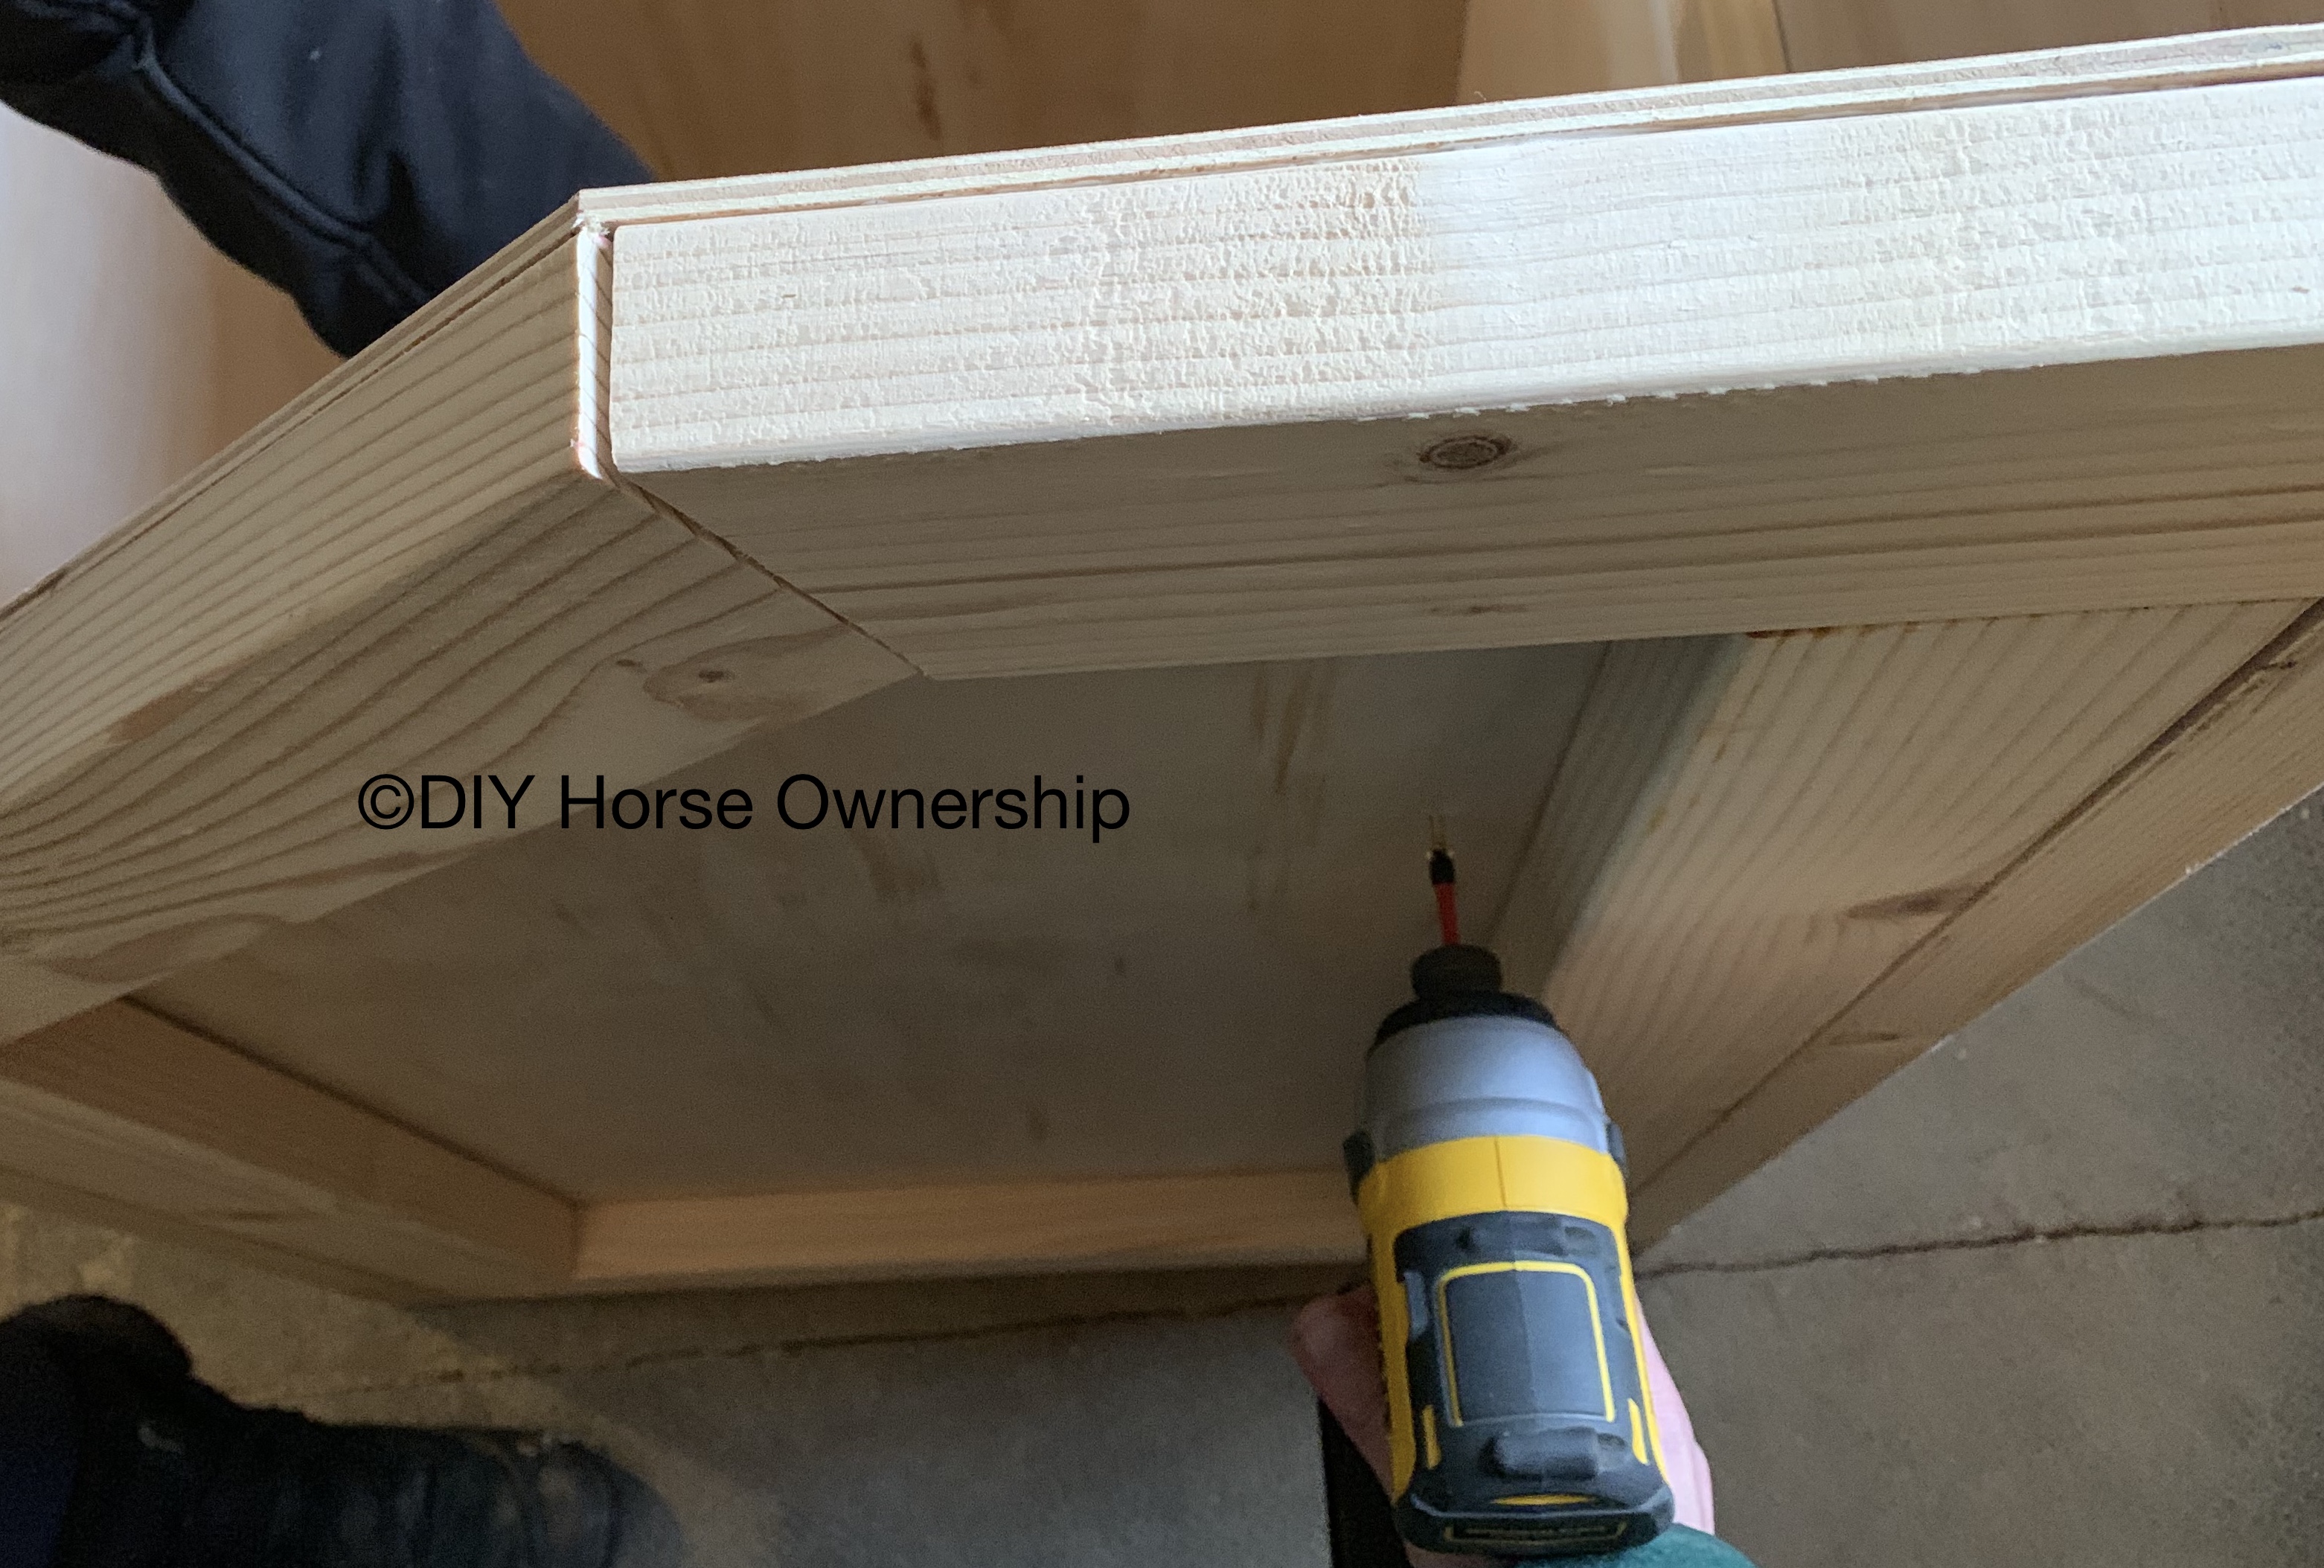
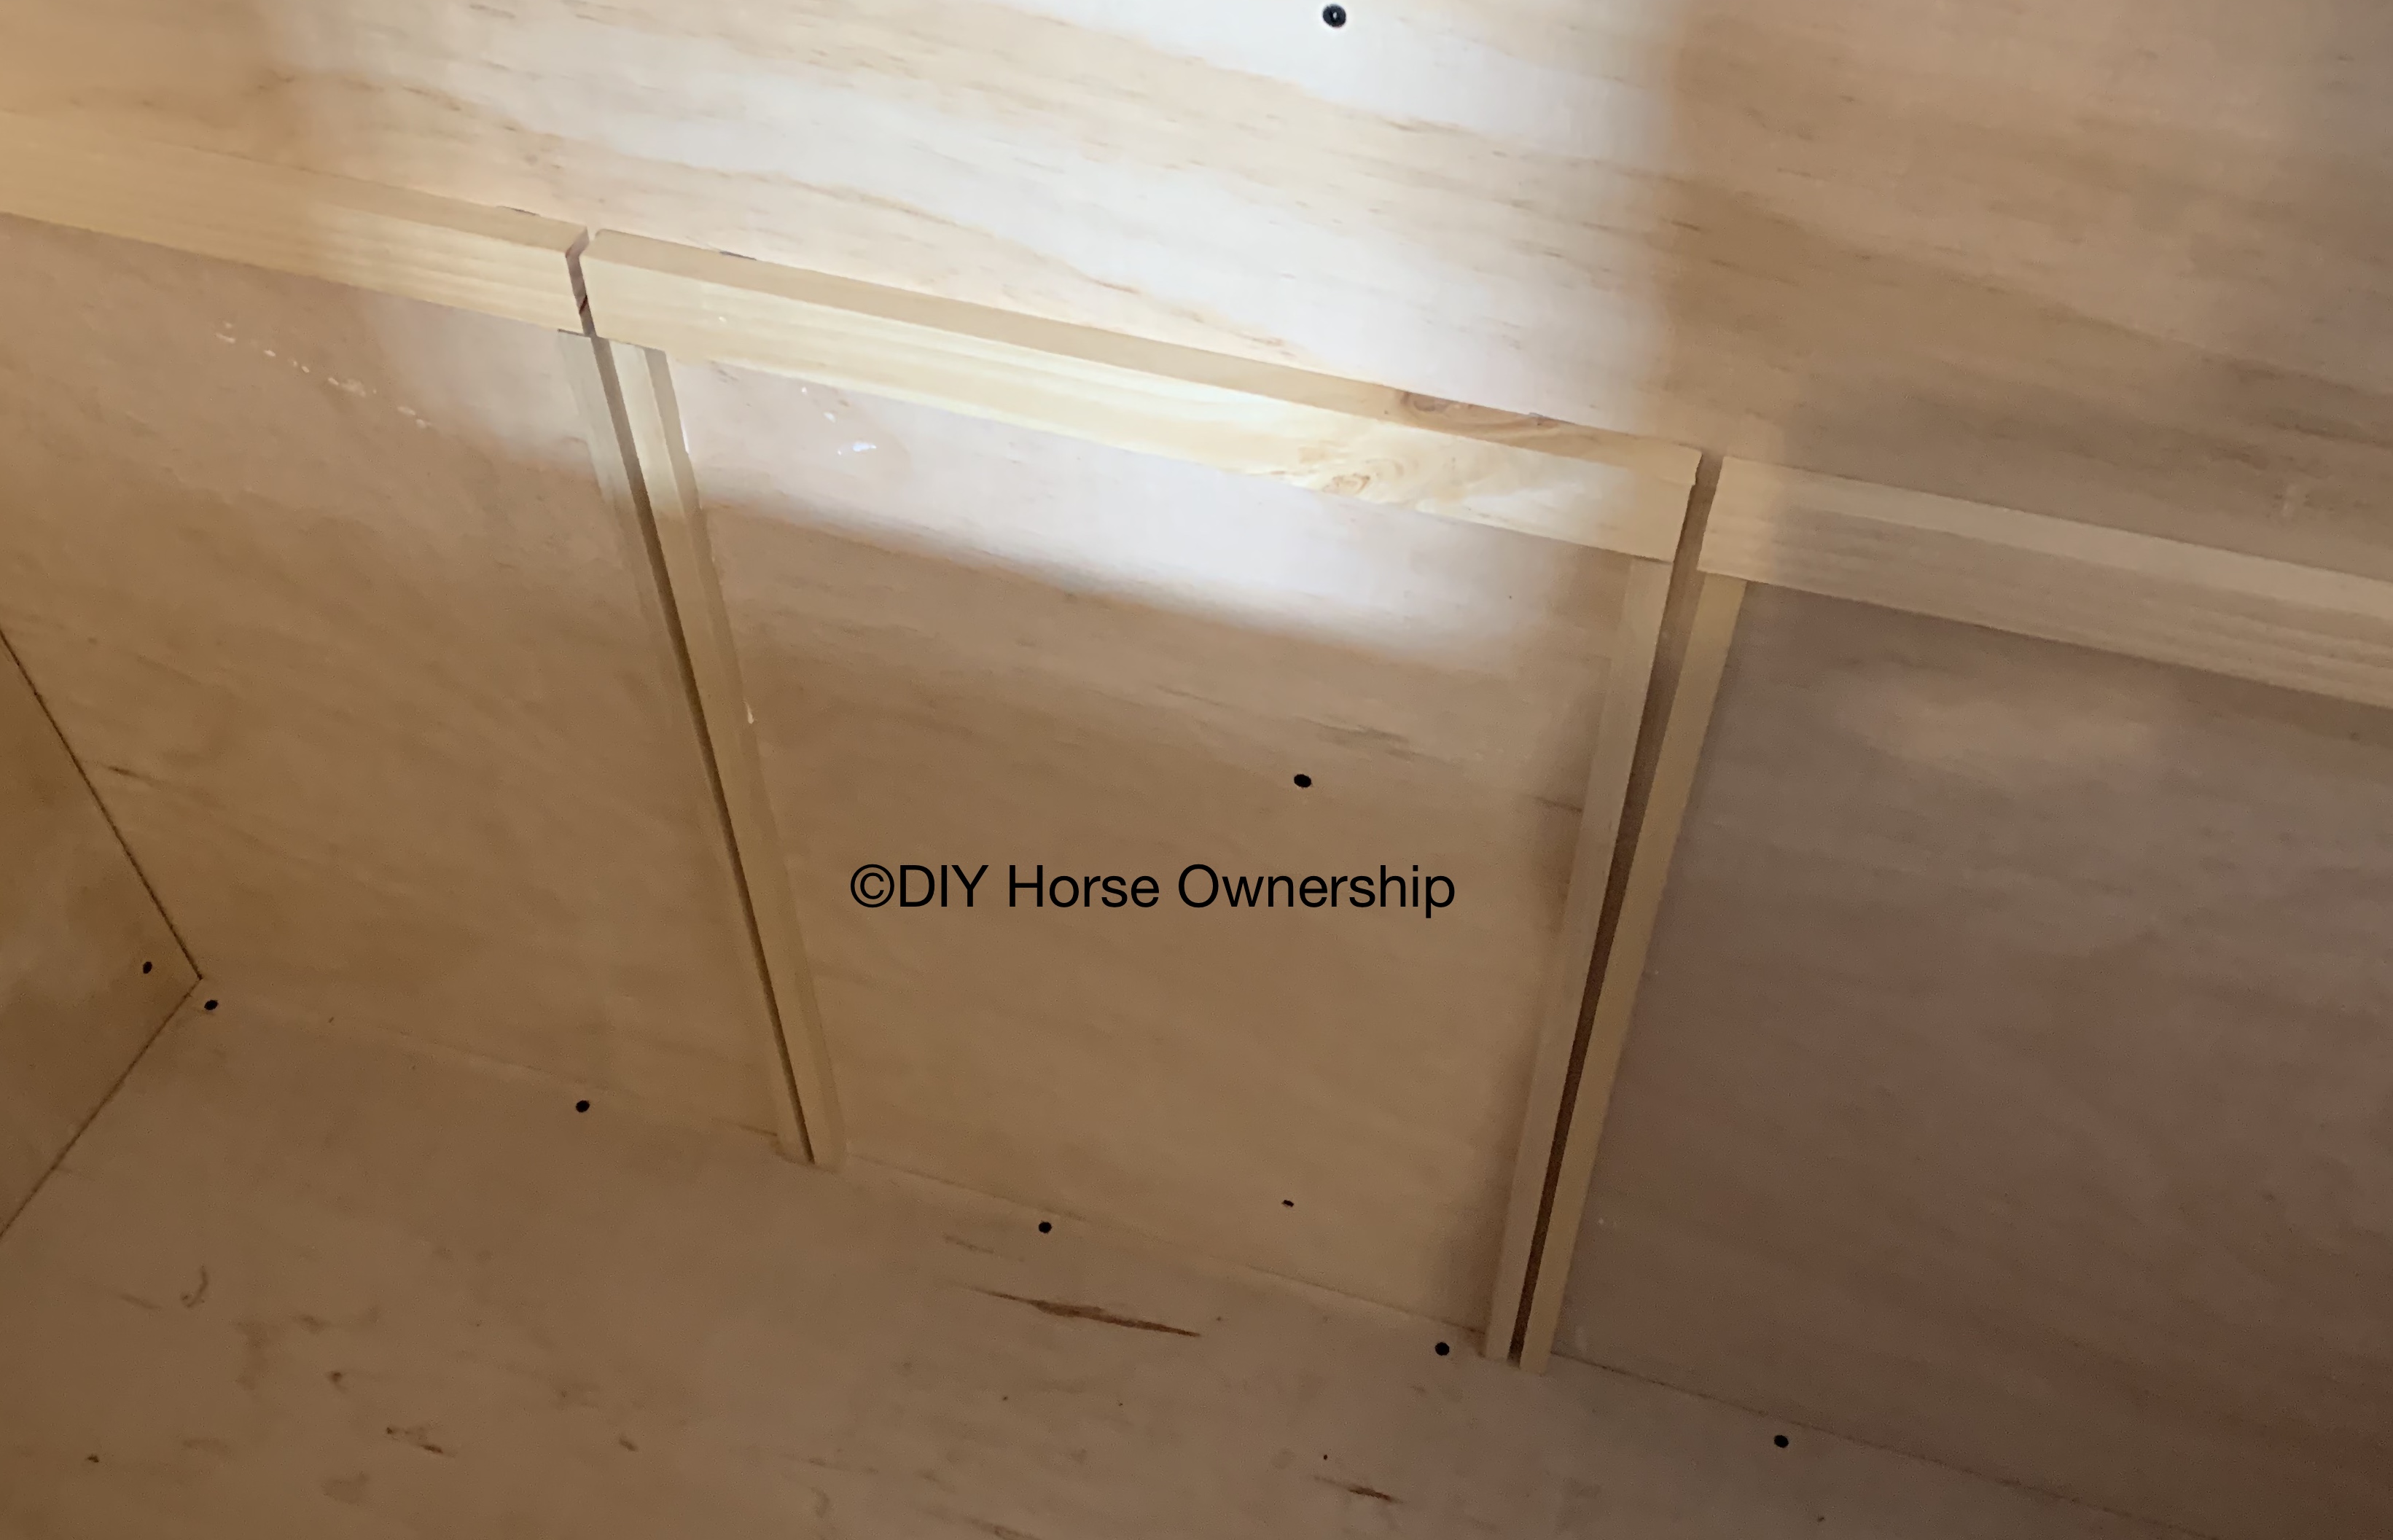
I didn’t get a picture of doing the back, but here’s a picture of this technique installing a side piece
- Repeat for the next 2 sections.
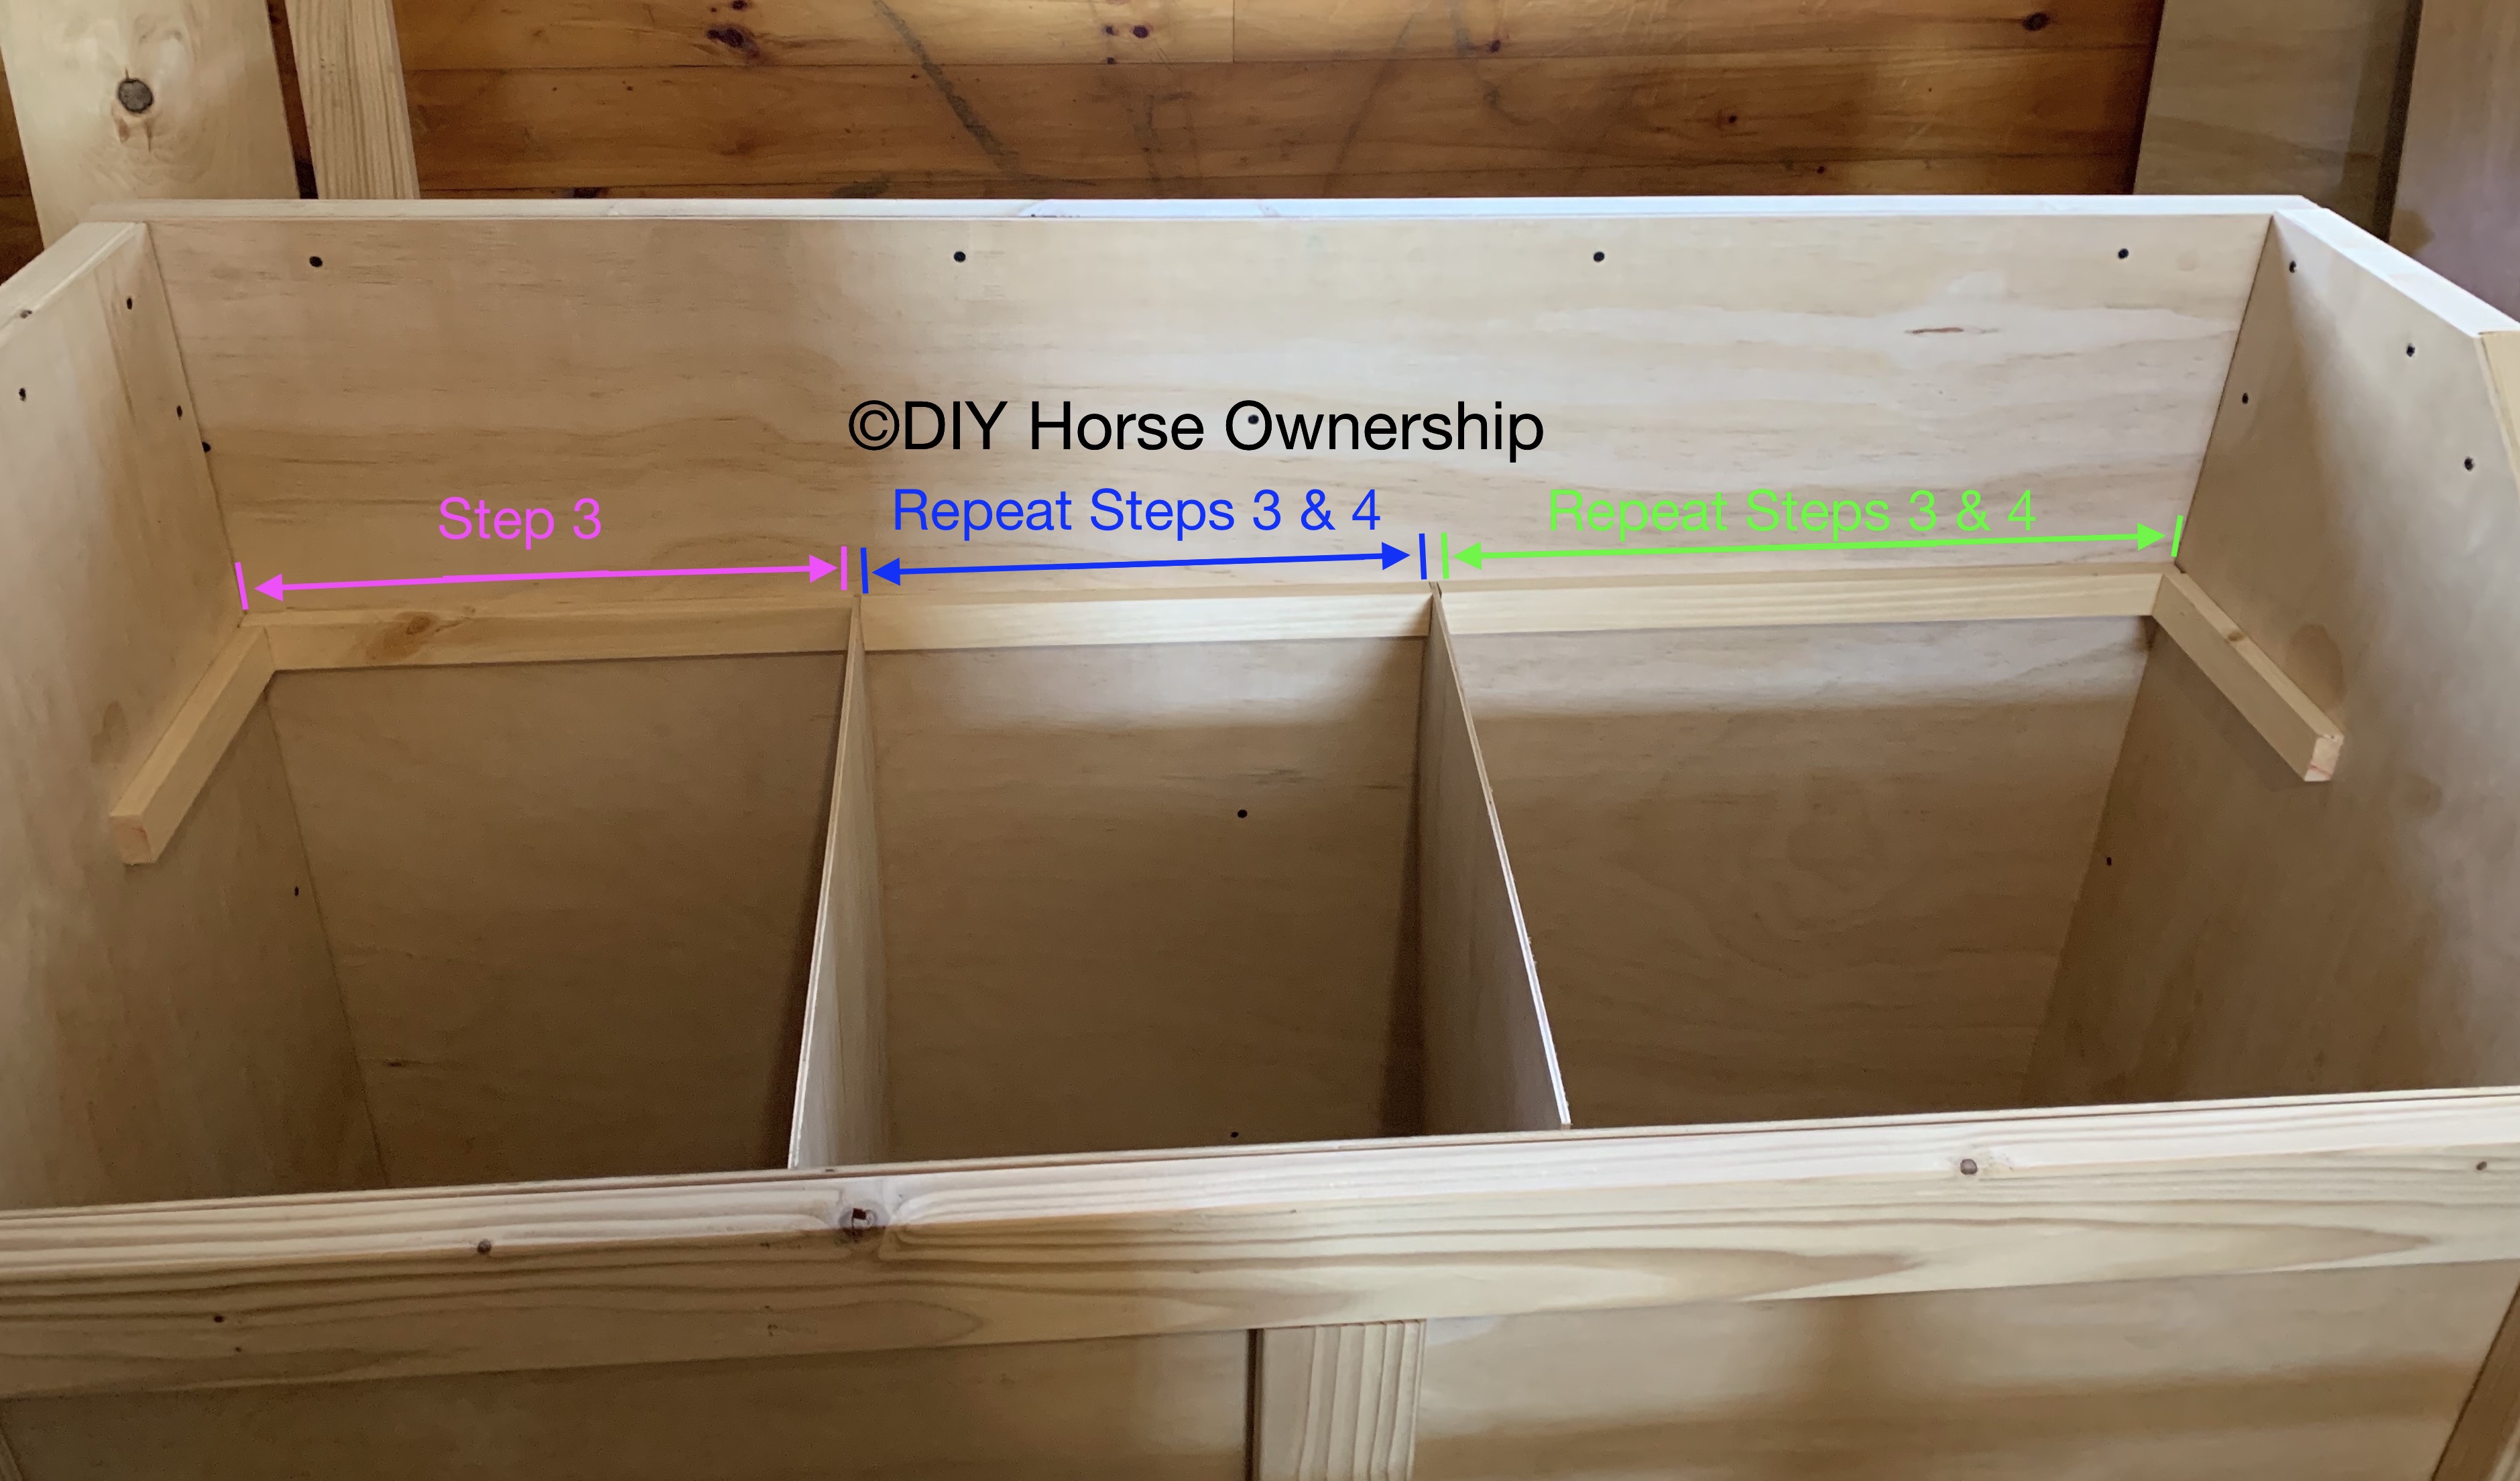
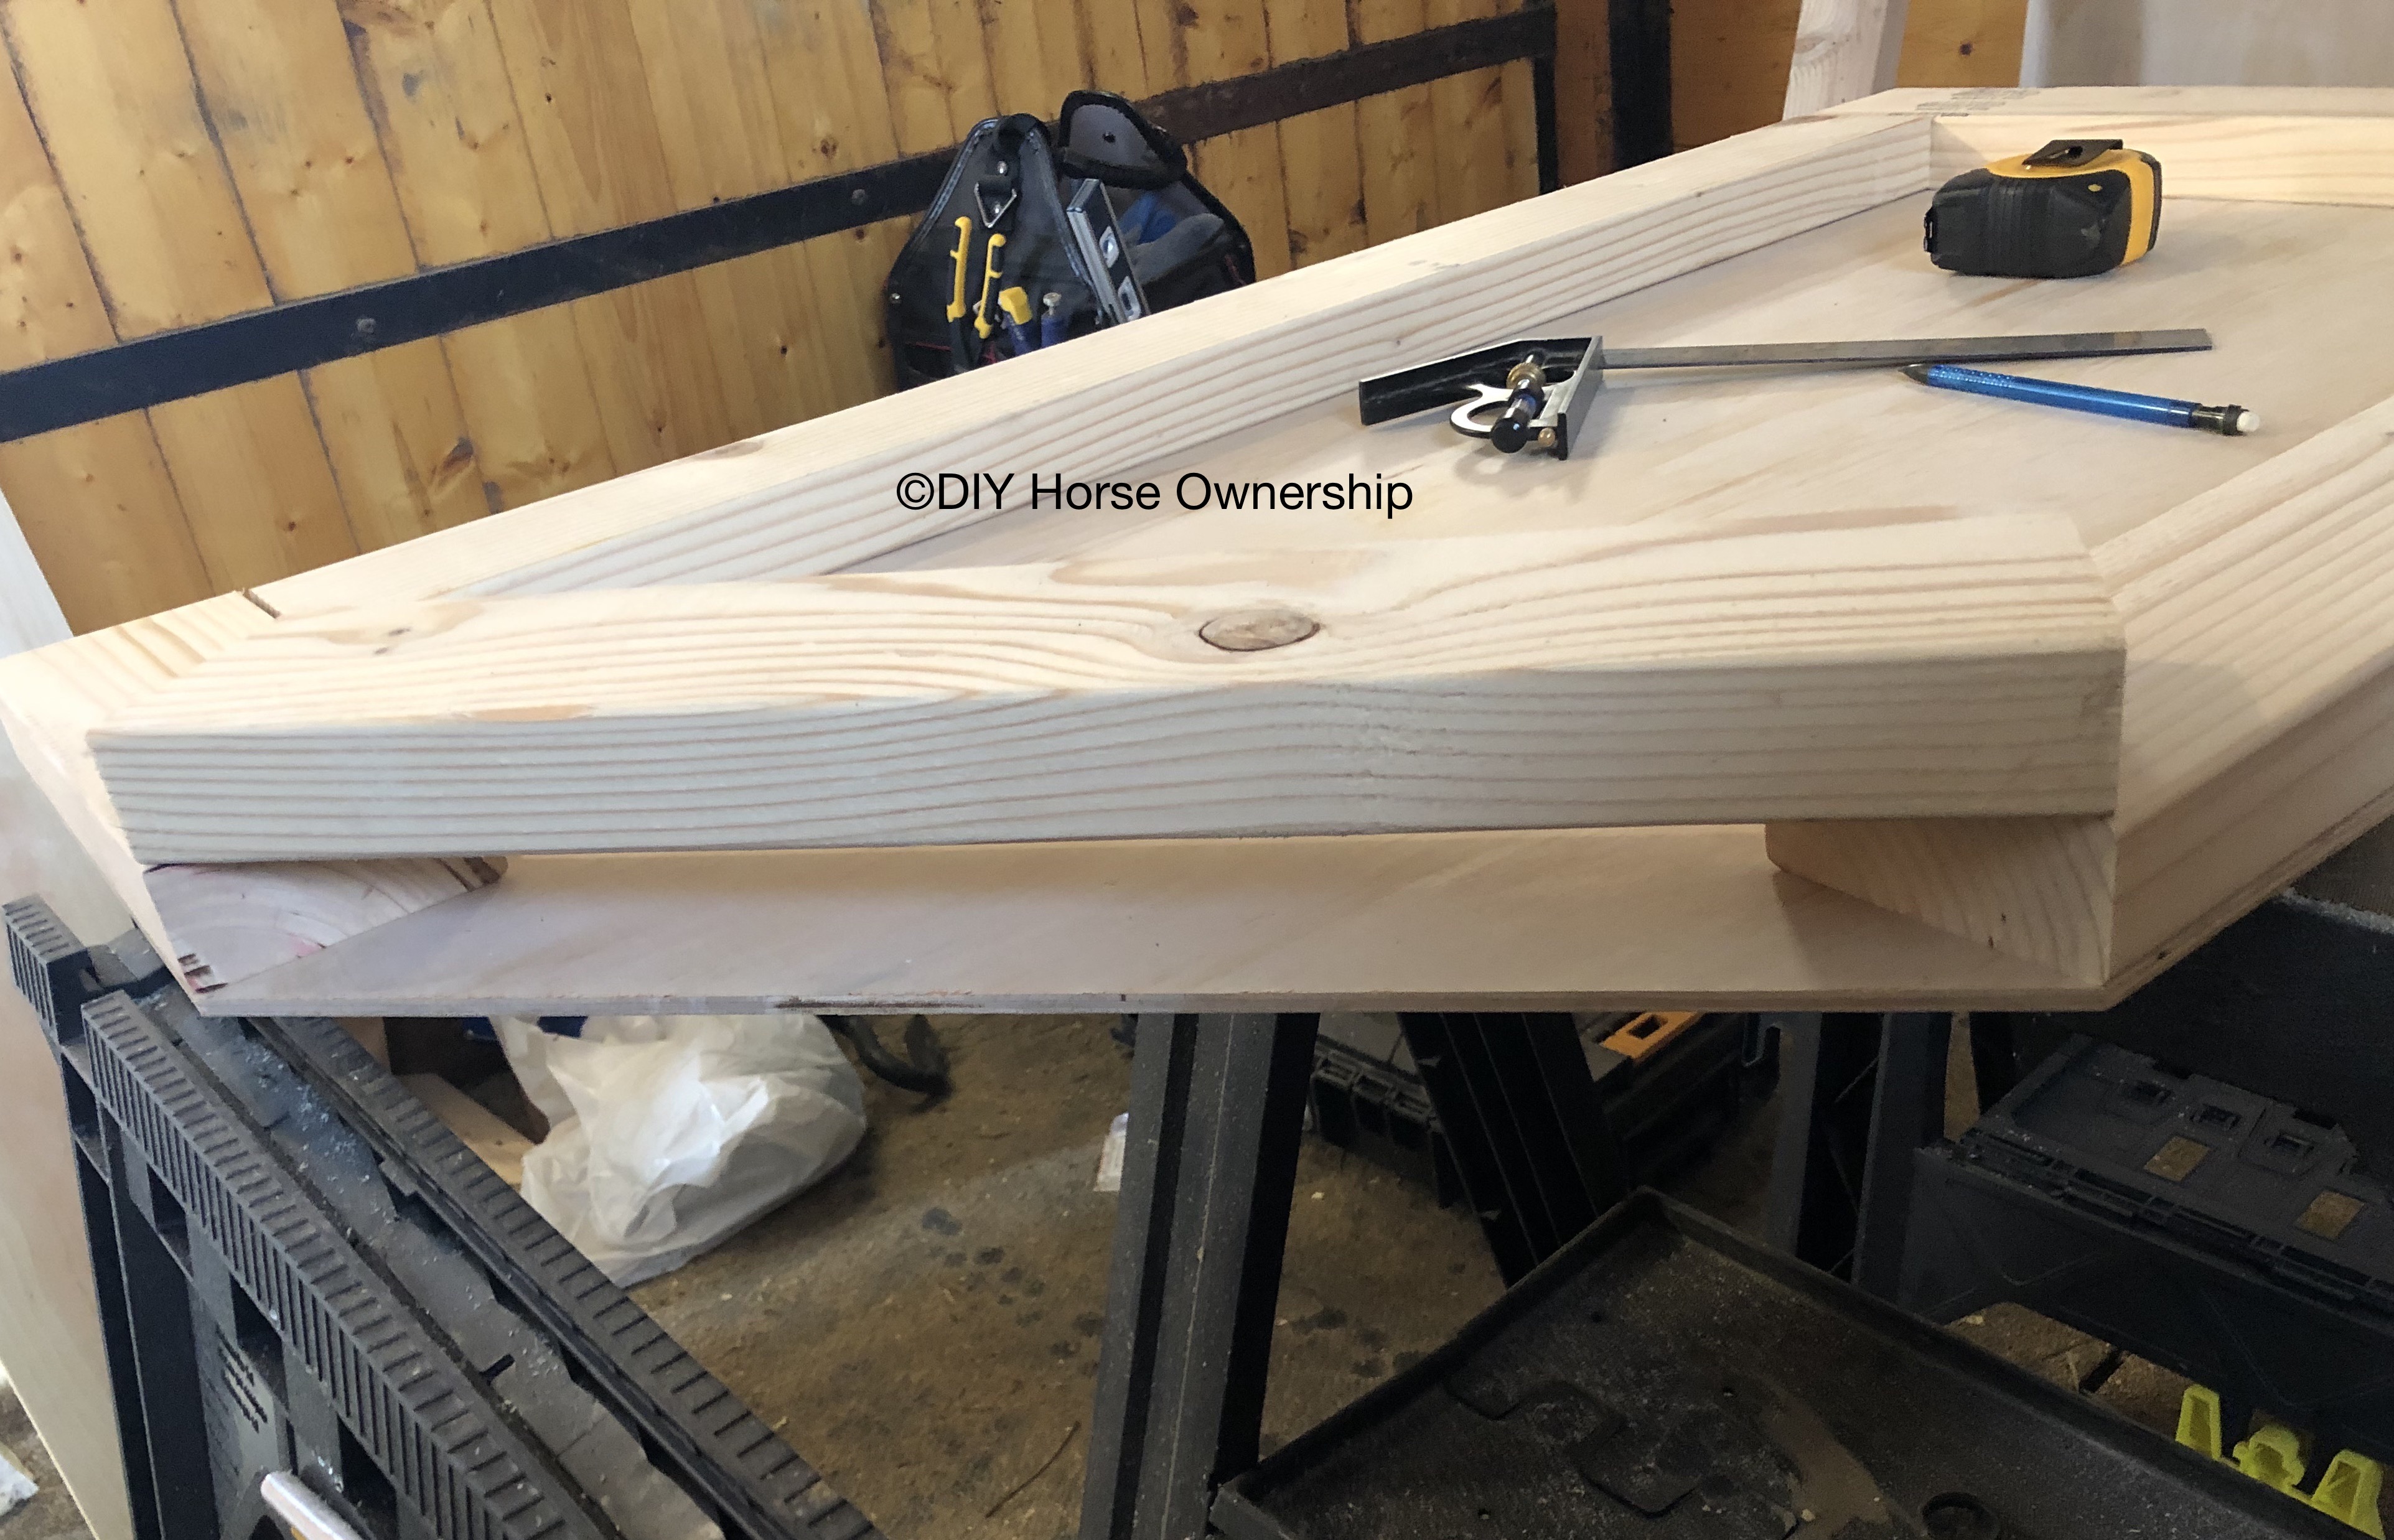
- Now you’ll need to cut and install the 2 side pieces using the same method as above. These pieces should be 8.25″ long.
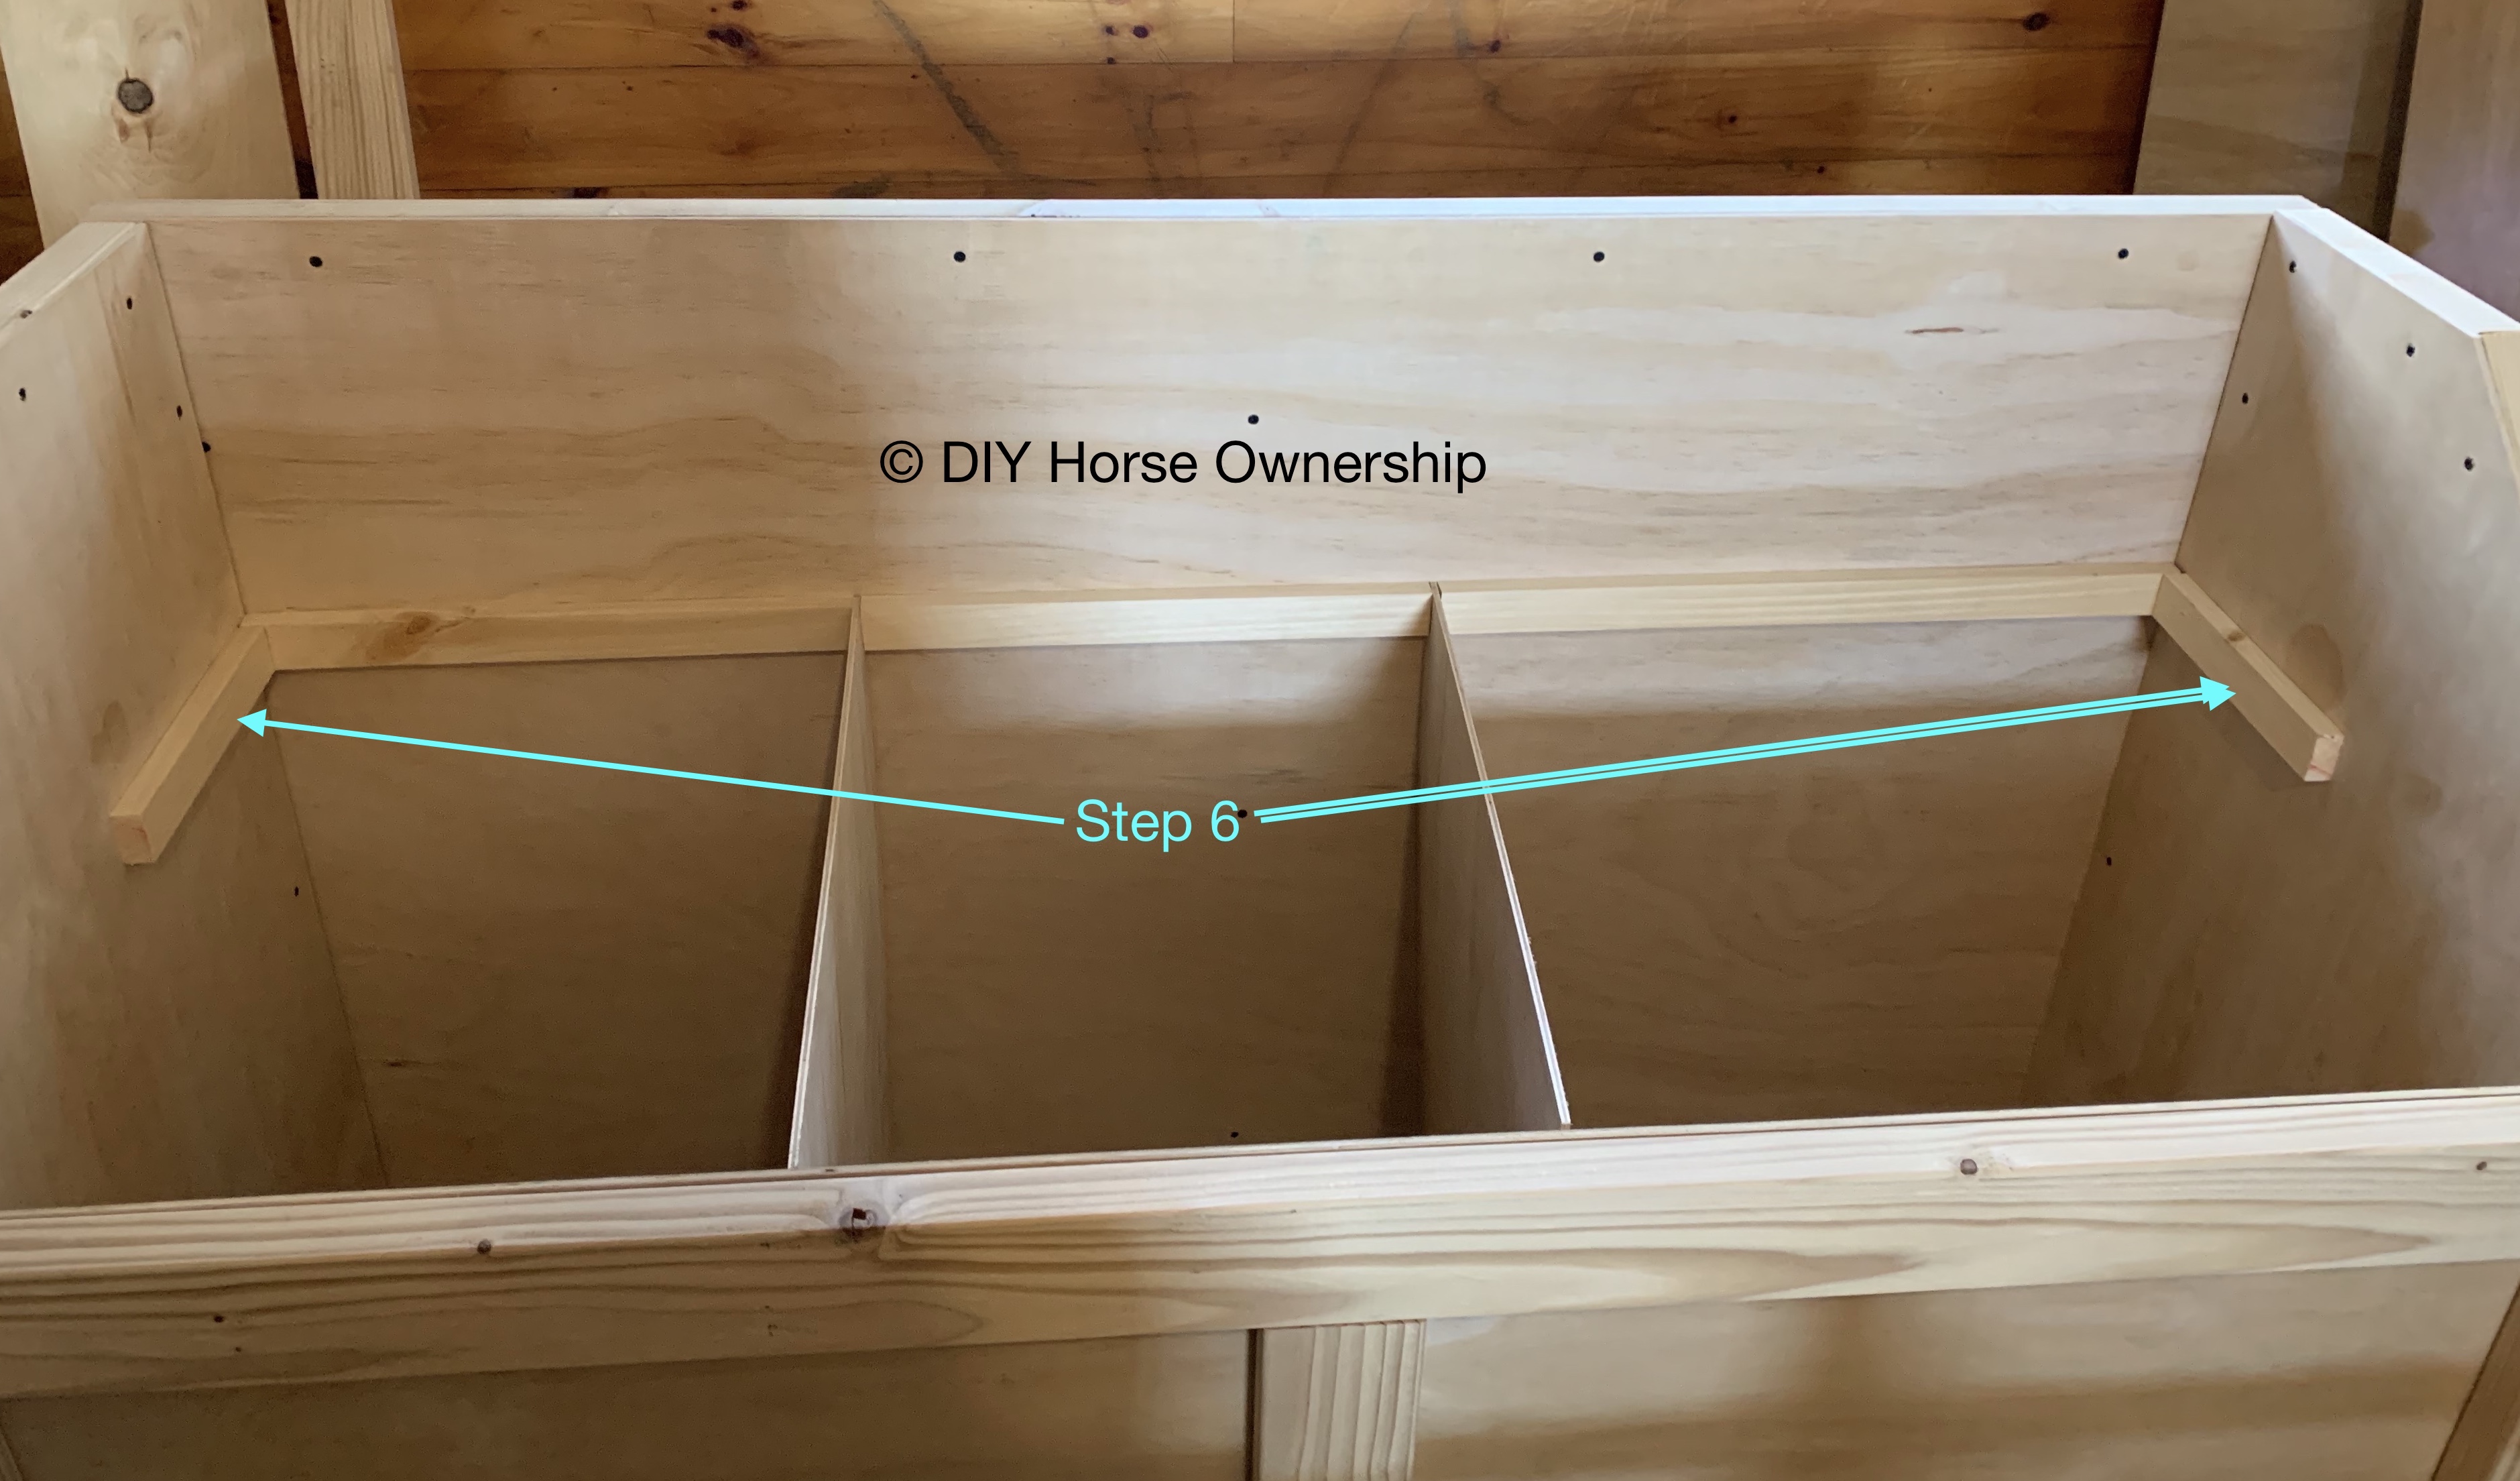
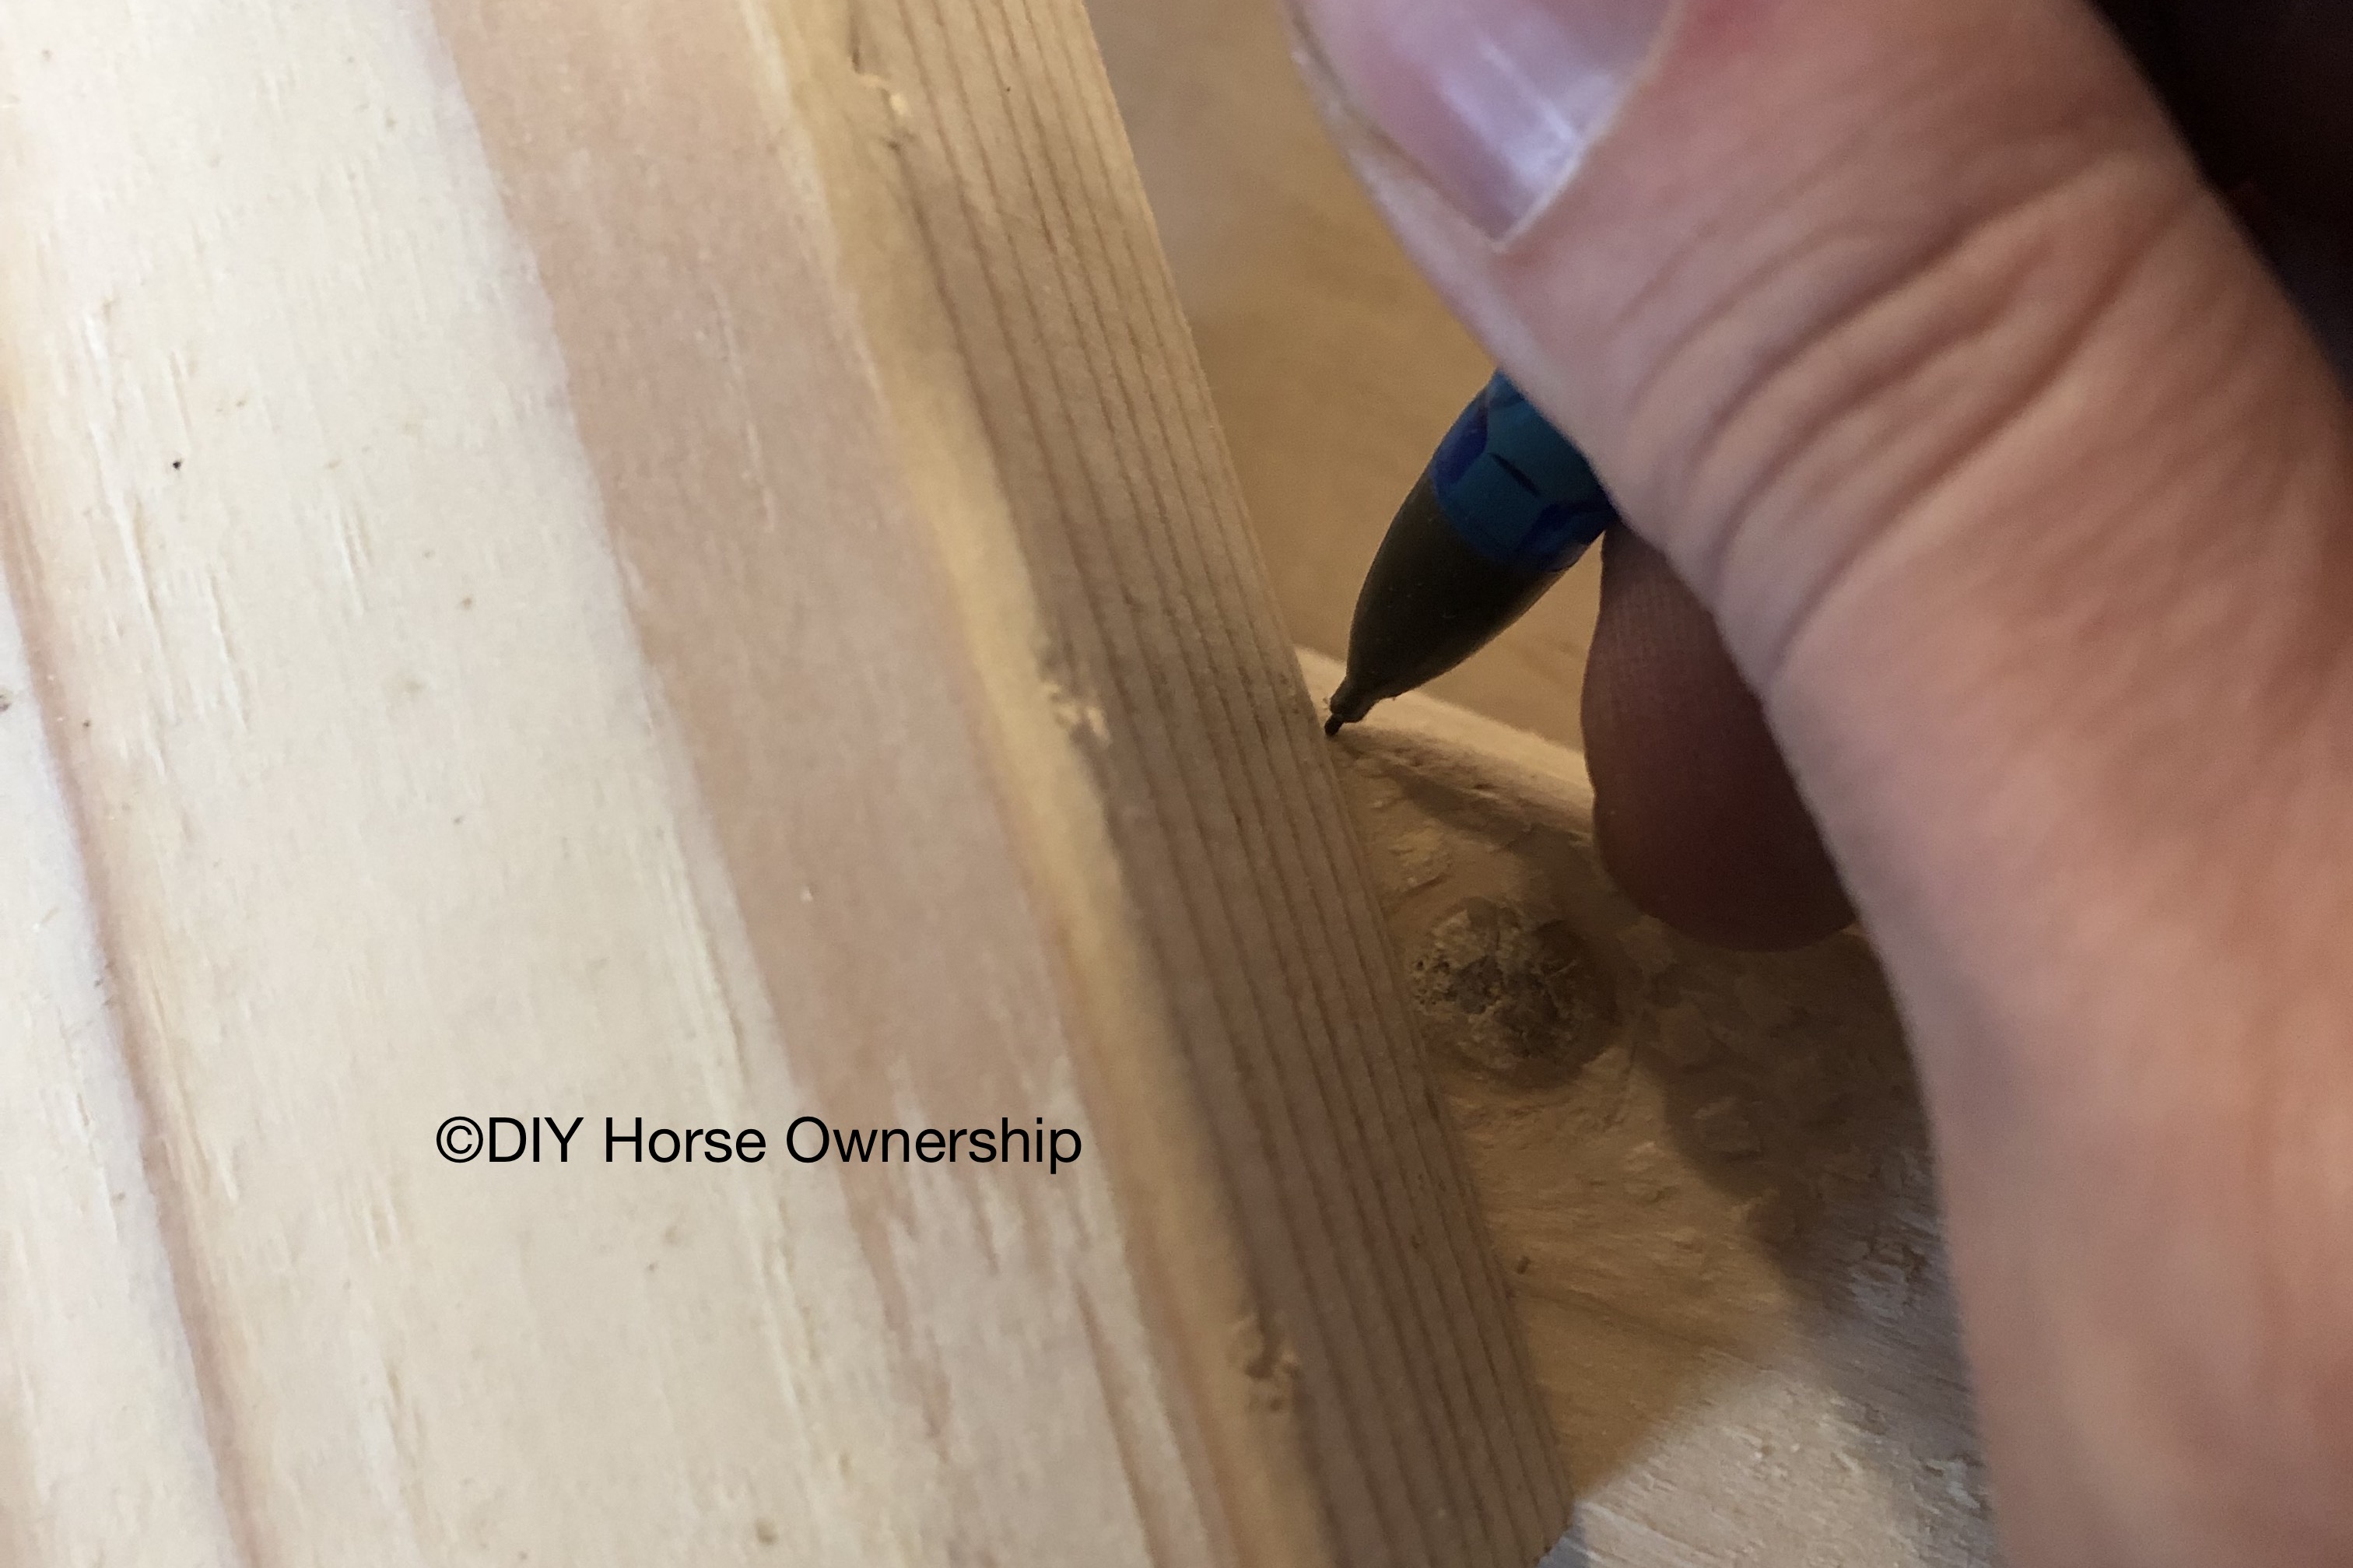
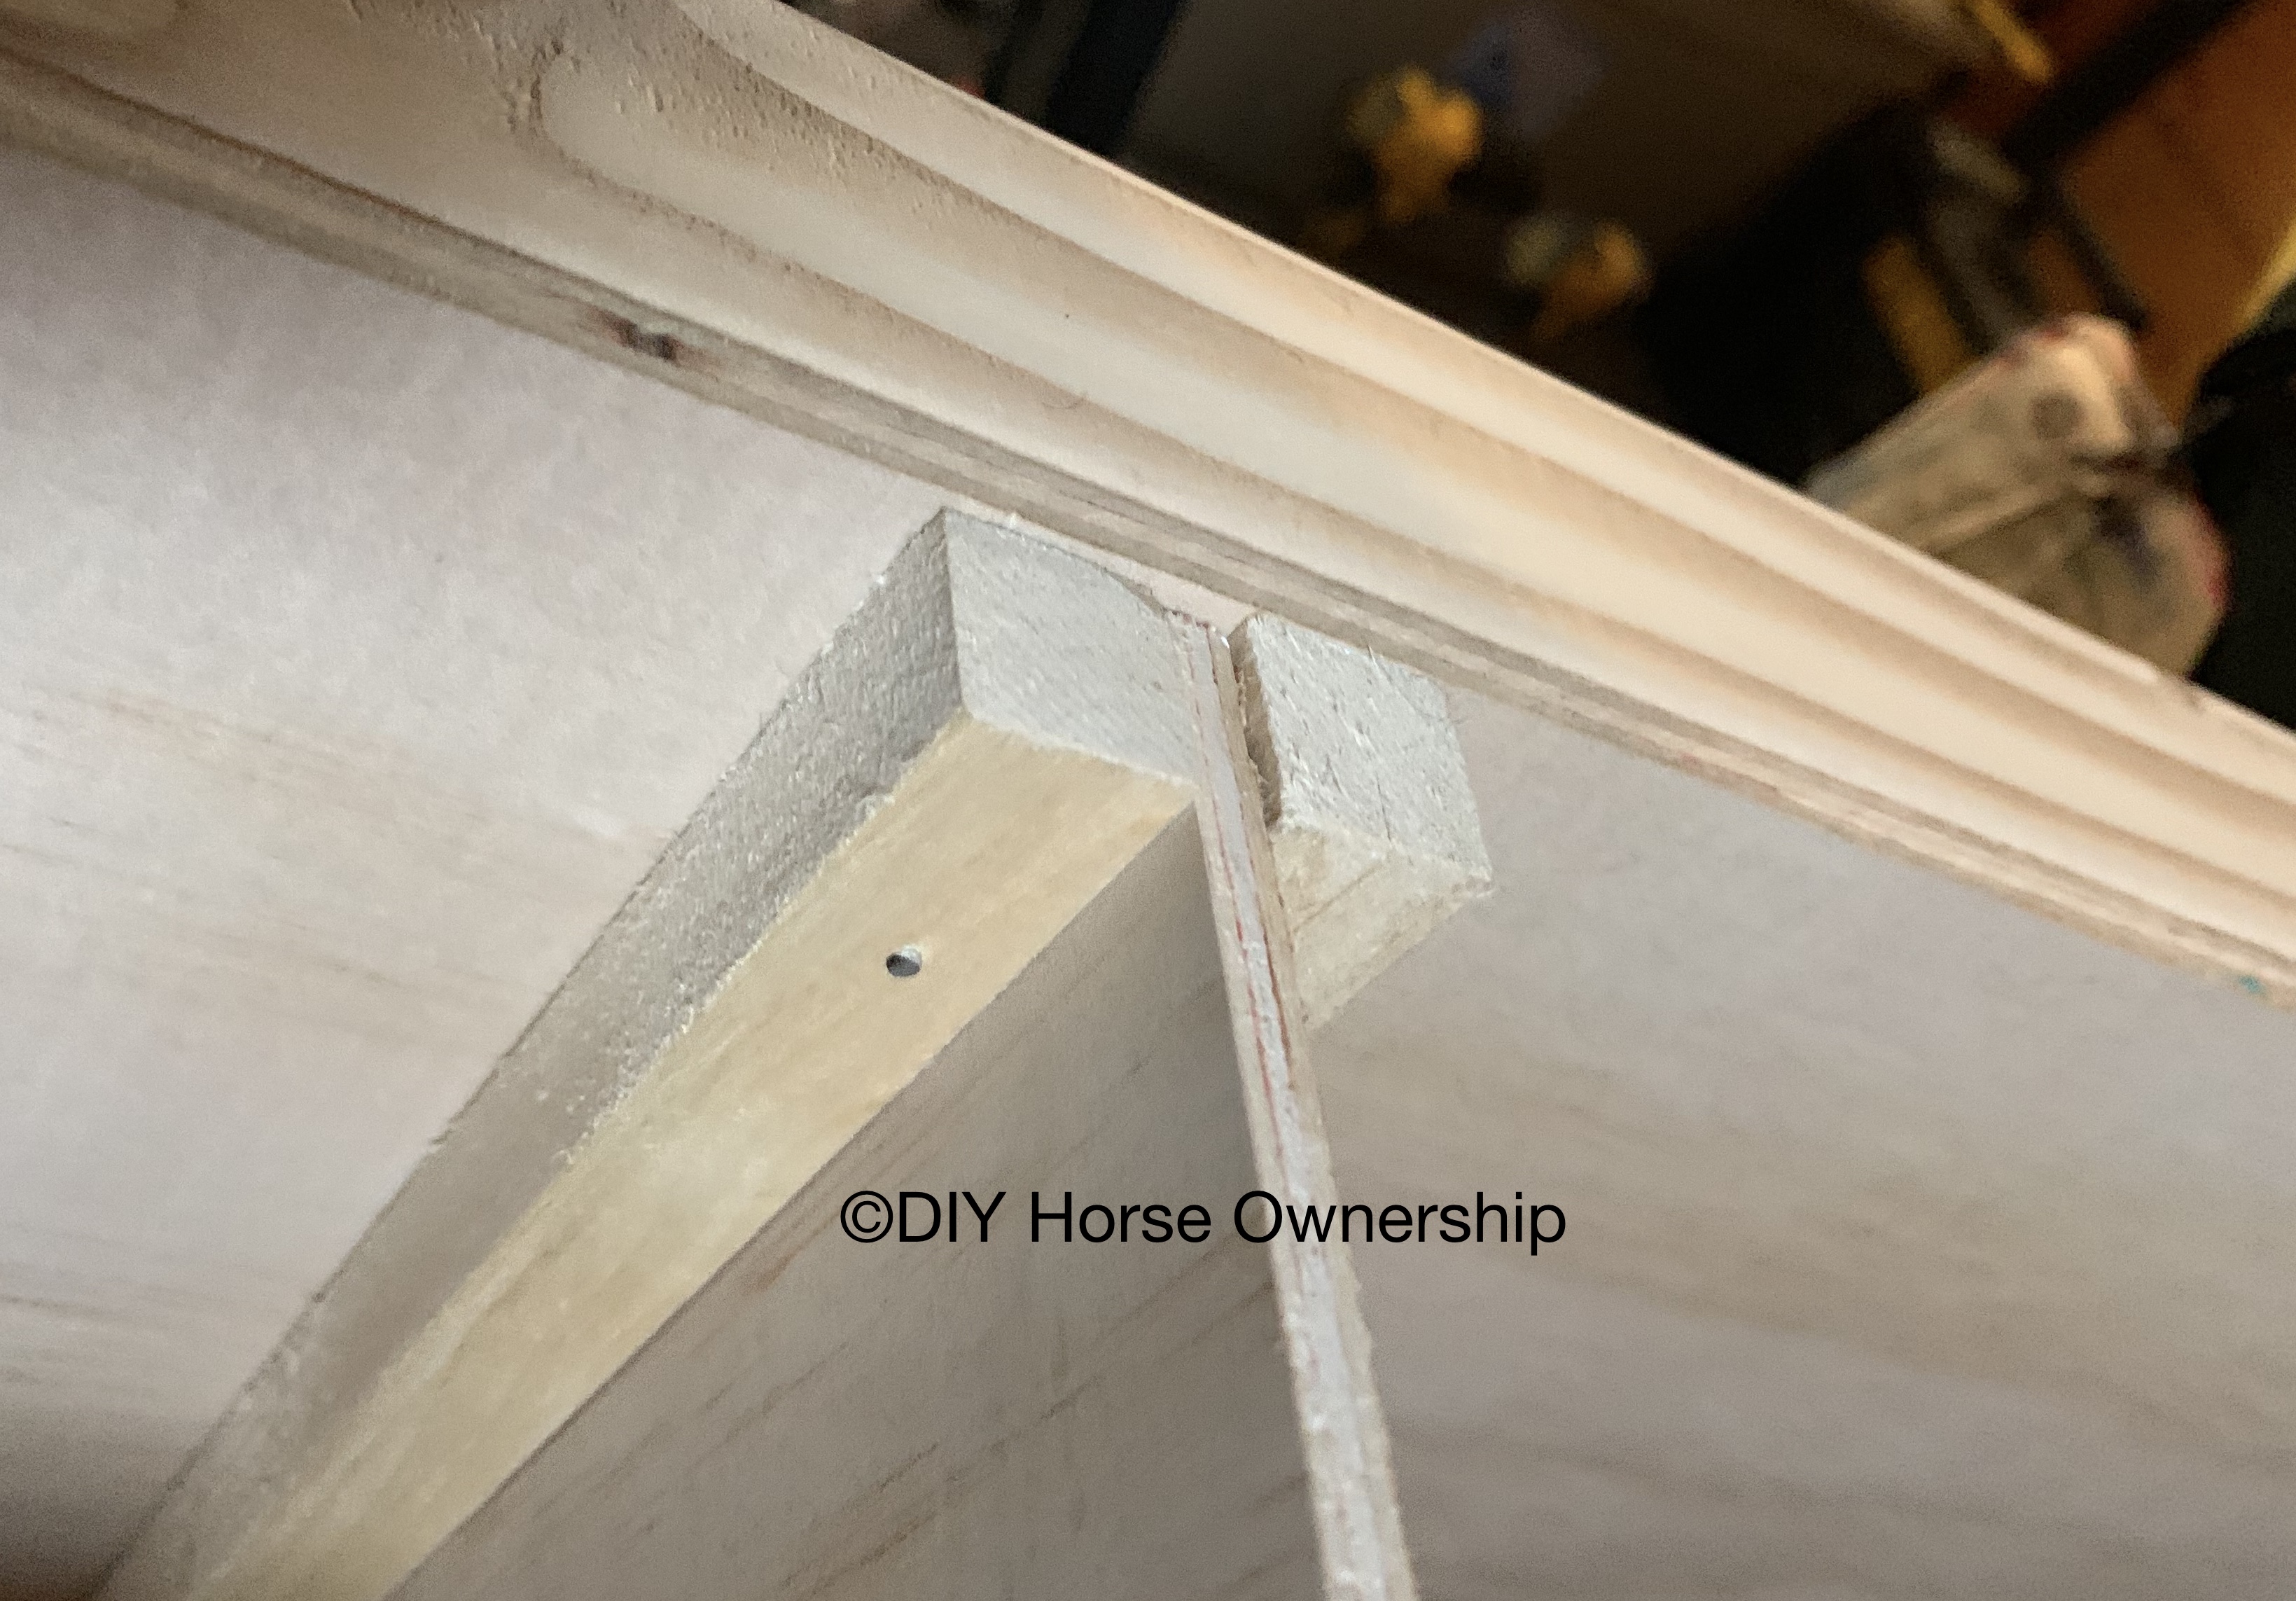
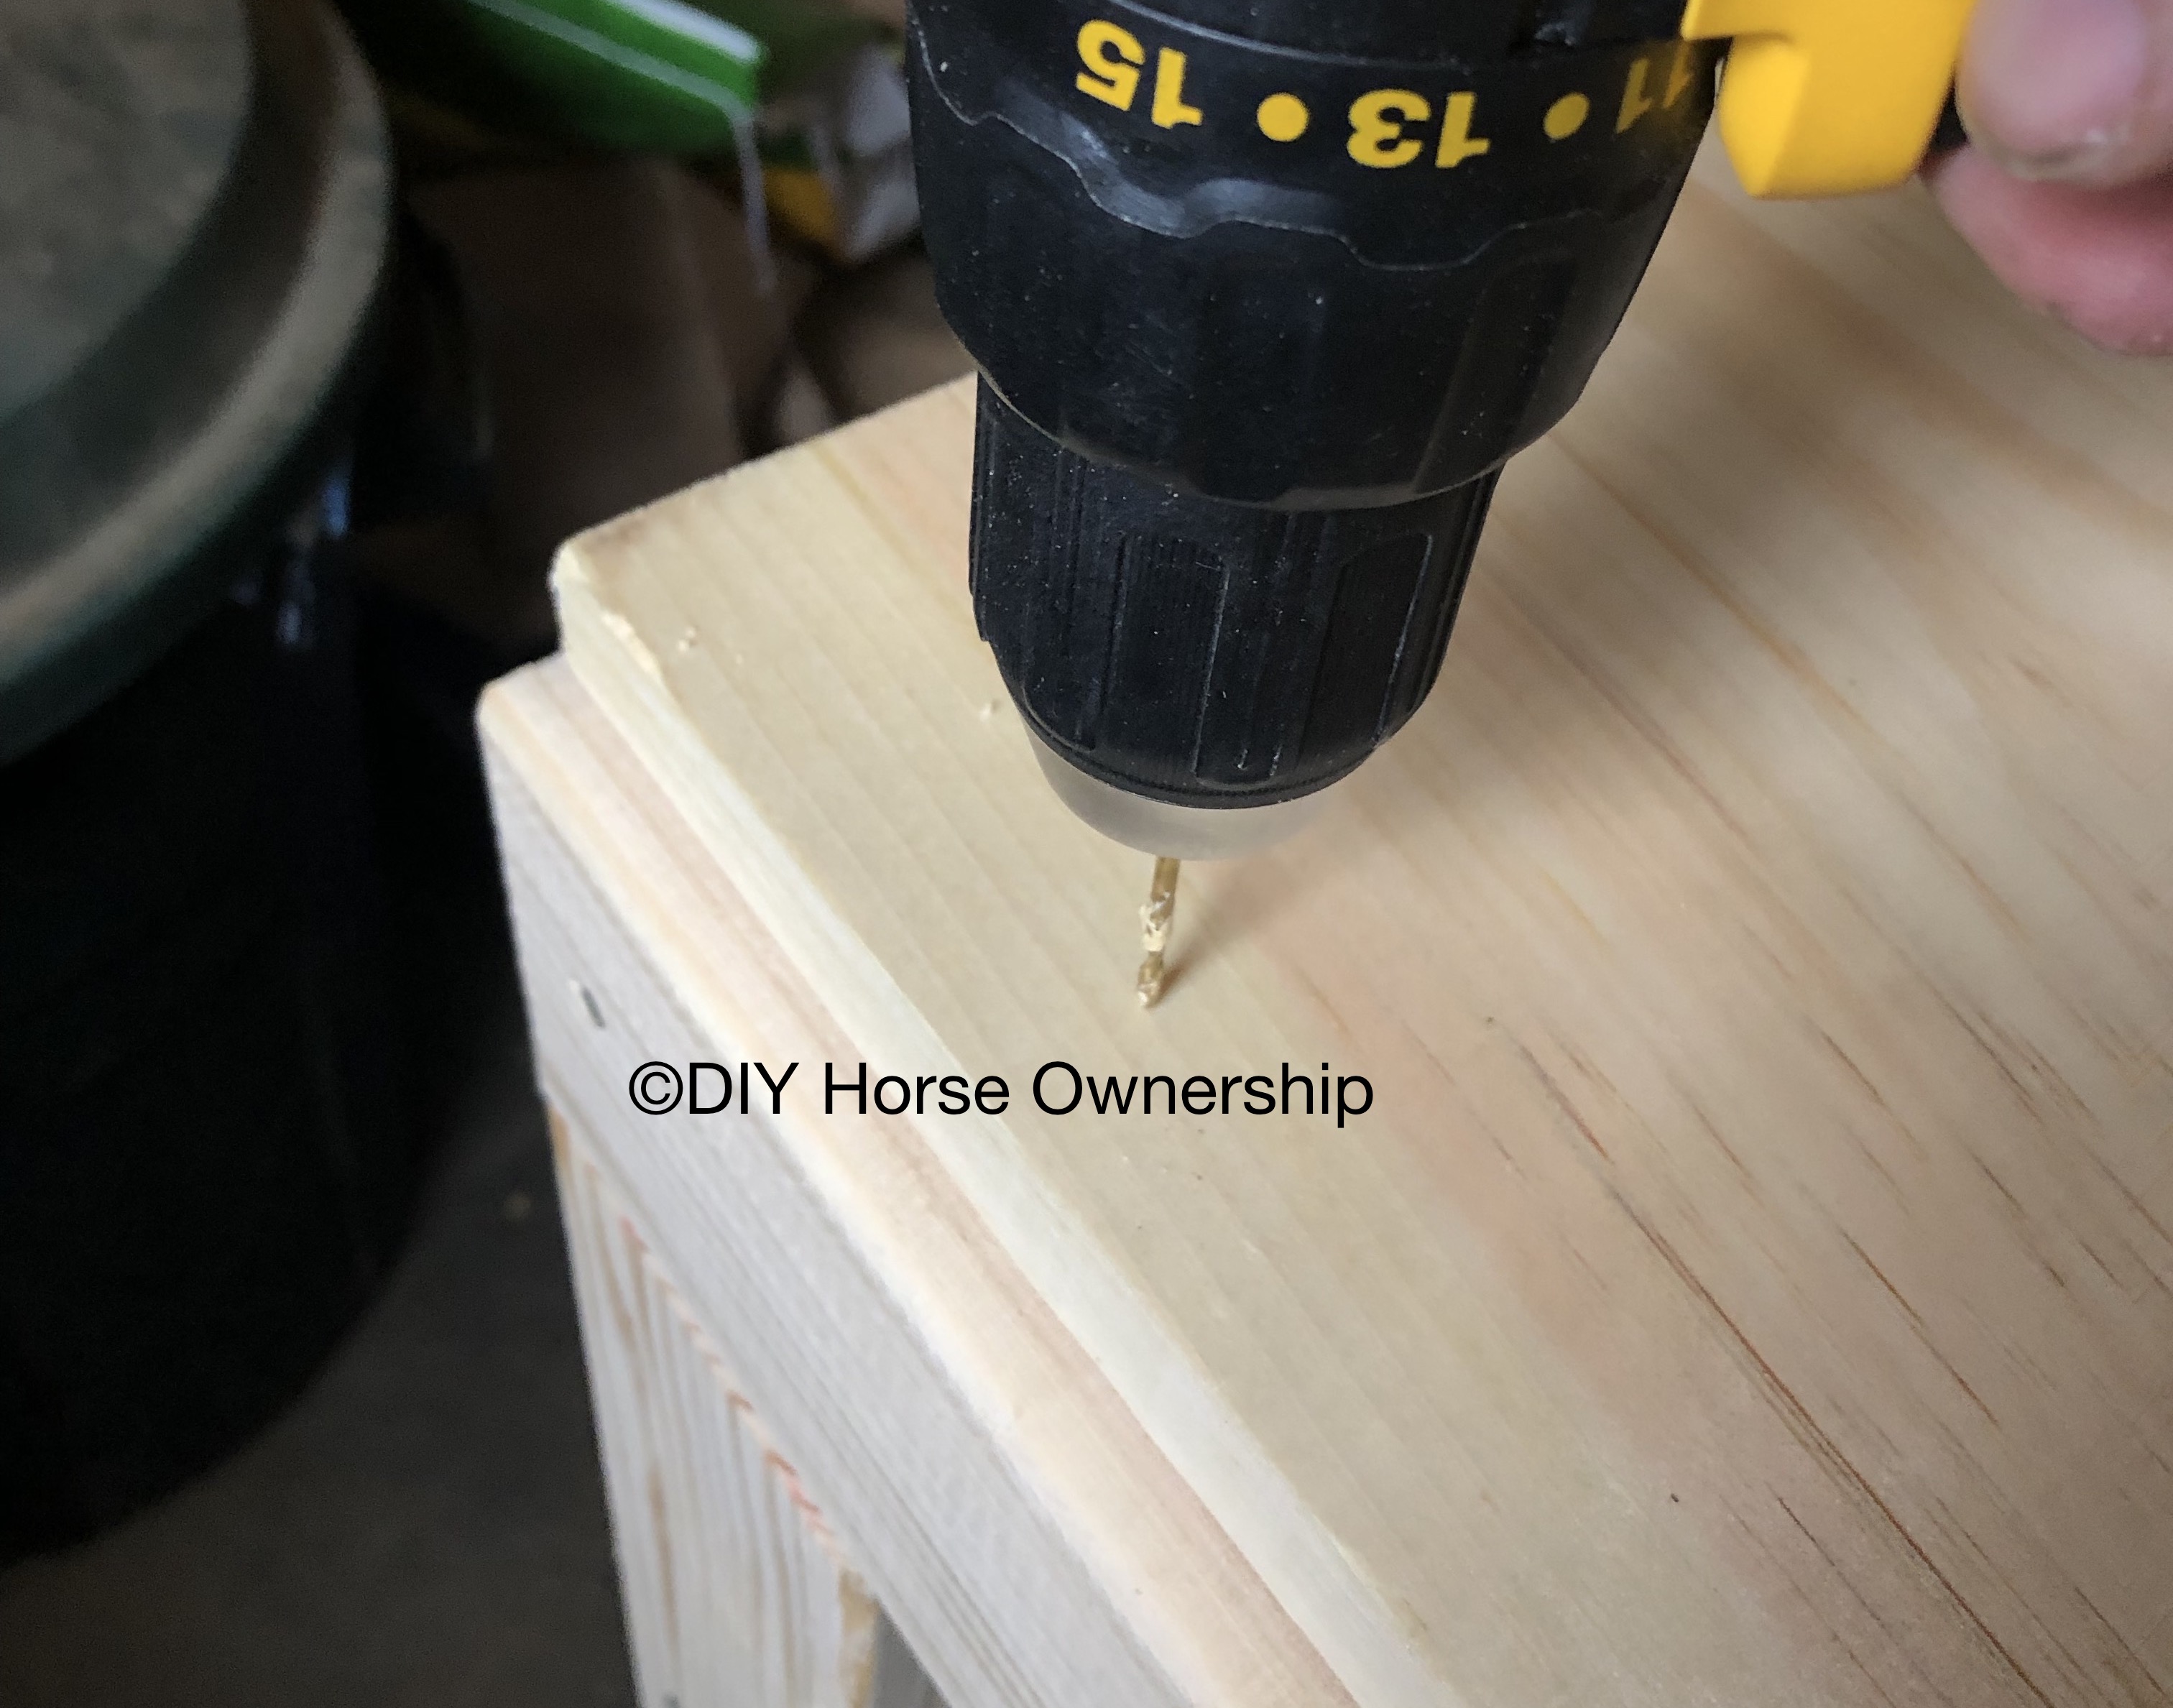
- Now it’s time to install the divider braces. Start by pre-drilling a hole next to the divider plywood where the brace is going to go.
- Measure and cut a piece of 1/2 square board to fit between the back brace and the bottom. Glue that board, put it in place, and drill from the back through your pre-drilled hole into the board.
Here you can see one divider has been braced and the other isn’t done yet.
- Repeat this process for the other divider.
- The front dividers should be the full height of the interior – in our case 26.25″ (remember you may have adjusted the hight of your bin for ease of scooping).
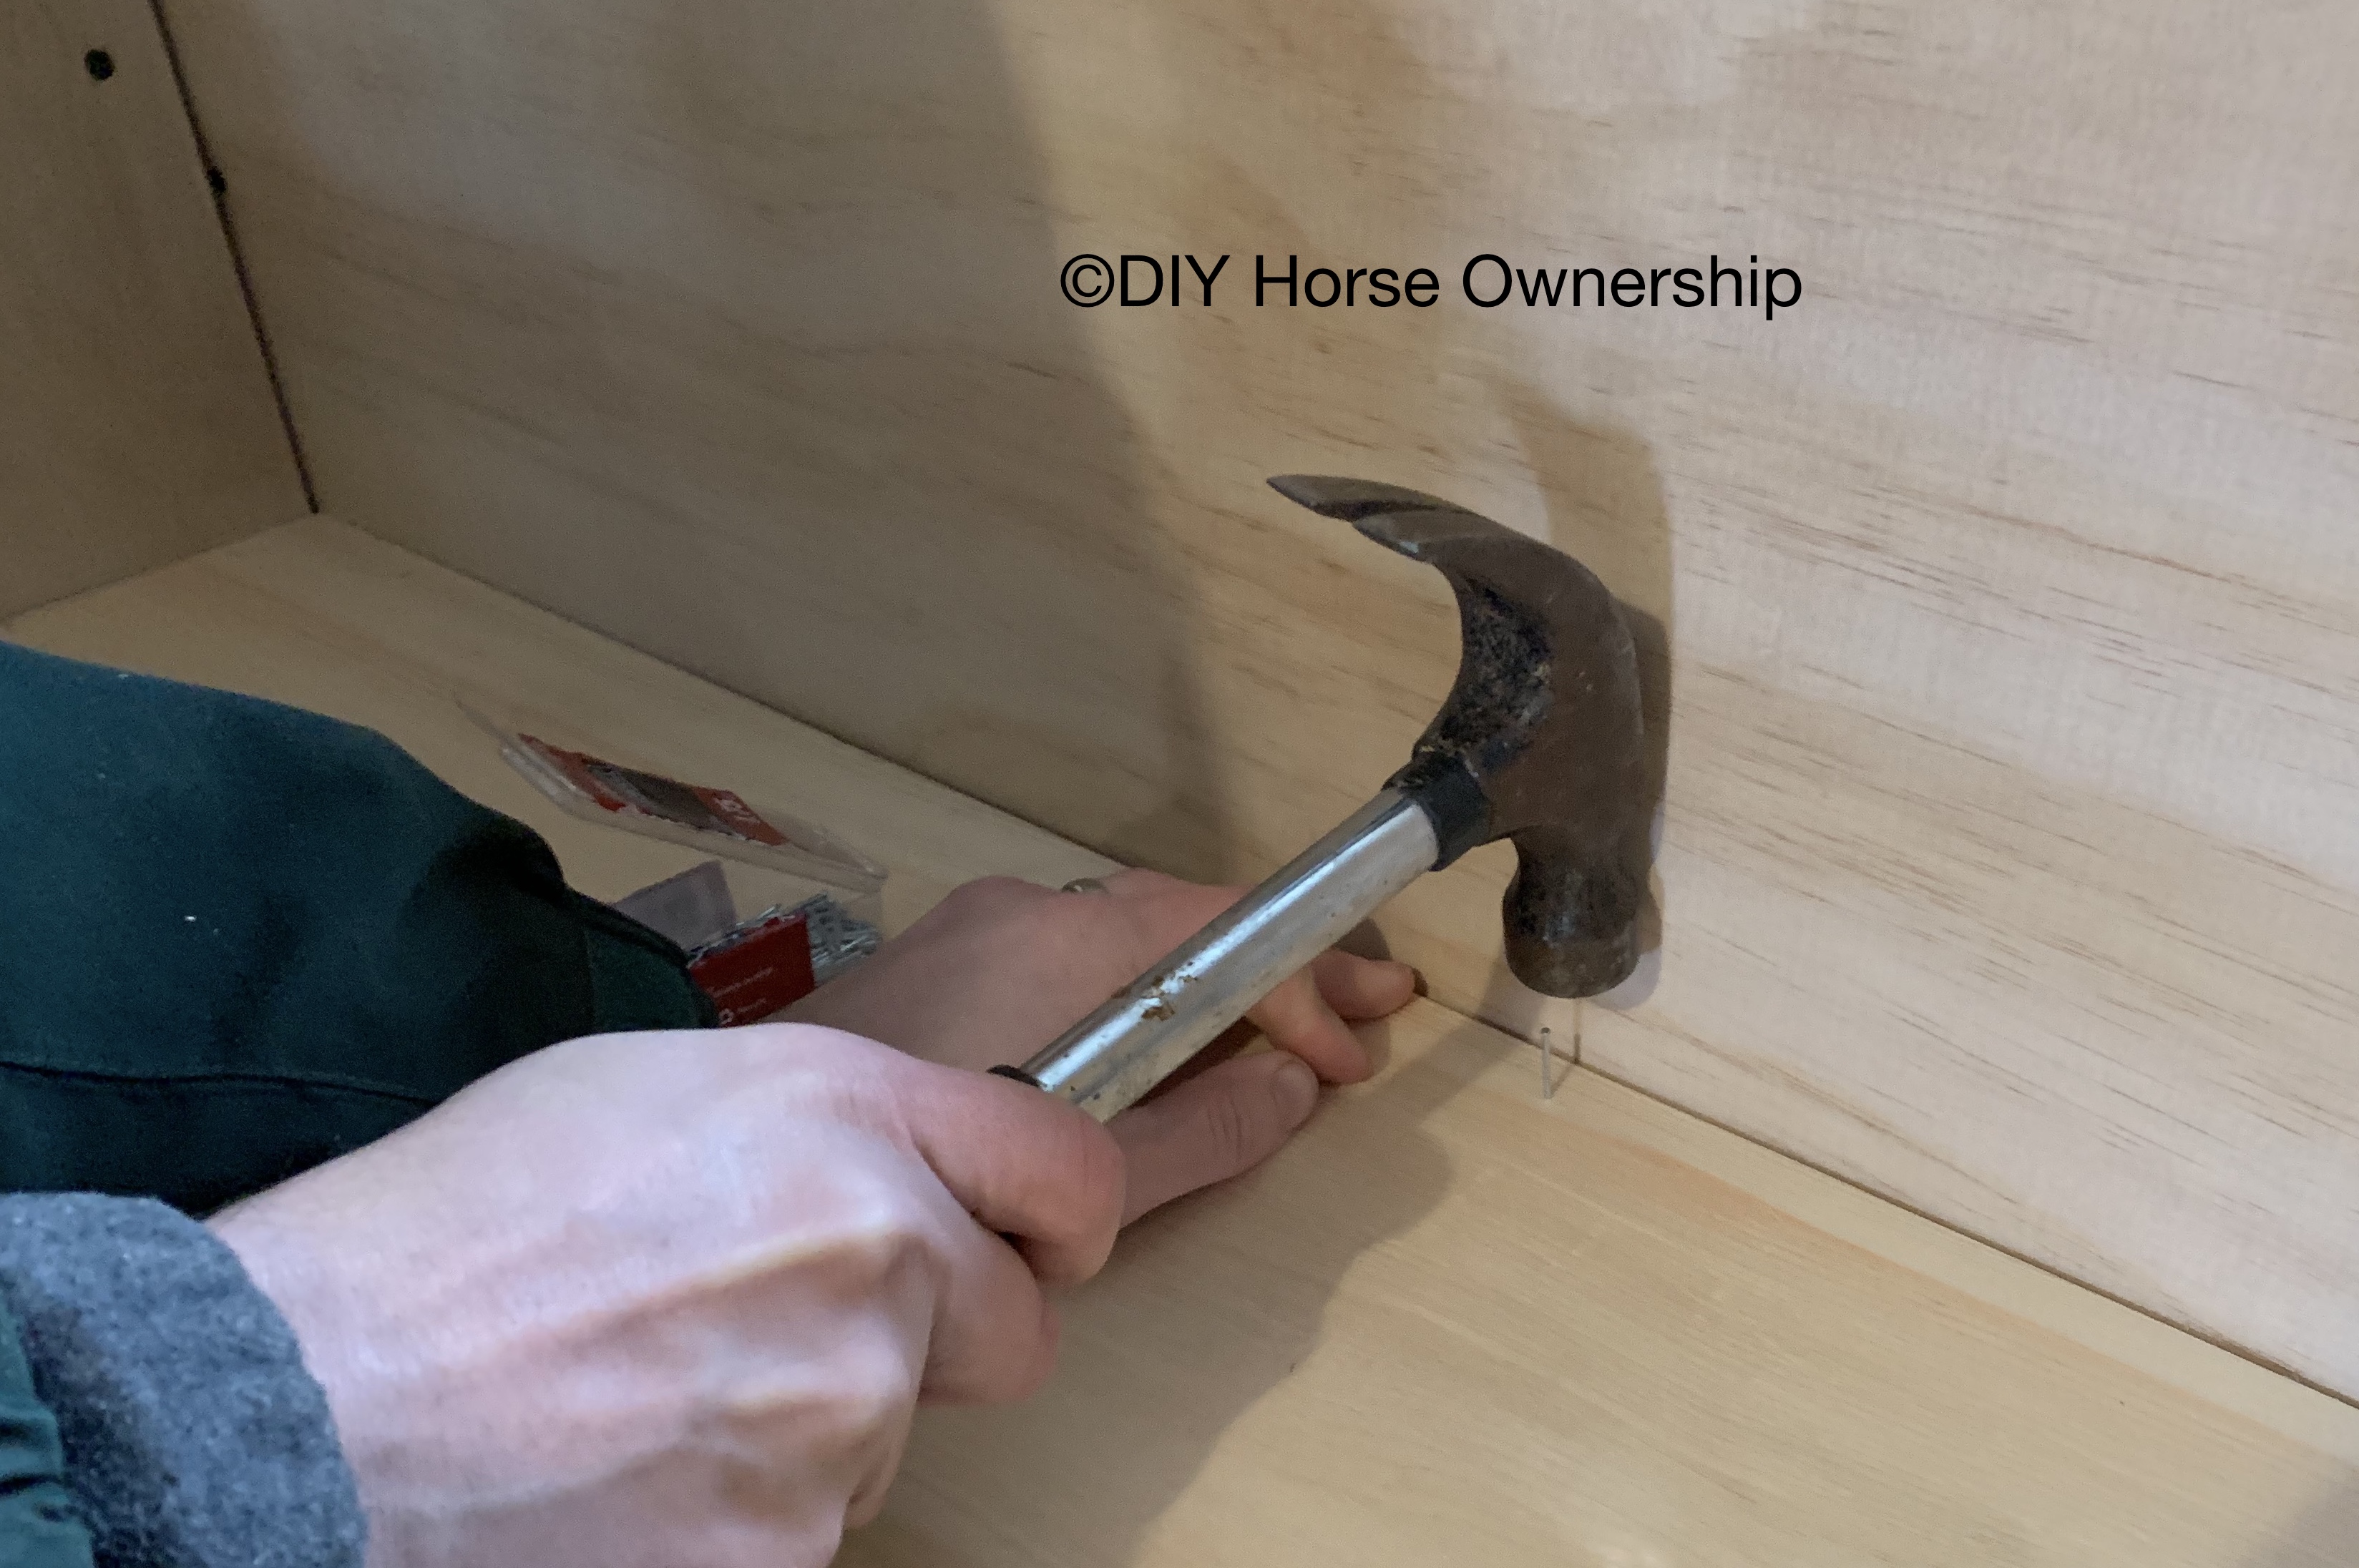
- Keep your divider in place and measure from the sides to make sure it’s even with the back and not slanted. Then line your divider braces with glue and place it next to the divider. Because we didn’t want to see screws on the front of our feed bin, we installed these with finishing nails from the inside and only at the top and bottom where they would go into the exterior 2x4s and thus not be visible. If you don’t care about seeing screws, repeat the the process from steps 8 and 9.
Now your dividers are installed and your bin should look like this:
Supplement Shelf:
This step is actually super easy.
- Cut your 1×10″ board to the width of the interior of your feed bin.
- Place glue along the shelf braces.
- Place the shelf on the braces.
- Using finished nails to fully attach the shelf to the braces.
If you do as I say in these directions and don’t do as my husband did, your side braces won’t stick out past the shelf like our (he measured and cut them to fit under the shelf if pressed all the way against the back instead of to the back shelf brace). It’s functional though.
Top Construction:
This is another step where you’re going to want to measure your feed been and use your measurements, not exact measurements from me. I recommend placing your top board (a 1×12″ board) on top and places your hinges to see where you’d like to place your hinges. With two doors, we decided to space the hinges, about 1/4 of the way in from the side of each door. You might want to do 1/3 instead.
- Once you’ve decided on where you want your hinges, you’ll need to add support beams for the hinges using 1×4″ boards cut to the width of your 1×12″ board less 2″.
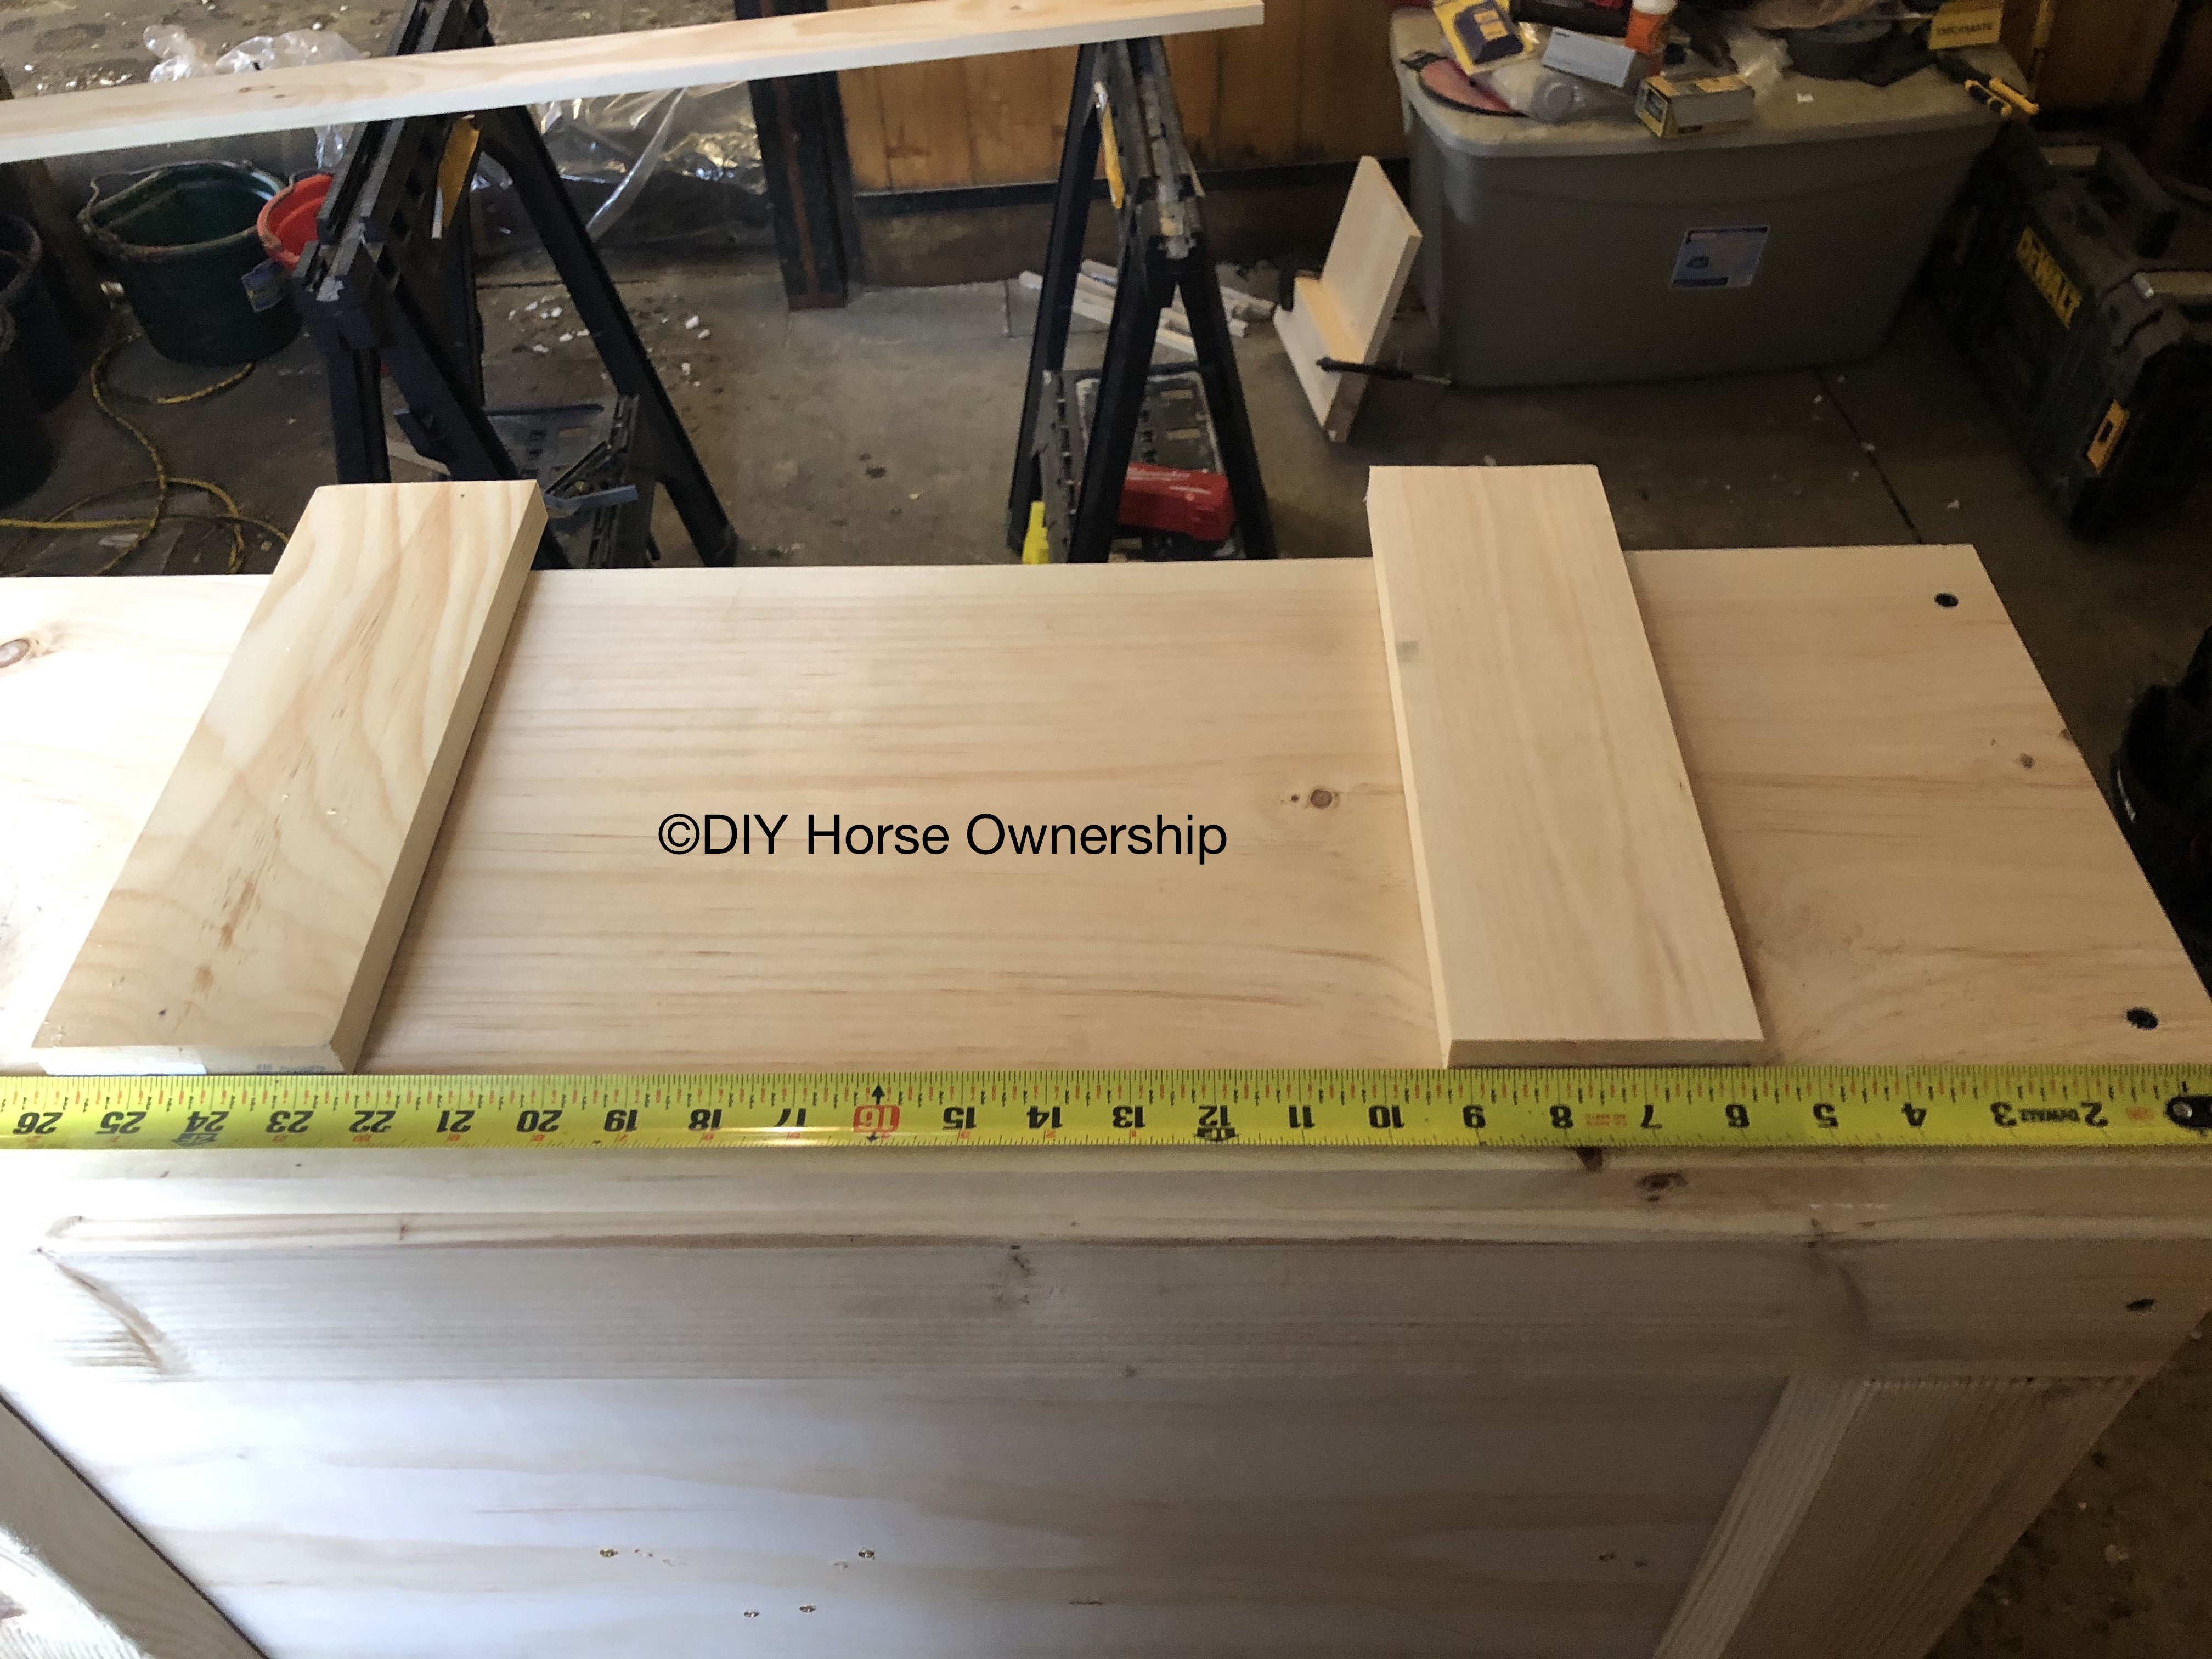
placed, but not cut do length yet
- Here’s a sketch to better explain this:
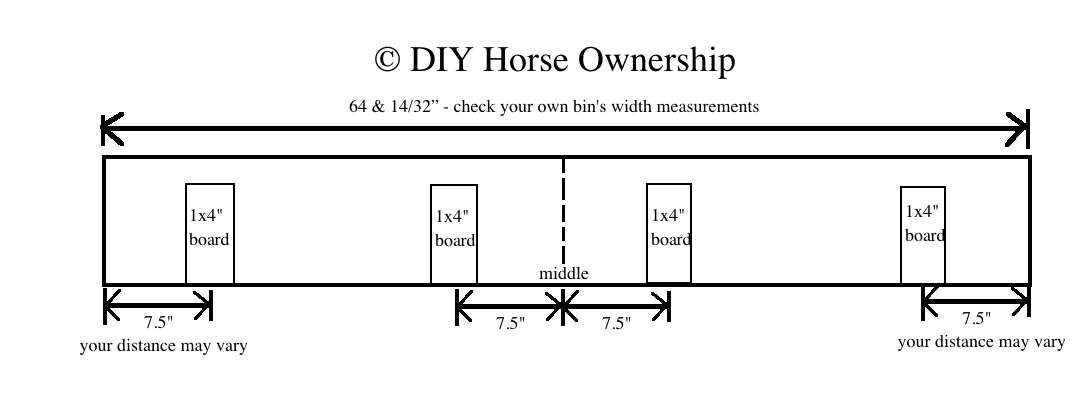
- Place your boards at your measurement spots for where you want your hinges. Glue and screw with 1″ screws. Repeat 4 times.
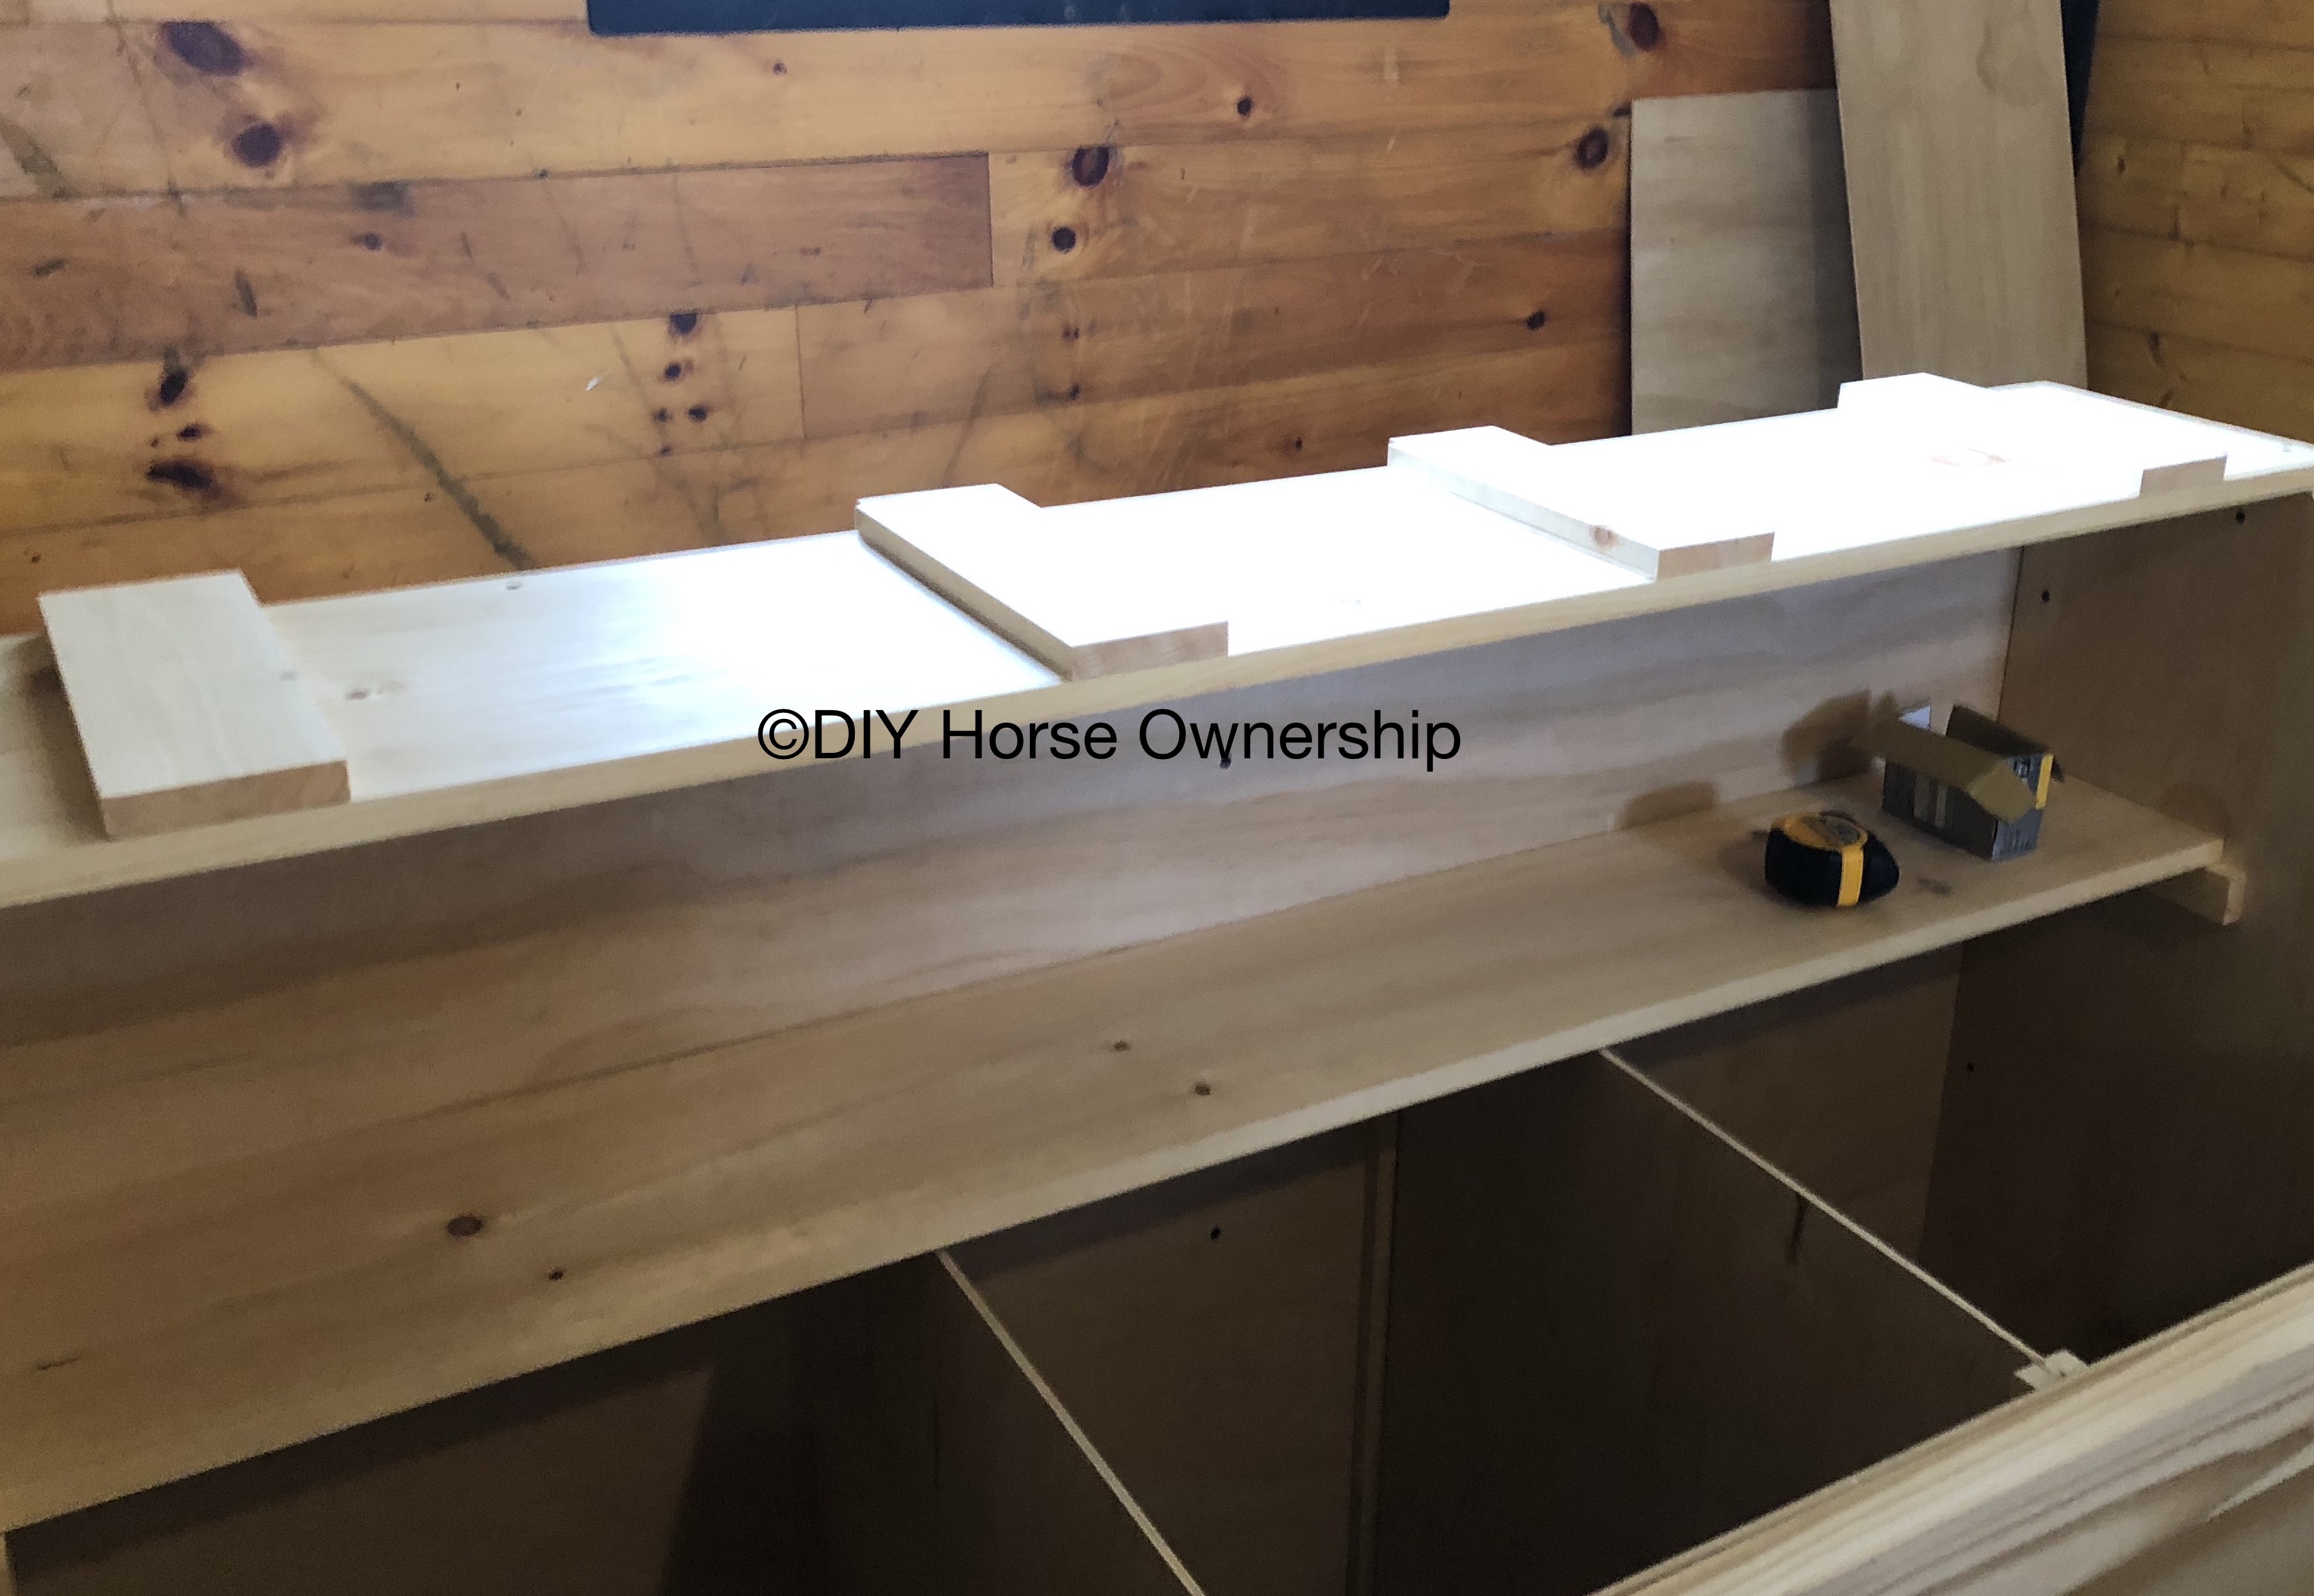
Sorry this picture is washed out, but the 1×4″ board are not flush with the back because they will sit inside the frame.
- Line the top of your feed bin with glue.
- Flip your top board over, place on the top, pre-drill, and then screw from above.
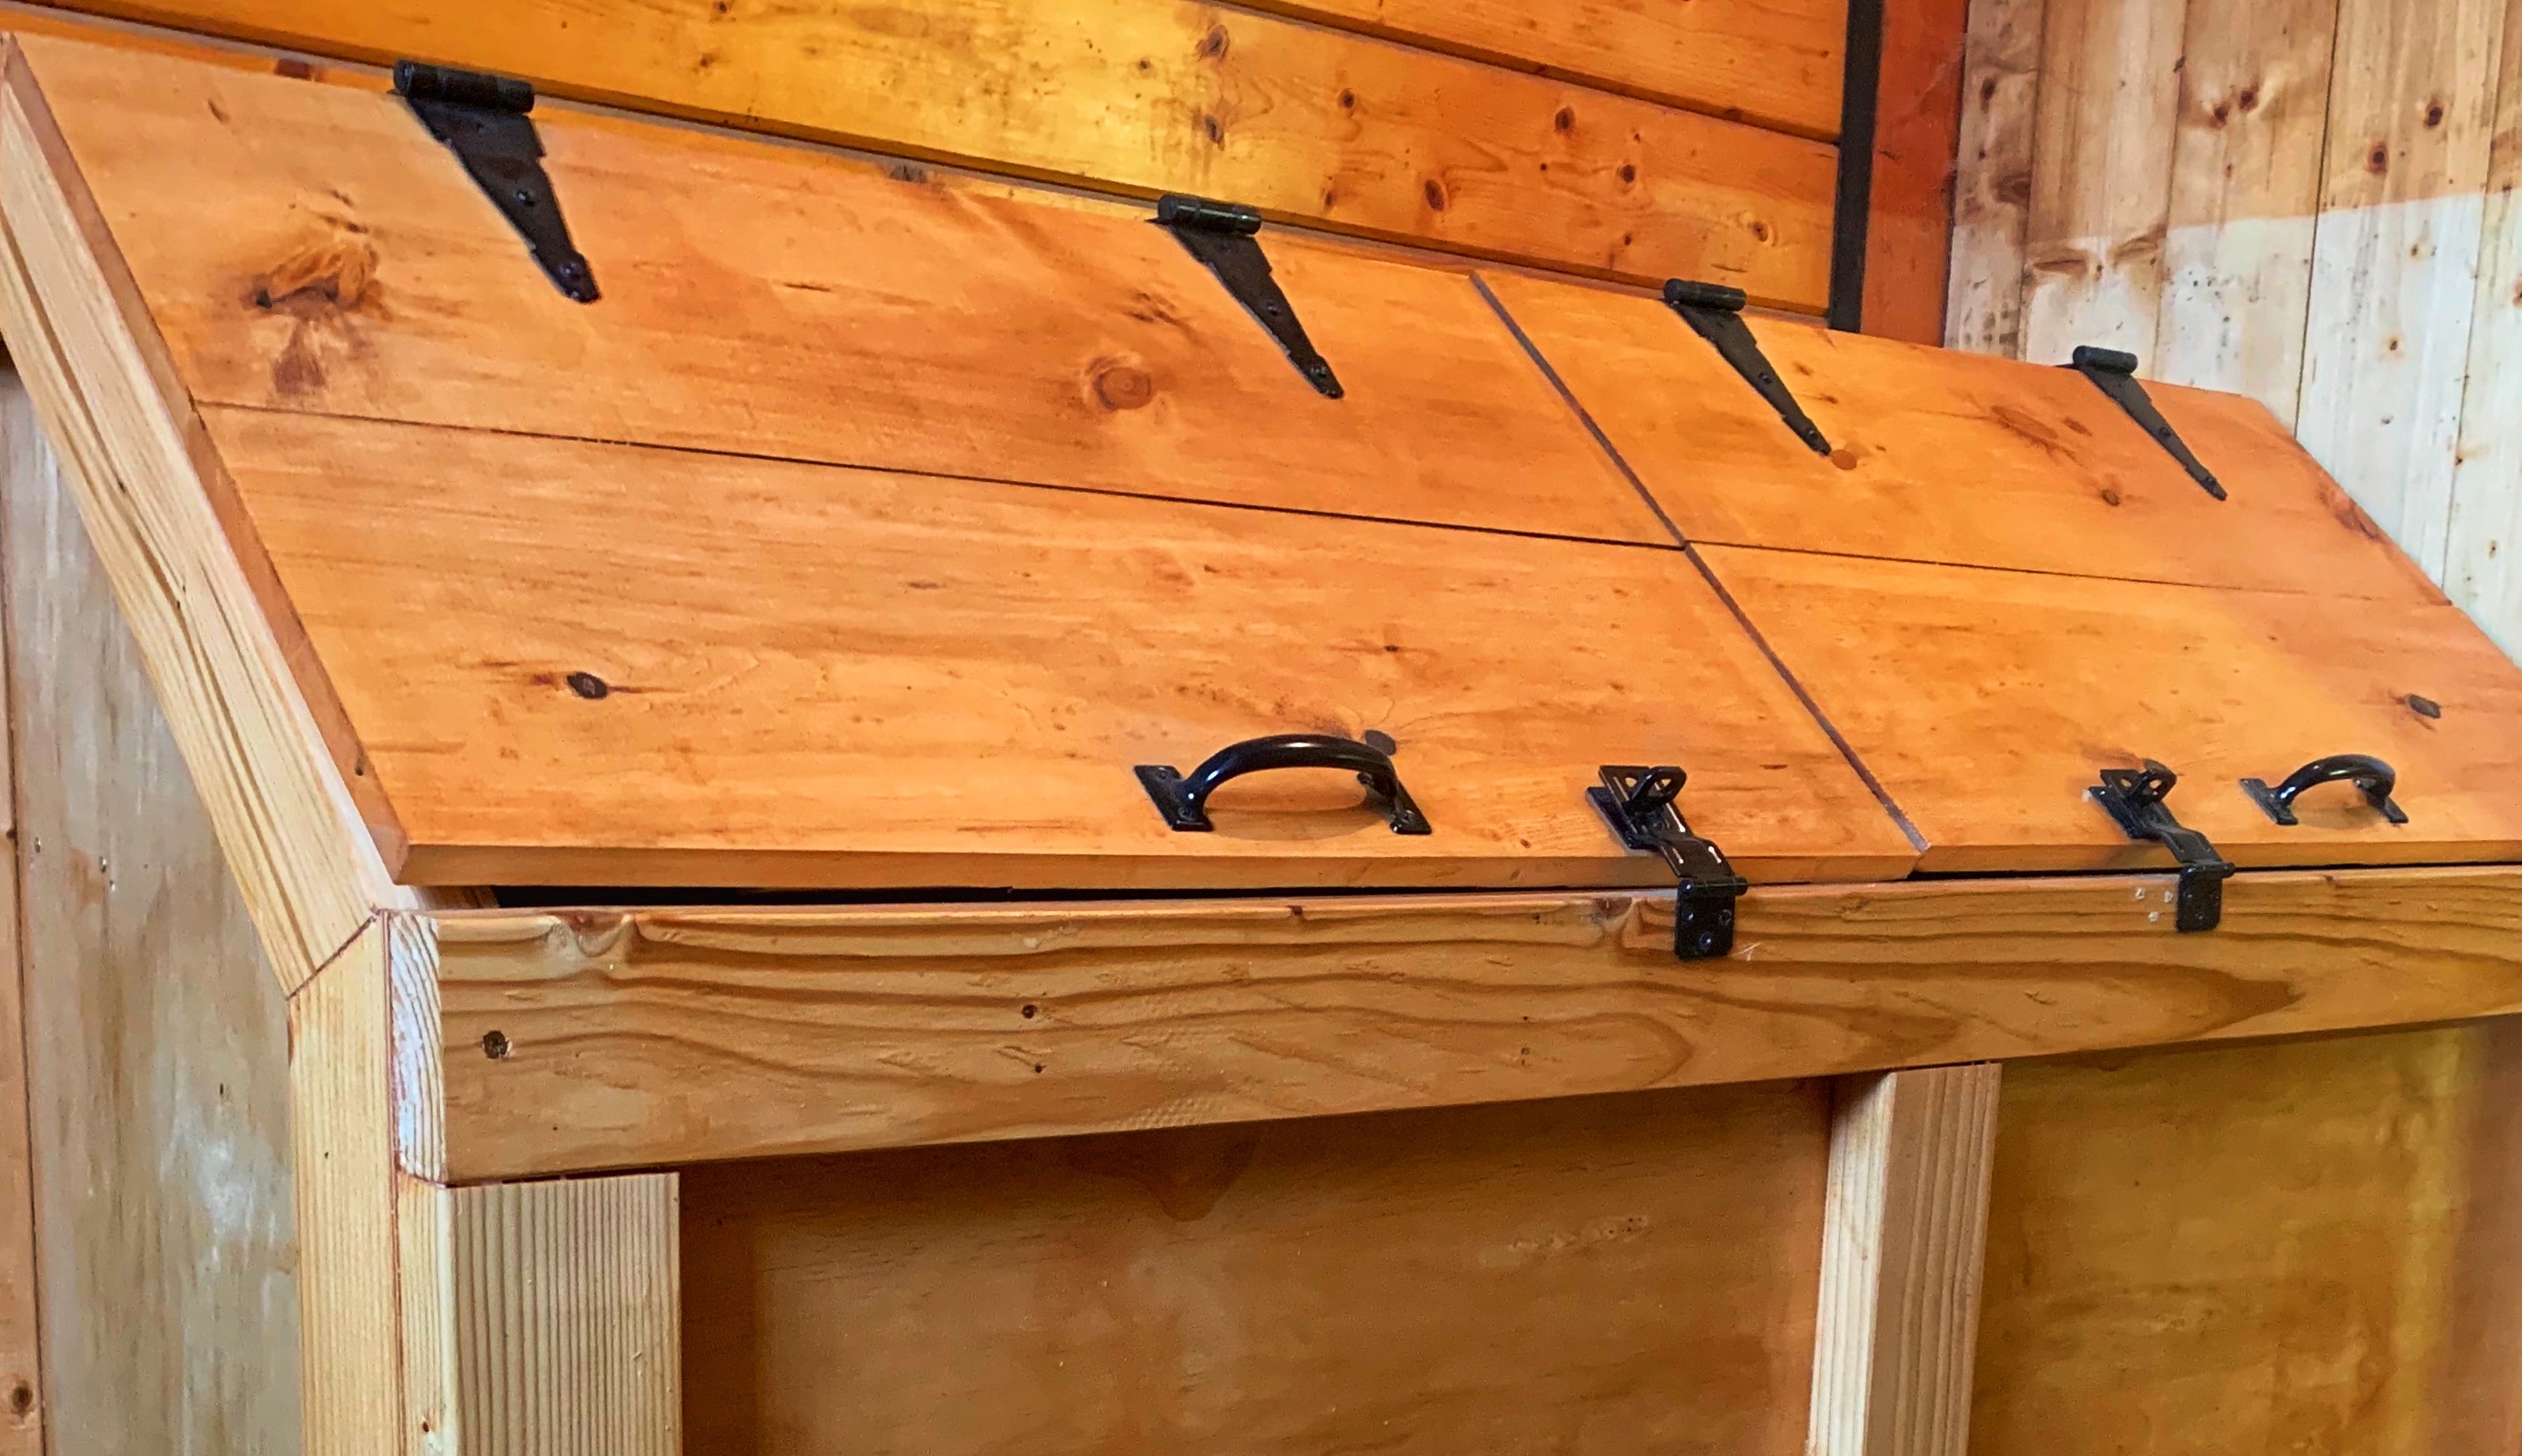
Doors
Apparently I captured no pictures of door construction. However it’s pretty simple. Again, you may need to make adjustments for your own measurements.
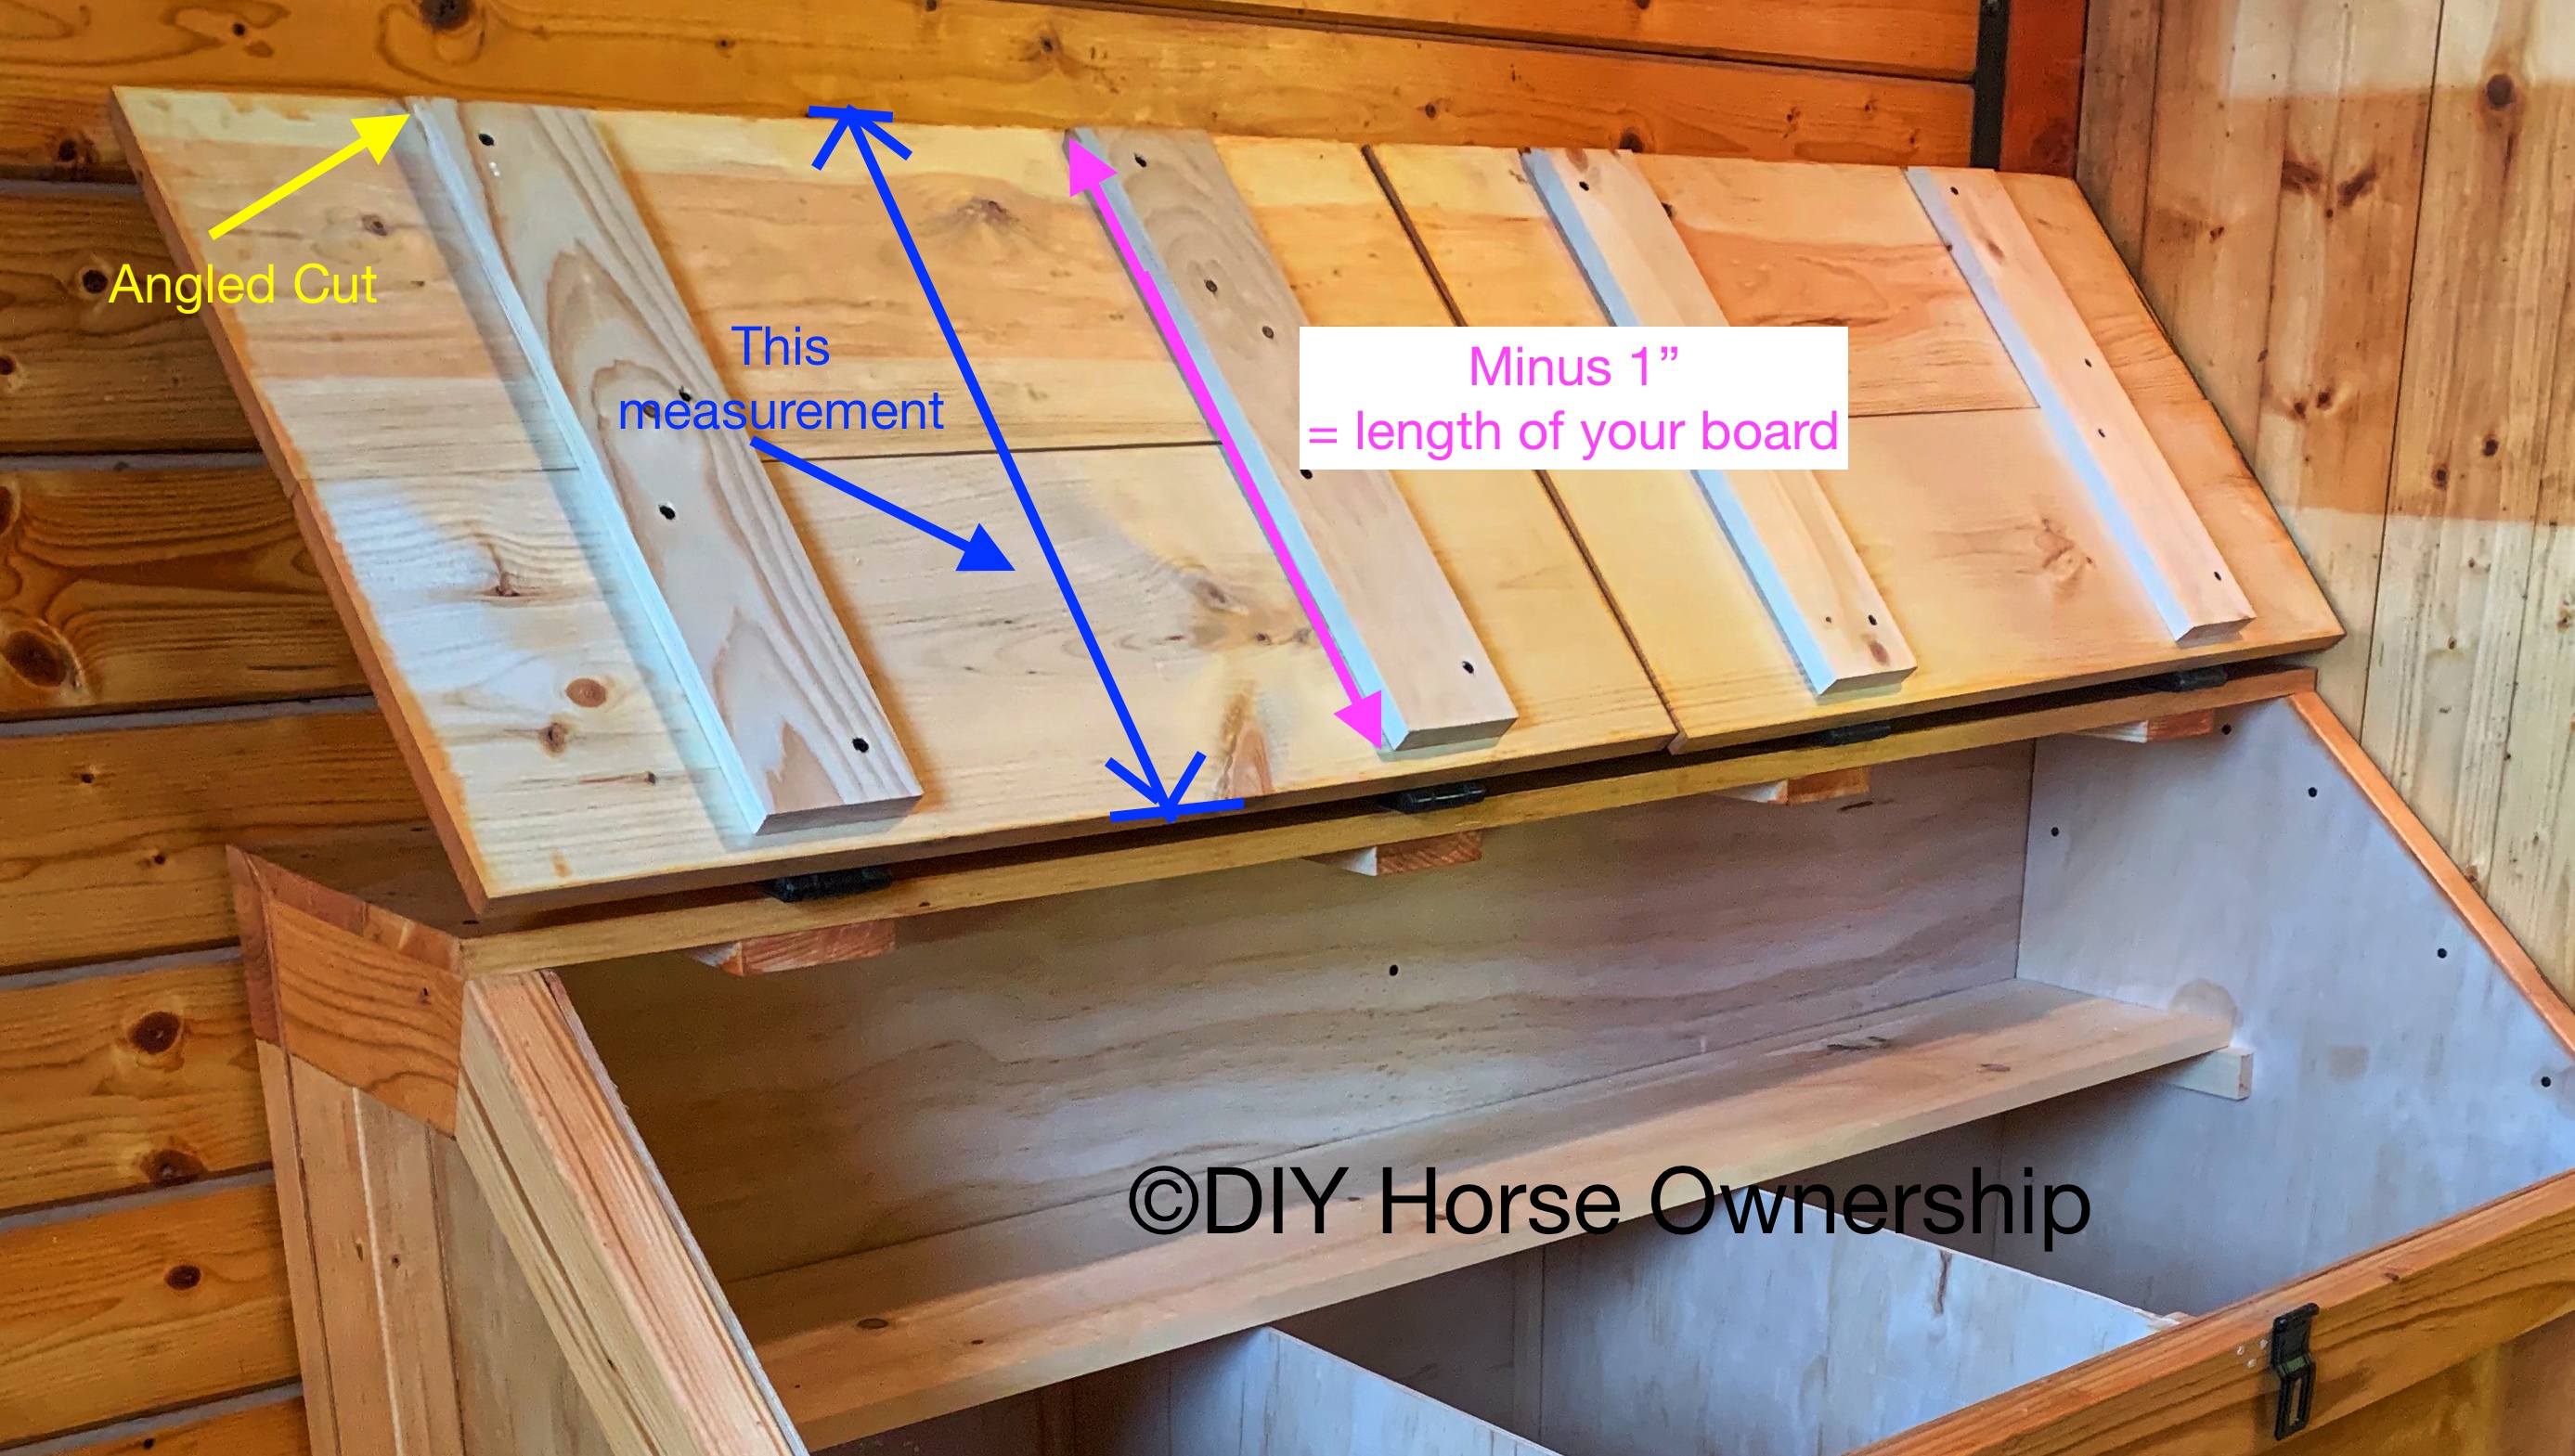
- Take two 1×12″ boards and cut them to the width of your feed bin (64 and 14/32″ in my case) and place them next to each other.
- You’ll be placing four 1x4s across these two boards. You’ll need to use the same measurements as you did in your top construction to space out your cross beams. In our case, 7.5″ from the edge.
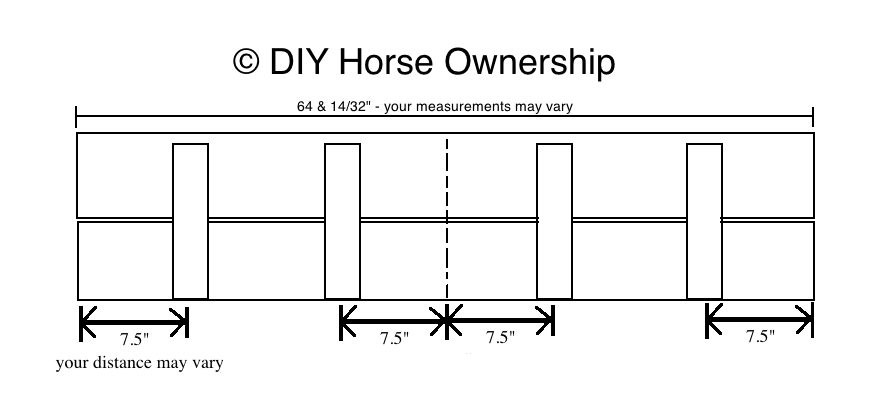
- The length of your 1x4s depends on your sawing abilities. If you can cut on an angle, the board’s should be the width of the two 1x12s pushed together, less 1″. If you can’t cut the board on an angle, make that length 2″ less.
- Cut the 1x4s straight on the one side and at a 45 degree angle on the other.
- Glue and screw your cross beams.
- Measure and cut the boards apart in the middle to make 2 doors.
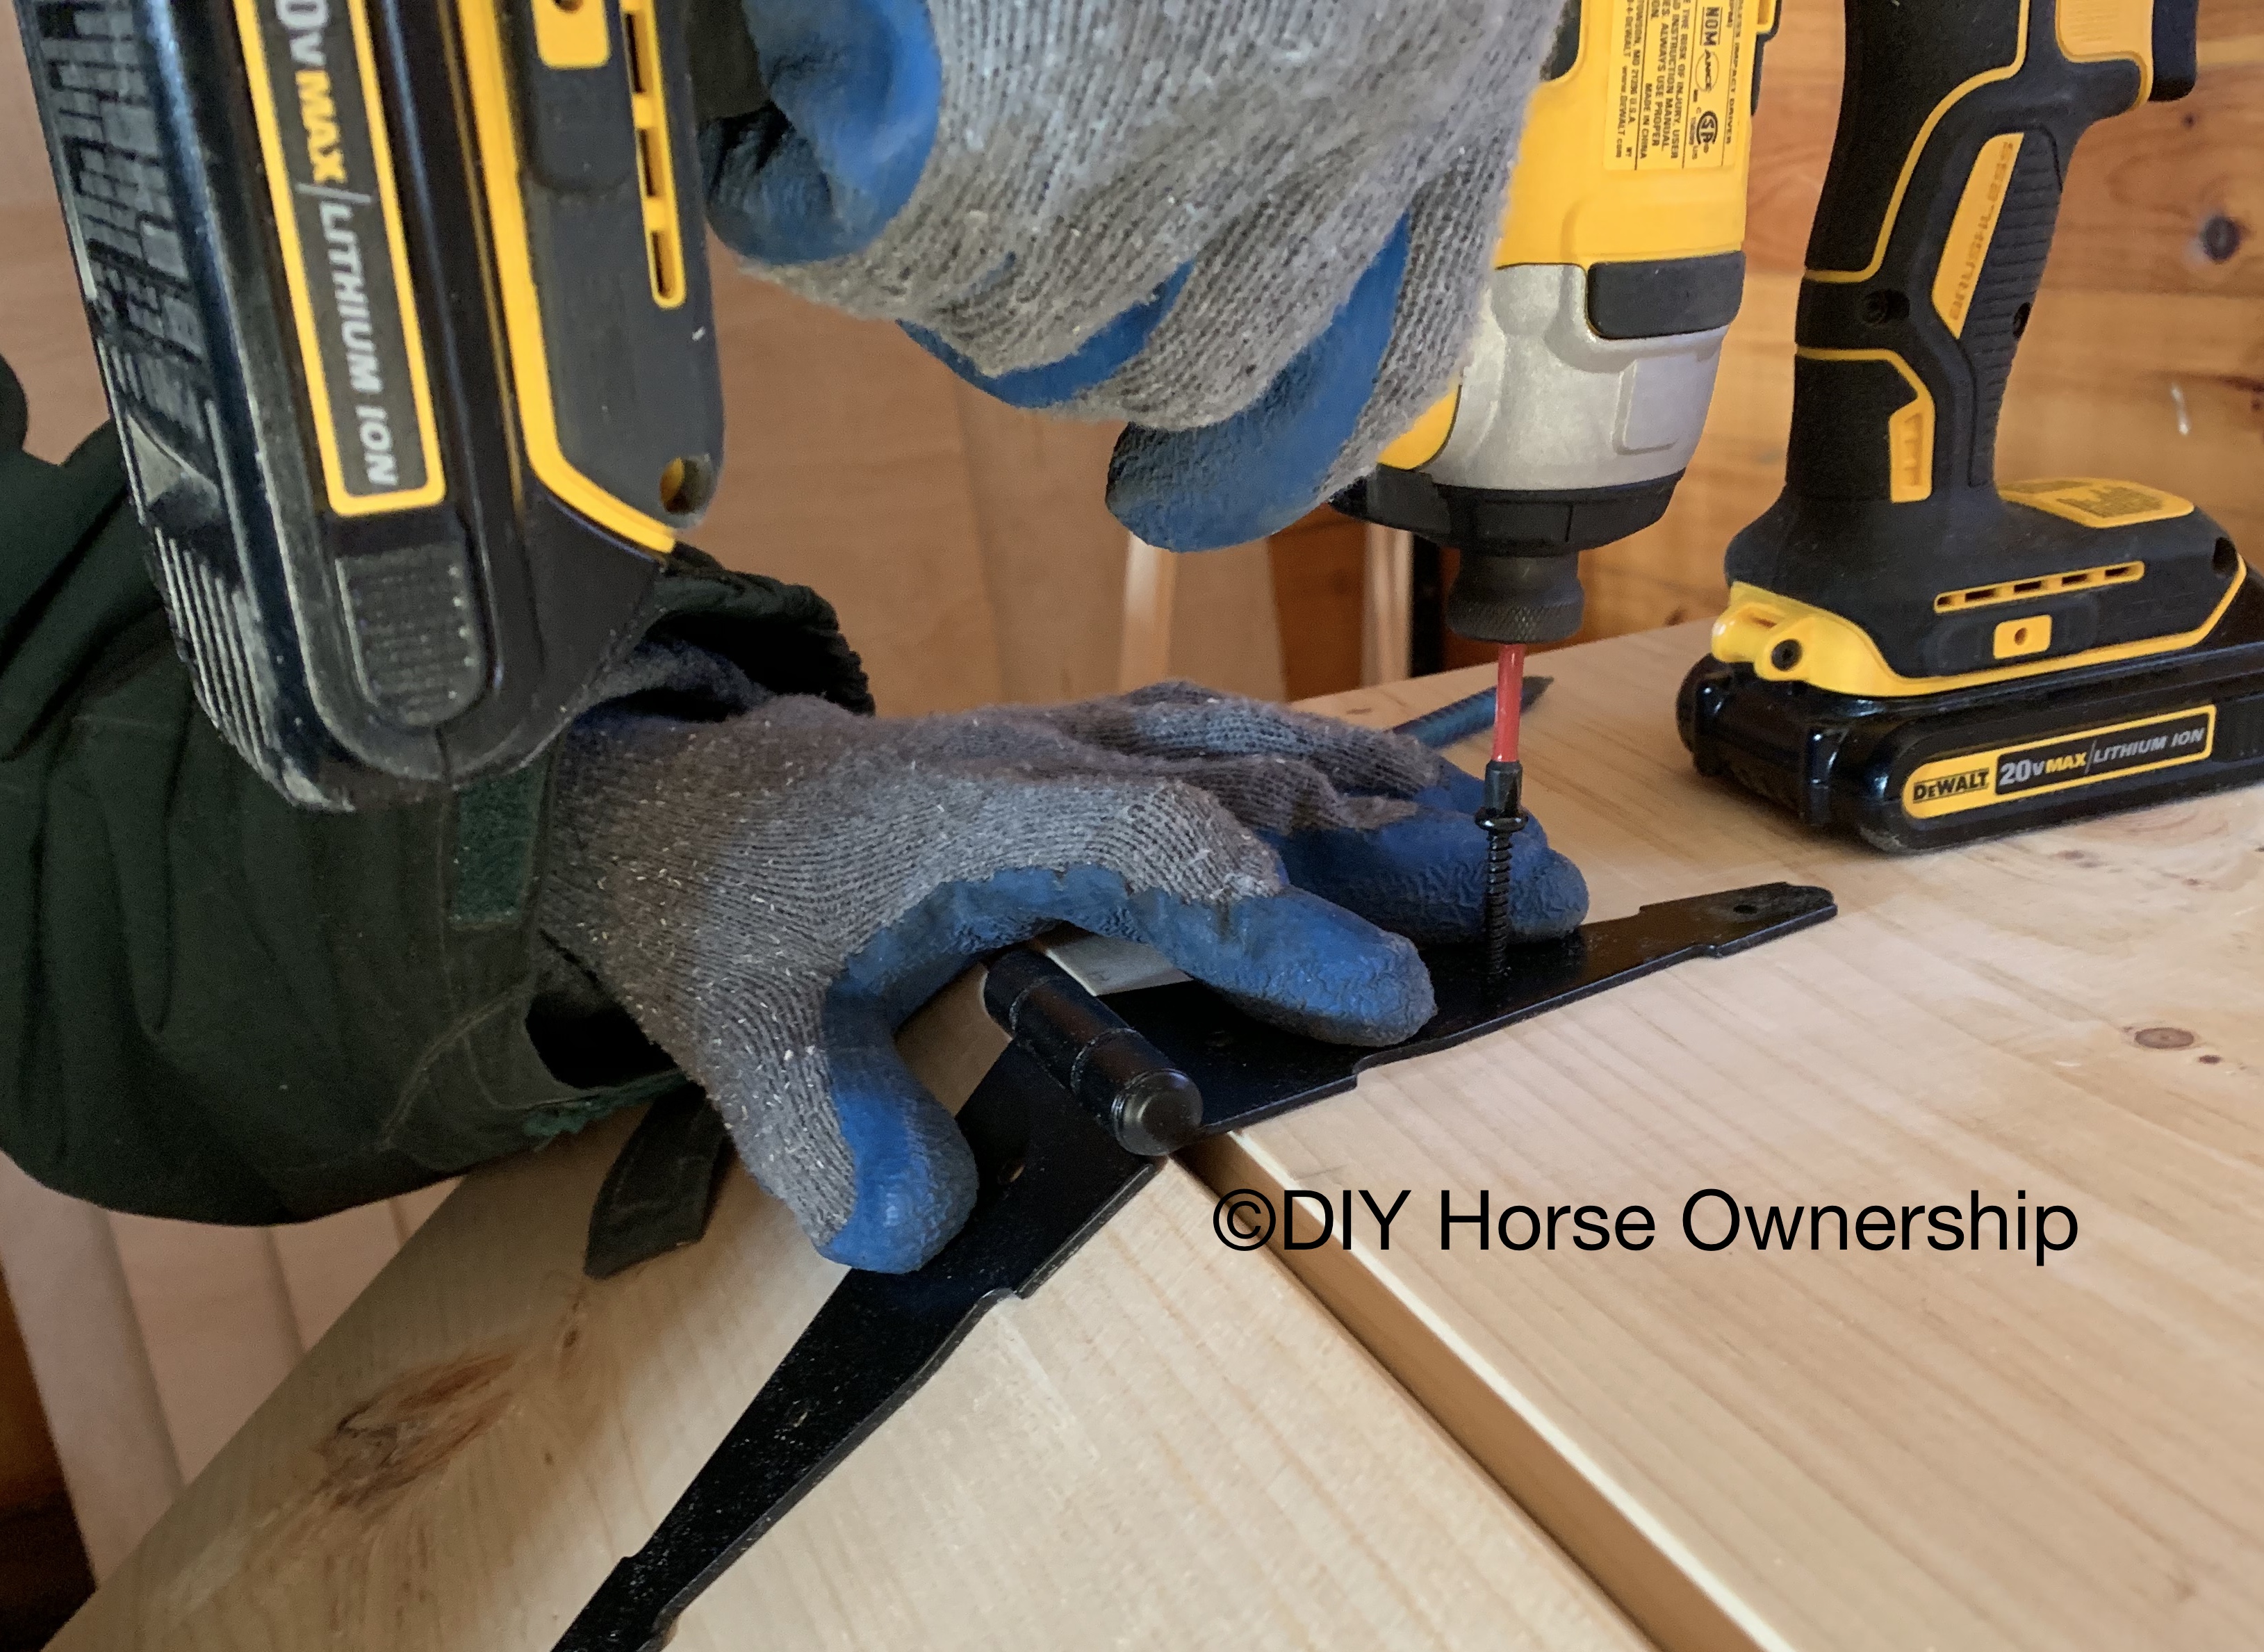
- Set your doors on the feed bin and use 1.5″ screws to attach the hinges.
- Screw handles onto doors in the middle of the bottom of each door.
- We also added some twist latches to keep raccoons from opening the doors. This step is optional depending on your barn design (our feed room only has a half door).
handles and latches
Final Steps
Paint or stain the outside of your feed bin. Do not paint or stain the inside as you don’t want the chemicals in paint or stain touching your horses’ feed. It’s a lot easier to do the painting and staining if you do it before putting the doors and hinges on (they’re annoying to get around). Our first bin was painted and it was infinitely easier than staining, but we wanted stain for this one to match the walls. I haven’t added white board to our new feed bin yet, but I plan to. They’re great for keeping track of what each horse is getting in feed and supplements.
When we made our first feed bin, I was concerned about rodents chewing through the wood. Despite being made of mostly thin plywood, we never had an issue. We had tons of rodents in our old tack room too as it was not a sealed room, but more of a roofed over and walled in section between the barn and hay trailer. I frequently found rodent dropping on the feed bin and at one point pulled a mouse nest out from under the bin (the ground wasn’t level so there was a gap), but we never had anything chew it’s way in. Since the room was enclosed enough to keep raccoons out, we didn’t need to have the latches and the weight of the doors kept them shut to smaller rodents. That feed bin is still going strong 7 years later so I can speak to the longevity of this style of DIY construction.
I hope you enjoyed this post. If you make your own feed bin, please let me know. I love seeing what other people make whether they use my guides or not.
** I’m not a professional woodworker or professional anything for that matter. If you follow these directions, do so at your own risk.
Nicely done! How functional but also pretty – good job guys
Thank you thank you thank you!!!! I love this so much!
For DIYers you guys are amazing. I have a system already but am really liking this.
Totally pinning this for when I get my own farm one day. I love the supplement shelf and the whiteboards inside; totally keeps down the ‘visual clutter’ of the feed room. Thanks for sharing!!!!
how do you scrape the last dregs out before refilling?
The bottom is flat and the sides are square so it’s really easy to just scrape the scoop along the bottom and collect it all. I also use the shop vac every few fillings.
I maintain that I can build anything with my skilsaw, impact driver, drill & sawzall. And hay string. I probably won’t win awards for aesthetics, but that’s mostly because I can’t afford to buy pretty materials. Great job on your bin, the organizer in me loves all the compartments. I have a friend who built something similar in her barn, works well for her. I’m curious too about how you handle cleaning before refilling since you can’t just dump it? Vacuum? If you wanted to get really fancy, you could also add a shorter panel on the bottom of the front which hinges up & would allow you to sweep everything out the bottom, I built that into a dog house once, worked well.
I’d add a caution to others to make sure to use untreated lumber for parts the feed is touching, leaching may be a low risk, but I’d want to avoid that.
There’s already a note about not using treated lumber in the feed bin, but I probably should make it bold as I agree. I wouldn’t use it even on the outside parts as it’s not necessary. Treated is great for making jumps, but not a good thing for indoors, let alone something holding food. As for cleaning, I can scoop almost everything out since it’s flat with square sides. I use a flat square scoop and get almost everything. I run the shop vac through it every few fillings.
Looks great! I really like the white boards in there. I have just polyethylene feed bins, but this wood is so much more attractive! I think I can probably add some white boards to what I have though… I’m going to look into that!
I thought about getting the big plastic bins too, but I liked our old bin and we could make this one match. You could probably get some sort of wood built around your bins so stylistic purposes. But the white board are really the best little trick.
My husband built one of these 30 years ago! We didn’t put in dividers. We put in metal trash cans to hold the feed. That way we could clean out the cans ocassionally.
That’s a good way to keep everything clean and rodent free, but still looking good on the outside. We just run the shop vac inside ours every few fills.