
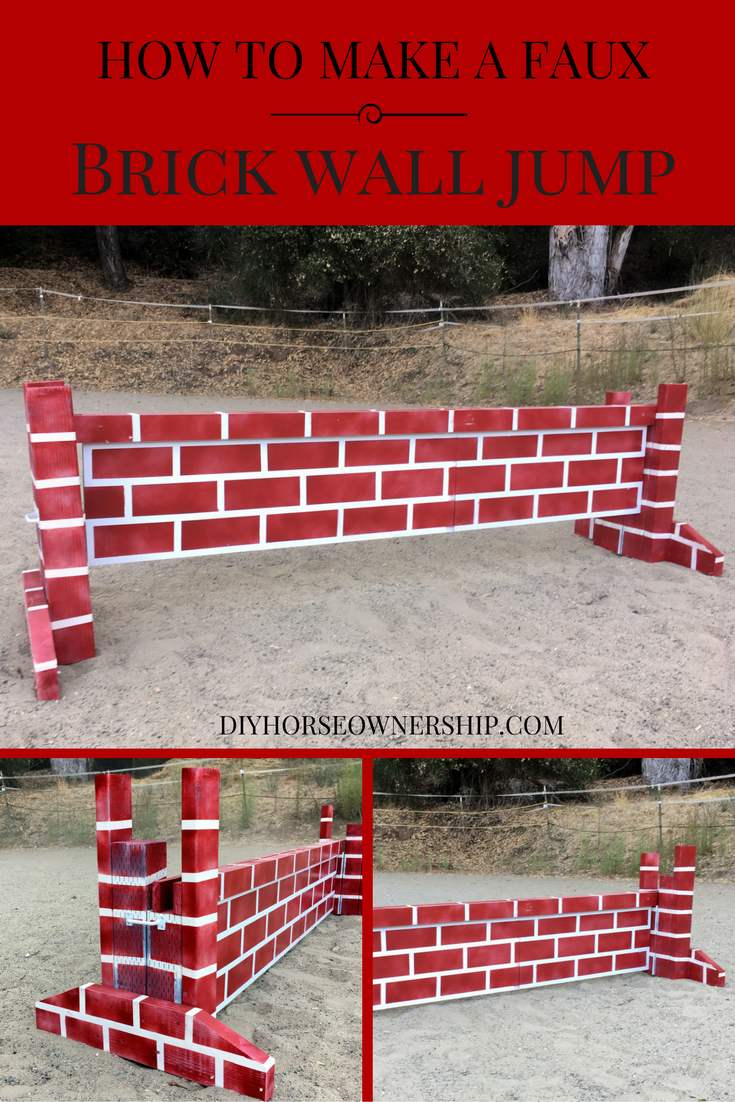
This was another jump made with a bunch of spare parts from around our yard, but you can buy all the supplies easily.
Materials Needed:
2 1″x3″x7’6″ boards
1 2″x4″x8′ board
½ 2″x6″x8′ board
1 4″x4″x8′ board
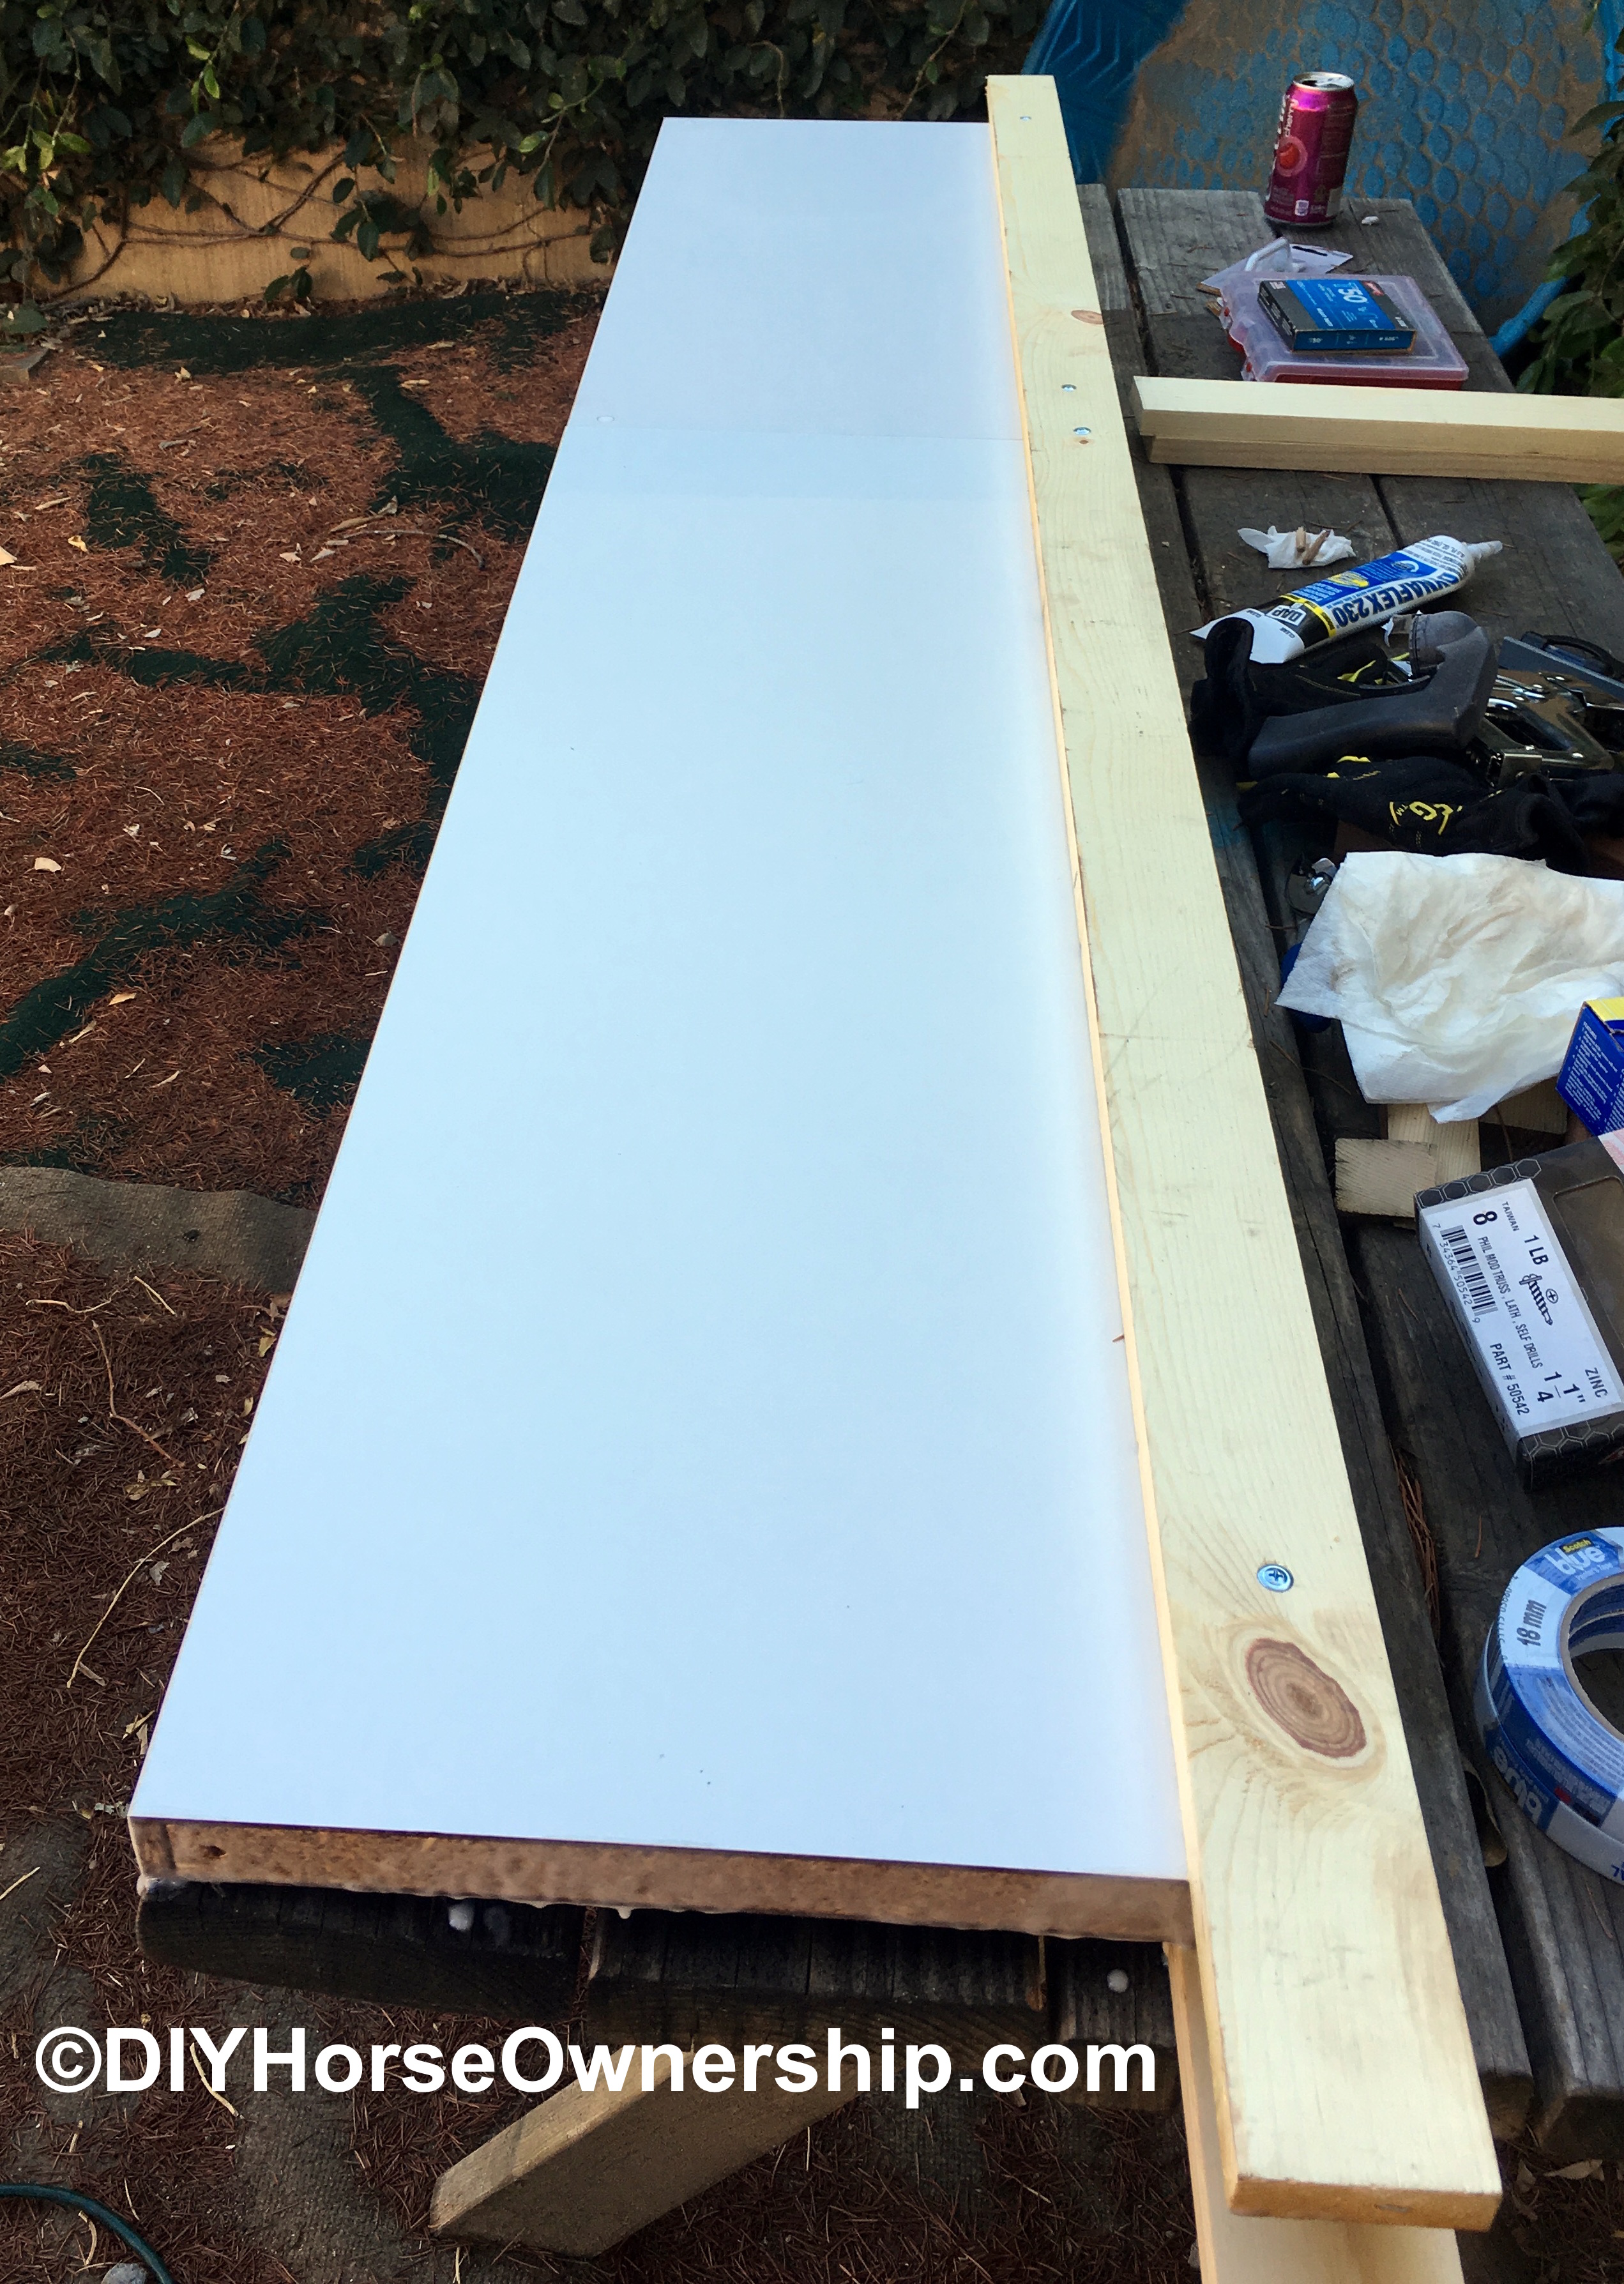
14.5″x6′ plywood board (in our case, we used parts of a laminate shelf) You may want to make this board taller; we were using what we had
2.5″ deck screws or nails
1.25″ screws
1 roll of 3/4″ painter’s tape
1 can white spray paint & primer
1 can red spray paint
2 handles
We had parts of a cheap laminate bookshelf that had broken during construction, so we used those for the wall part of our jump, but you’d be fine to buy a piece of plywood or actual board for the center piece.
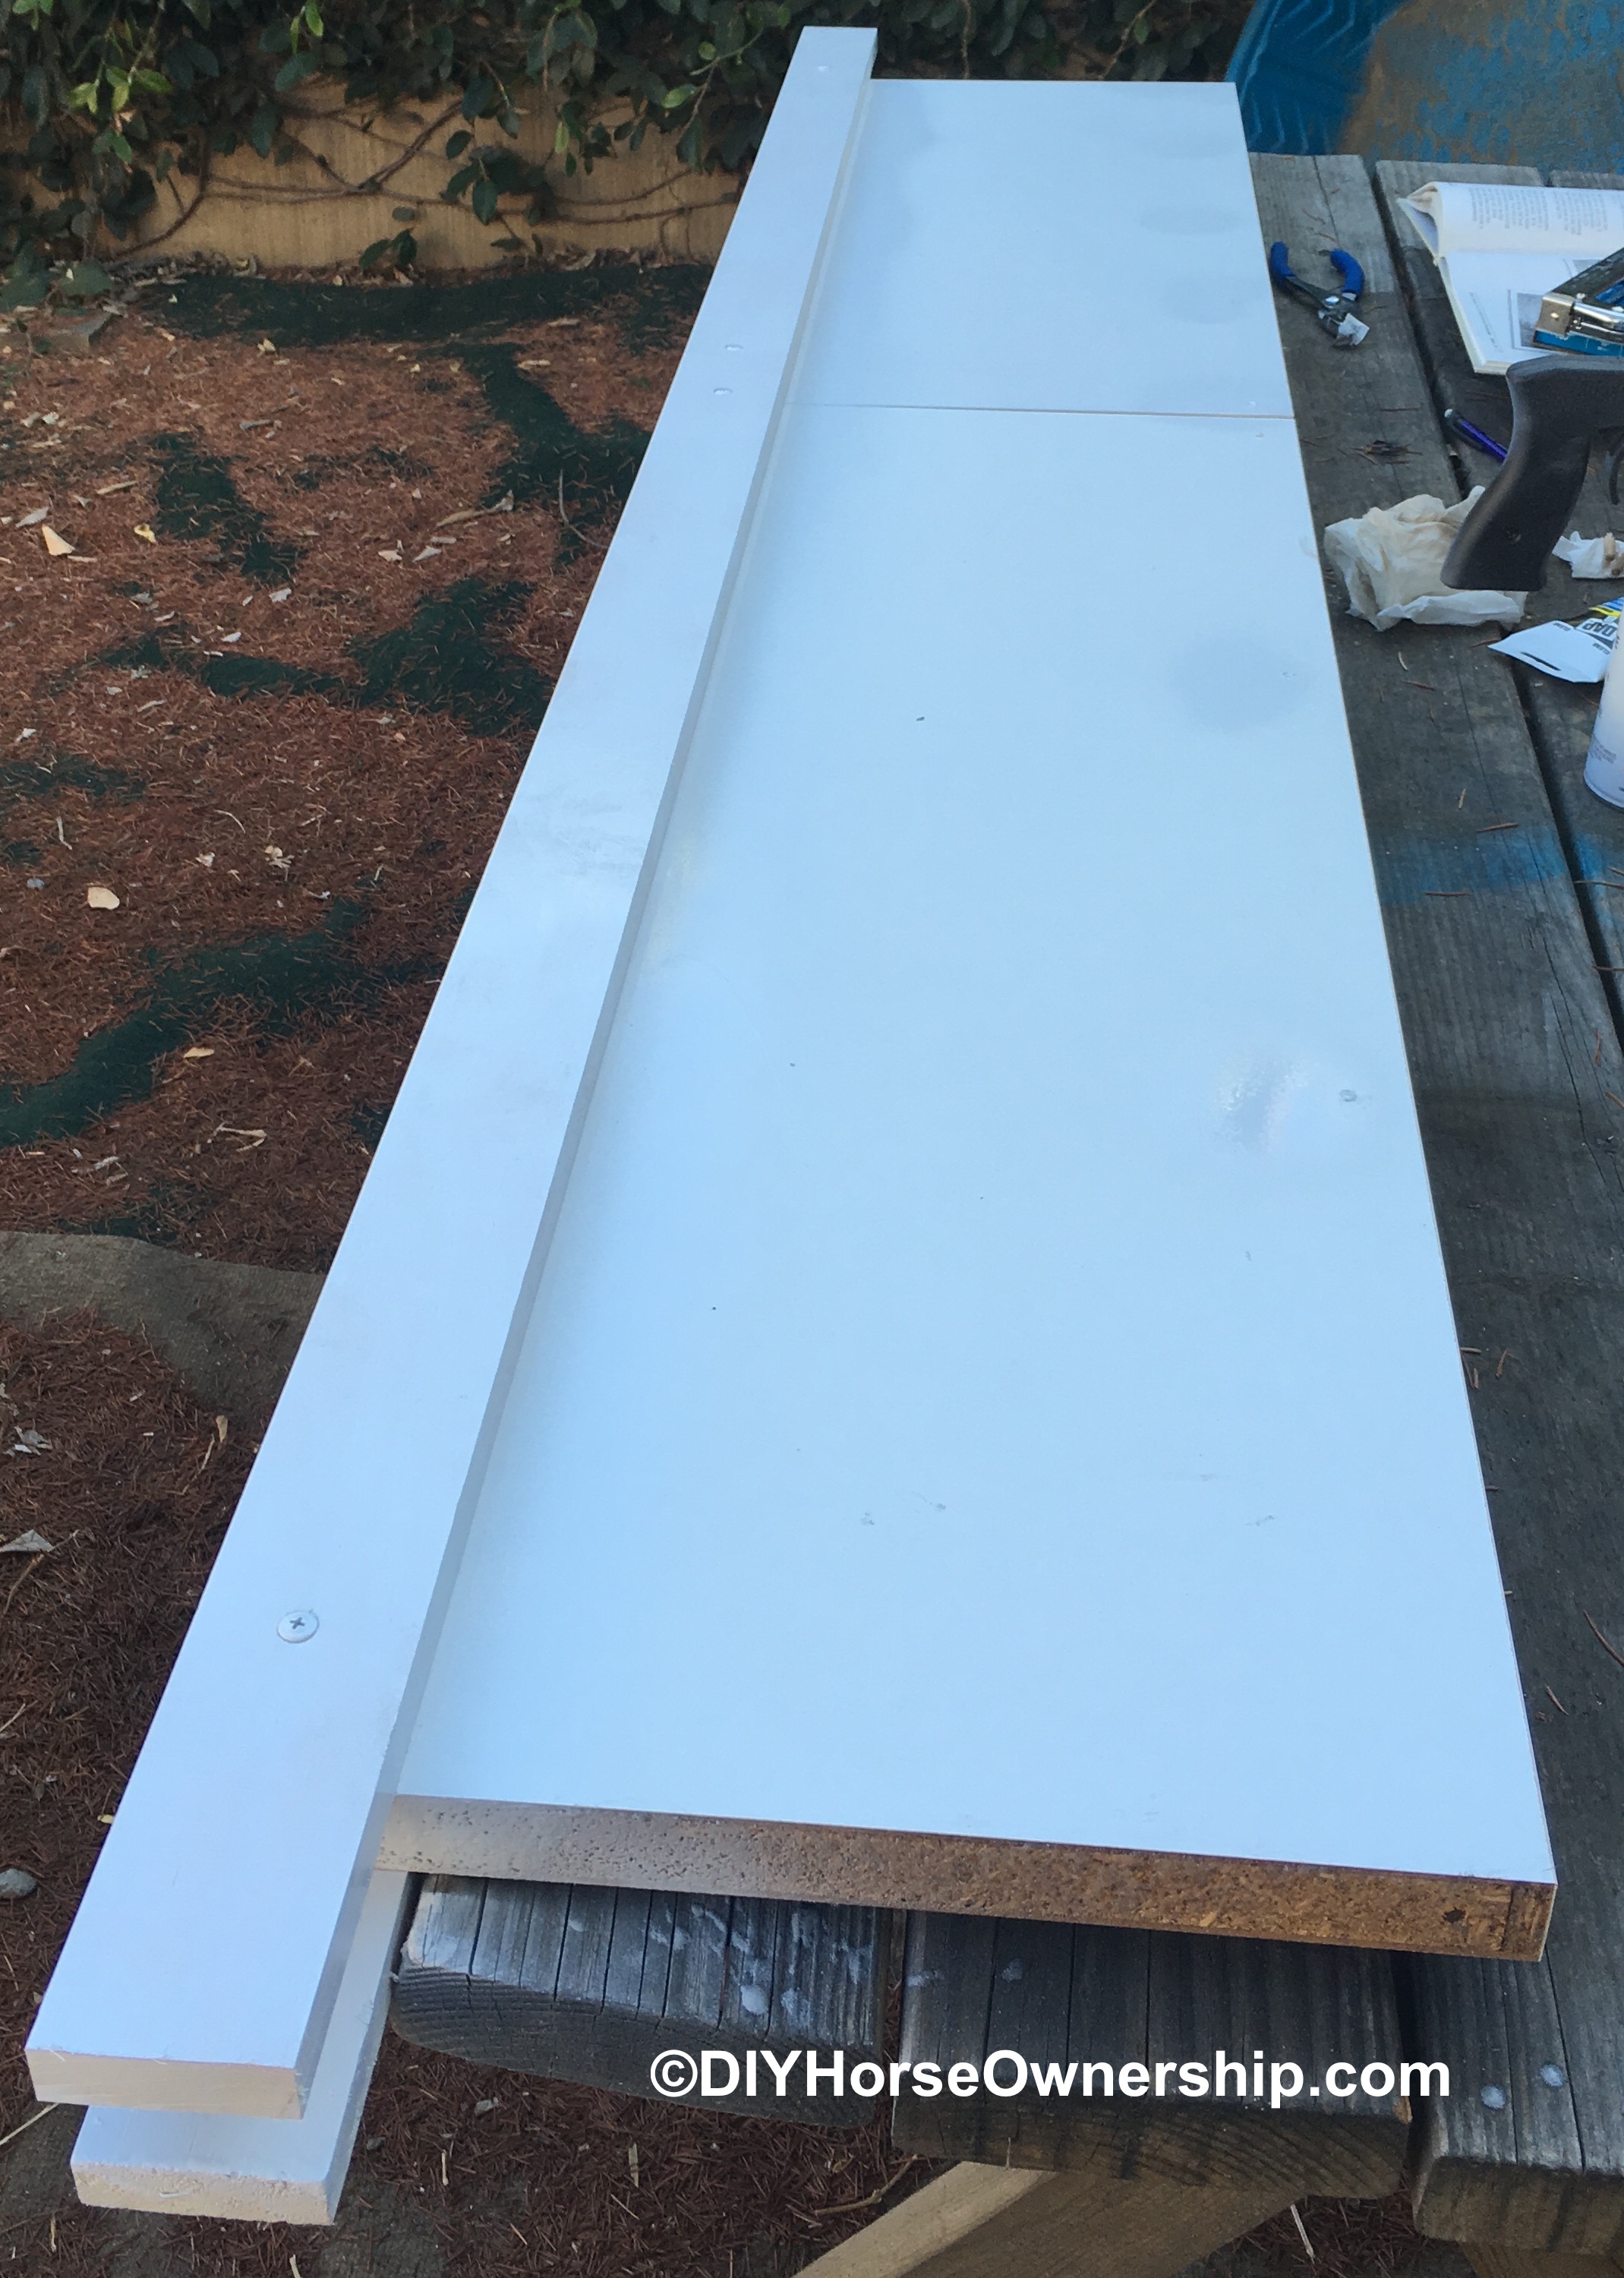
Step 1: Screw your 1×3 boards onto each side of the plywood.
Step 2: Spray paint the entire thing white. I like to use spray paint that has primer in it so I can do just one coat. The vast majority of your white is going to get painted over, so don’t worry about it being perfect. Just get it done and move on. Let it dry overnight. (Or if you’re me, only let it dry for like 10 minutes because screw the rules, you can do whatever you want).
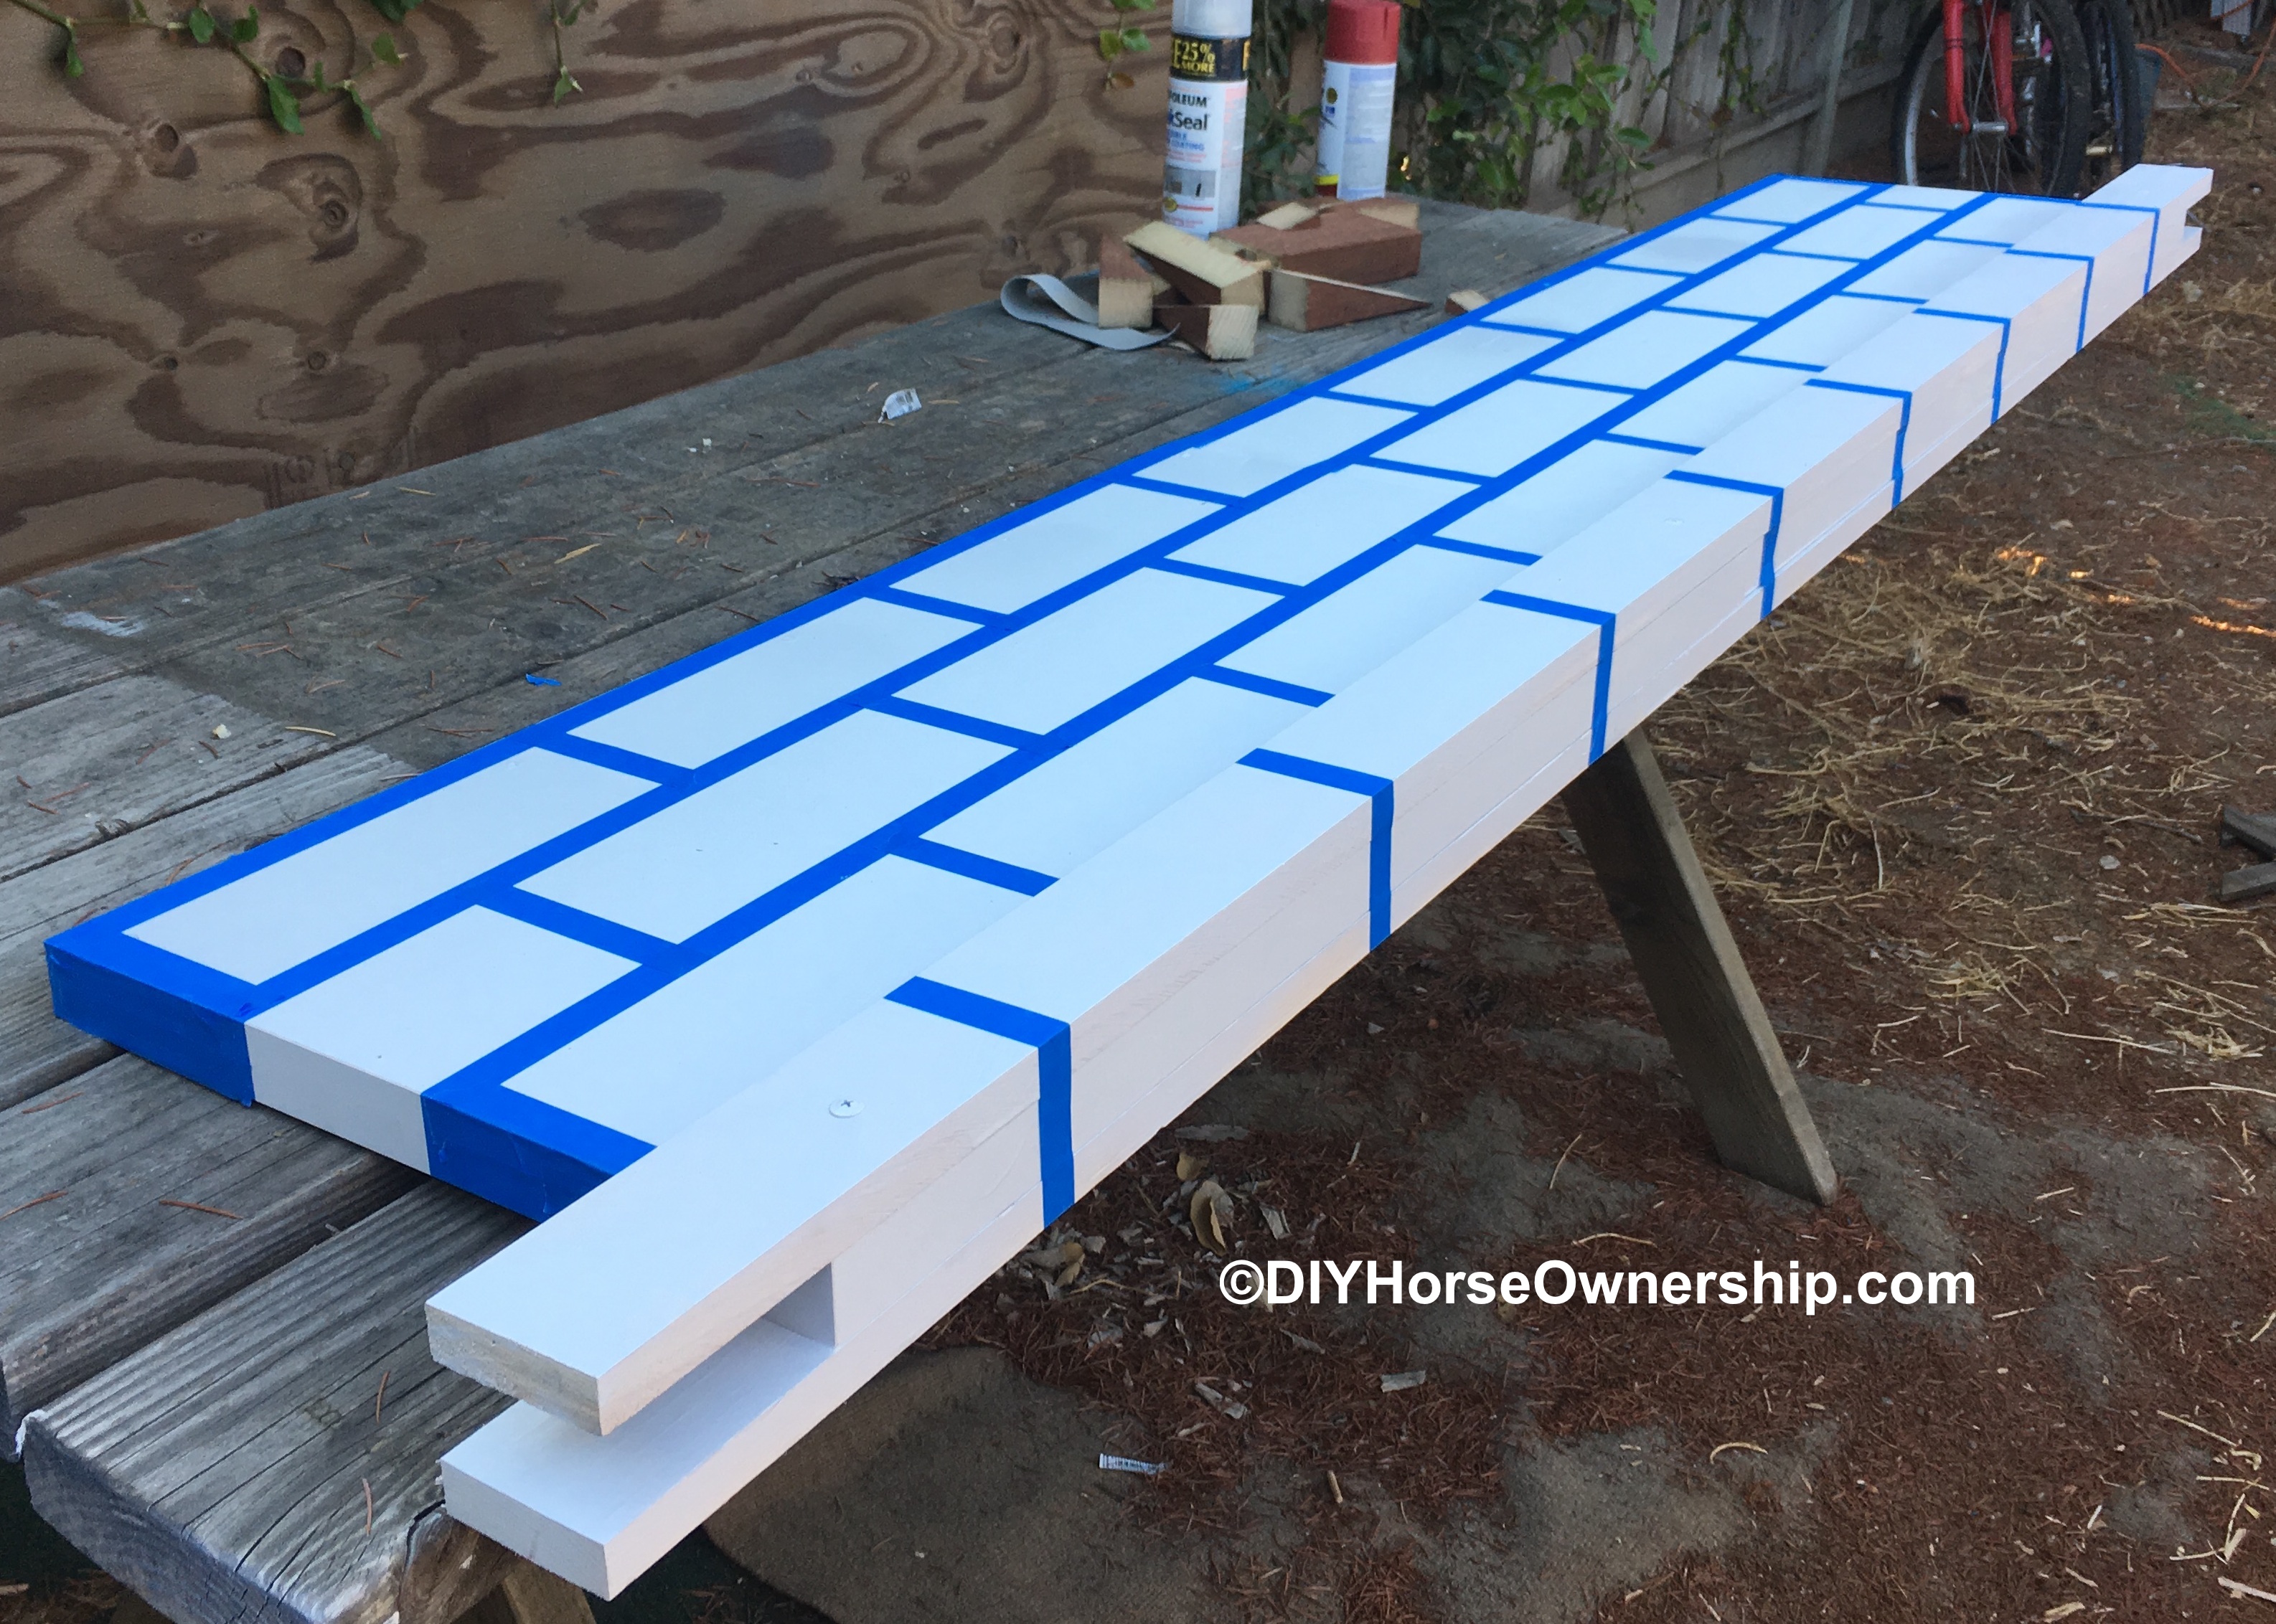
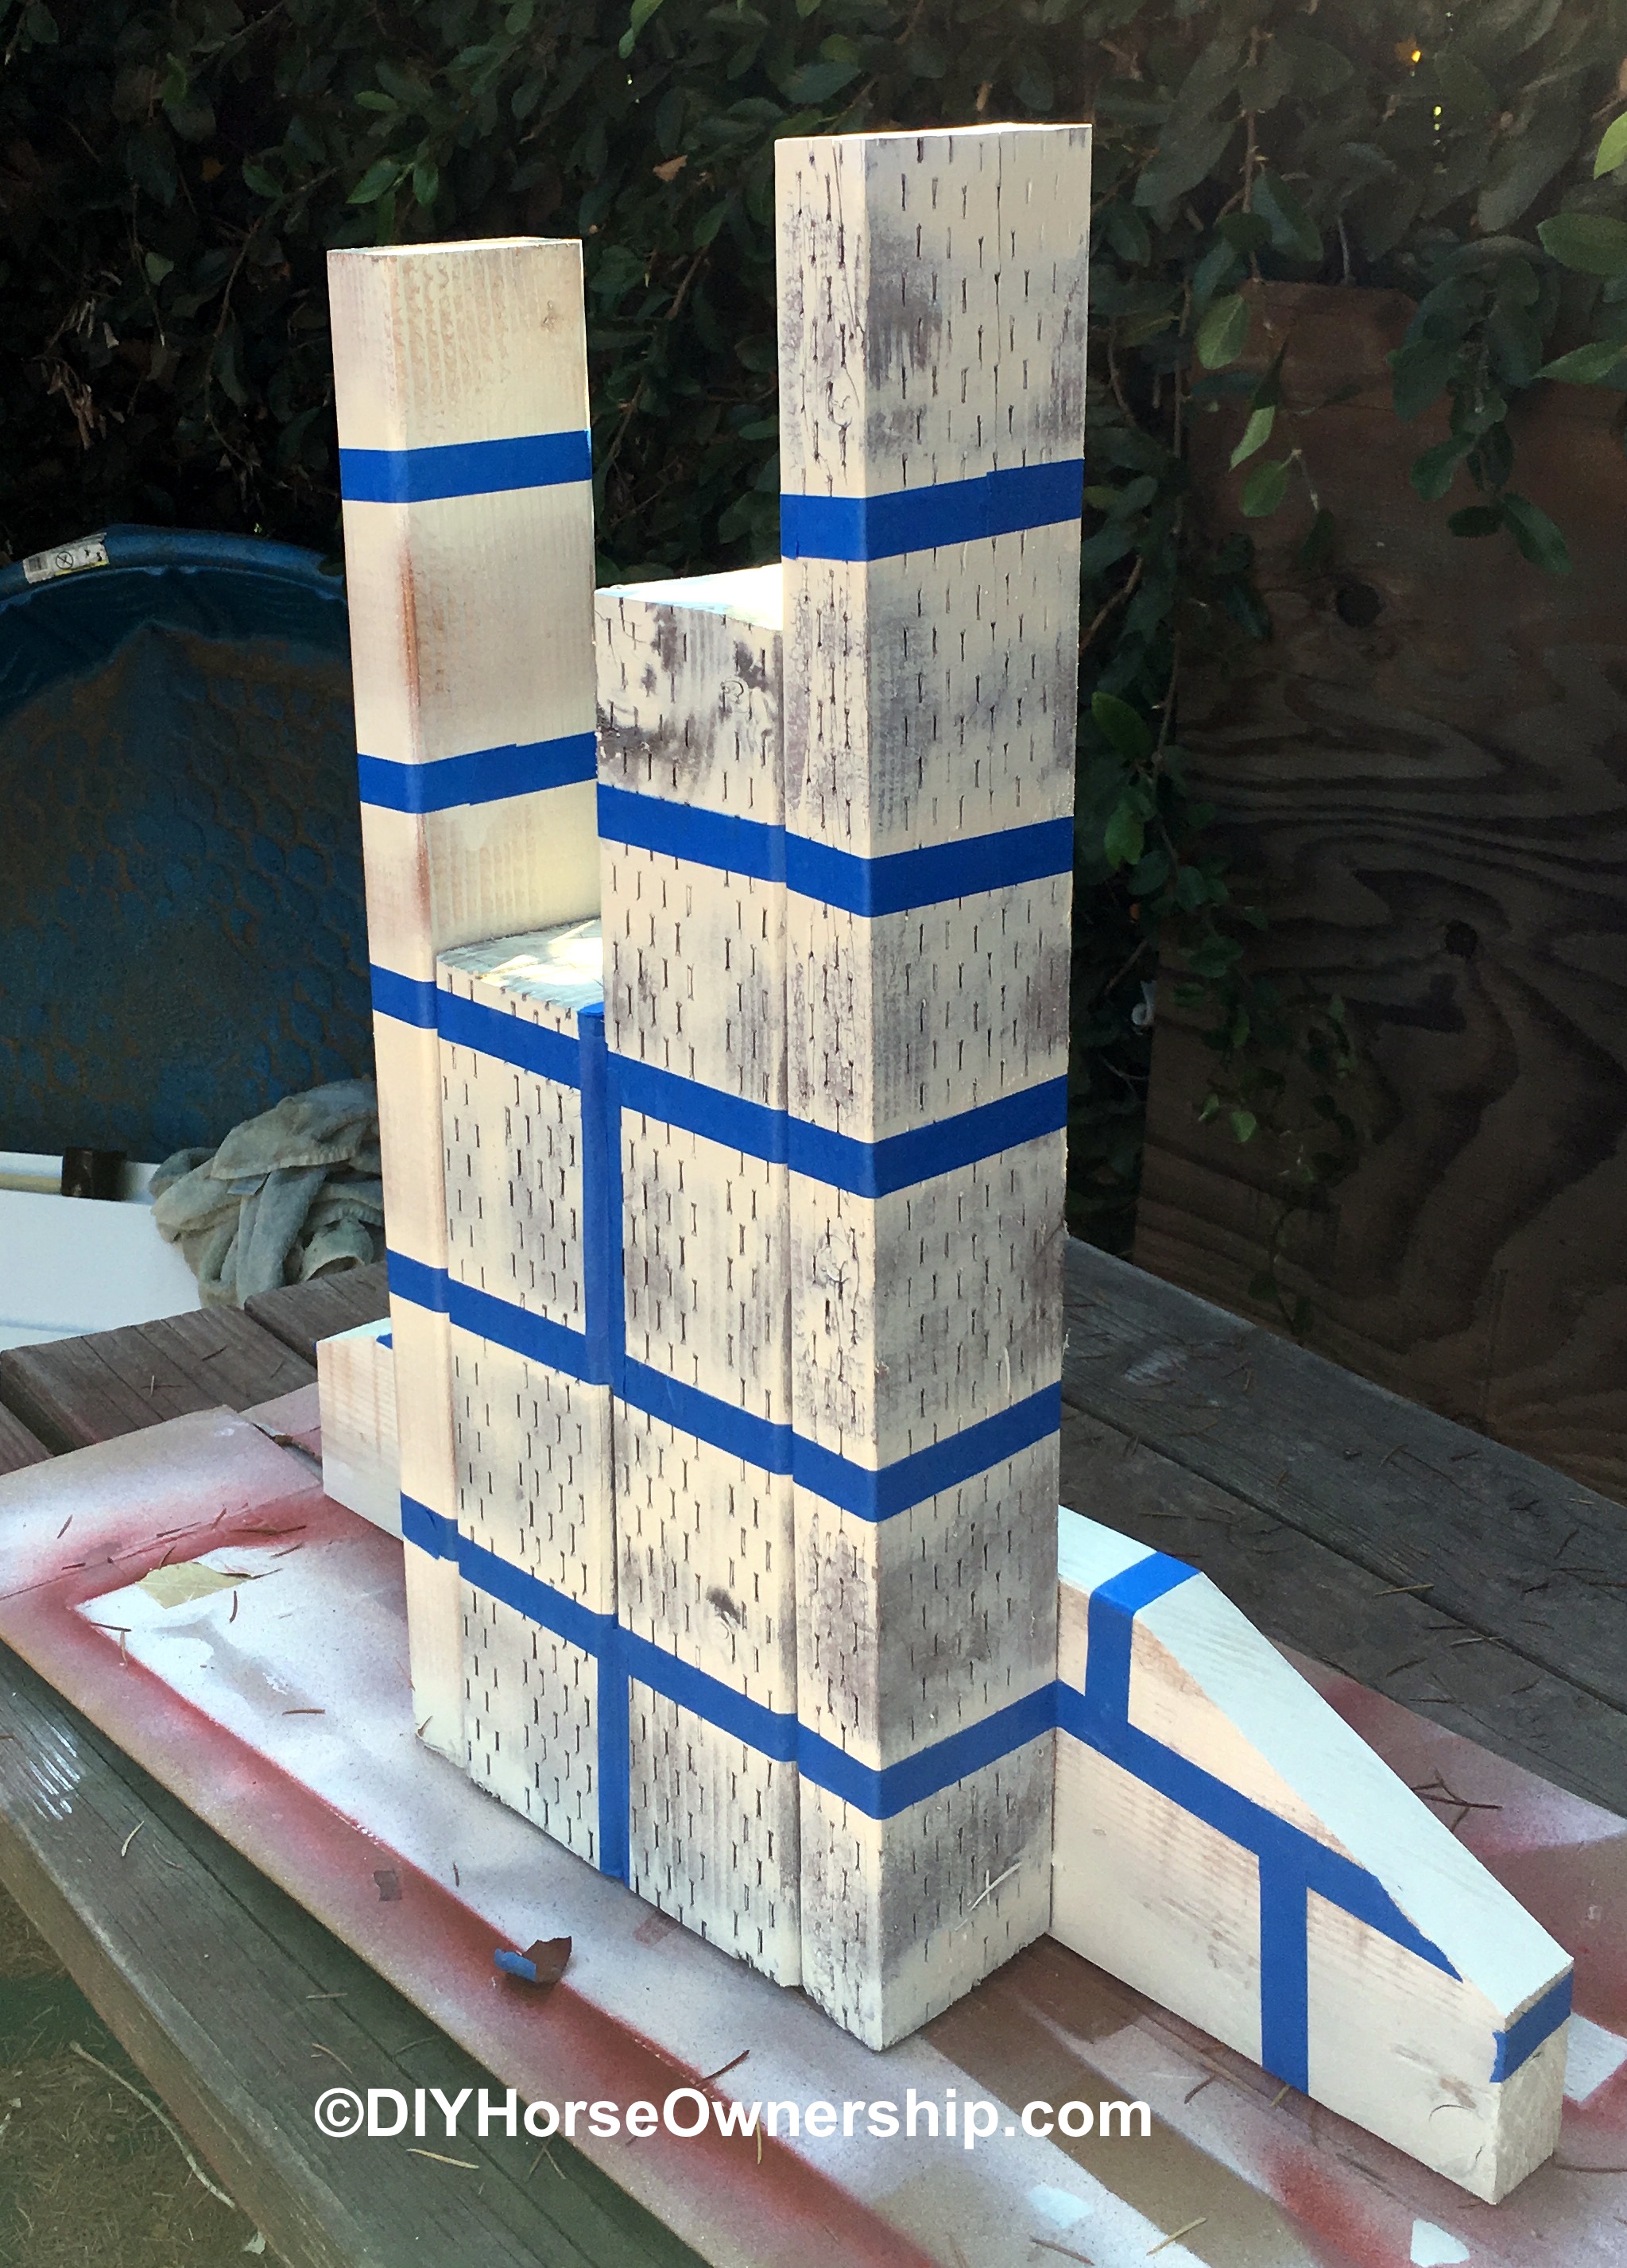
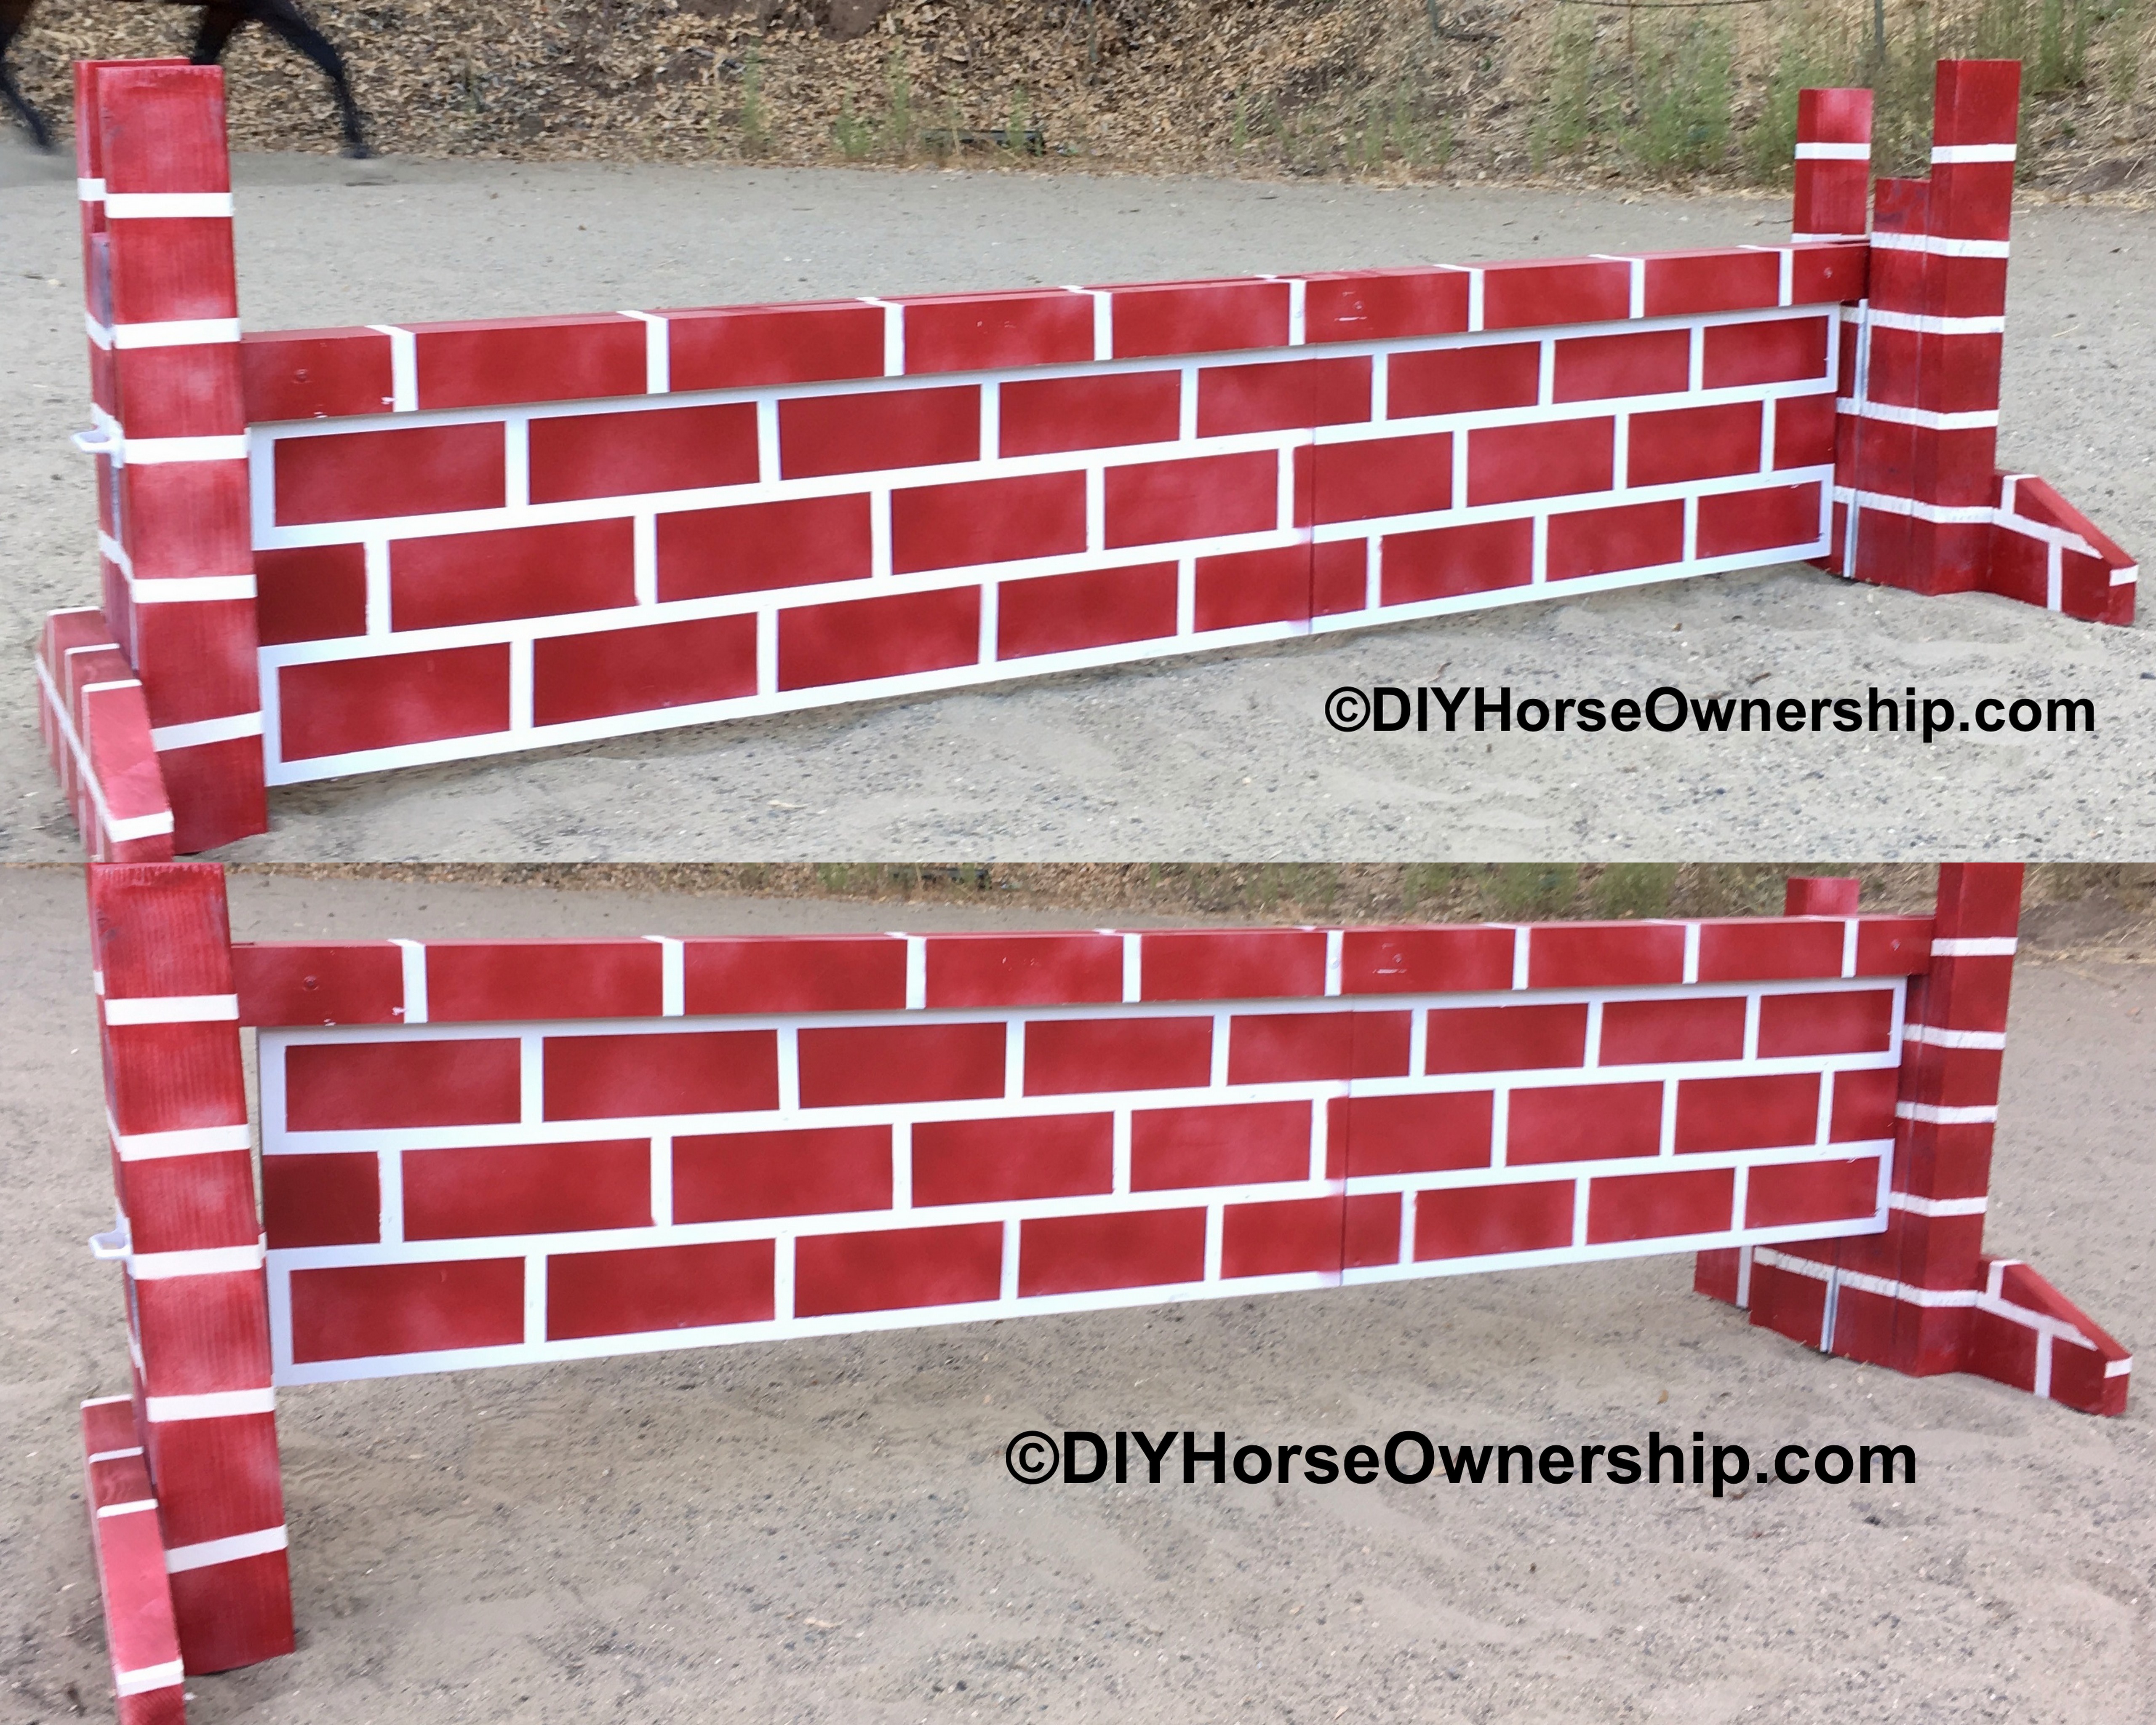
Step 3: Take your tape measurer and mark out your wall. Real bricks are 3 5/8″ x 2 1/4″ x 8.” But reality is irrelevant. You’re making art. Since my board was 12″ tall up to 1×3, I just divided that by 3 and made marks at 4″ up and 8″ up. Do multiple marks along the board so your lines end up straight. Lay your painters tape along each edge and along your 4″ and 8″ marks. I forgot to take a picture, so here’s one from my sketch.
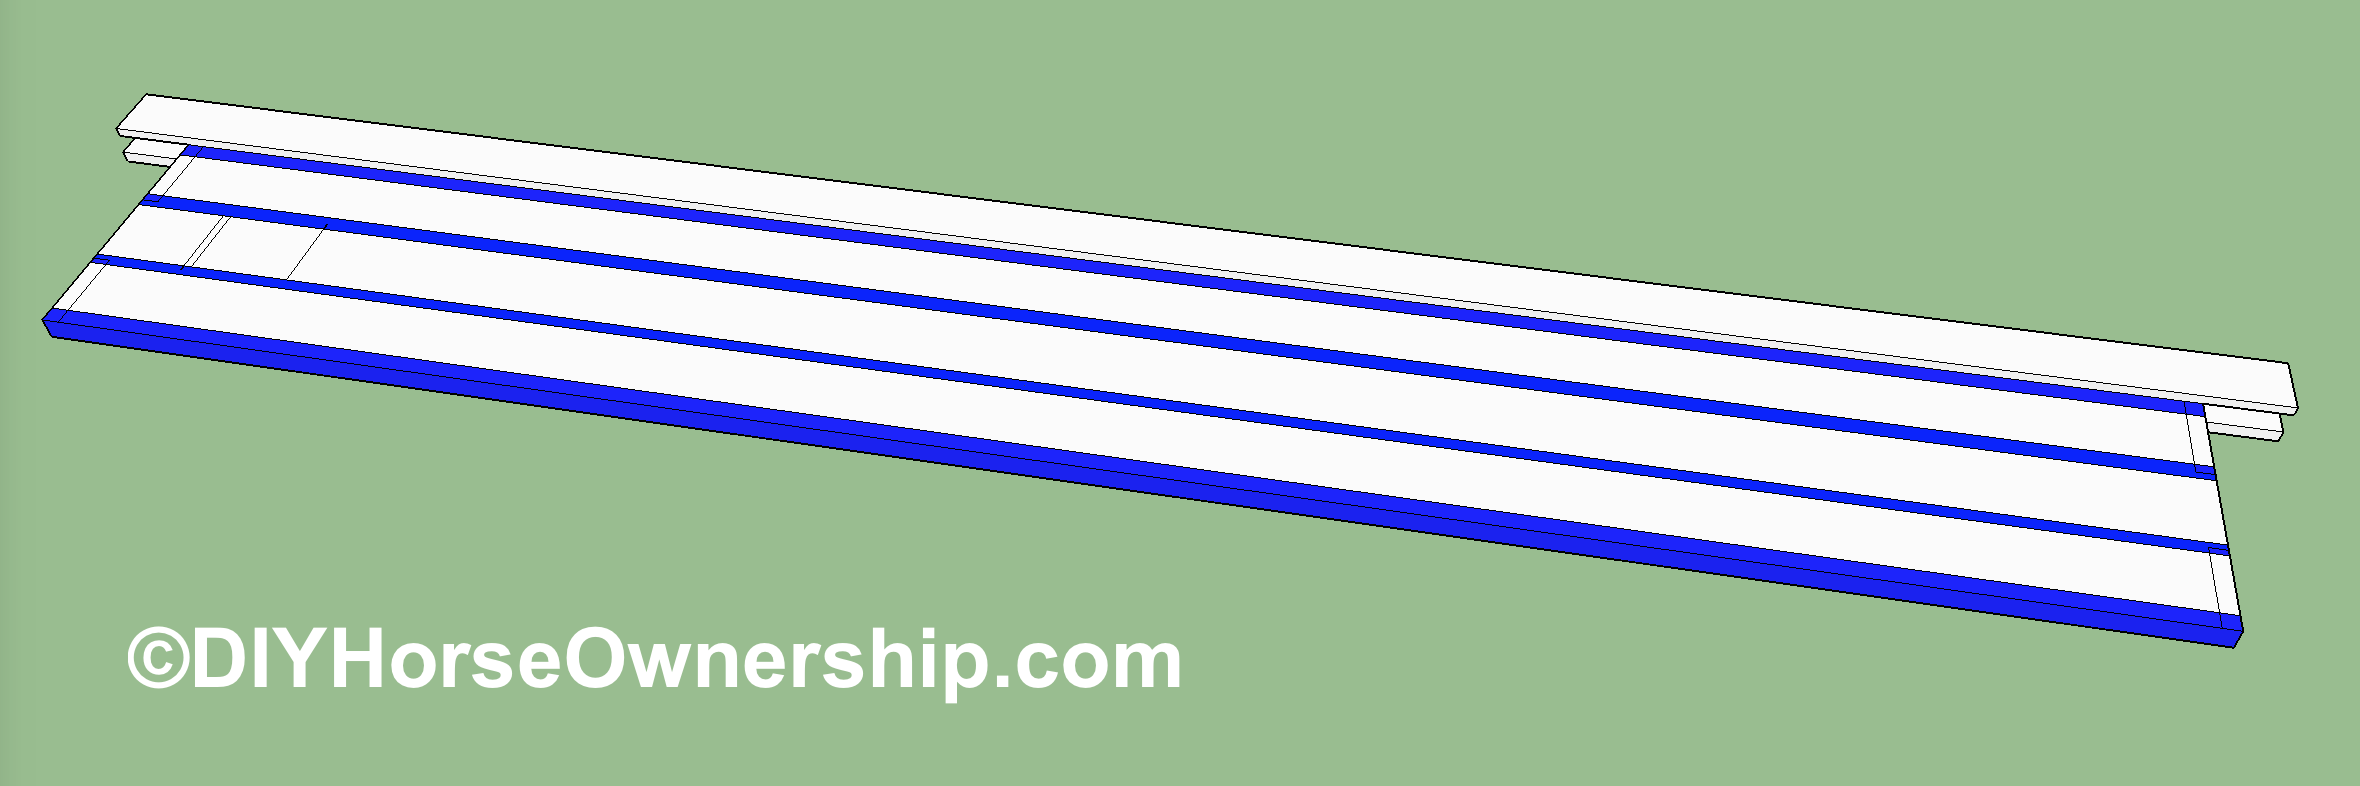
Step 4: My board was 72″ long so I decided mark every 9″ to make them fit evenly across the bottom length. Tape at your measured marks and along each edge for the bottom. Alternate with the next row so you’re measuring at 4.5″, 13.5″ and so on. Here’s what your brick wall should look like at this point.
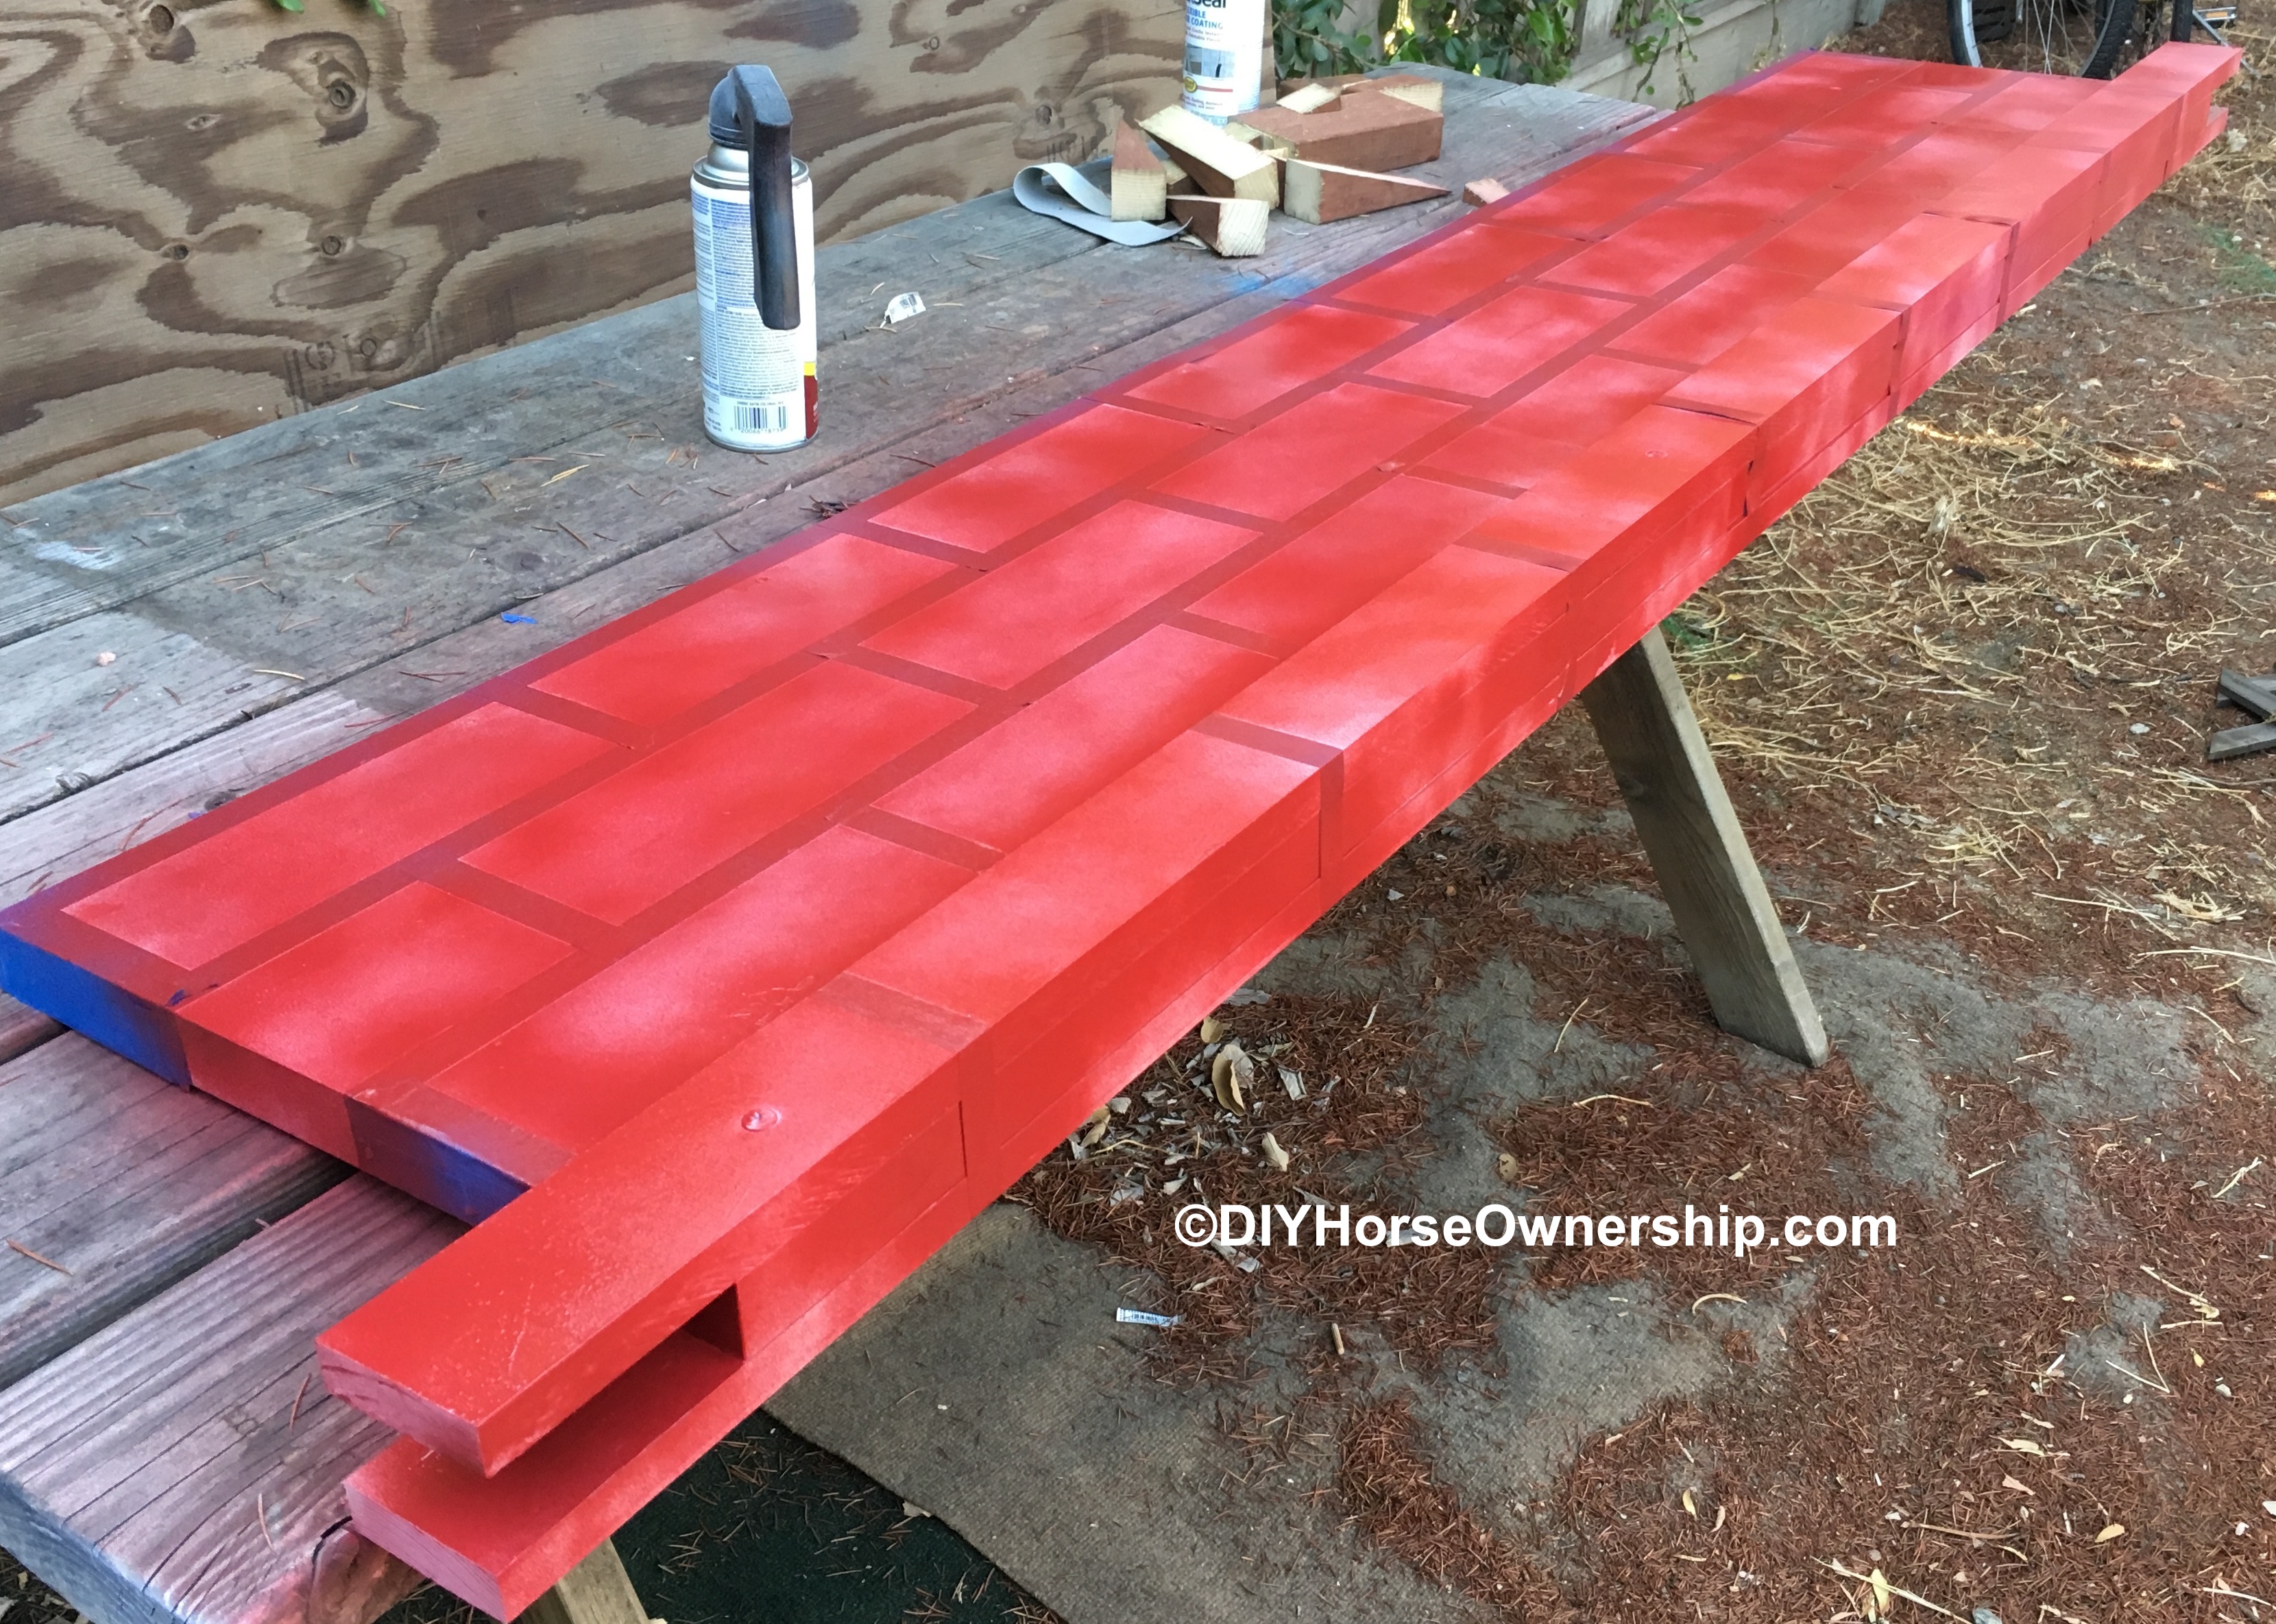
Step 5: Grab your red spray paint and spray away. This is another place where you don’t want to go for perfect. Bricks aren’t perfect, so if a little white shows through, they’ll look even more real.
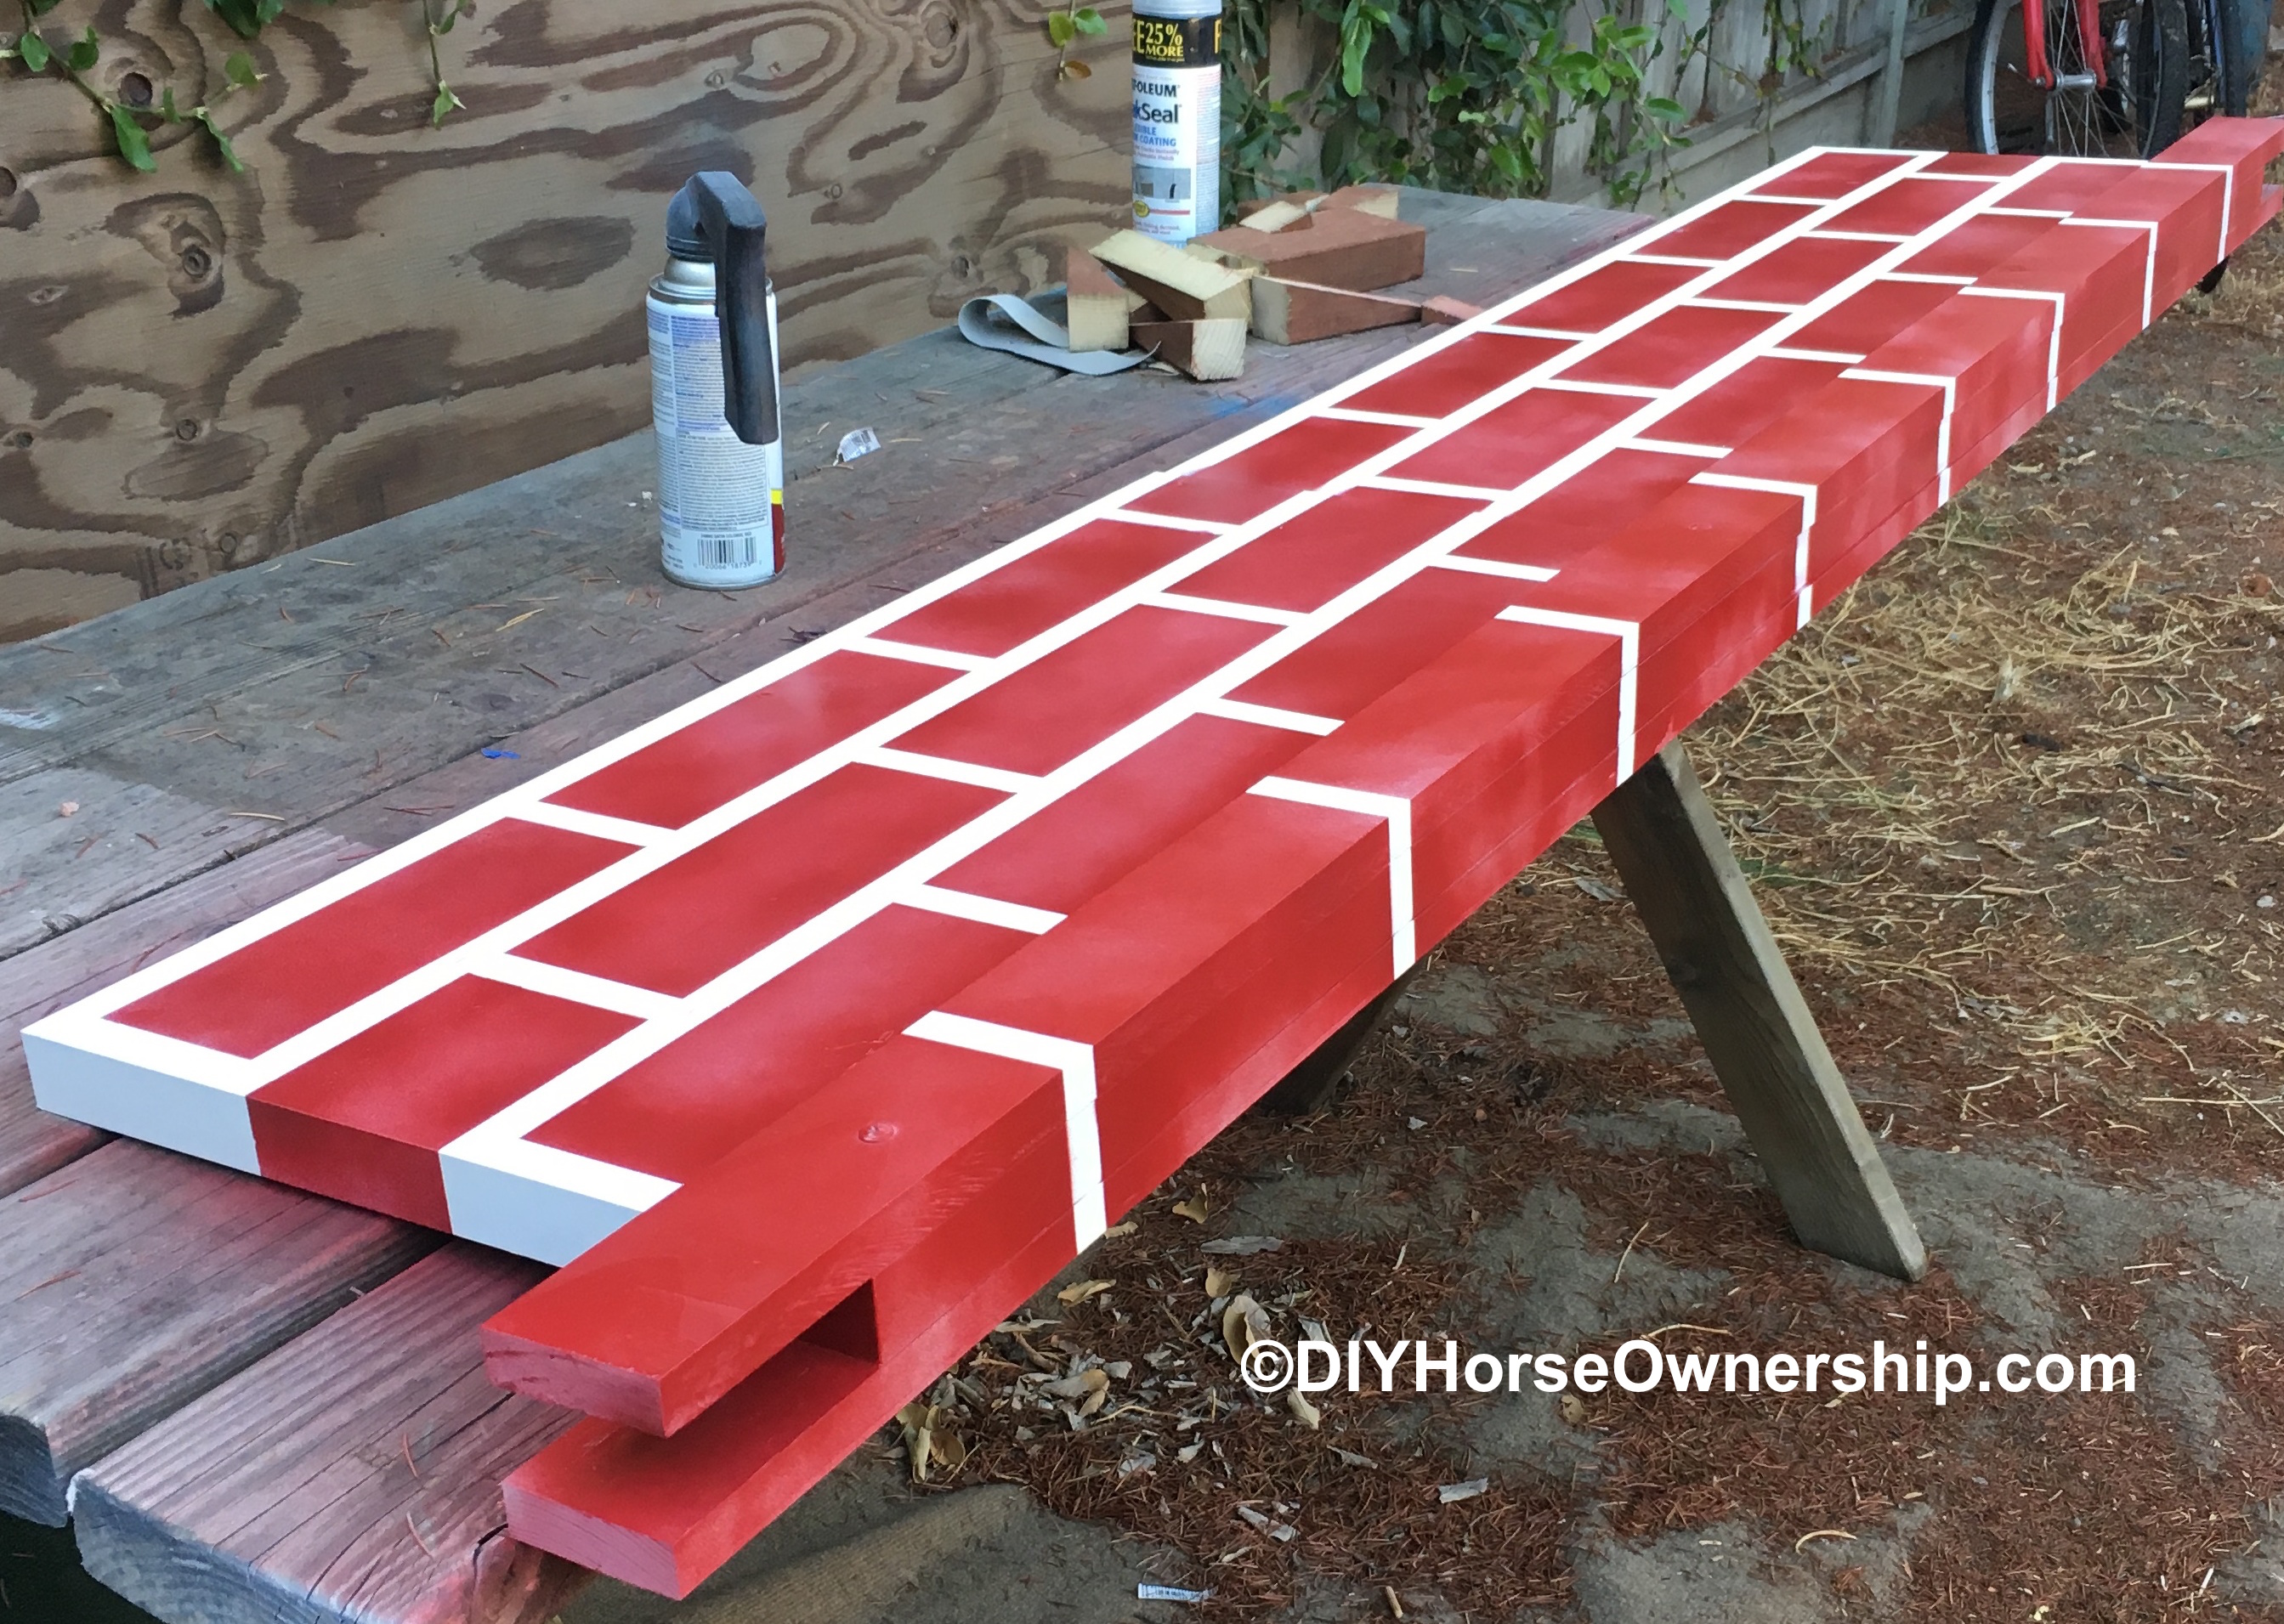
Step 6: Peel all of your tape off. You’ll need to actually let this dry before flipping it over and doing the other side. I let it sit overnight.
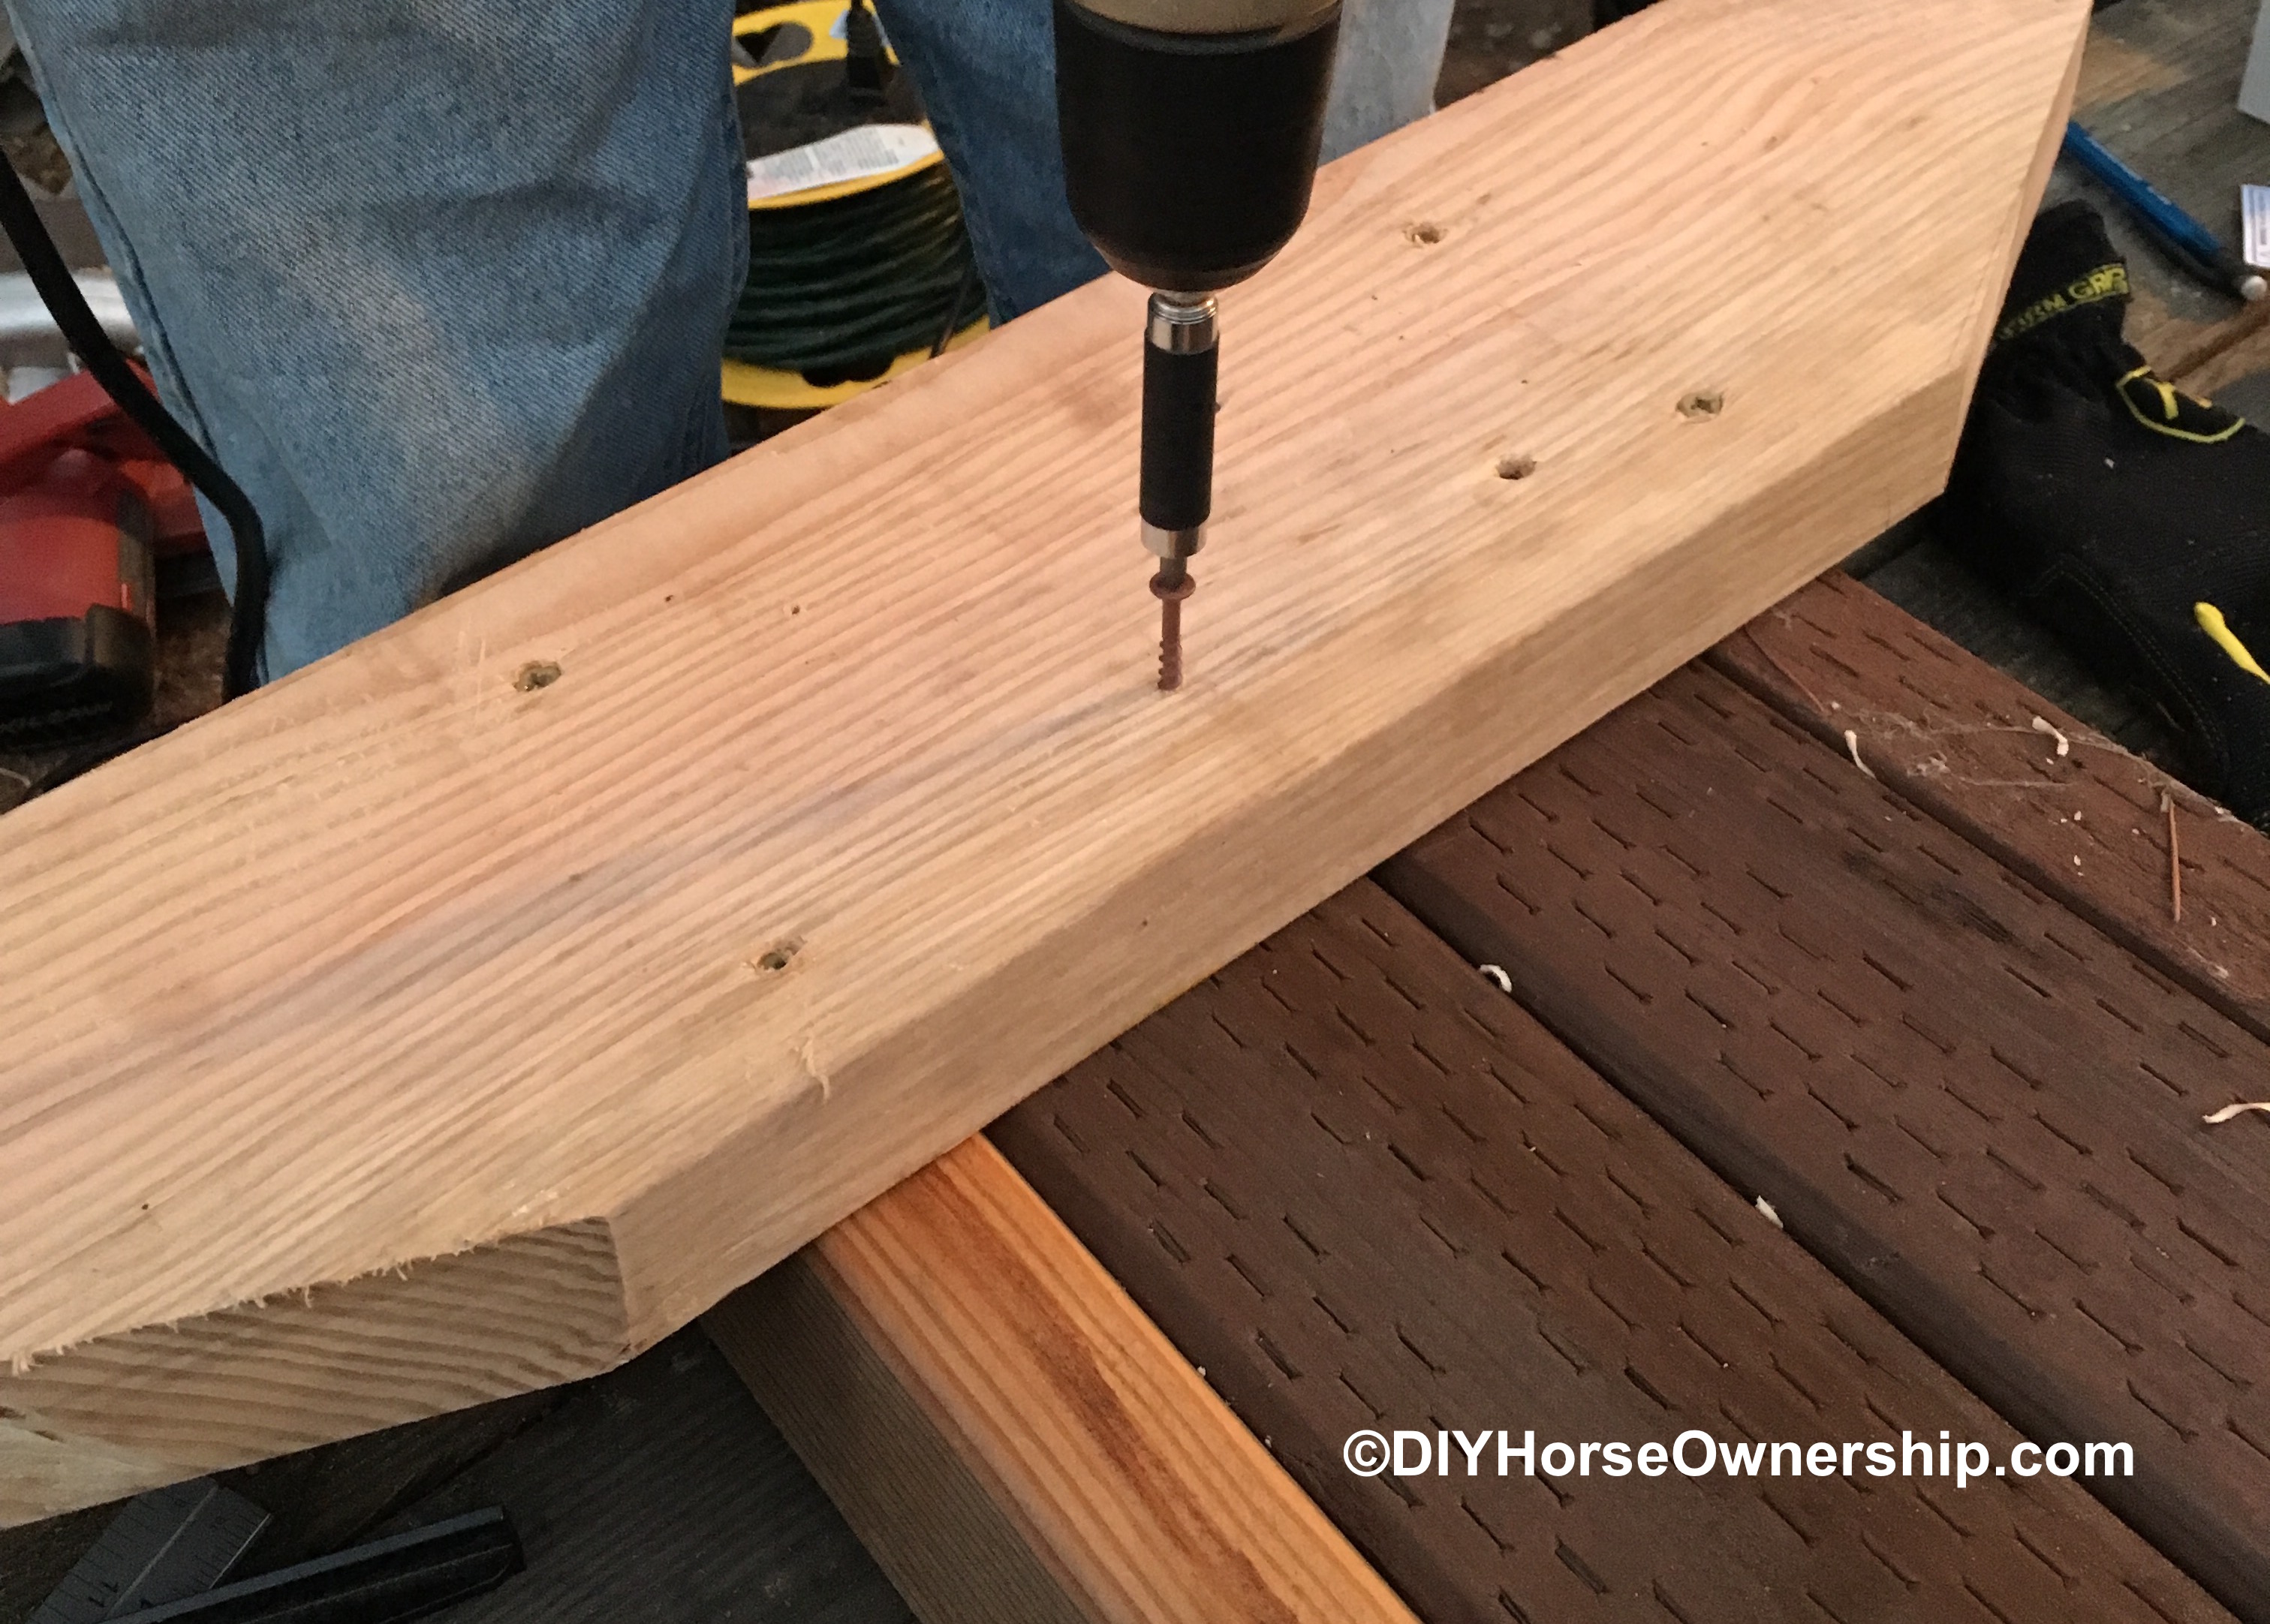
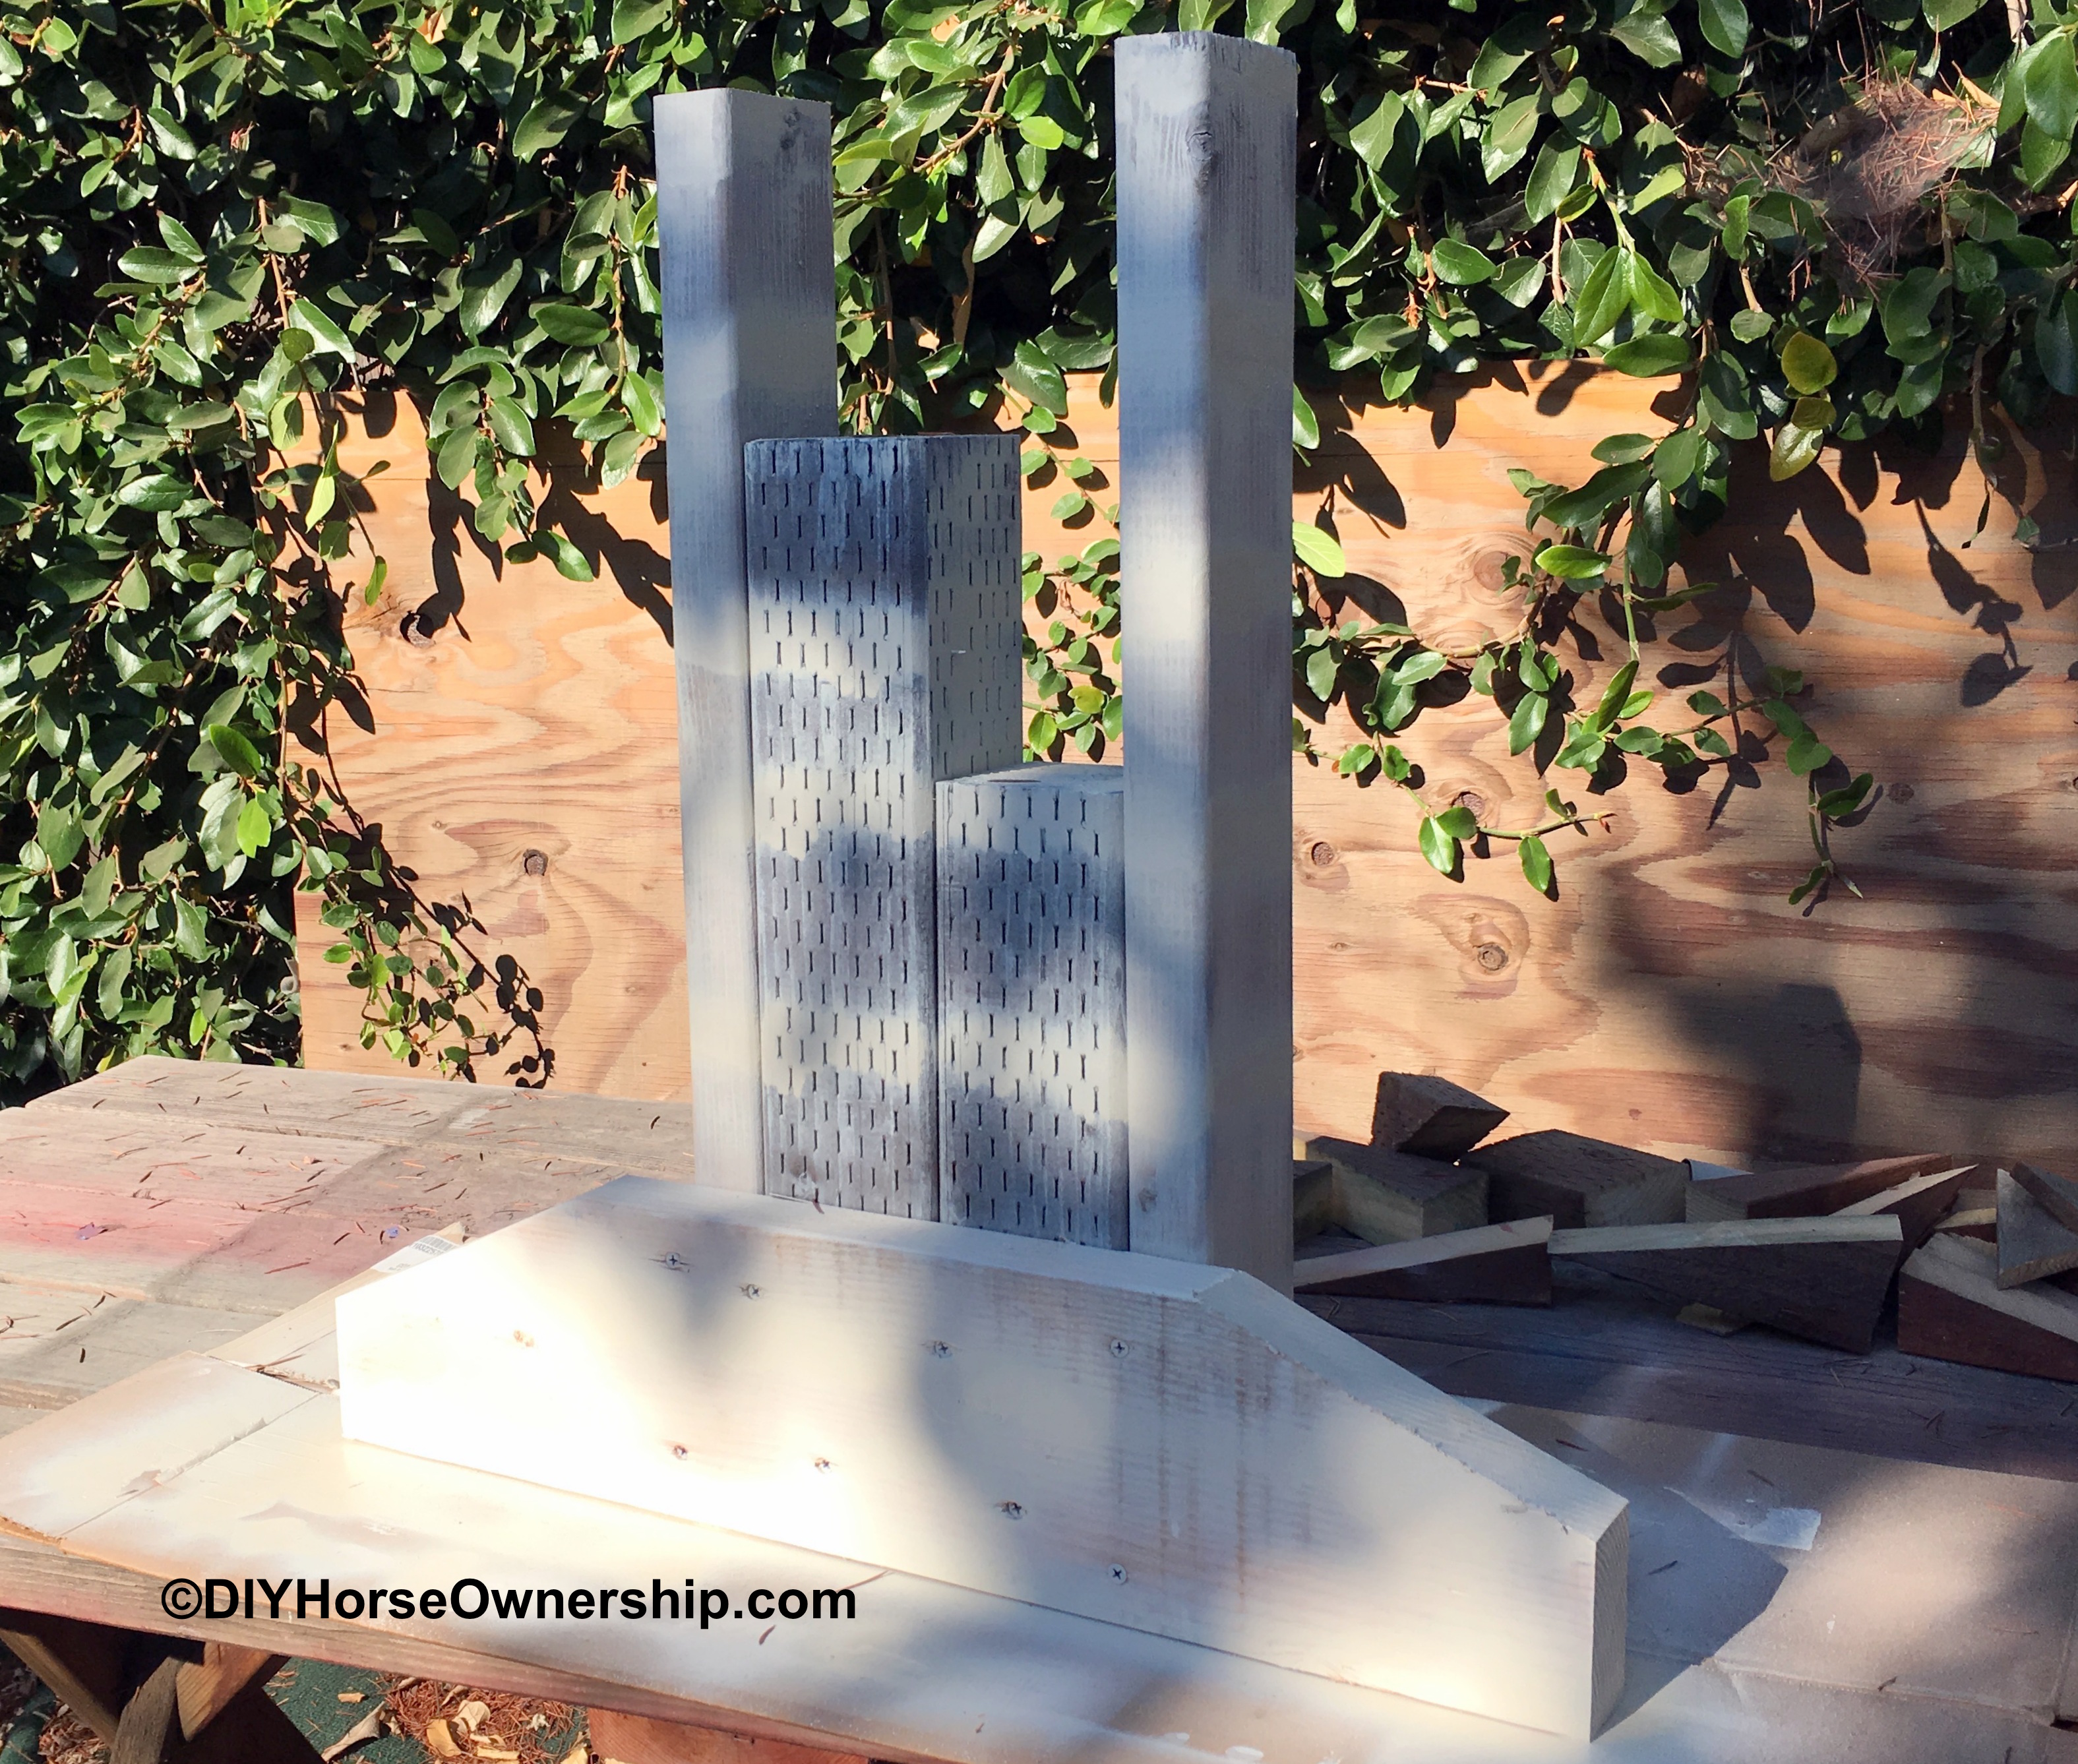
Step 7: Cut your 4×4 and 2×4. You’ll need four 4x4s of 2 different heights. We made ours 13″ and 18″. Feel free to use different heights. All of your 2x4s should be 2′ tall. In our case, one of our boards was 22″ because we were using scrap wood.
Step 8: Cut your 2×6 board into 2 2′ long sections. Cut triangles out of the top to make it a trapezoid.
Step 9: Place your 4x4s next to each other and sandwich them between your 2×4. Place your 2×6 on top.
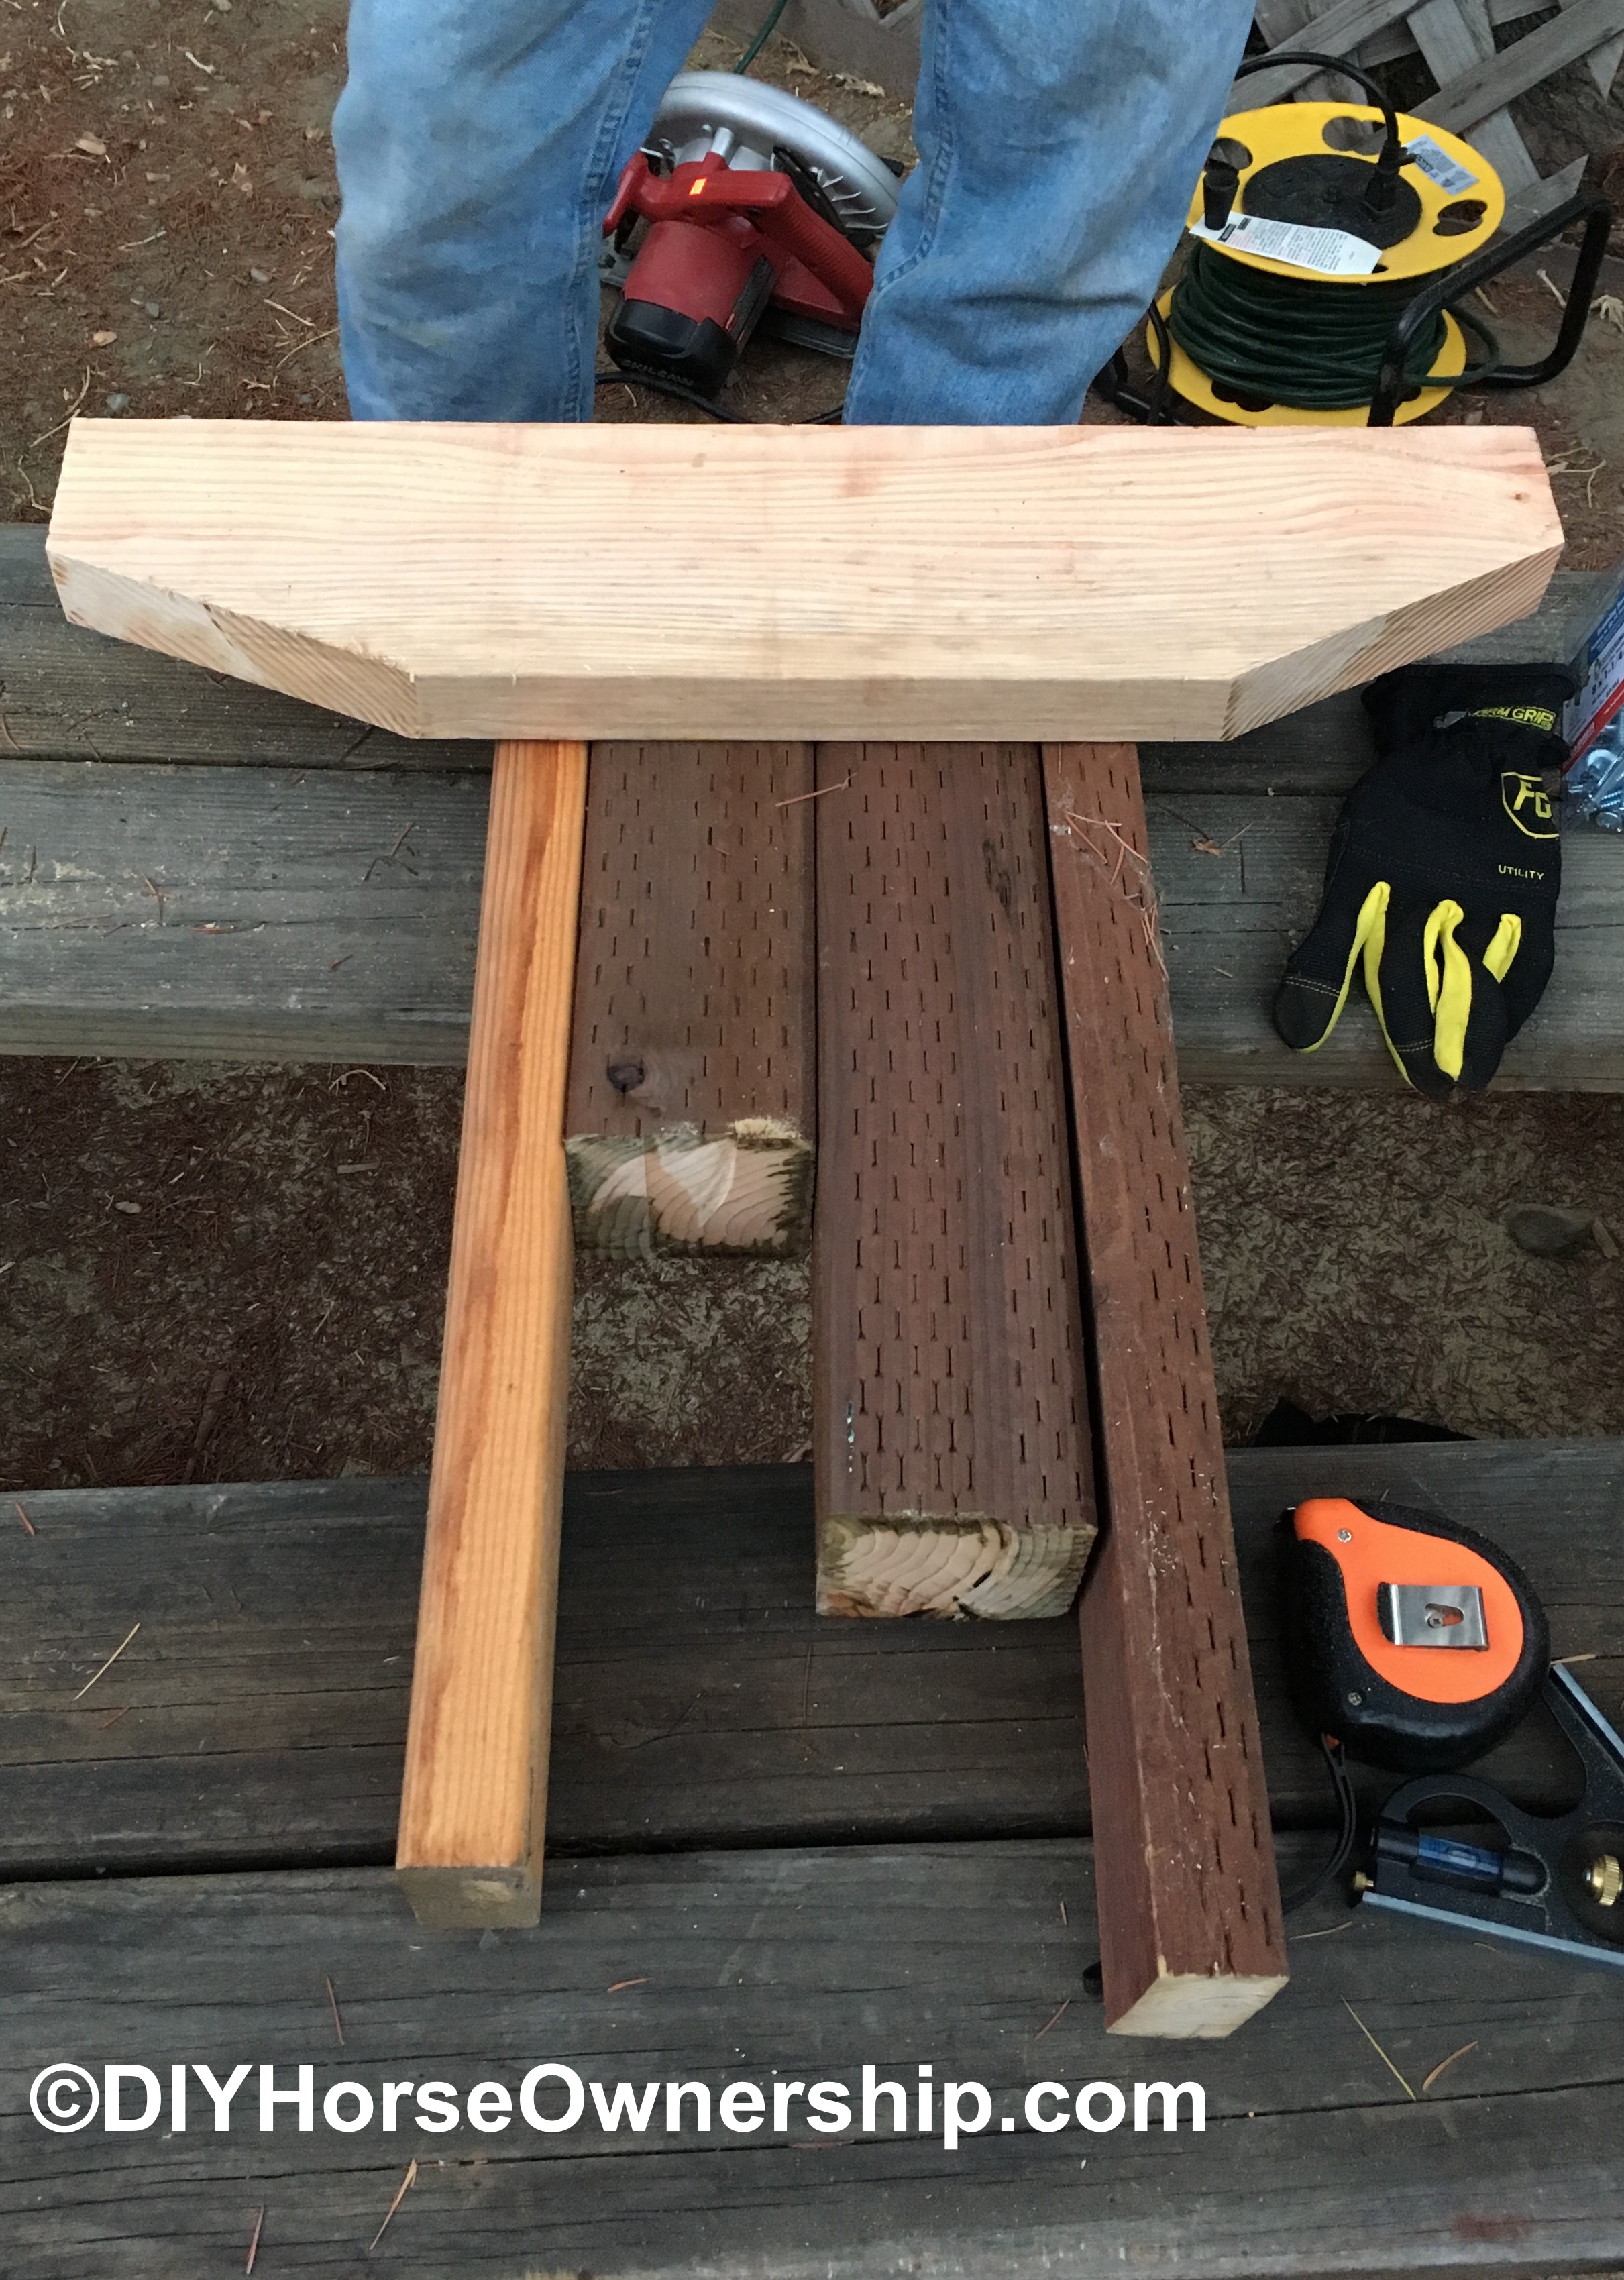
Step 10: Pre-drill holes and then screw your 2×6 into the other boards. Use at least 2 screws per board.
Step 11: Repeat steps 9 and 10 for your second standard.
Step 12: Paint the entire standard white. I was running out of spray paint, so I painted extra along the lines where the painters tape would go so that would be whiter, and then just a light coat over the rest. If you have enough paint, coat the whole thing.
Step 13: Using the same 4″ measurements, tape up your standard.
Step 14: Spray paint with red and then peel your tape off.

Step 15: Add handles (this is an optional step, but I like having them).
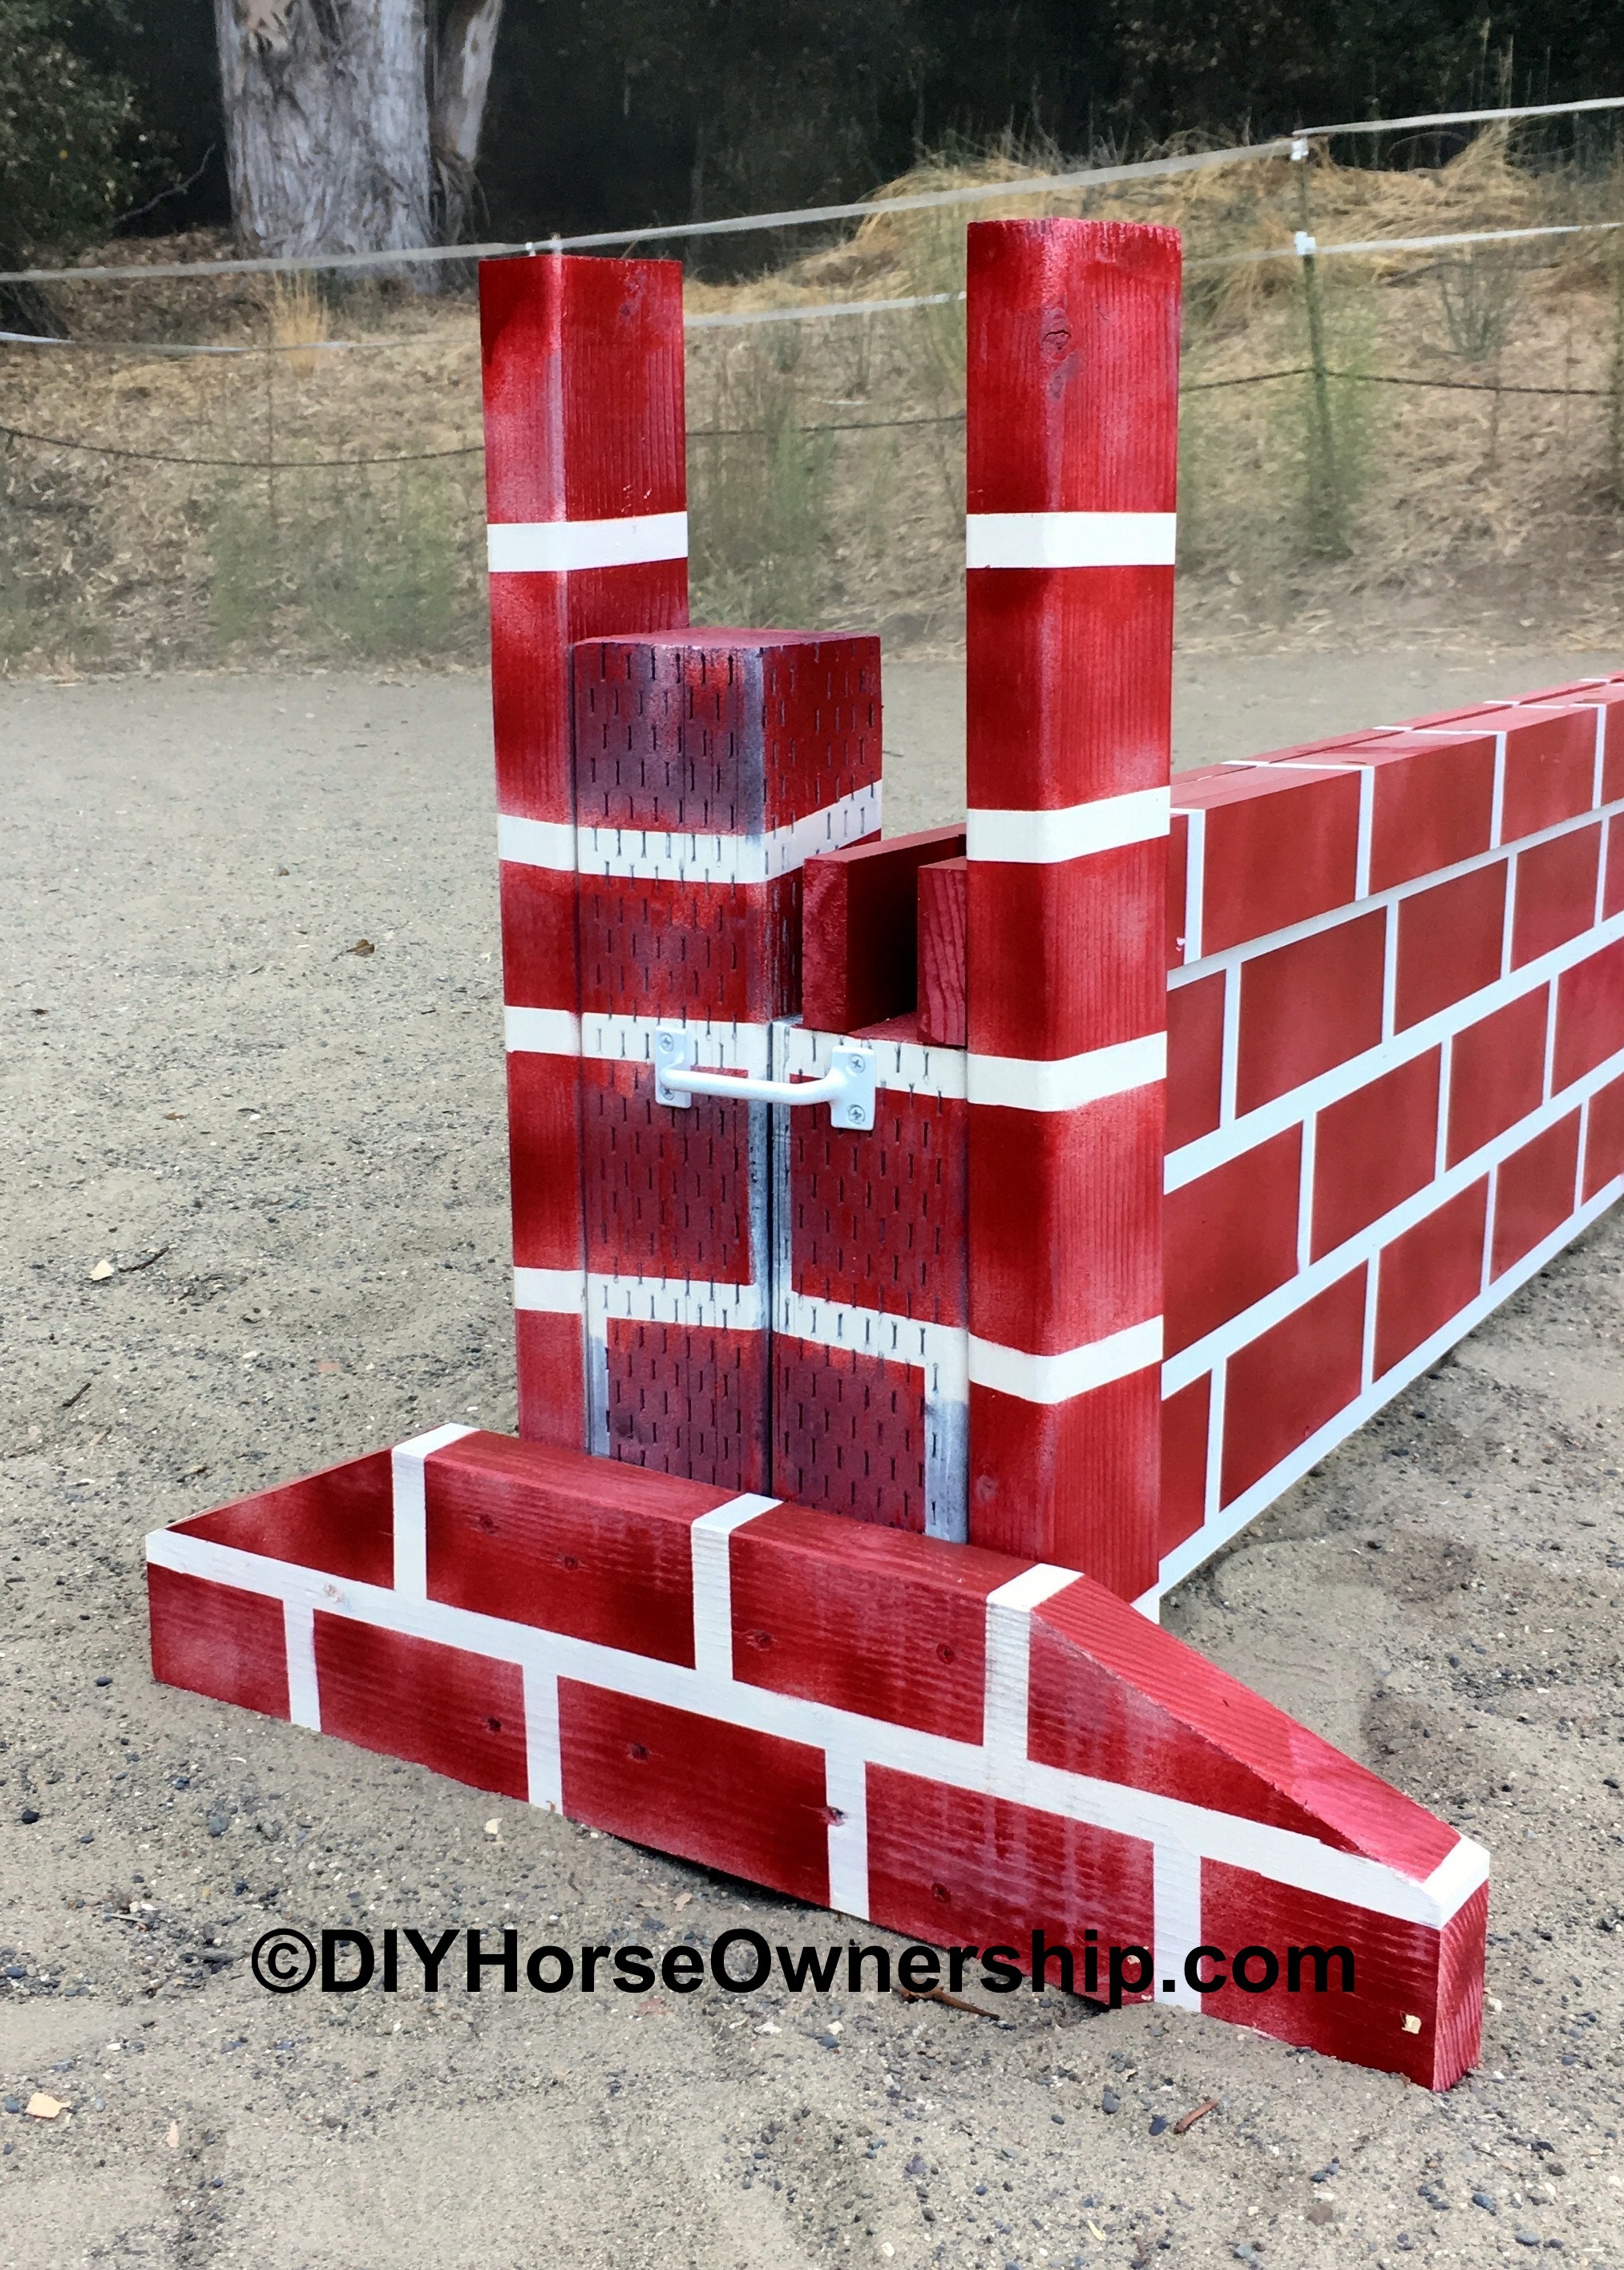
Step 16: Add your wall to your standards and you’re done. Adjust height as desired.
Disclaimer: I am not a professional woodworker or course builder. Build and use this jump at your own risk and with your own risk.
I admire your patience with the tape lol. Looks very sturdy too!
The tape really isn’t so bad. I think it took me <10 mins.
Nice looking jump. Very sturdy. Looks like it is built to not drop if the horse hits it? So more like a solid jump than atypical stadium jump?
We wanted more XC type jumps. If a horse really clobbers it, it’ll fall apart, but it won’t fall at a touch like a pole.
Nice paint job! Love it!
Thanks.
Sweet! I did one of these once but i used a big sponge to make the “bricks” instead of tape. Yours looks really nice though!
That’s a good way to do it too.
This is gorgeous
That looks awesome! Adding that to my husband’s to-do list XD
Post pics if he makes one.
This came out great! I like that you can adjust the height.
That was a last-minute addition and I really like it too.