
When we first started thinking about moving to the frozen tundra of Vermont, I knew we’d need heated waterers. It was always part of our budget for a property wether we had to add them to an existing barn or to one we built. What we didn’t count on was the shocking dearth of plumbers. Finding a plumber who would return my calls was frustrating enough. Finding one that services my area was worse. And finding one who isn’t completely booked up for the forseable future proved impossible. I did manage to find a good plumber to fix some of the barn plumbing – we needed to move the hot water heater from the bottom of the bank barn into the heated tack room and heat tape and insulate the pipes (the previous owner went to NC for the winter and the barn wasn’t set up for winter use). However, despite my wanting to pay him money for a large project, he was booked up for anything more than quick projects and wouldn’t take on installing the heated waterers.
While the barn does have electric, I don’t trust heated water buckets. To begin with, I own toddler horses who think everything must be put in their mouths. Even if I managed to drill holes in a way that would keep the cords safe from them, I don’t trust heated water buckets.
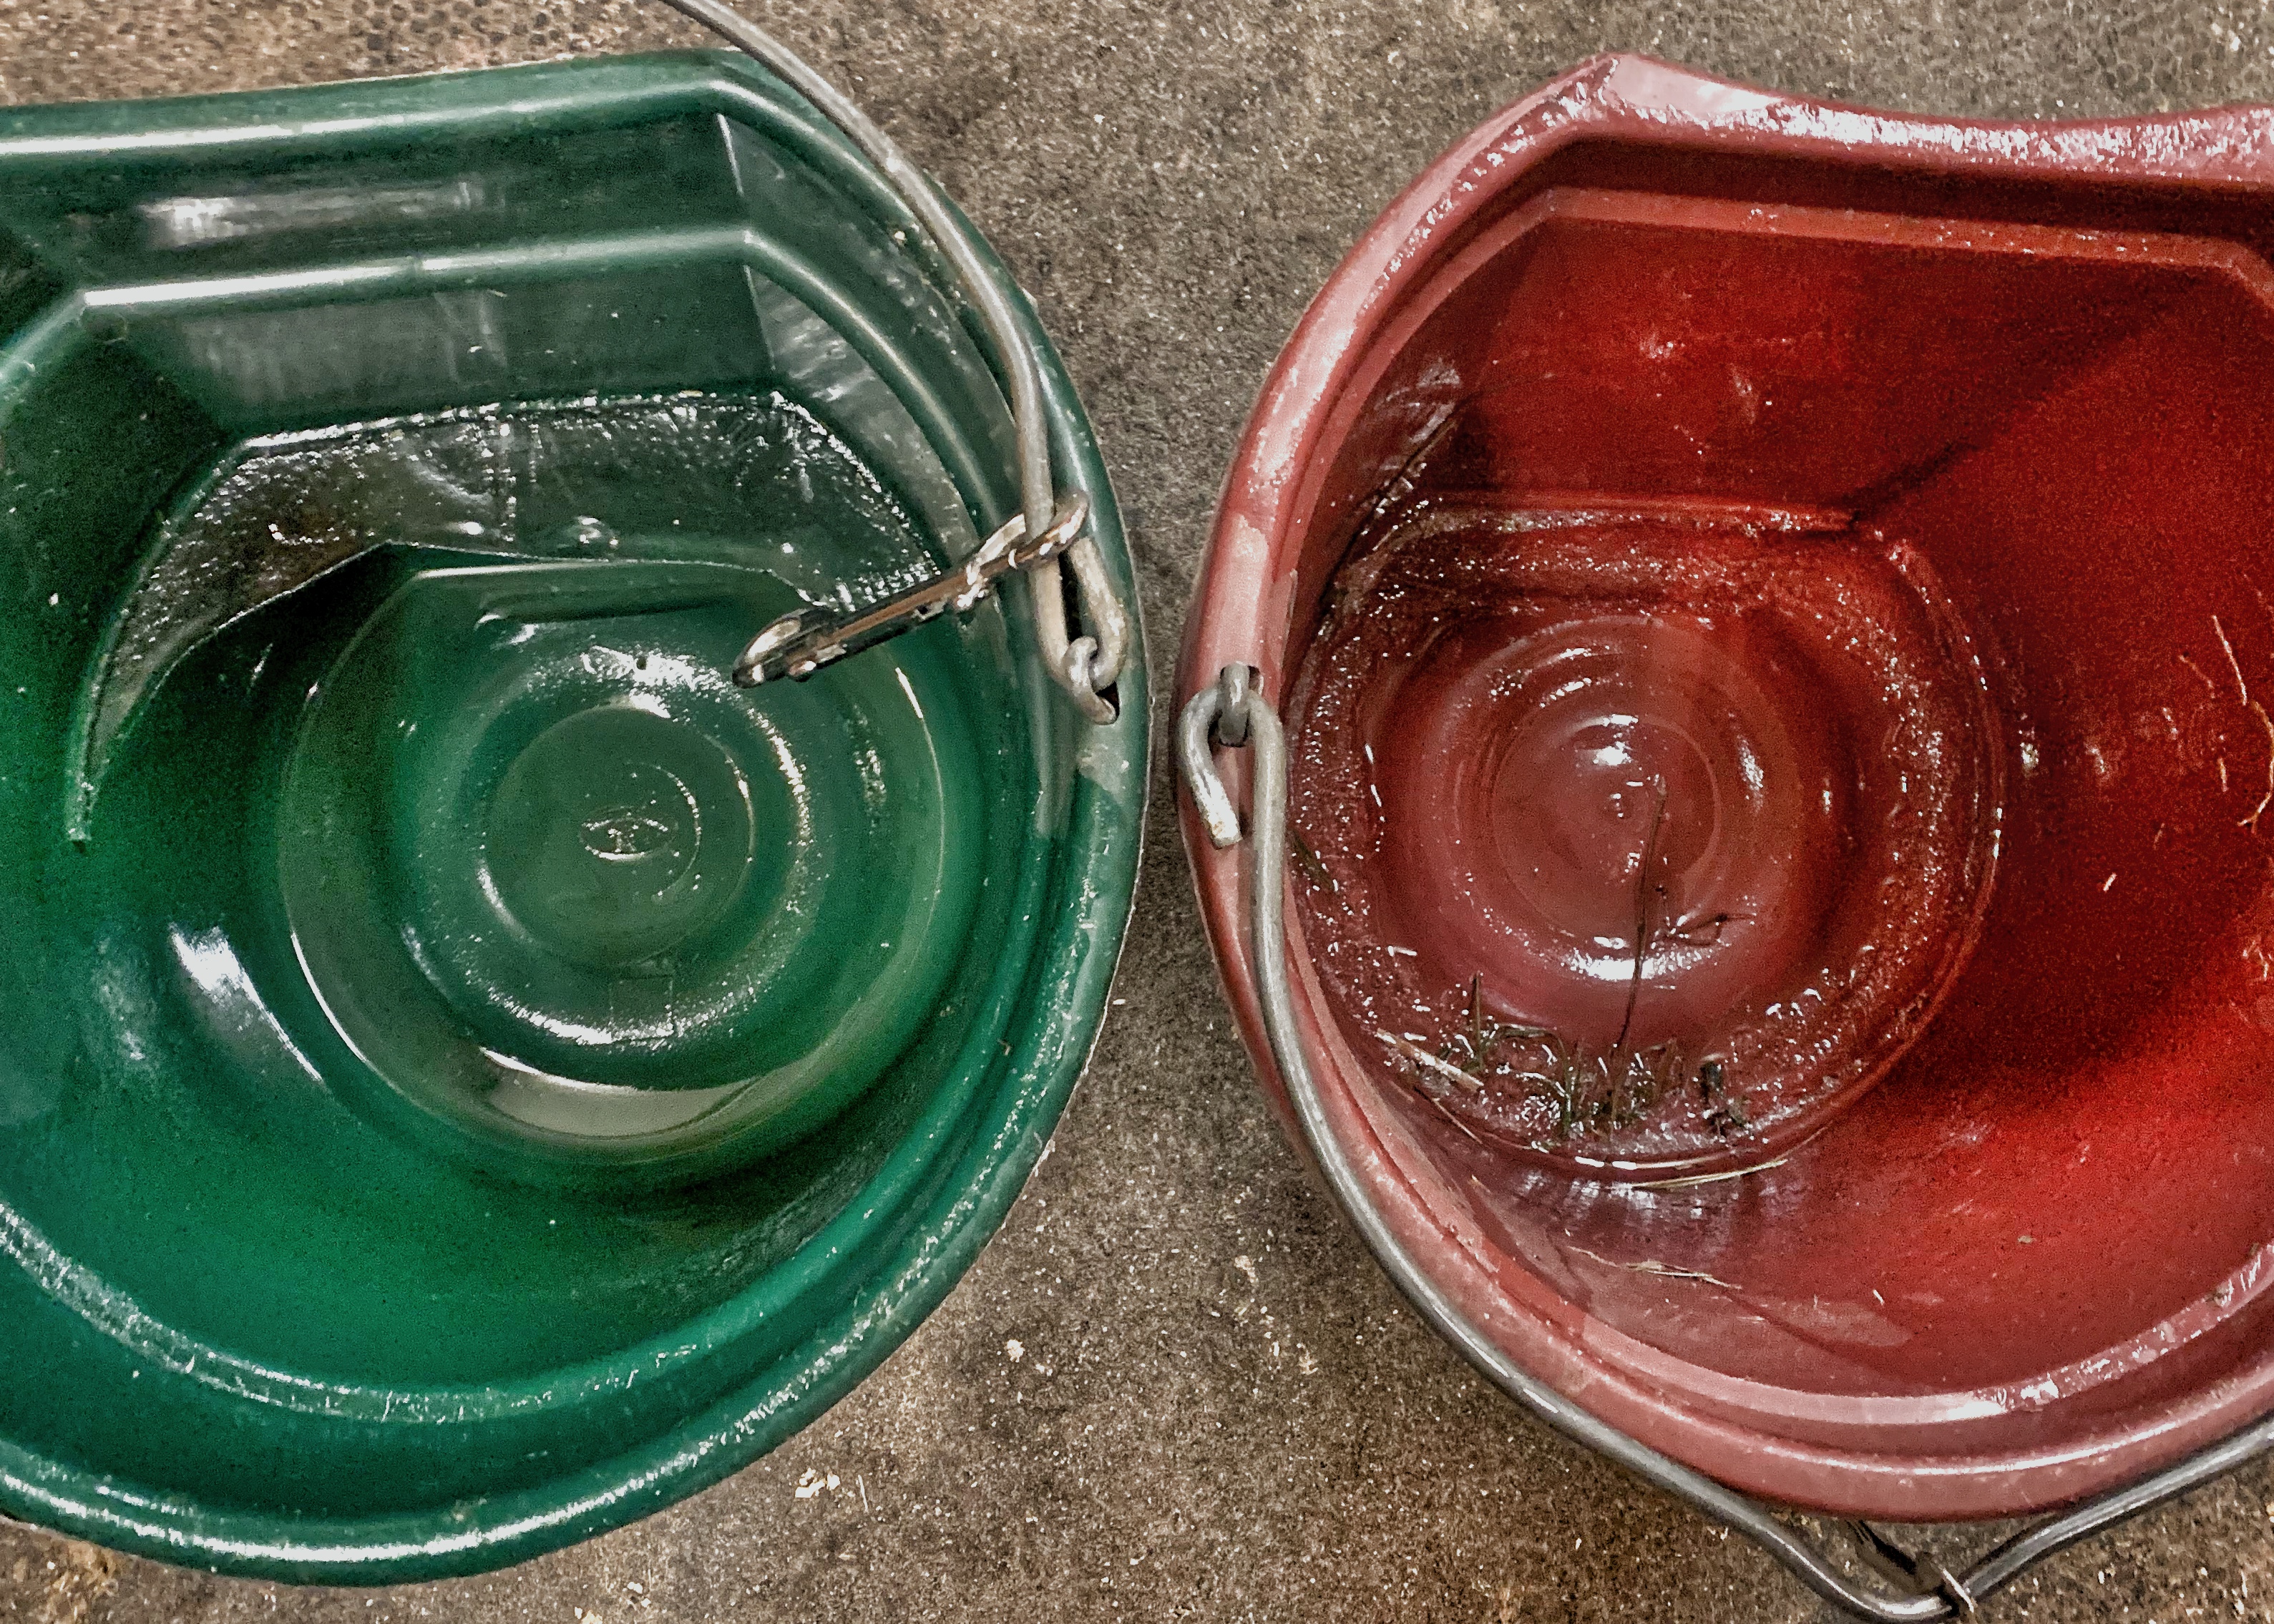
PC: Dr. Peter Conserva via Woodstock Veterinary Clinic
While we’re still planning to install the Nelson Waterers – which keep water warmed but in a safe way – we need it to be not freezing cold outside while we’re doing it. My husband is actually taking a plumbing class so we can do this ourselves – and also it’s a super useful skill to have for minor projects. I may take the class too at a future date. That said, with heated waterers being a next summer project, we needed a way to keep the horses’ water warm in the meantime.
Enter insulated buckets. I looked around online and found a few different ways of insulating water buckets. While the two buckets with foam in-between looked great, that involved buying second larger buckets. The bubble wrap and duct tape method seemed best. Especially given that we had just moved across the country and had tons of free bubble wrap. I opened lots of boxes marked fragile, gathered stacks of bubble wrap, some packing foam, duct tape, and – to try something a bit different than what I had seen online – some Reflectix – which is basically bubble wrap, but with reflective metal sides and sold at Home Depot or other stores in the insulation section.
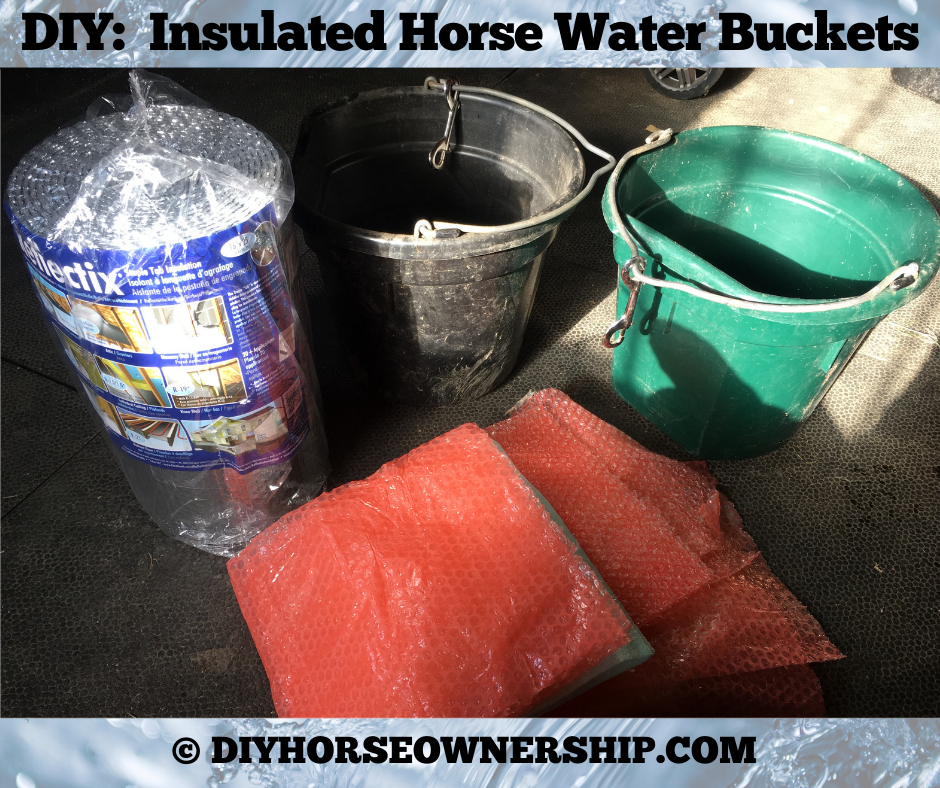
Sadly, I got very few pictures of this project because I was doing it on my own and didn’t have a 3rd hand for picture taking. Luckily, it’s really easy. You basically wrap the bucket in bubble wrap (and in my case some packing foam too).

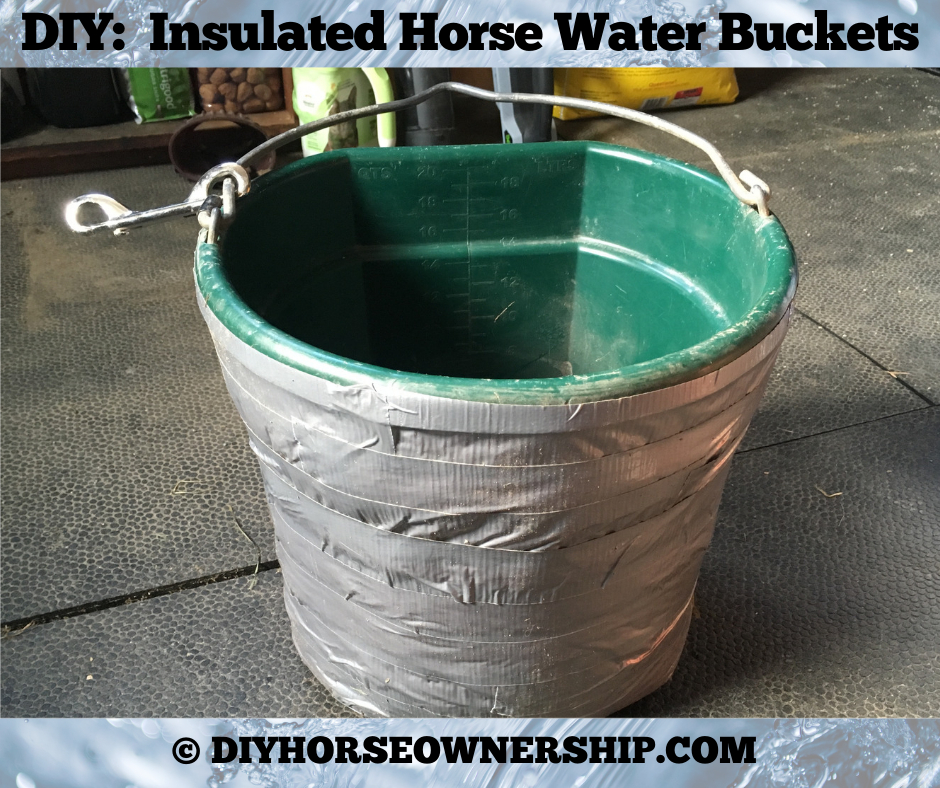
I found it helped to duct tape some pieces down – especially around the edges – to keep things still as I went along. Once you’ve got several layers wrapped around the bucket, cover everything in duct tape. I made one bucket with just the regular bubble wrap.
Then I made another bucket with the reflective wrap. I used the regular – in my case free – bubble wrap for the majority of the layers and just used one layer of the reflective wrap to keep costs down. The Reflectix is only ~$16 a roll, but free is still cheaper than $16 and I managed to cover 4 buckets with one roll of the Reflectix doing just one layer and I have some left (1 roll should make 5-6 buckets I think). I think 1 roll would do maybe 2 buckets if you only used it. Regular bubble wrap is about 1/3 to 1/4 (depending on where you buy it) the cost of Reflectix if you don’t have stacks of it lying around like I did. Sadly, I got no pictures of making that one until the end.
They were super easy to make and didn’t take very long at all. I think about ~15 minutes for the later ones. The first one probably took 20-25 minutes as I was figuring it out. The cost was great too. I think each one probably cost me about $5-$6. Even if I had to buy the bubble wrap, the cost per bucket would probably still be <$10.
The price is great, but I know what you’re wondering, because I was wondering this too. Do they actually work?
The answer is an astounding yes.
I really want to do a timelapse video to show just how well these buckets work, but I haven’t gotten around to it yet, so here’s a poorly lit picture. For added comparison, Nilla’s bucket has the SmartPak Insulated Water Bucket Cover on it and Levi’s bucket is uninsulated. Why is Levi’s bucket uninsulated, you might ask?
Because Levi is the living embodiment of the phrase “this is why we can’t have nice things.”
proof
Seriously though, he shredded his so now he doesn’t get one.
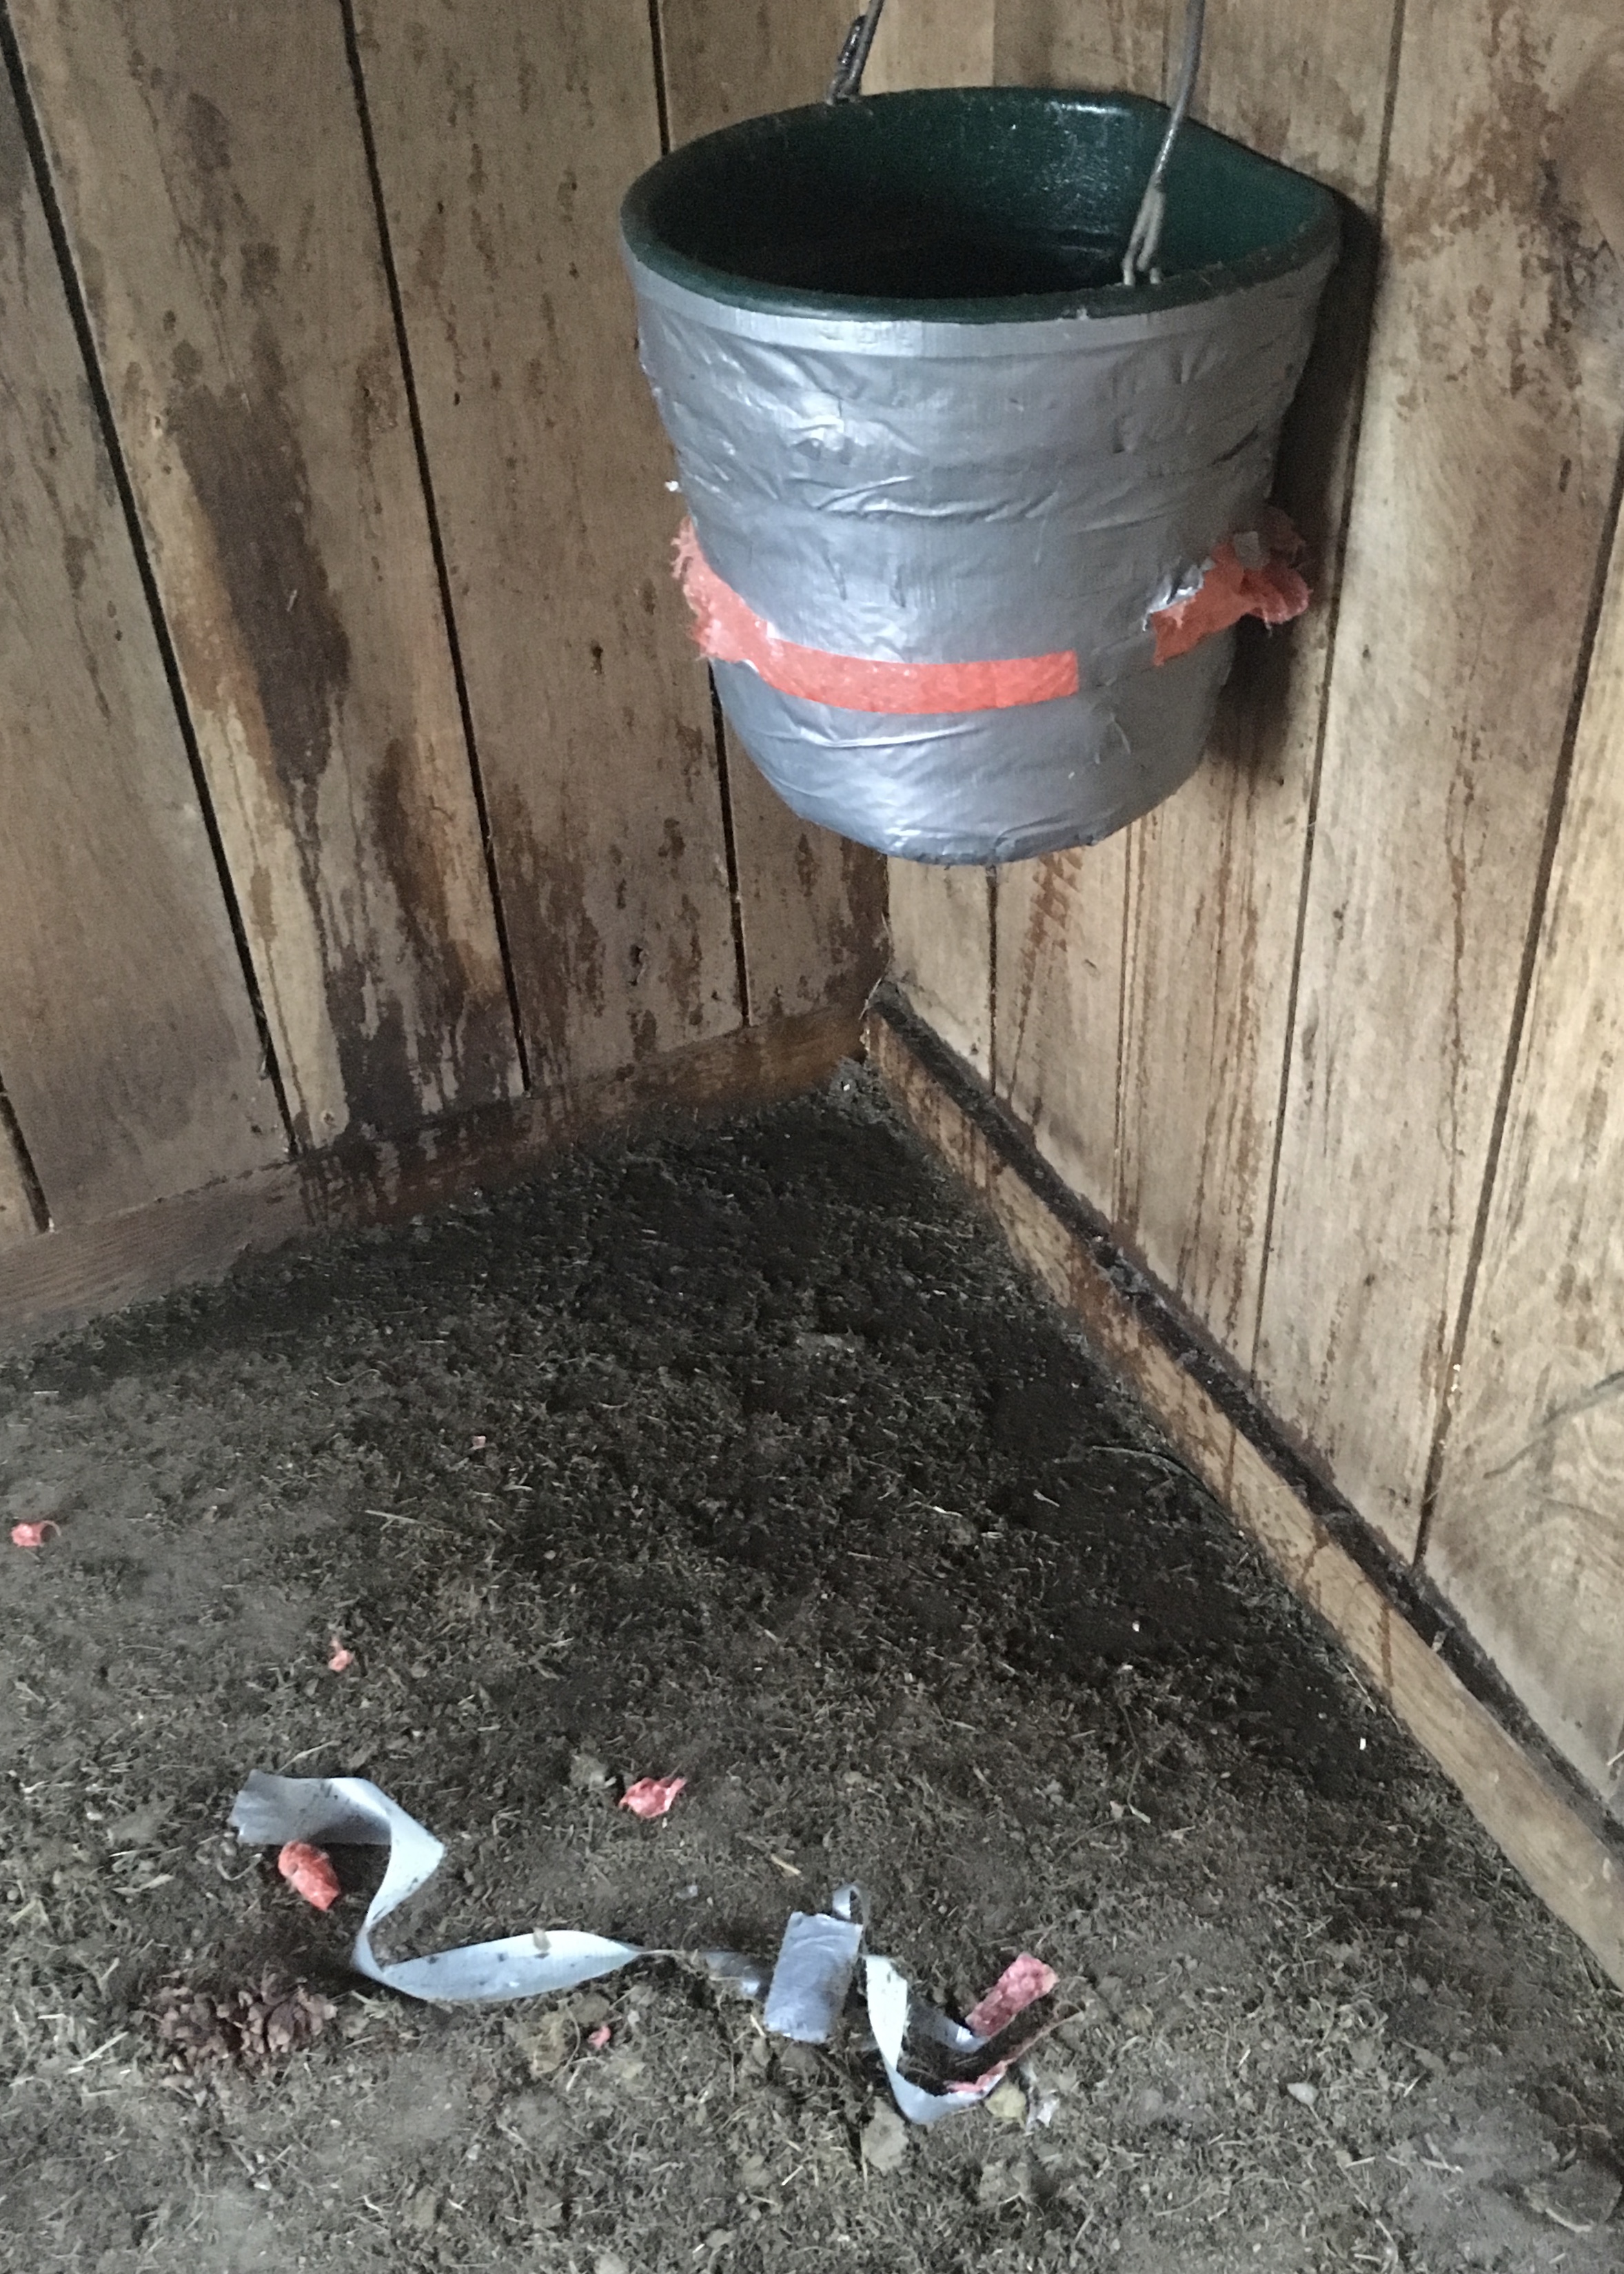
This is a downside to this type of insulated bucket. If you have an incurably mouthy *asshole of a horse, this isn’t going to stand up to them. Then again, I don’t think SmartPak cover would survive him either. Possibly the foam method would work.
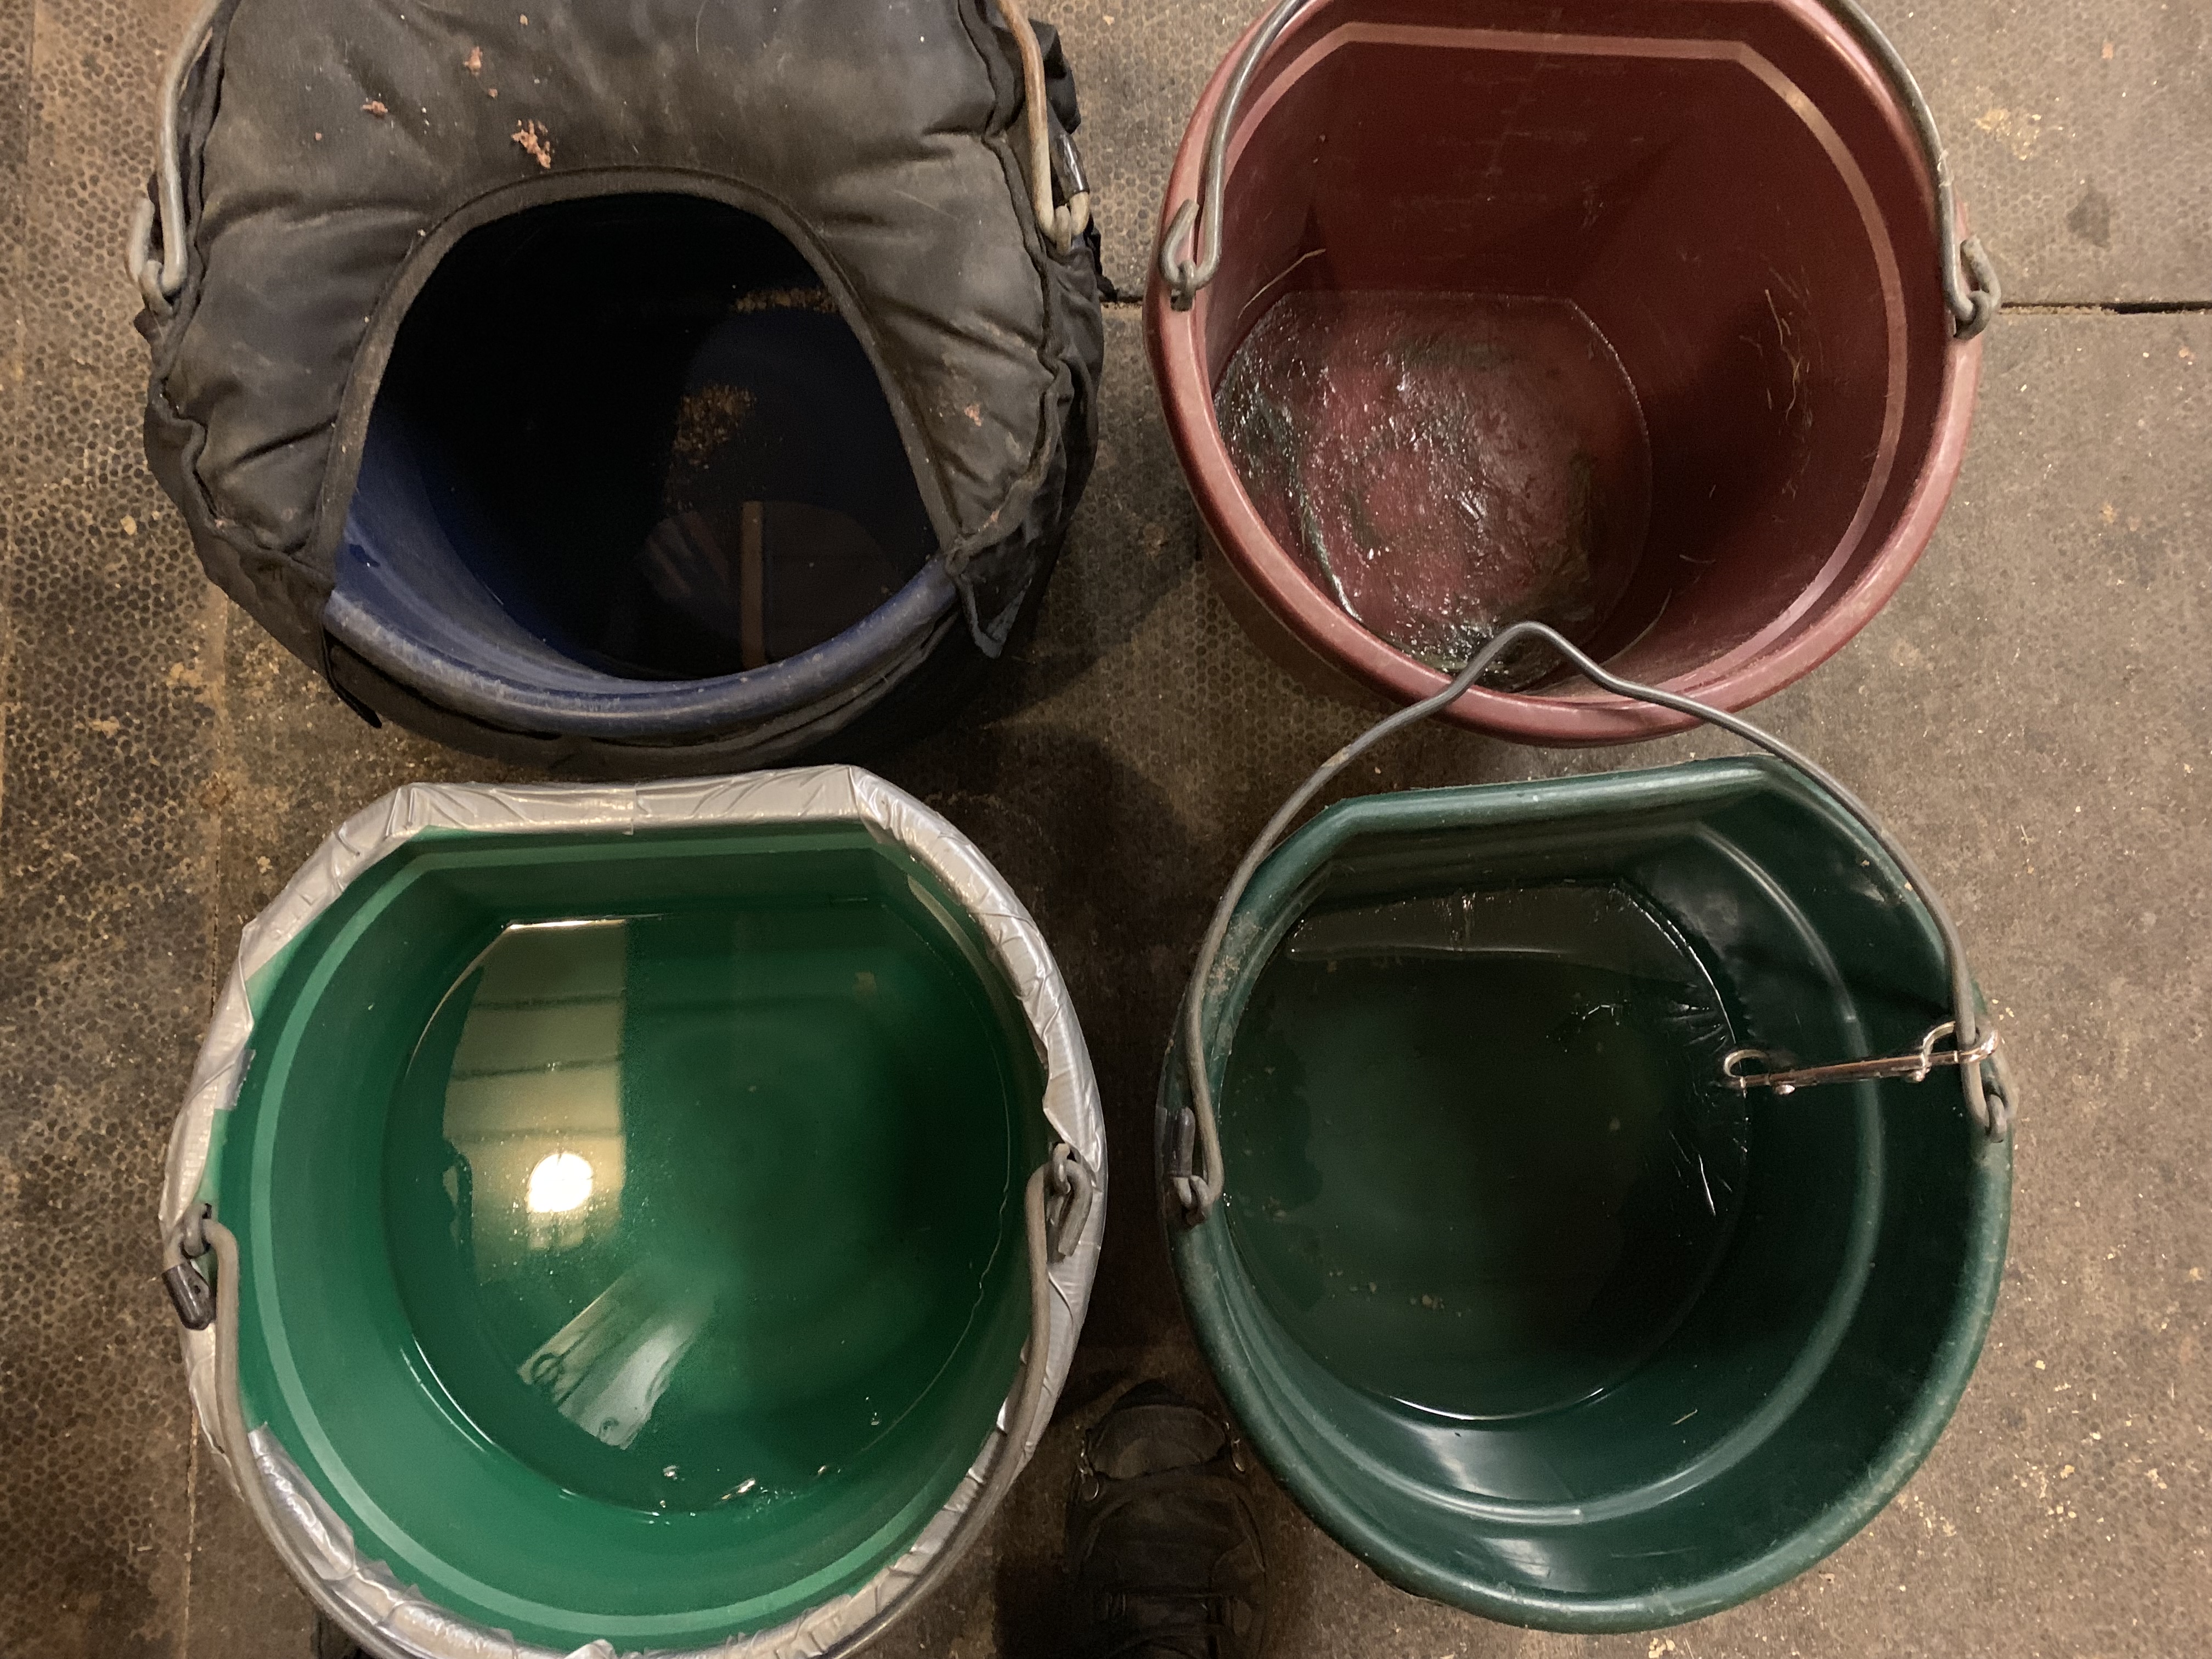
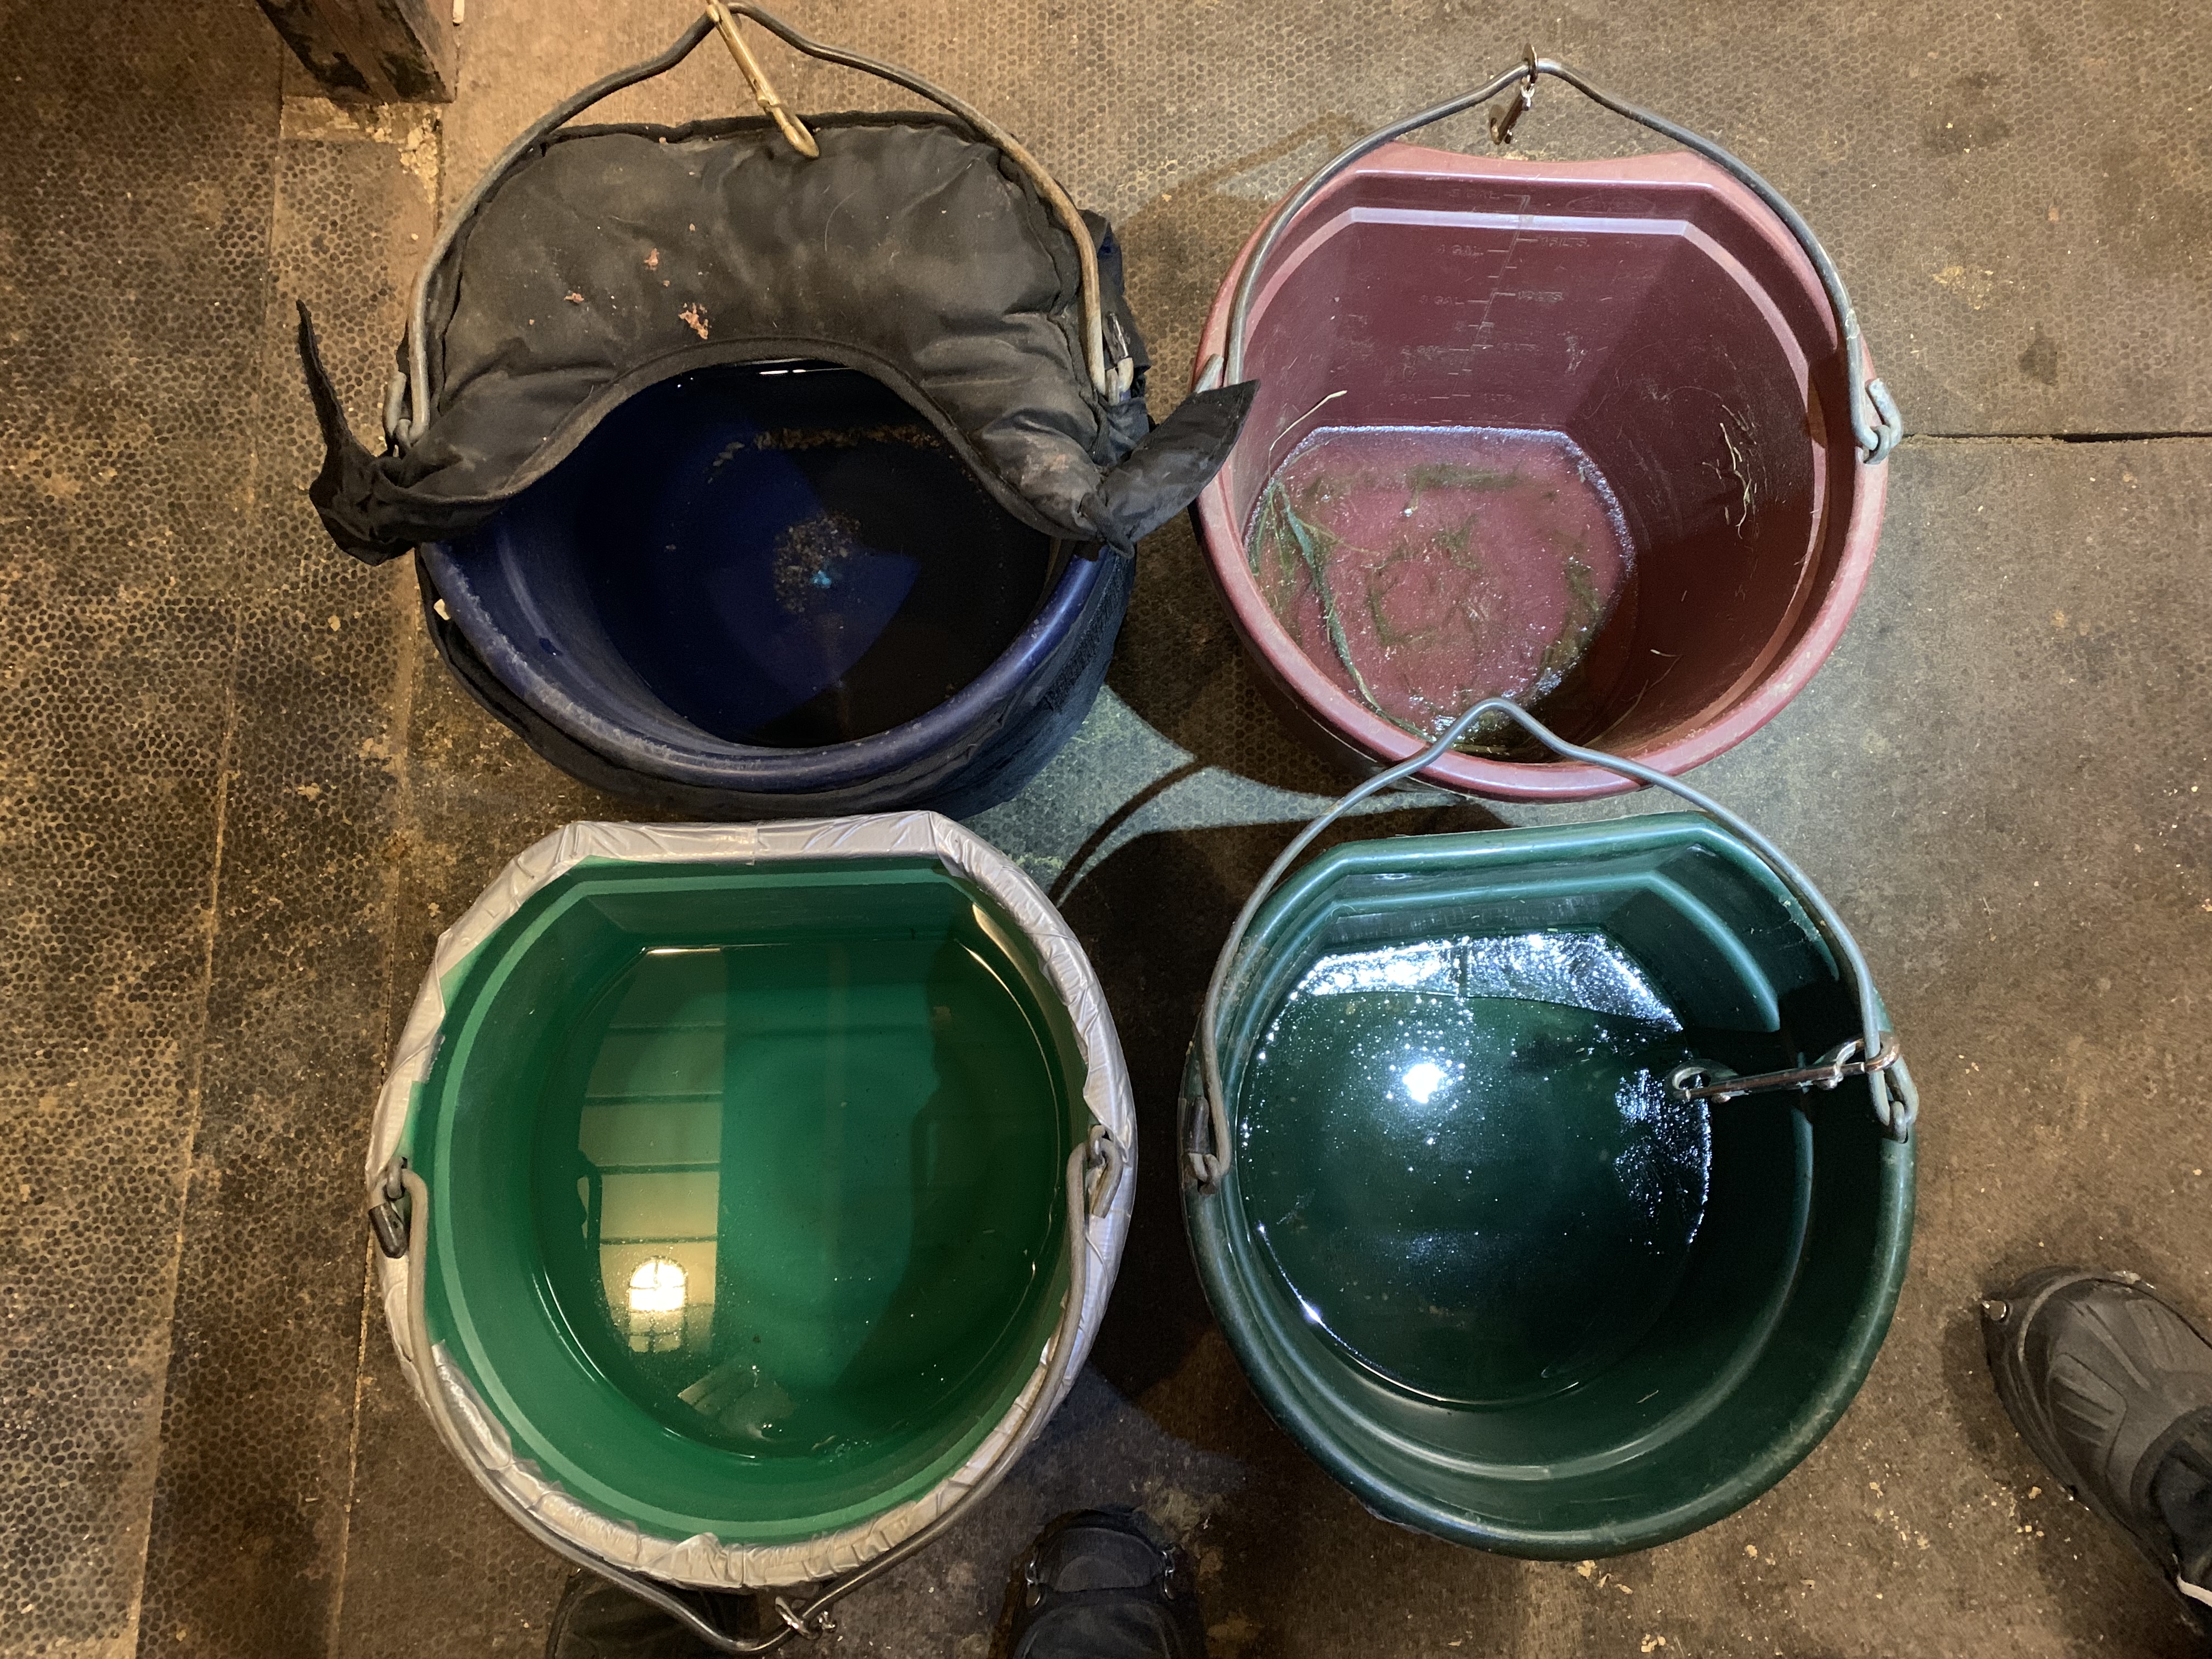
Anyway, in this picture of all 4 buckets, you can see that Nilla and Eugene’s (on the left) are completely free of ice. Shasta’s – the green one on the right- has a very thin layer of ice on the top. Levi’s is iced all the way around (his was nearly empty). I took a picture of those two after dumping them. The lighting wasn’t great in the barn at night so I threw the picture into an editor and jacked up some of the effects so it looks weird, but it does help you see how Levi’s has developed a thicker layer of ice all around the sides and bottom. Shasta’s only has a the skim on top.
Since Shasta’s bucket is the one with just regular bubble wrap, you can see that even regular bubble wrap and duct tape will help. However, in the picture of all four, you can see that the reflective wrapped bucket is working just as well as Nilla’s expensive SmartPak cover.
I will say I think the SmartPak cover works even better than the DIY buckets. Nilla’s stall is a lot colder than Eugene’s (reasons I’ll get into in another post) and her bucket started freezing before everyone else’s before I added the covers. I bought the SmartPak cover back when I did the other ones because I was curious if my DIY covers could work as well. For the most part, they have. However, the temps were only in the high teens evening when I took these pictures. When the temps get below 0 the DIY buckets get more iced than the SmartPak one. They still get significantly less ice than the uninsulated one. I’d like to try making a duct-tape lid for one of the DIY ones to see if that helps. If you’ve got lots of $ to spend or don’t like Doing it Yourself, the SmartPak covers cost $45 and really do a great job. The DIY covers only cost about $5-$10 though and do a pretty damned good job as well.
I highly recommend making some of these if you ever worry about your horse’s water freezing.
As a side note, if you’re thinking “My horse has been living in the cold forever. He knows how to break through ice to drink, and doesn’t need warm water,” you should really read this study. To sum it up though: In the winter, horses will drink more water when the water given to them is warm, but will chose cold water – and then drink less – if offered a choice. Since I want my horses drinking as much as possible – especially in the winter – I want them to have warm water. Even with the insulated buckets, I like to mix in a little hot water to my horses’s buckets when I fill them. The insulated buckets will keep that water warm too. I’ve hung an insulated bucket outside in the wind with some hot water mixed in and found it still nice and warm hours later.
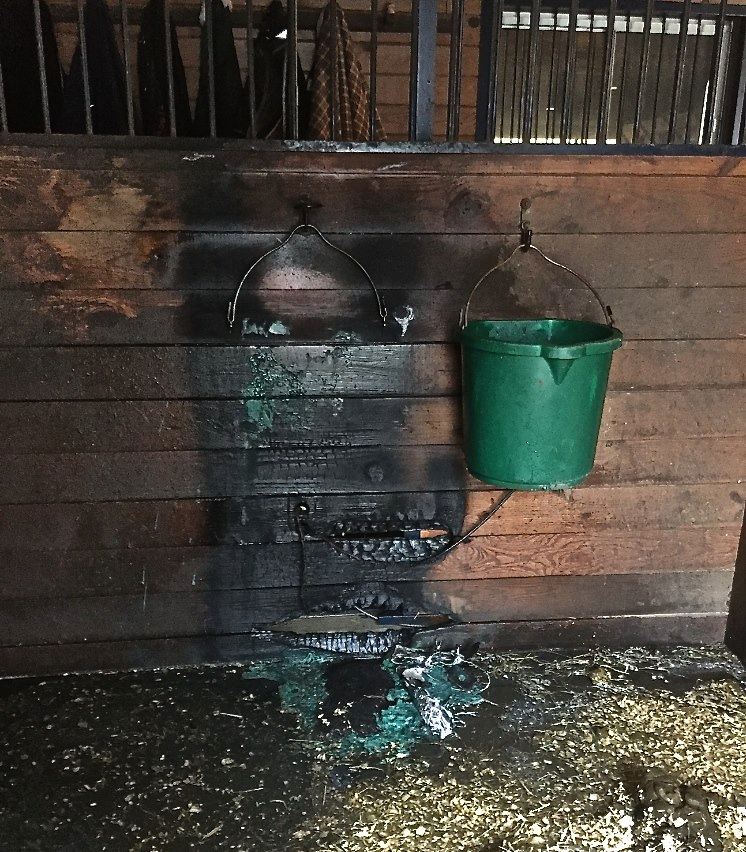
holy moly, that burnt barn stall is SCARY!
Absolutely terrifying. They’re so lucky the fire didn’t spread.
Had you thought of using a hay box as insulation? My husband was in the army and they used insulated hay boxes to keep food warm. Obviously they had lids, which you wouldn’t want,
https://www.woodland-ways.co.uk/blog/others/making-and-using-a-hay-box-to-cook-in/
This link tells you how to make a haybox to use as a slow cooker, but I was thinking that you could make one, and use sacking or something to cover the hay, with a space in the middle for the bucket. Just an idea.
I have thought about doing something like this for the outside trough. For indoors, it’s too much work to build something like that when the bubble wrap buckets work just fine.
I like these! I have the SmartPak insulated covers (I bought 3 clearance once’s for $17 ea. because SmartPak kept sending me $10 giftcards for increasing supplements prices). I bought 3 more when they put the rest on clearance because I liked them so much but they were pricey even at $27 (sale plus perks plus membership). Still, my one guy is a slob and I worry about the duct tape/bubble wrap holding up but I may need to try this on Subi’s mash bucket as he picks all night and his dinner freezes on cold nights before he finishes.
I only do heated buckets/deicers outside. I don’t have electric inside yet but still I’m nervous. These other methods work well.
I bought a few more when they were on clearance too. I figured I’d stock up while they were cheap and have some extras around as backups. The duct tape ones have been easy to rinse off so far. Shasta likes to drool her food all over her water buckets (and stall and door and everywhere) and I just run the duct tape under the tap, scrub with the brush and it cleans up nicely. I don’t know if it’ll last forever, but it’s easier to wash than the SmartPak ones.
This is awesome – thanks for sharing, esp with the comparison between different styles of insulation. I bought the smartpak cover last year and was admittedly a bit skeptical of it, but then barn staff assured me it helped a lot and others in the barn started buying them too. It’s great to know that the DIY version is nearly as effective tho – I’m definitely sharing with my barn family haha!
Also agreed that it’s worth it to do what we can to supply warmer water. On very cold nights I’ll actually add some hot to the insulated bucket to keep the temps slightly higher than otherwise. And I’ve noted my horse has two buckets in his stall but prefers to drink from the insulated one.
I was so skeptical too. But it’s impressive just how much they help. I think given your more mild climate the DIY ones should be fine. If a bunch of people are going to make them too, you could split the cost on the one roll of reflective bubble wrap. I really think that helps.
thank you so much for sharing this! I’ve gone back and forth on it through 2 cold snaps and I REALLY don’t want to spend that kind of money when that kind of cold wasn’t the norm down here.
However maybe I should bite my tongue, because I think it is becoming the norm!!
The $5-10$ it’ll cost to do the DIY ones is pretty easy to swing. I got some 5 gallon buckets on sale a few months ago so even if you needed a bucket the whole thing would cost less than the SmartPak ones.
That’s impressive! I actually bought some of the smartpak covers. My barn is heated, so I haven’t needed to use them, but just in case we lose power, I figured it was a good thing to have.
Not sure how well they work, but I have seen people on facebook using water coolers as water buckets in the cold which supposedly works well too. That might be an option for Levi since it’s basically just a double walled bucket. (something like this, but without a spigot: https://www.amazon.com/Water-Coolers-5-gallon-cooler-fastflowing/dp/B00NWULXJC)
I thought about doing something like that cooler idea. He wouldn’t be able to shred it, but it seems like to would be annoying to move around for dumping and cleaning. I like the bucket covers because they’re all easily portable. My barn isn’t heated, but I’v been impressed with it staying decently warm compared to the outdoors. It’ll stay in the 20s with the doors shut and the horses inside when it’s 0 outside.
Great idea – I’ve been meaning to try DIYing a couple of buckets myself. I don’t have my horses in much due to the frozen water thing, but it sure is better than just letting everything freeze up.
and totally agree on the heated/warmed water! I brought my gelding a bucket filled from the hydrant – I think the water comes from the Arctic, lol – and he wouldn’t touch it. Dumped that and scooped up a bucket from the heated trough and he drained it in one shot!
Our well water is crazy cold too. Even in the summer it comes out of the tap chilly. It’s nice in the summer, not so much in the winter.
That first photo is terrifying. Just say no to cheap electric water heaters!
Those aren’t even that cheap. I think anything that isn’t an installed product can’t be trusted. I wouldn’t use those drop in heaters for troughs either. I’ve heard horror stories of horses being shocked by them.
Thanks for the comparisons. H’Appy can’t have nice things as apparent by the jolly ball ripped and shredded from the wall, two broken feed buckets and a half chewed stall door. He’d shred that in 2 seconds. Gem and Pete though could probably deal with it. Not that we get many frozen buckets here but cheap and easy is worth doing.
It’s a good thing to keep in the back of mind if you know a freeze is coming.
Totally doing this for next winter! Thank you for all of the comparisons and for saving me $$$!
Since you’re building from scratch consider getting the Nelson Waterers. They’re pricy, but they won’t burn your place down and you can set them up outside to provide constant water year round and warm in the winter.
When I boarded in a co-op, everyone used these for outside paddock water buckets in the winter. At the end of the day, you simply re-fill, and put the cover on. Next morning, the AM person only had to take the lids off, and Ta-Da — unfrozen, full buckets of water. Stayed unfrozen all day too. Easy to clean. The only drawback would be that the size was really only good for one horse, but we had individual paddock turnouts – no group turnout, so it worked for us. You could probably go up a size and get the same result.
https://www.amazon.com/Coleman-Quart-Performance-Wheeled-Cooler/dp/B00C4ZYYAG/ref=sr_1_1?hvadid=77996681307780&hvbmt=be&hvdev=c&hvqmt=e&keywords=coleman+cooler+60+quart+wheeled&qid=1549978815&s=gateway&sr=8-1&tag=mh0b-20
That’s interesting. I can see how those would work for paddocks. I have started working on a paddock water bucket, but if it doesn’t work, I’ll see if I can get a cheap cooler.
We have a tank heater in our trough, and the horses drink LOTS more water when it’s warm – and we only live in central Texas! Warm water is definitely the way to go in the winter. Love these insulated buckets!
Heated water is definitely happening as soon as possible. I would really prefer that, but these help for now.
thank you for this!! I made one and tried it out last night, and it worked super well! the (insulated) bucket didn’t have any ice at all, and the other (uninsulated) bucket in the stall had a good 2 inches of ice.
Awesome! It’s so cool to me just how well these work. I was really skeptical before.
Pingback: winter update – Brianna's Blog
finally catching up on blogs. These are great. I need to do some just to have as Levi and Remus share a brain (in PA Remus used his water bucket fine and did not chew on cord. Here all bets are off). Also Remus never would drink out of the outside waterers but waited to come in to drink his heated water. Here he seems to drink plenty and not matter if it is cold or not. He has 3 buckets in his stall and Tate has two. Tate could totally have one as he waits to drink when they are turned out again. Horses!! 🙂
Thanks for the idea though!!