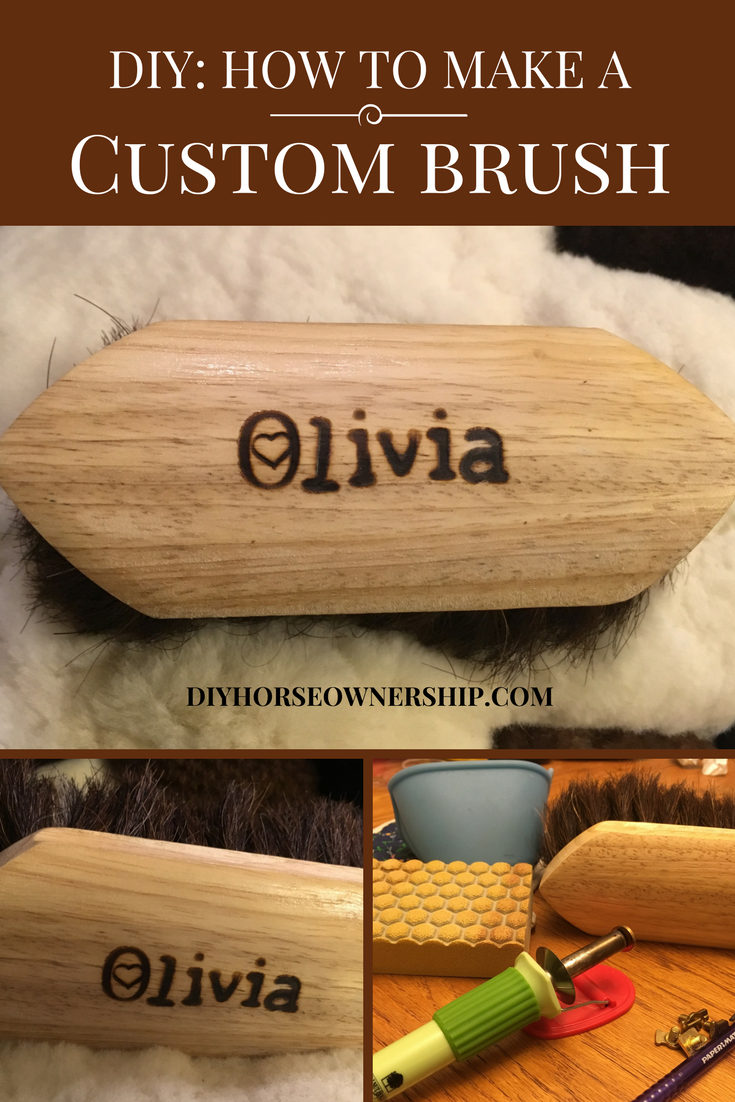
Since I’m cheap and okay with being tacky, I generally mark all of my grooming equipment with a sharpie so that none of it “wanders.” However, I have been seeing a lot of cool custom brushes over the holidays and though I should try to class mine up a bit. I got a nice natural hair brush in my prize bag for getting 3rd at Camelot. I put it away in my cabinet and hadn’t added it to my grooming bucket yet so it was sharpie free and ready for some customization.
This is a super easy project. It doesn’t look as awesome as some of the fancy painted custom brushes, but it certainly looks better than the sharpie and it’s a bit more durable since there’s no paint to chip off. Given that the Mustangs both like to put things from the grooming bin in their mouth and Shasta likes to knock the grooming bin over, durable is key.
Things You’ll Need:
a horse brush with a wooden base
a wood burning tool
wood burner letters (I have a mix of caps and lowercase, but you can do all of one or the other)
pencil and ruler
sand paper
oven mitt
stove pad
optional: heart stamp for wood burner

Supplies
Step 1:
Clean and lightly sand the wood on the brush. You want to make sure there’s no sticker residue or anything else on the brush.

Step 2:
Attach the middle letter to your wood burner and let it heat up.
Step 3:
Use a ruler to find the middle of the brush and mark it with a pencil.
Step 4:
Press the letter onto your center mark. If you’ve never used them before, practice with your wood burner and the letters in advance to see how long you need to hold the letter down. Rock the letter back and forth gently to make sure the whole letter burns in.

Step 5:
Remove the letter with an over mitt and place the letter on a pot holder to avoid burning your table like I’ve done in the past.
Step 6:
Add the next letter and repeat steps 4 – 5 moving outwards from the center letter.

Optional Step: Add any other embellishments. My wood burner came with a set of heart, star, and other decorative stamps. If you’re talented an/or have time, draw something onto the brush with the pen tips of the wood burner.
That’s it. As I said: it’s a super easy project and the end result looks a lot better than a sharpie.


That is nice! Did you varnish it after?
I’m still debating that. I might throw a coat of sealant on top. I was also thinking of sanding it down fully and adding a nicer stain so I haven’t sealed it yet.
That turned out really nice.
Thanks.
That’s awesome!
Thanks!
Ugh, that looks cool enough I ALMOST want to buy my own wood burning tool. You do such neat stuff!
You can get a wood burner pretty cheaply.
That looks great! I’m a sharpie user myself, but I love this idea!
Me too, but I’m trying to branch out a bit.
This is awesome!! Now I totally want to try this 🙂
Do it. It’s really easy.
Very pretty! I’ve had some luck customizing brushes by sanding the top, then using paint pens and hitting it with a fixative spray afterwards. 🙂
Oh, paint pens is a cool idea.
Wow, looking great!
Thanks
I really like this! Almost makes me want to buy a wood burning tool! Anyway, looks really nice!
You can get them for pretty cheap. Usually like 20$ and Michael’s always has a 40% off coupon.
Wood burners have alphabets?!?! I HAD NO IDEA! Okay, gonna add this to my “jack of all, master of none” toolbox…
I just got them last year so it may be a relatively new thing.
That is a very cool and practical DIY. Well done!
Thanks!
What a great idea! I haven’t done woodburning in a long time!