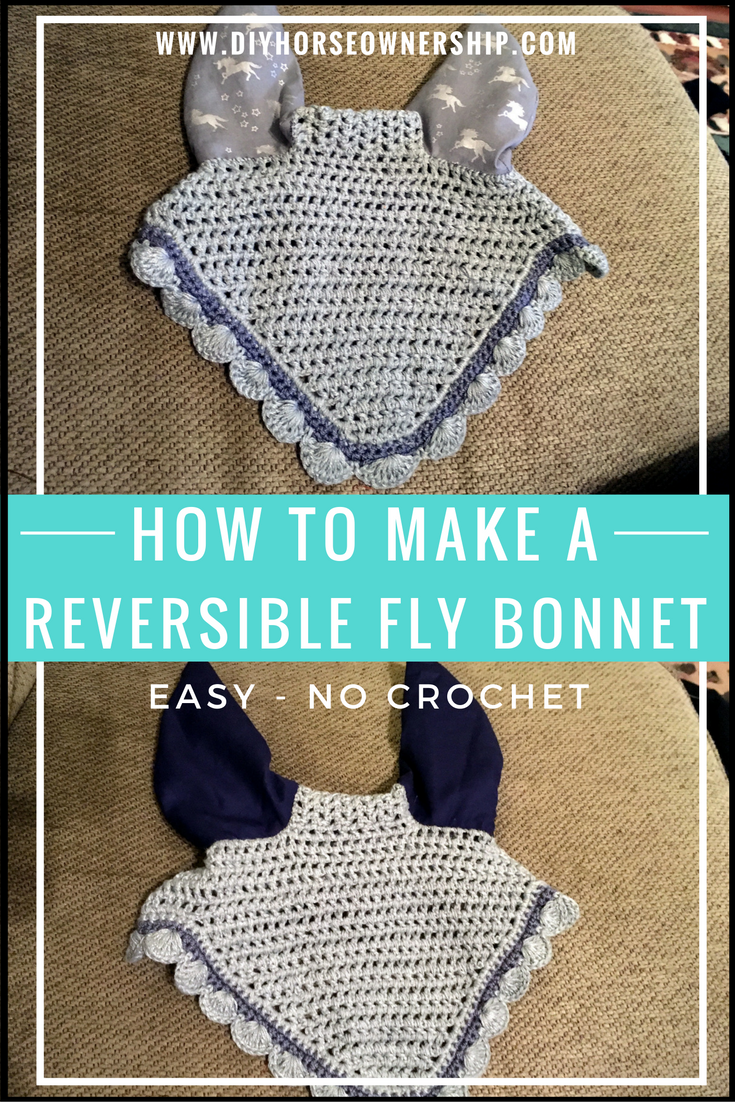
When we were organizing our meet up, L Williams asked me if she could pay me to make her a fly bonnet. I replied that I didn’t think my work was professional enough for purchase, but I would certainly make her one. She asked if I could do a cool grey with navy piping. Well, I hate working with piping, but I figured there must be some way to work in navy and grey into one fly bonnet.
And so I set out to make what might be my new favorite style of ear bonnet: a reversible ear bonnet. Fair warning: this is not an easy project. If you want a easy fly bonnet project, try either of these:

Materials needed:
1x fly bonnet. I like these, but any type works.
2x 1/4 yard of fabric in two different patterns
threads that match the color of the bonnet and the fabrics
basic sewing equipment: seam ripper, sewing machine, scissors, pins, needle
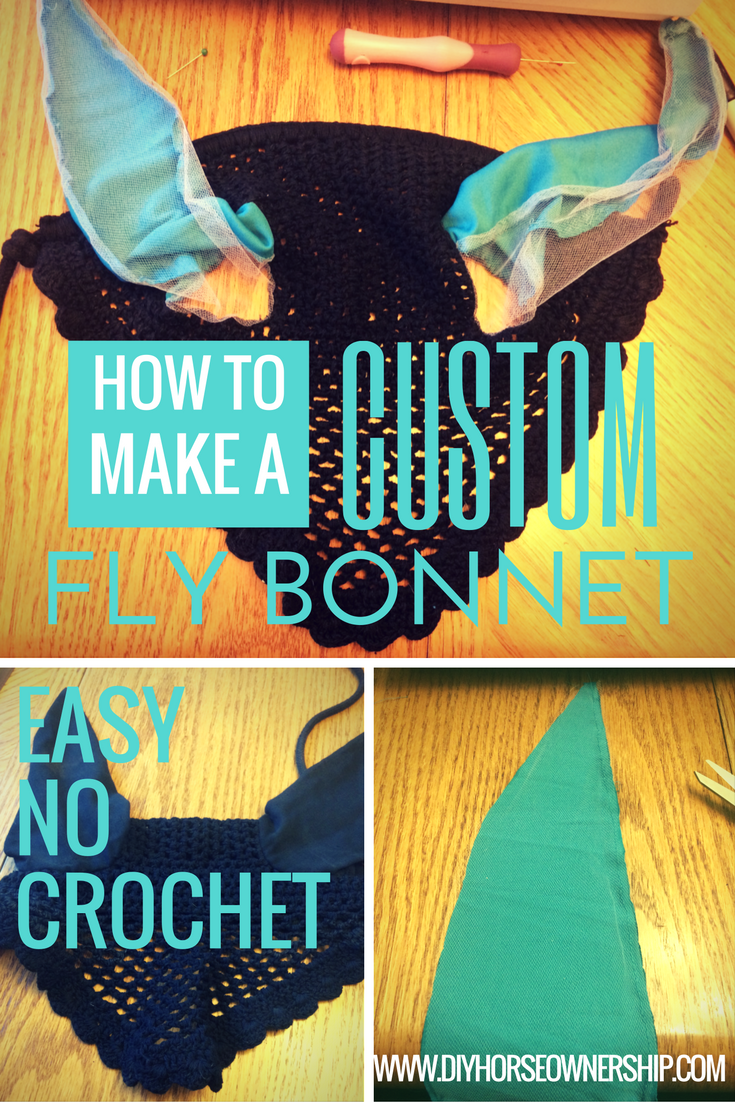
Step 1: Use your seam ripper to remove the original fabric ears from the crochet base and undo the stitching to open up/flatten 1 ear

Step 1
Step 2: Pin the flattened ear to your fabric

Step 2
Step 3: Cut our your fabric. Repeat steps 2-3 until you have 2 ear cut-outs in each fabric for a total of 4 ears.
Step 3
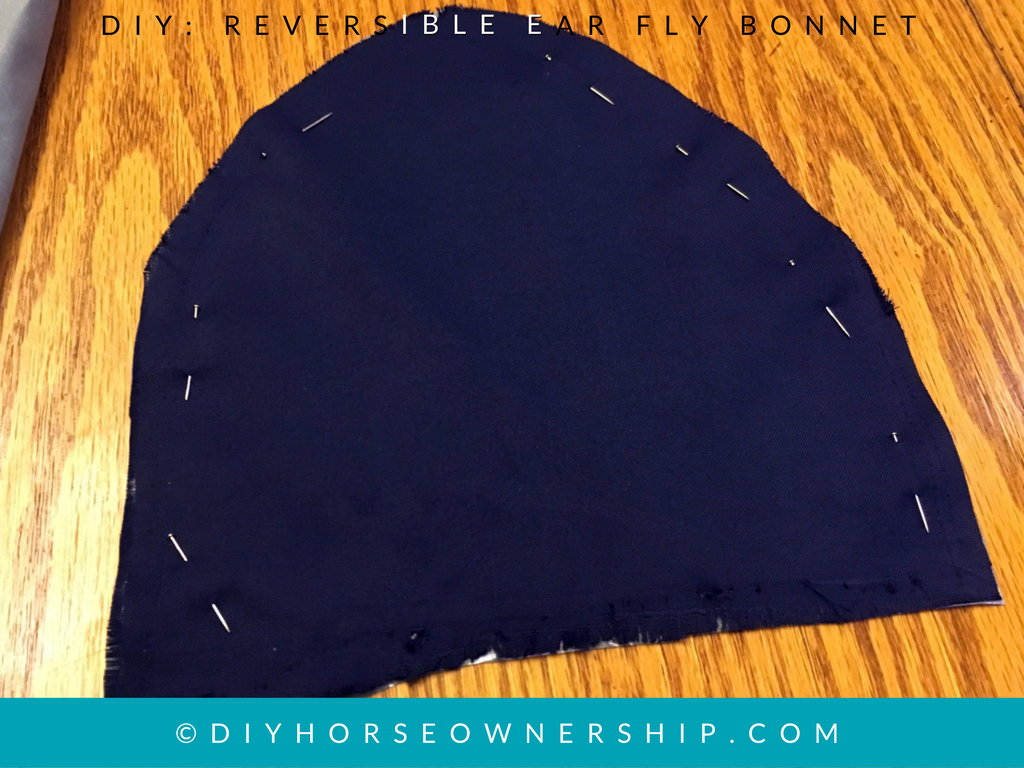
Step 4: Fold over your ears with the right-side of the fabric facing in and sew a half inch seam along the long edge. Repeat for all four ears.
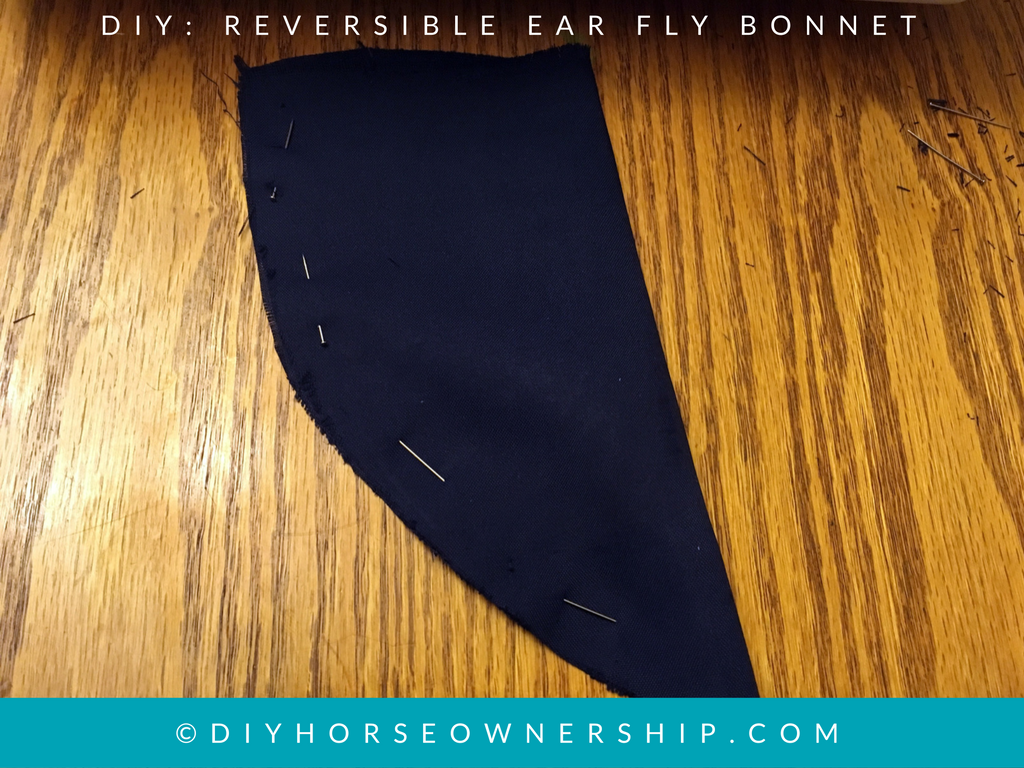
Step 4
Step 5: Turn one fabric right-side out and place it inside an ear of the other fabric which is still right-side in. The right-sides should be facing each other inside the ear. Sew the bottom edges together about 3/4 of the way around. Do not sew it all the way around as you need to be able to turn the ears right-side out. Repeat for the second ear.
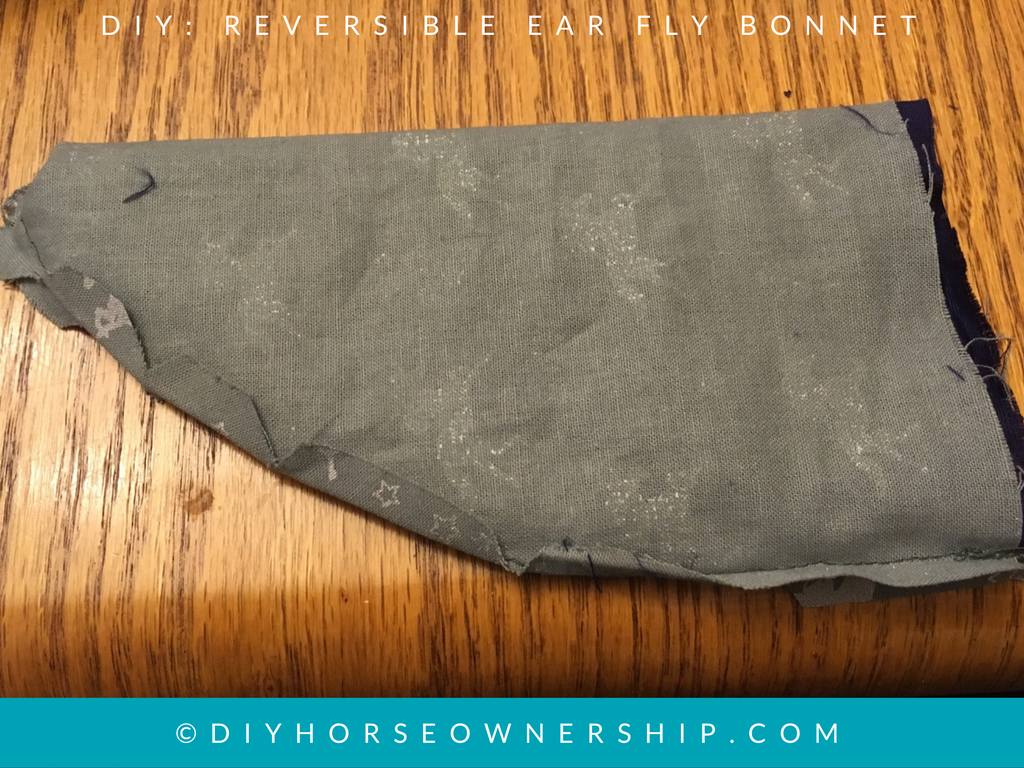
Step 5
Step 6: Turn the ears right-side out and then hand sew the remaining edge shut making sure to turn the seems inside so that they are hidden. Use blind stitch to make your stitching invisible. Repeat for the second ear.

Step 6
Step 7: Use a needle and thread of the same color as the crochet base to hand sew the ears to the base using loop/blanket stitch.

Step 7
Flip your ears in or out as desired.
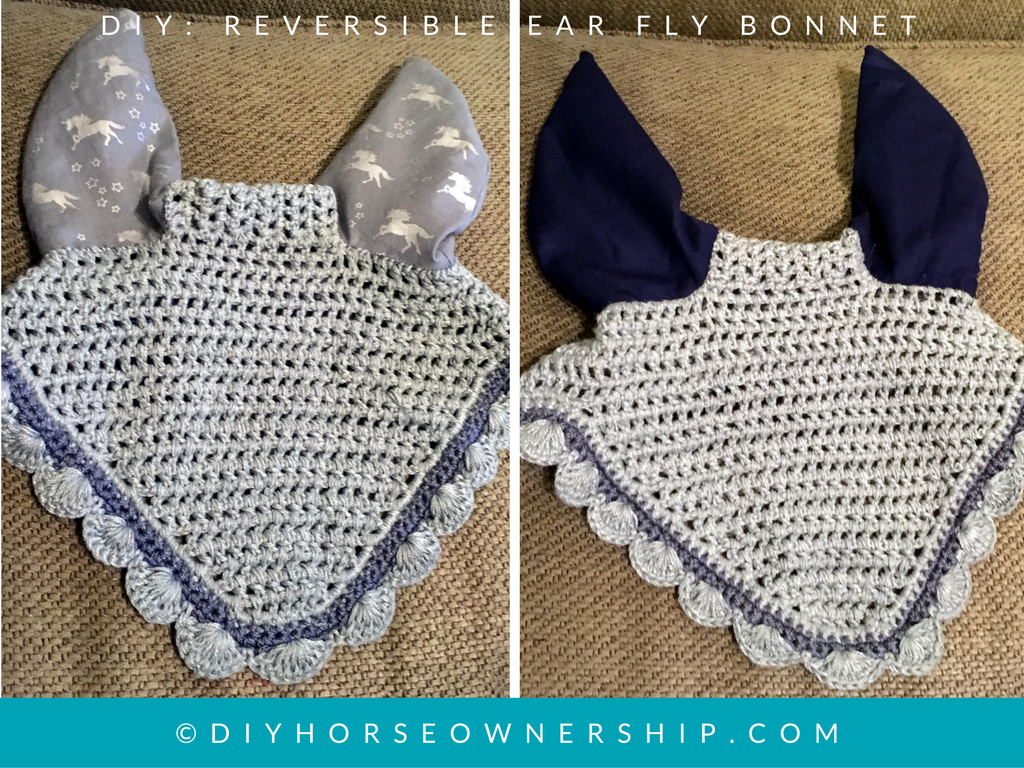
While a bit more difficult/fiddly than my other DIY bonnets, the end result is pretty awesome. With this you could have a serious side for dressage and a fun side for jumping or just two different colors to complement different saddle pads. The choices are endless. I told L. I seriously considered keeping this one for myself. Since I did end up giving it to her, I may try making one for Nilla next.
These are beautiful! what a great idea.
I wish I’d thought of these before.
Nice I like it!
thanks!
I love those fly bonnets! I have one in basically every color 😀 they’re not the prettiest but I use them for everyday so I don’t worry so much if they get dirty or beat up. I might to try to “upgrade” one!
Do it!
Love that pony print fabric you picked! Great idea!
It’s unicorns actually.
That is great idea.
I like this one a lot too.
OMG the unicorns… EPIC!
Isn’t it the best? I found the same unicorn pattern in black and gold and teal and gold. If only I could find teal and silver, I’d make a saddle pad.
Love this idea! I wish I was at all competent at using my sewing machine.
You could hand sew this entire project. Although I would really suggest trying my easier bonnets first.
Great tutorial! Thanks for posting it!
All I can think is that this looks like way too much work! Which is really ridiculous, but… Might have to try this one day. LOVE the unicorns–where did you find that fabric?! I really think I need to start finding fun fabrics and making matching ear bonnets and saddle pads…
The unicorn fabric is from Jo Anns
Actually SO cool.
You really should sell these! I would buy some 😀
I’m 100% sure the price I could charge would not equal the cost of my time.
Some things are just going to have to be DIY.
Wahhh I love it and can’t wait to use it and pfftt I’d still pay you if you let me! Guess I’ll just need to buy you some food next time I see you!
That sounds good to me. Let me know next time you’re in the area.